-
Welcome to the new NAXJA Forum! If your password does not work, please use "Forgot your password?" link on the log-in page. Please feel free to reach out to [email protected] if we can provide any assistance.
- Home
- Forums
- NAXJA Unibody Jeep Technical Forums
- Jeep Cherokee XJ (1984 - 2001)
- Modified Tech Discussion
You are using an out of date browser. It may not display this or other websites correctly.
You should upgrade or use an alternative browser.
You should upgrade or use an alternative browser.
1993 Cherokee (XJ) Country: Build by ArmyDad
- Thread starter ArmyDad
- Start date
ArmyDad
NAXJA Forum User
- Location
- Elk Grove, CA
Make sure you cut those U bolts and put your bumpstop in unless you want your shocks forced through the floor!
Oh, right on!! Want to measure how far I can stuff the tires, front and rear, before cutting bolts and setting bumpstops. There are no off-road plans for the next 4 weeks so I do have a bit of time.
Lowrange2
NAXJA Forum User
- Location
- Abbeville, SC
I wish 4 weeks was plenty time to do what I need to do... Ugh. Time is hard to come by these days.
ArmyDad
NAXJA Forum User
- Location
- Elk Grove, CA
I wish 4 weeks was plenty time to do what I need to do... Ugh. Time is hard to come by these days.
OH, don't misunderstand ... lots more to do than 4 weeks will allow time for. Just the remaining items to get this phase completed and ready for an outing will be done in the next 4 weeks.
Lowrange2
NAXJA Forum User
- Location
- Abbeville, SC
Gotcha. We have a ride Feb 18th. It's in Laurens South Carolina. I expect to see you there. ")
ArmyDad
NAXJA Forum User
- Location
- Elk Grove, CA
Ummmm, afraid I might not make that one but I'll keep you in mind.
Lewybrewing
NAXJA Forum User
- Location
- Chula Vista,CA
Looks really good. I to have a white/grey country model. I think they are the best looking combo...
ArmyDad
NAXJA Forum User
- Location
- Elk Grove, CA
Hey all!
I just put up all the NEW, used and takeoff parts I was going to use on my original build for 3" lift with 30" tires with wheels. If you or anyone you know are interested, check out the thread in the FOR SALE section. Here is the link.
http://www.naxja.org/forum/showthread.php?t=1055294
Any questions, PM me.
Thanks again for all the help and support!!
ArmyDad
NAXJA Forum User
- Location
- Elk Grove, CA
What I got done this weekend:
1 - Measurements around the lift and new tires (after 100 miles).

2 - Installed the RC sway bar disconnect. Neat setup! Hadn't used a sway bar since last spring.
3 - Measured the DS and pinion angles. With a 6* shim already in place, I measured the pinion at 12* and DS at 18*. A visual inspection shows the pinion pointed lower than the DS. This gave pause for concern. With those numbers, it would appear I'd need to increase the shim to ~10* to get close to the 1-2* area that the double cardon DS needs to operate in. Those numbers, though, do not seem reasonable as I had the same issue with my YJ years ago.
After speaking to Steve, my personal expert/mentor/guru the idea was floated that went something like this: My lift in the rear is a RE 4.5" spring pack with the standard/OEM shackles as was my YJ. Most folks get longer shackles when doing a leaf spring lift which will increase the pinion angle all by itself. Am I shooting myself in the foot by NOT using shackles?
As it turns out, I would not mind another 1" lift in the rear to accommodate the effect of gear and other loads in the back to I'm open to a 1" shackle lift if that would take care of the pinion/DS issue as well.
Looking for input from those who've seen this before … and THANKS in advance.
1 - Measurements around the lift and new tires (after 100 miles).
2 - Installed the RC sway bar disconnect. Neat setup! Hadn't used a sway bar since last spring.
3 - Measured the DS and pinion angles. With a 6* shim already in place, I measured the pinion at 12* and DS at 18*. A visual inspection shows the pinion pointed lower than the DS. This gave pause for concern. With those numbers, it would appear I'd need to increase the shim to ~10* to get close to the 1-2* area that the double cardon DS needs to operate in. Those numbers, though, do not seem reasonable as I had the same issue with my YJ years ago.
After speaking to Steve, my personal expert/mentor/guru the idea was floated that went something like this: My lift in the rear is a RE 4.5" spring pack with the standard/OEM shackles as was my YJ. Most folks get longer shackles when doing a leaf spring lift which will increase the pinion angle all by itself. Am I shooting myself in the foot by NOT using shackles?
As it turns out, I would not mind another 1" lift in the rear to accommodate the effect of gear and other loads in the back to I'm open to a 1" shackle lift if that would take care of the pinion/DS issue as well.
Looking for input from those who've seen this before … and THANKS in advance.
ArmyDad
NAXJA Forum User
- Location
- Elk Grove, CA
What I did today: 2/14
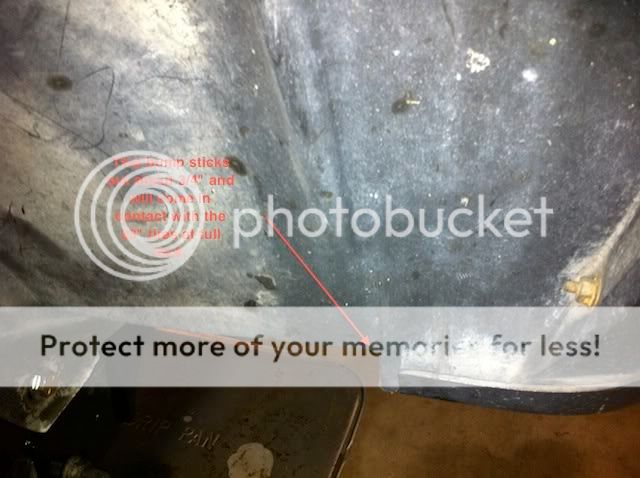
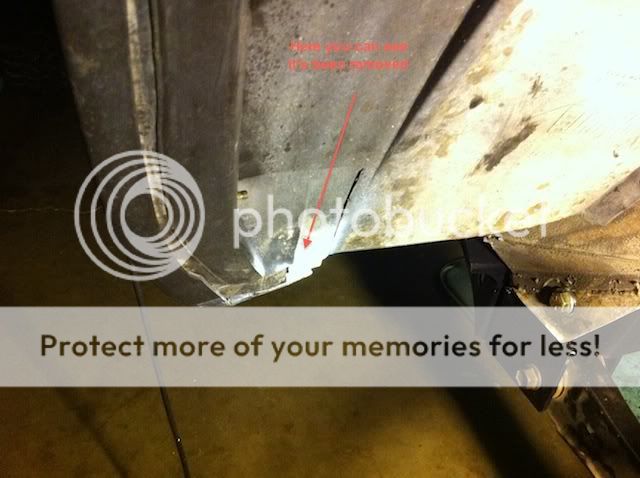
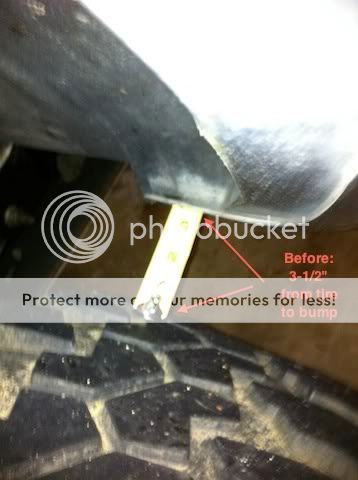
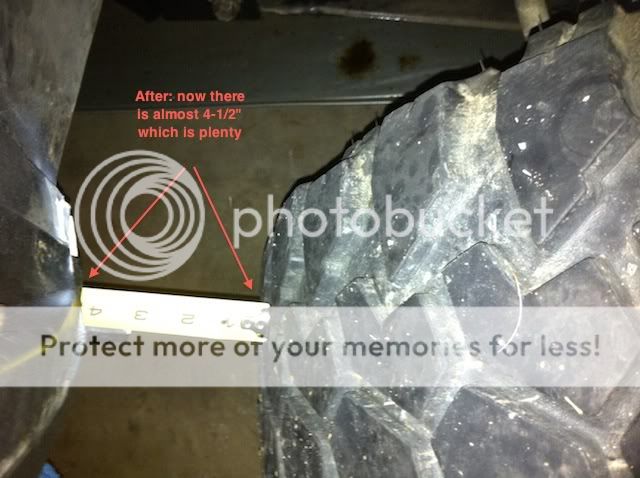
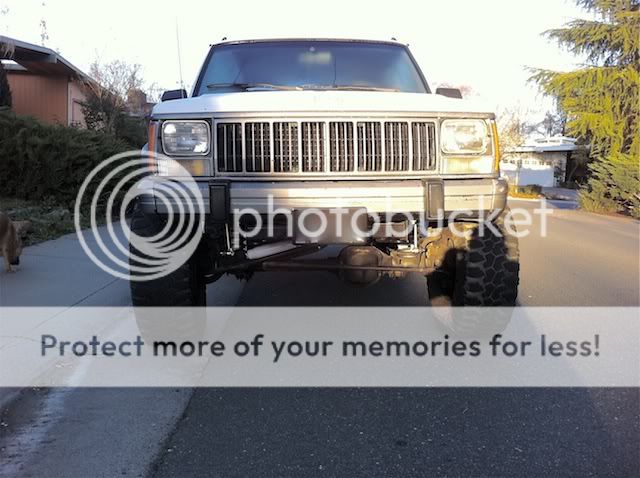
Pulling in and out of my driveway or making a tight turn at speed, the tires would rub on the back side of the front venders.
GoJeep has a great write-up on getting extra space for clearance just for that situation. How much space? Here are the pics.
Pulling in and out of my driveway or making a tight turn at speed, the tires would rub on the back side of the front venders.
GoJeep has a great write-up on getting extra space for clearance just for that situation. How much space? Here are the pics.
Lowrange2
NAXJA Forum User
- Location
- Abbeville, SC
When in doubt, cut it out.
I would not go with 2" longer shackles to get your 1" lift in the rear. The stock upper shackle mounts are prone to cracking with the extra leverage put on them as only thin steel. I have re-enforced mine by plating my mounts with 3/16" steel and building only 1" longer shackles today for it. The longer they are the more rear sway you will get as well.
ArmyDad
NAXJA Forum User
- Location
- Elk Grove, CA
I would not go with 2" longer shackles to get your 1" lift in the rear. The stock upper shackle mounts are prone to cracking with the extra leverage put on them as only thin steel. I have re-enforced mine by plating my mounts with 3/16" steel and building only 1" longer shackles today for it. The longer they are the more rear sway you will get as well.
I'll hold off on any extended shackles then. I'm pulling the rear DS to do the next set of calculations so I can be double-sure of the numbers. After, we'll see what I'm up against.
ArmyDad
NAXJA Forum User
- Location
- Elk Grove, CA
Over the last couple of weeks there has been a whole lot of prepping, waiting and not a lot to show but, at last, there is something of some significance.
1 - Prepped the track bar mount, control arm drop bracket reinforcement and rear shock mount (cut for relocation) for welding.
2 - Did some fender liner and sheet metal trimming. Removed the front valance.
3 - Found a hole (no idea when or how it got there) in the vacuum bottle located behind the passenger side of the front fender … no wonder the speed control barely worked and the heater operated funky.
Welded the track bar reinforcement in place. Cleaned up and painted.
Not so much luck welding the CADB reinforcement. Turns out the welder is too small. Cleaned up area and repainted. Needs to have something before going off-road … I have another idea I'll share later after it is designed and installed. Didn't try to weld the shock mount for the same reason.
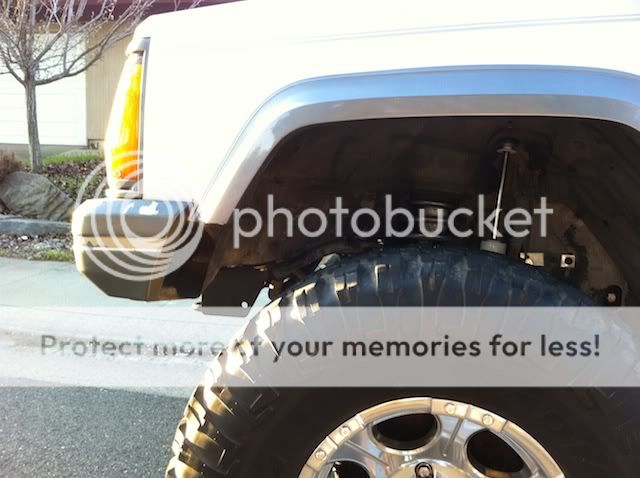
Fender trimming turned out well. Should take care of things until I decide if off-roading the Cherokee is going to get more serious.
Replaced the vacuum bottle.
Also remeasured the rear DL angle … with the 6* shim in place, there is still a 6* difference between the pinion and output shaft. Going to drive a bit without the rear DS to see if there is any change in the vibrations at speed or whether I'm feeling the tires. Will update after the evaluation.
Here are some pics of the completed fender/liner trimming --

1 - Prepped the track bar mount, control arm drop bracket reinforcement and rear shock mount (cut for relocation) for welding.
2 - Did some fender liner and sheet metal trimming. Removed the front valance.
3 - Found a hole (no idea when or how it got there) in the vacuum bottle located behind the passenger side of the front fender … no wonder the speed control barely worked and the heater operated funky.
Welded the track bar reinforcement in place. Cleaned up and painted.
Not so much luck welding the CADB reinforcement. Turns out the welder is too small. Cleaned up area and repainted. Needs to have something before going off-road … I have another idea I'll share later after it is designed and installed. Didn't try to weld the shock mount for the same reason.
Fender trimming turned out well. Should take care of things until I decide if off-roading the Cherokee is going to get more serious.
Replaced the vacuum bottle.
Also remeasured the rear DL angle … with the 6* shim in place, there is still a 6* difference between the pinion and output shaft. Going to drive a bit without the rear DS to see if there is any change in the vibrations at speed or whether I'm feeling the tires. Will update after the evaluation.
Here are some pics of the completed fender/liner trimming --
OK Cherokee
NAXJA Forum User
- Location
- Tulsa, OK
So are the "ugly" wheels you mentioned on the first page the stock wheels or the other ones that are on it now?
Looking good.
Looking good.
ArmyDad
NAXJA Forum User
- Location
- Elk Grove, CA
So are the "ugly" wheels you mentioned on the first page the stock wheels or the other ones that are on it now?
Looking good.
OK Cherokee: The "ugly" wheels were some old, scratched up aluminum wheels with rusty bolts that was on the rig when I bought it. The OEM aluminum came later, looked WAY better and did not have the backspacing ... did not rub the flares.
Stukboy
NAXJA Forum User
- Location
- Lancaster, PA
Good looking Jeep.
Nice build.
Nice build.
ArmyDad
NAXJA Forum User
- Location
- Elk Grove, CA
It's been a while since I did any kind of update, so there's not much in the way of pics ... BUT ... here's what's gotten done:
1 - Welded the reinforcement onto the lower track bar mount.
2 - Welded the rear, lower shock mounts (raised 2" - better ground clearance).
3 - Installed the RC X-flex LCAs (those are BIG!)
4 - Finished the fender and liner trimming.
5 - Replaced the vacuum assist bottle.
6 - Reinstalled the rear DS. No unacceptable vibrations at freeway speeds so sounds like all is good.
Next up: steering and armor.
ArmyDad
NAXJA Forum User
- Location
- Elk Grove, CA
Thought I'd throw in a couple of pics on the finished rear shock mount relocation. This actually raised the shock and increased ground clearance by almost 2-1/2" … and at the same time, corrected for the 5" lift and 6* shim needed to bring the pinion angle back into spec for the double carden driveshaft.
As before, BIG thanks to GoJeep for showing how to make all this happen.
The only thing I did differently from his instructions was when it came time to weld into place. First upper mount was bolted in place then, with vehicle weight on the tires and suspension, swung the shock into place with the lower mount already bolted to the shock. In this way I felt the shock would be in a "neutral" position both upper and lower so, when placed against the axle, it would be in position with no binding top or bottom. When done, the lower mount slid onto the lower mounting pin like it was greased.
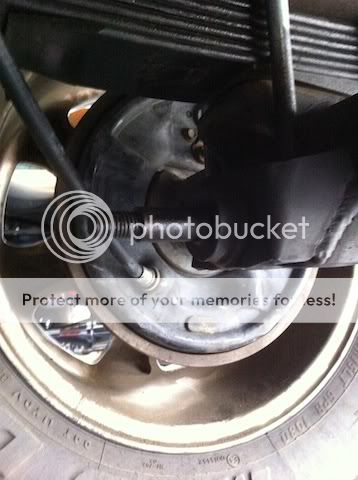
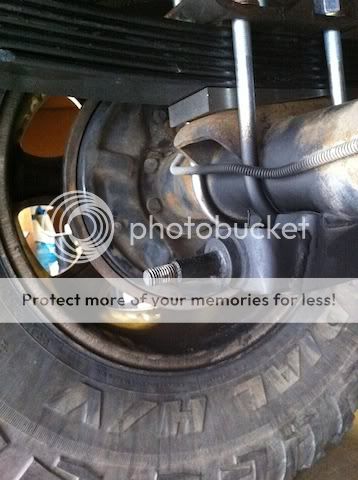
ArmyDad
NAXJA Forum User
- Location
- Elk Grove, CA
Thought I'd do a quick update as there has been a lot more time working, traveling for work and wheeling when possible than actually work on the XJ. Since my last update ...
1 - Installed the v8ZJ tie rod ... WAY bigger.
2 - Driveway alignment "a la" GoJeep. When new tires were put on toe was a bit off but caster was right on.
3 - New tires: Toyo 33x13.50R15. What a difference!
New thing "to do" ... found some rust on the front passenger side floorboard so will need to remove carpet and all to see what is up with that.
=====
Similar threads
- Replies
- 31
- Views
- 314
- Replies
- 11
- Views
- 220