-
Welcome to the new NAXJA Forum! If your password does not work, please use "Forgot your password?" link on the log-in page. Please feel free to reach out to [email protected] if we can provide any assistance.
- Home
- Forums
- NAXJA Unibody Jeep Technical Forums
- Jeep Cherokee XJ (1984 - 2001)
- Modified Tech Discussion
You are using an out of date browser. It may not display this or other websites correctly.
You should upgrade or use an alternative browser.
You should upgrade or use an alternative browser.
XJ "Budget Build"
- Thread starter raptor314
- Start date


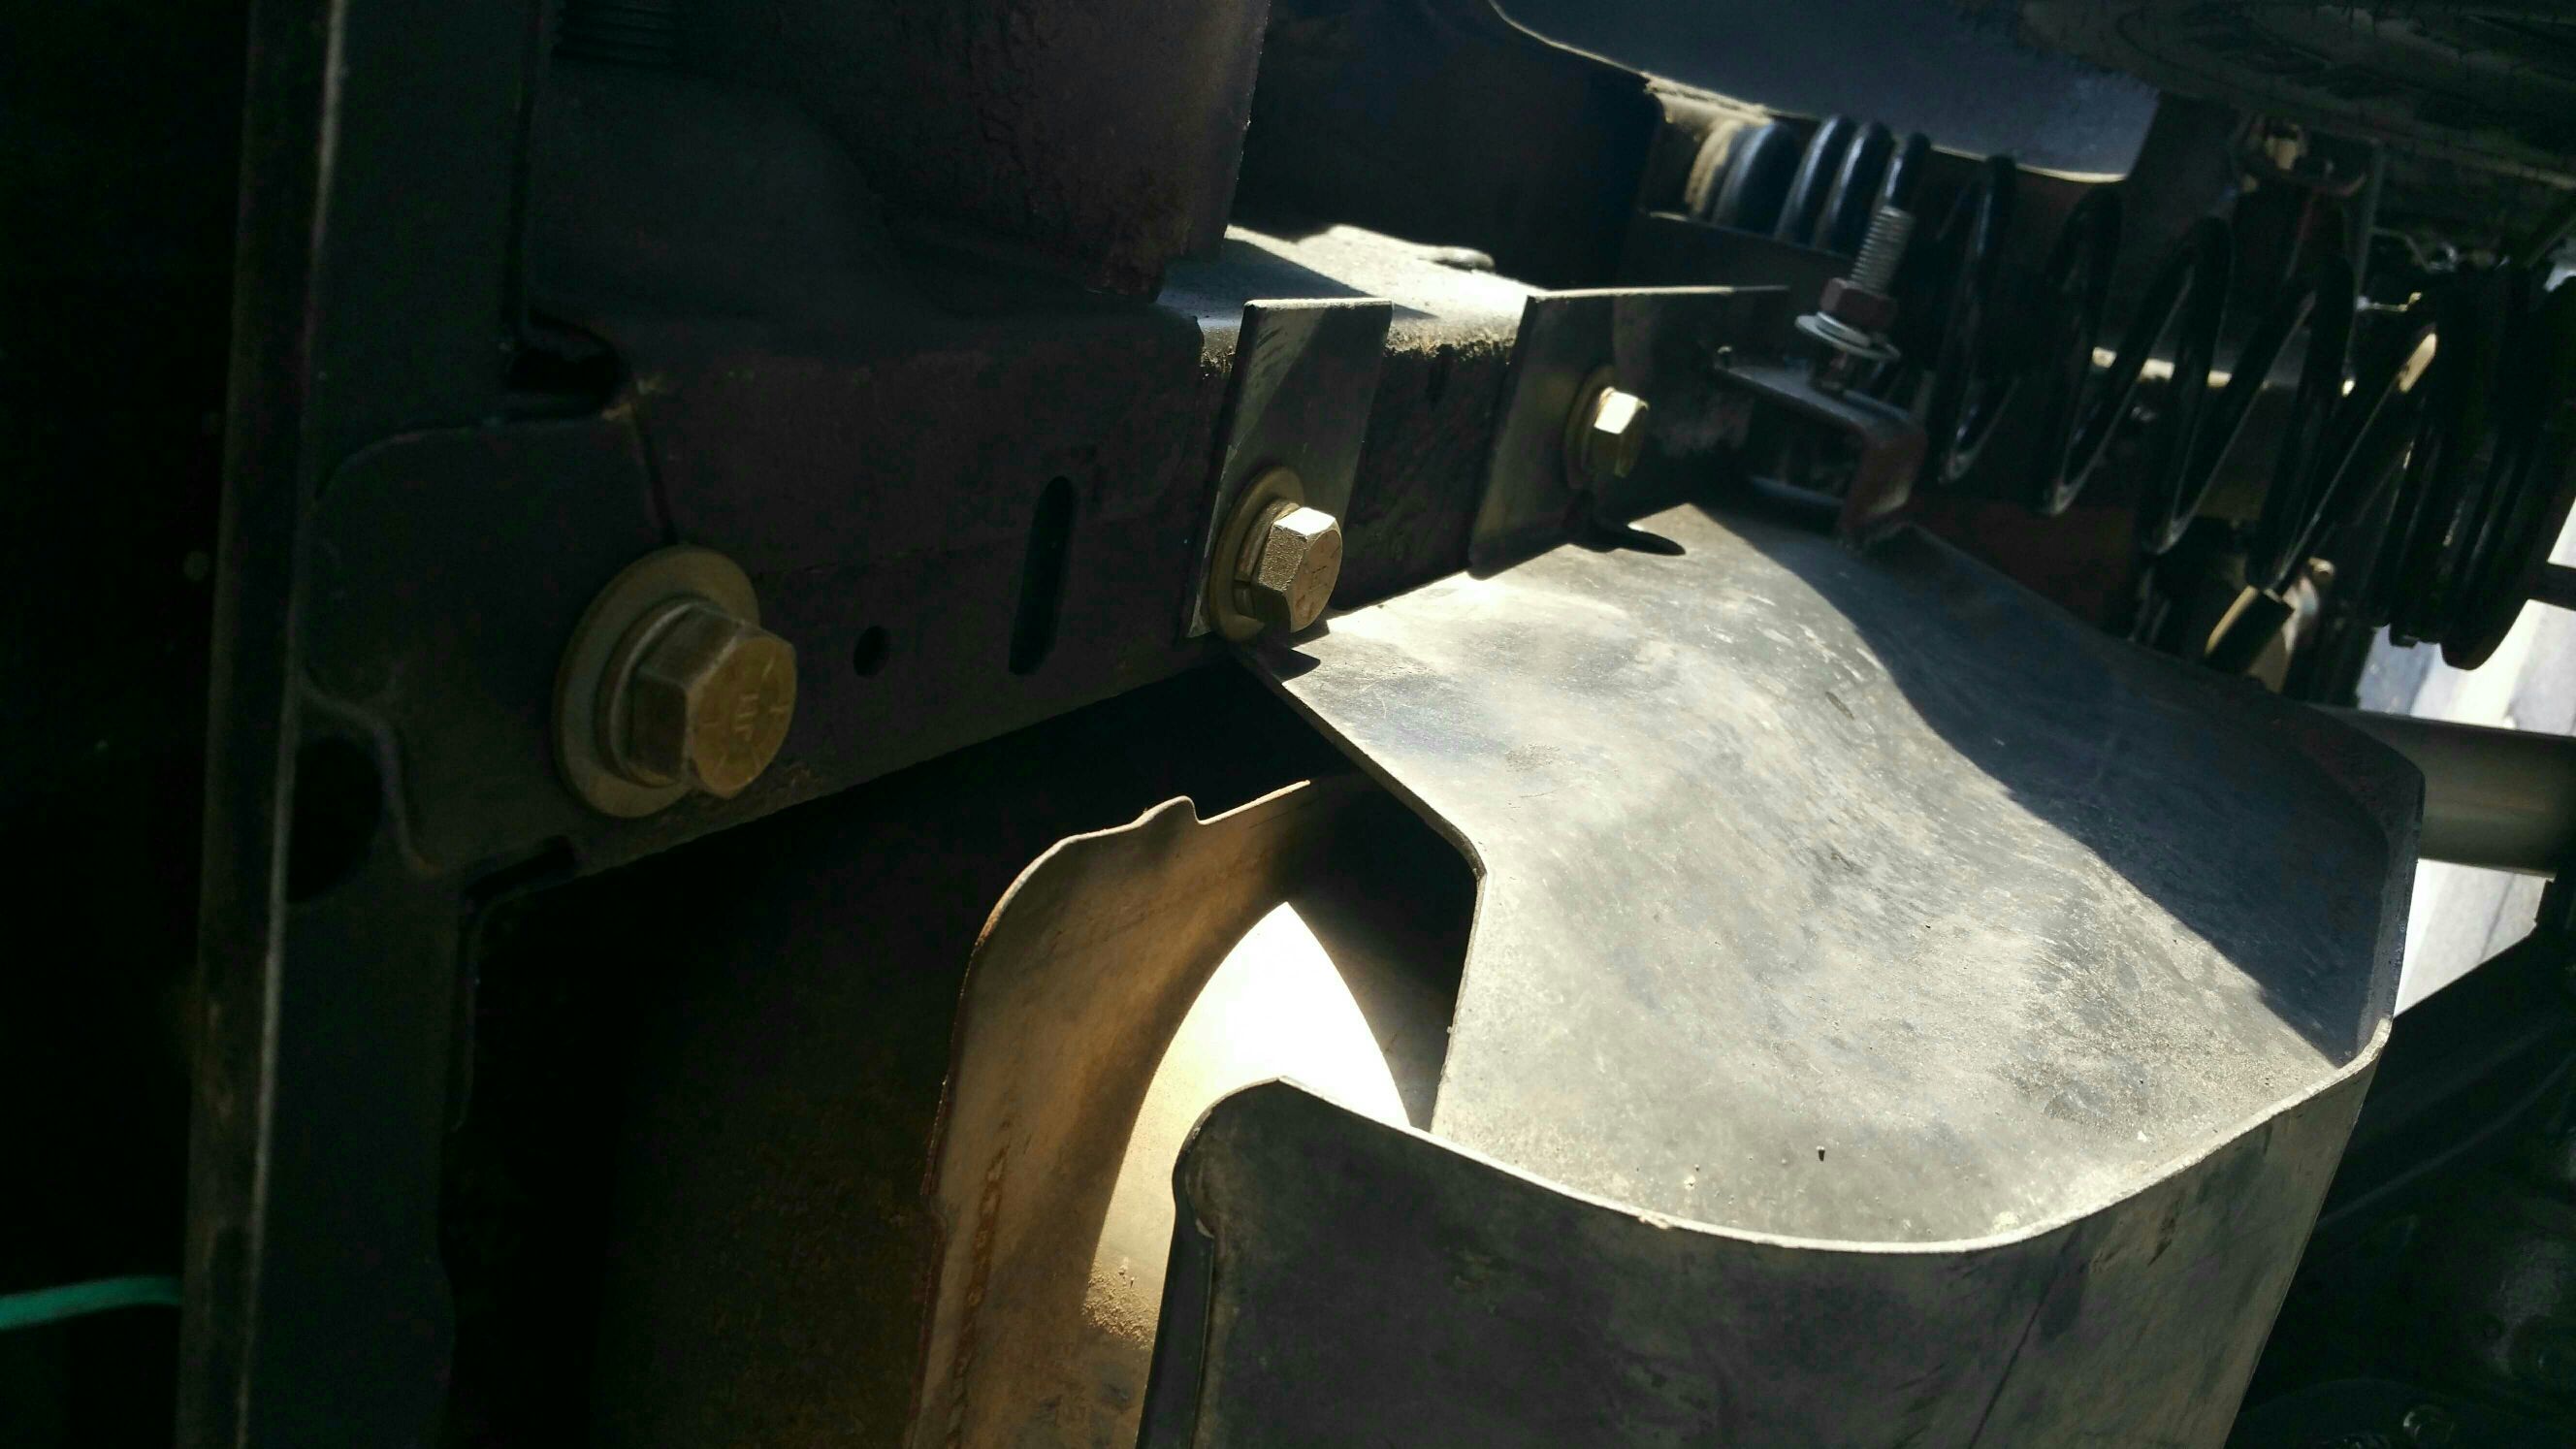
You can also see how I changed the crossmember from solid to removable.
Notice on the driver's side where I had to clearance the flanges to clear the front driveshaft. If I were to do it again, I would have moved the crossmember back about 3 inches.
Notice on the driver's side where I had to clearance the flanges to clear the front driveshaft. If I were to do it again, I would have moved the crossmember back about 3 inches.
I got a little distracted from the important stuff and decided to build the front bumper. Nothing original here. 3/16" plate welded up with a 2" receiver in the middle and D rings. I did trim the front fenders so the bumper would go straight back.
I didn't do a winch bumper because I have a Superduty, the FJ40 I'm going to finish one day, and a motorhome we take to Pismo, soooooo I plan on all of them sharing a 12K winch at some point. So the receiver with a multi mount winch seems like the best way for me to go


I didn't do a winch bumper because I have a Superduty, the FJ40 I'm going to finish one day, and a motorhome we take to Pismo, soooooo I plan on all of them sharing a 12K winch at some point. So the receiver with a multi mount winch seems like the best way for me to go
Last edited:


- Location
- WA state
Looks good.
But, with your fab ability, Kind of disappointed with the RC and (c)Rusty's choice of steering parts. Hope it works for you though.
But, with your fab ability, Kind of disappointed with the RC and (c)Rusty's choice of steering parts. Hope it works for you though.
So this is about the point where I think I went nutts. So this budget build with off the shelf suspension was clearly derailed on the front end. The smart and easy thing for me to do would have been get some lifted leafs and shackles to level it out. I actually bought a pair of 63" GM springs, but in the end I decided to do a 4 link.
I found inspiration in the Clayton kit and read that stock front coils in the rear will get you close on a 6.5" lift. I still had some extra Ballistic Joints so decided to go for it.


I copied the Clayton upper mount making mine out of 3/16" plate and 2" DOM for the upper retainer and bump stop mount. I cut into the unibody and welded it into place.
I made the rear truss out of 2X2 square tube. If I were to do it again I would have bent one up out of 1/2" plate like I did the front.
The links are 2"X 1/4" square with Ballistic joints at the frame end and poly bushings at the axle end.
I used brackets from ruffstuff and Ballistic for the lower coil buckets, axle tabs/brackets, and tabs for the truss. I had to fab the upper brackets. I welded the upper and lower link brackets to the unibody stiffeners.
I found inspiration in the Clayton kit and read that stock front coils in the rear will get you close on a 6.5" lift. I still had some extra Ballistic Joints so decided to go for it.
I copied the Clayton upper mount making mine out of 3/16" plate and 2" DOM for the upper retainer and bump stop mount. I cut into the unibody and welded it into place.
I made the rear truss out of 2X2 square tube. If I were to do it again I would have bent one up out of 1/2" plate like I did the front.
The links are 2"X 1/4" square with Ballistic joints at the frame end and poly bushings at the axle end.
I used brackets from ruffstuff and Ballistic for the lower coil buckets, axle tabs/brackets, and tabs for the truss. I had to fab the upper brackets. I welded the upper and lower link brackets to the unibody stiffeners.
Last edited:
I forgot, I looked into swapping in ZJ brakes to get rear disks, but learned if I went with an Explorer 8.8 I could get added strength, disks, 4.10 gears, and a limited slip. I scrounged through 3 Pick N Pulls before I found one with all of that. Sooooo there it is.


GroversXJ
NAXJA Forum User
- Location
- Peoples Republik of Kalifornia
I love your removable stifeners because I don't want to weld big pieces to my rig that I can't swap to another easily because I feel the body is on its last leg anyways.
Cutting a coil off will increase the spring rate of the coil. If it ends up too stiff you may be able to get some stock TJ coils because they seemed way softer and shorter than the xj ones I have.
Cutting a coil off will increase the spring rate of the coil. If it ends up too stiff you may be able to get some stock TJ coils because they seemed way softer and shorter than the xj ones I have.
Thanks for the info. You'll see later that I add coil spacers in the front and stock height dual rates in the rear.I love your removable stifeners because I don't want to weld big pieces to my rig that I can't swap to another easily because I feel the body is on its last leg anyways.
Cutting a coil off will increase the spring rate of the coil. If it ends up too stiff you may be able to get some stock TJ coils because they seemed way softer and shorter than the xj ones I have.


I didn't do anything original with the rear bumper. I just copied design features from other prople's builds and aftermarket products.

For the bumper itself I used the pre cut strips of 3/16" that I had sheered earlier (4" and 2" wide). I added D rings and a hitch receiver.
I opened up the unibody at the centers of the bumper mounting flanges so the bumper could extend into the frame. Doing this you can use the 3 stock holes from the factory hitch/gas tank skid to give yourslf added strength in the bumper and rigidity in the unibody. I welded 1/2" nuts to the part of the bumper that slid inside.
On the driver's side you need to clearance your extensions to clear the gas tank filler hose.
It mounts with the 8 stock bolts plus 3 1/2" bolts coming through the bottom.
The swing arm is 3/16" 2X3 box tubing. I actually cut it into 3 sections and mitered it so it would kinda contour around the rear hatch. The vertical and supports going down to the swing arm are 2X2. I think the spare tire bracket cane from ruffstuff.
The swing arm secures to the bumper with a T-bolt and threads into a piece of 1/2 plate welded to the bumper. The hole for the T-bolt is sleeved. The swing arm rests on some delron to take sone load off of the T-bolt and spindle.

I welded a pop pin to the swing arm and there's a plate welded to the bumper with a hole drilled in for the pop pin. The swing arm swings straight out and locks into place.
I can add more pictures if anybody wants to see it in more detail.

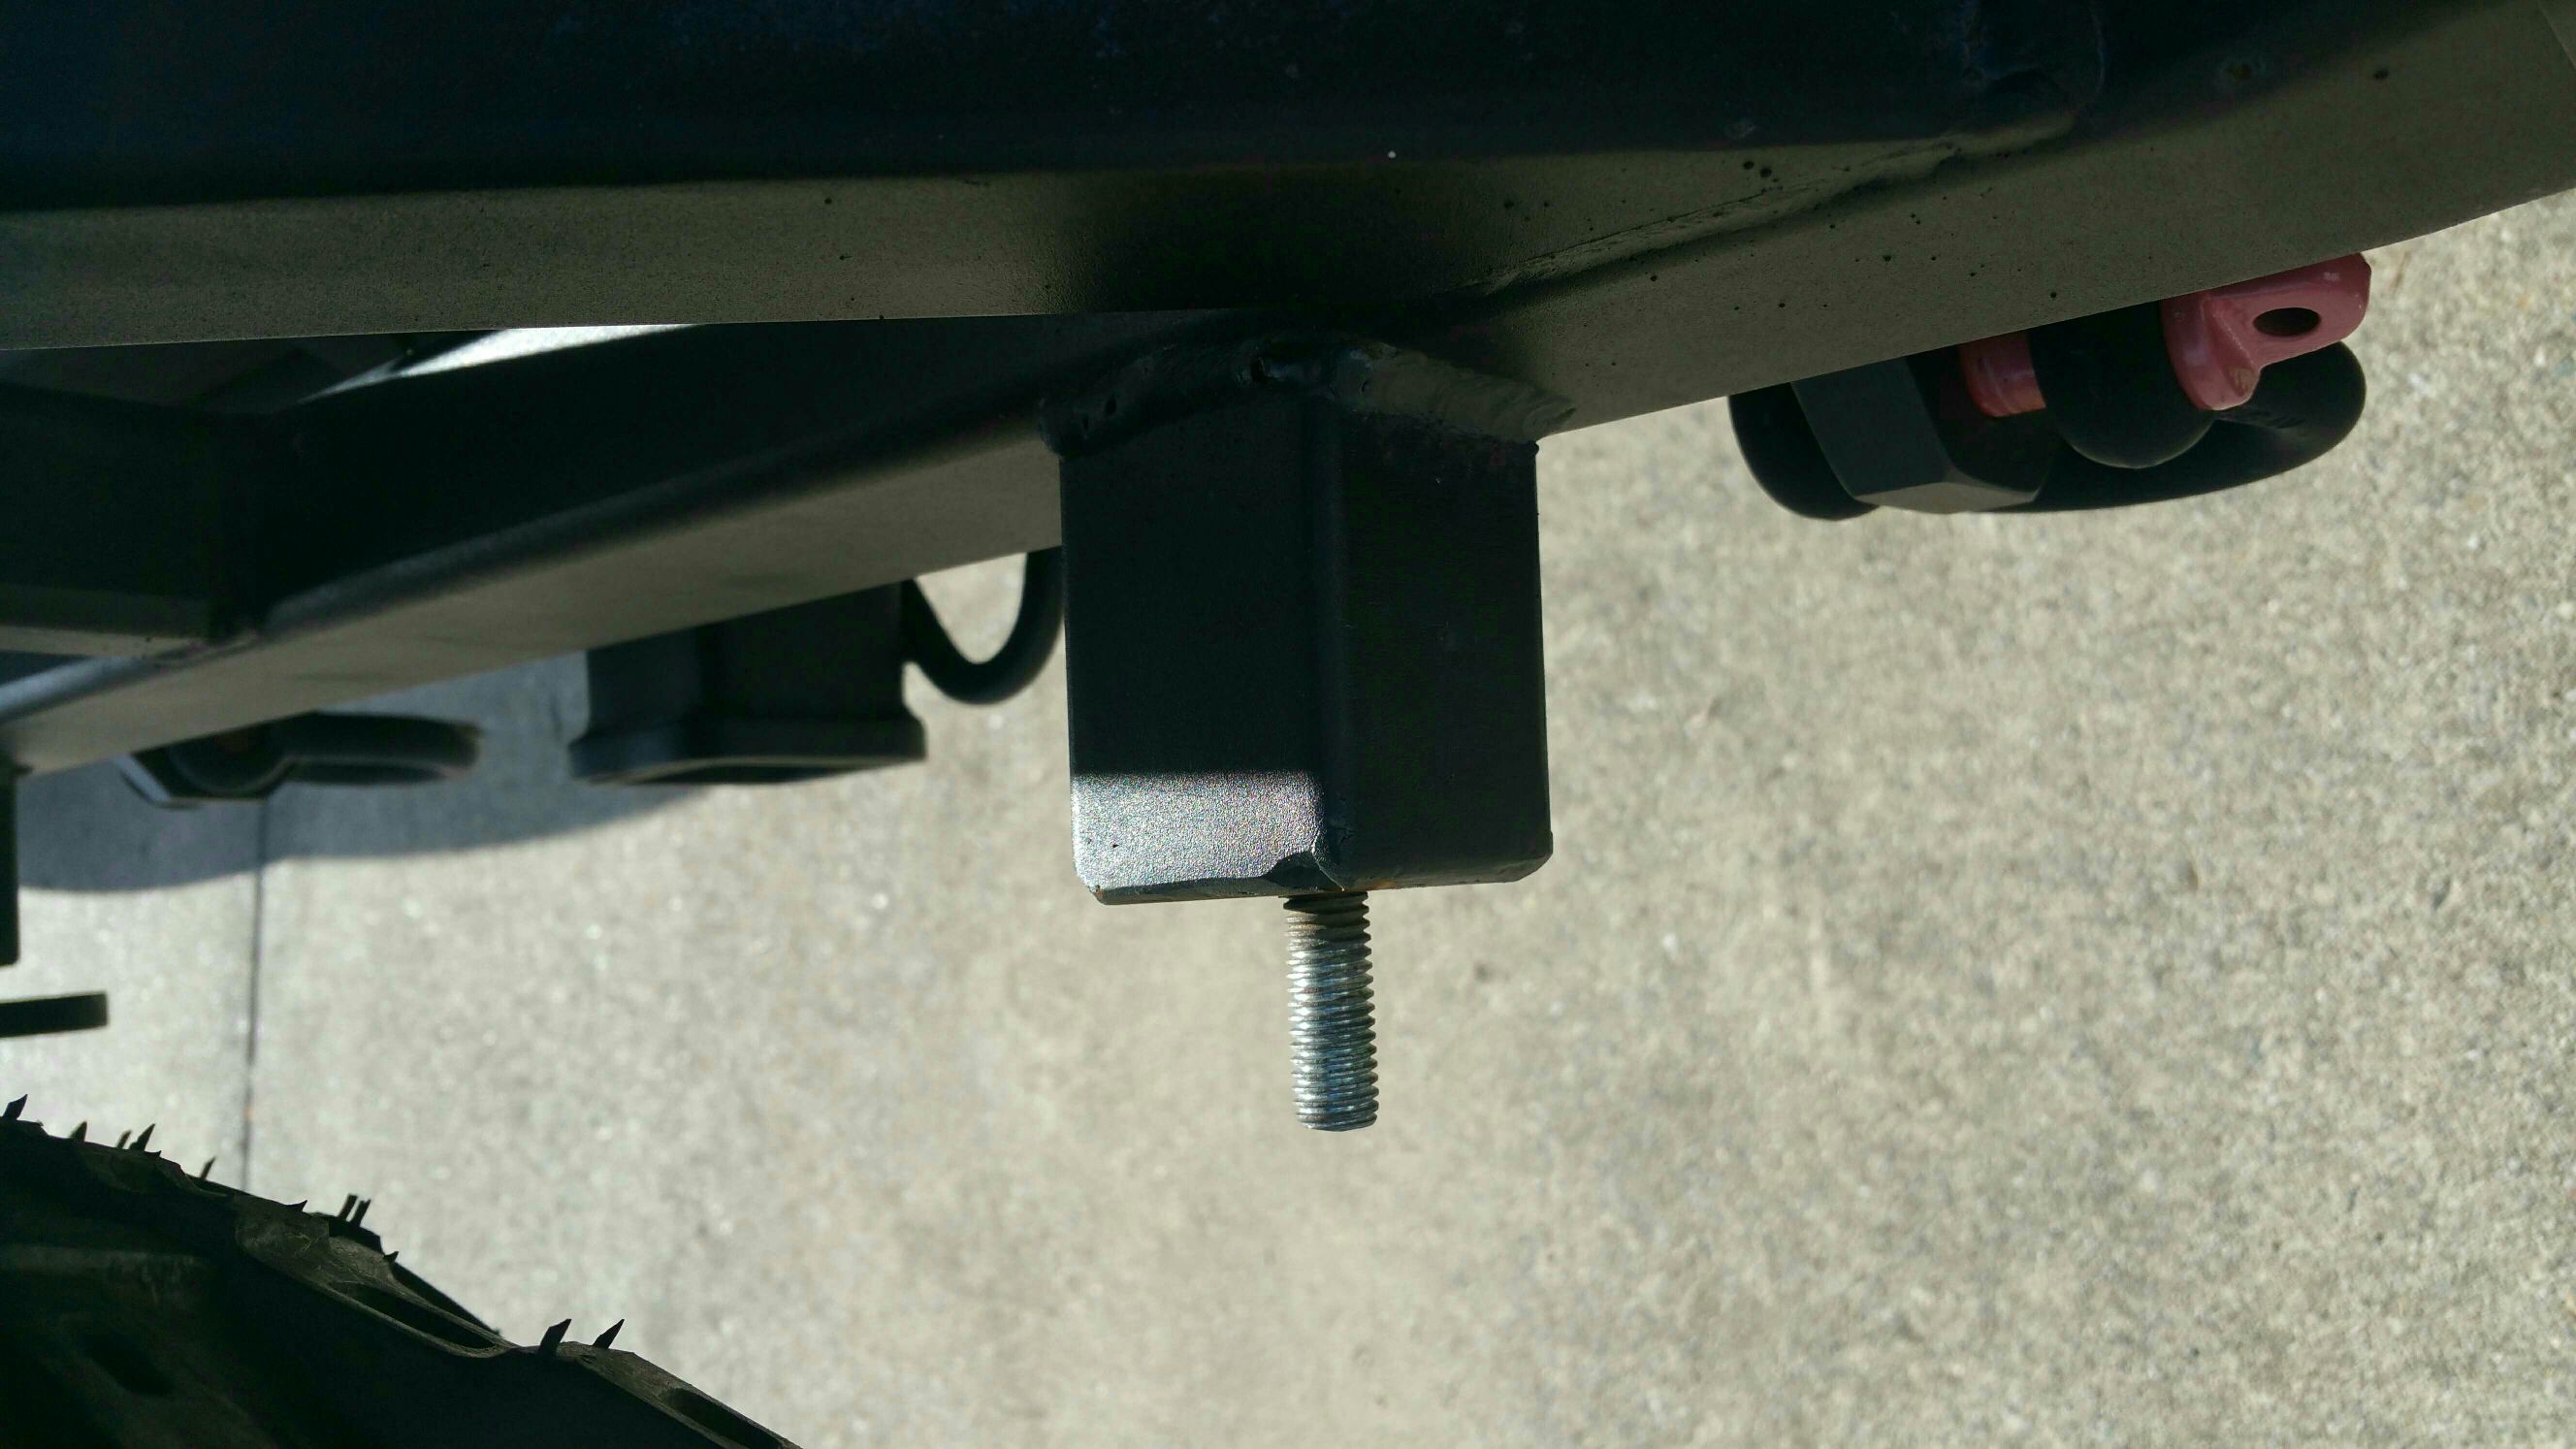
The mount for the jack is 2" square with a half inch bolt sticking out. I use 1/2" Nuts with some half in bar welded to it to sucure the jack.


I welded some hitch receiver tubing to the tire mount to make my license plate removable.
The swing arm secures to the bumper with a T-bolt and threads into a piece of 1/2 plate welded to the bumper. The hole for the T-bolt is sleeved. The swing arm rests on some delron to take sone load off of the T-bolt and spindle.
I welded a pop pin to the swing arm and there's a plate welded to the bumper with a hole drilled in for the pop pin. The swing arm swings straight out and locks into place.
I can add more pictures if anybody wants to see it in more detail.
The mount for the jack is 2" square with a half inch bolt sticking out. I use 1/2" Nuts with some half in bar welded to it to sucure the jack.
I welded some hitch receiver tubing to the tire mount to make my license plate removable.
Last edited:

DeftwillP
NAXJA Forum User
- Location
- Round Rock TX
Hmmmm so how low does your crossmember hang? Also, Is that your rear arm mount build into the rocker skid?
The crossmember is a couple of inches below the unibody...I know, I know...right at the center of the vehicle where it's most likely to rub. I couldn't figure out another way to do it and maintain any height difference between the upper and lower links.Hmmmm so how low does your crossmember hang? Also, Is that your rear arm mount build into the rocker skid?
And yes, the rear lower link bracket is welded to the unibody stiffener. I wanted to be unable to unbolt my stiffener/suspension and bolt it onto another XJ when I destroy this one. The crossmember hangs down about the same amount at the link bracket.
Similar threads
- Replies
- 11
- Views
- 218