• Welcome to the new NAXJA Forum! If your password does not work, please use "Forgot your password?" link on the log-in page. Please feel free to reach out to [email protected] if we can provide any assistance.

The Nail Salon

Also, even with a stock pump it doesn't hold enough fluid to keep cool. You need to add an external reservoir and a cooler. I have a ginormous cooler and I'm still getting higher temps when I'm really on it a lot for hours. I'm about to add another 2' of tubing and a second cooler and auxiliary fan to get it down a bit soon.
 
Clean install as always Torx. I refer to this tread as a "I want to build that, how would Torx do it"
 
Clean install as always Torx. I refer to this tread as a "I want to build that, how would Torx do it"
Haha, thanks man. I kind of miss working on this jalopy, so hopefully there's more to come.
Wonder what the gpm is for the stock pump and wj pump
I haven't verified sources, but I've read a OEM XJ will do 2.0gpm, and OEM WJ will do 2.8gpm. Take it for what it's worth.
Also, even with a stock pump it doesn't hold enough fluid to keep cool. You need to add an external reservoir and a cooler. I have a ginormous cooler and I'm still getting higher temps when I'm really on it a lot for hours. I'm about to add another 2' of tubing and a second cooler and auxiliary fan to get it down a bit soon.
Good points. A cooler was one of the first things I did on this Jeep, and something I think every trail rig needs to have plumbed in. I'm still running the same Derale cooler with the new assist setup. Although, I think I'll likely step up the size, or go to a stand alone unit with separate fan.


Worked on wrapping the intake relocation today. With the power steering reservoir and winch solenoid box now where the stock air box used to be, meant that I needed to figure out an alternative solution for the air intake.

I decided to relocate the filter to the passenger side cowl compartment, similar to the kit Thor used to produce. I began by removing the cowl trim piece, and then cut out the sheet metal over the top. The driver side is already open as it acts as an intake for HVAC controls. Water shouldn't be an issue as I'll be putting the top trim piece back on.
5B331919-58F6-492E-848E-04F13192809A.jpg


I picked up a Green Filter #2061, 3" inlet diameter, 5" tall with a 4.75" diameter. I'd prefer a little more surface area, but space is limited. I then attached some Spectre flexible intake hose to the filter, and ran it through a 3" hole I hole sawed through the cowl.
660A3572-540B-4F97-85F4-303D621631B6.jpg


To join the flex hose to the throttle body I scored a piece of 3" stainless heavy duty flex tube.
0CE4F217-7232-409A-9590-B5A3FB670D4C.jpg


I still need to add a filter to the front crank case vent line, but other than that she's ready for some wheeling! Next weekend, anyone?
 
I'd be curious to see what you think of the noise?
I wanted one of the Thor setups (or the other one, whatever it was) but of course you can't get them anymore
The only thing holding me back was I wanted to actually hear inside the cabin before I committed
 
It's been said already but have spent the last 3 days reading through this thread. Great work!

Any thoughts on skinning ur boat sides? (I'm about to start that project)
 
It's been said already but have spent the last 3 days reading through this thread. Great work!

Any thoughts on skinning ur boat sides? (I'm about to start that project)
Thanks, man. When I originally built them I had plans to plate them in UHMW plastic. That's still the plan, I just need to buckle down and do it one of these days. While I've never gotten hung up on the frame tie-ins, I have contacted them on more than a few occasions.


I guess since my last update I actually got the Jeep out for a run down to Hoodoo to run Quack Attack. Here's a few pics from the trip, others are in the trip report section.

DSCN3368.jpg


DSCN3417.jpg


DSCN3432.jpg


DSCN3438.jpg


It was a pretty legit trip. My new steering setup pretty much sucked on that trip. I bent my tie-rod on the first drop in, which made my ram start to contact my diff cover, which in turn killed my turning radius. I also think I'm not getting full pressure out of the pump, as it's harder to turn now than with just my stock pump. Still need to double check everything, and maybe call PSC for some pointers. Other than that, the Jeep took a pretty good pounding all day, and was still able to use cruise control on the drive home (until I ran it out of gas :rolleyes:.)

I was able to winch the tie-rod straight-ish after getting home. Gave it a quick once over, and she's pretty much ready for another trip out. I blasted around some forest roads one day, which was good to get the Jeep out for a bit.

CED19FEC-5B12-4352-9656-6F377DA9A354.jpg


I have plans in my head for upgrades, but honestly I just haven't been using it much lately so I can't justify spending the time/money on them. Hopefully that will change, and the NWC crew will get back in the game, and the Nail Salon will start getting some trail time under it again.
 
My new steering setup pretty much sucked on that trip. I bent my tie-rod on the first drop in, which made my ram start to contact my diff cover, which in turn killed my turning radius. QUOTE]

This is why I reworked my steering before Sierra Fest. I bent my tierod on the Reno Run and tweaked it some more on the Rubicon after that. Now, with the hi steer, everything is up and out of the way. The Nail Salon looks great, time to bring her down to California again!
 
The Nail Salon looks great, time to bring her down to California again!
SierraFest is definitely on my mind this year. I'd love to get back to the Rubicon, and Deer Valley. We'll see if I can pull it off. ;)


Took the Jalopy in the white stuff a few times this winter. The Falken's did well, and the added ground clearance was definitely noticeable. I'd like to get another run in before it goes away.
DSCN3527.jpg


20170114_111649.jpg


Time is flying by for me these days, so the Jeep sits most of the time patiently waiting for it's next trip or batch of upgrades.

Oregon Trophy Challenge is coming up in June, which means it's time to start prepping with only two months to go. Team6 is gunning to get our trophy back this year! Lots of parts are on order, and projects are getting added to the to-do list.

Ben called me up one day asking for some help in retrieving a CJ5 barn find he scored a deal on. Turns out this CJ5 had some practically brand new Corbeau SS seats in it. They weren't quite Ben's size, so I called dibs.

Getting the seats mounted was this weekends project. Started with removing the stock seats, and staring at the factory seat brackets for awhile. It's amazing how some things can be so over engineered.
20170326_141614.jpg


Found some 3/16" angle and flat bar in the scrap pile that looked like it would do the trick adapting the Corbeau's to the stock brackets. After some measuring, drilling, and welding, I had a bracket made up.
20170326_164244.jpg


Bolted up to the seat. Gotta have some speed holes!
20170326_133826.jpg


Job complete.
20170326_174536.jpg


Took it for a test drive to get some seat time in (pun intended). I like them! The side bolsters really keep you secured in the corners. I never noticed how much I was accounting for lean in the corners with the stock seats. These should make it a little easier on us if we're in the Jeep again for 24+ hours.

20170326_174558.jpg
 
Question

Is there still Blue tape on the passenger side that says "Do not adjust seat"...?

Asking for a friend
 
Question

Is there still Blue tape on the passenger side that says "Do not adjust seat"...?

Asking for a friend
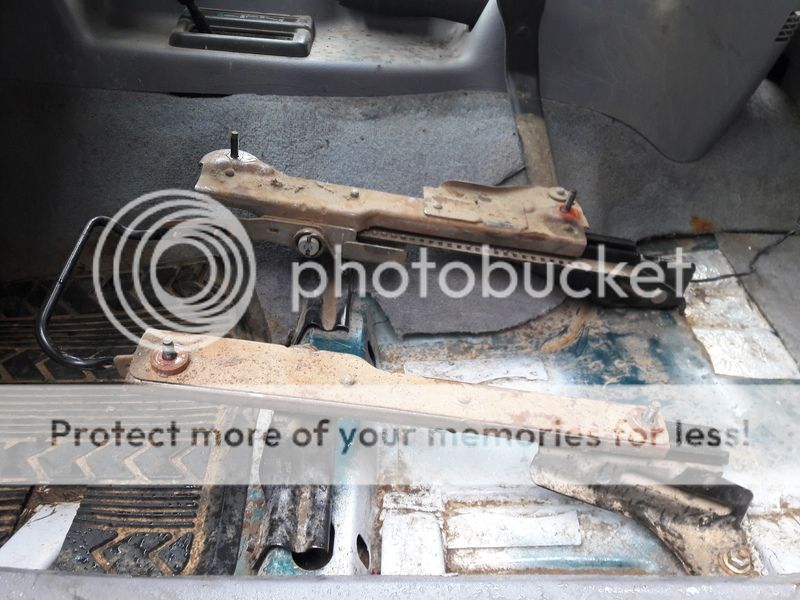
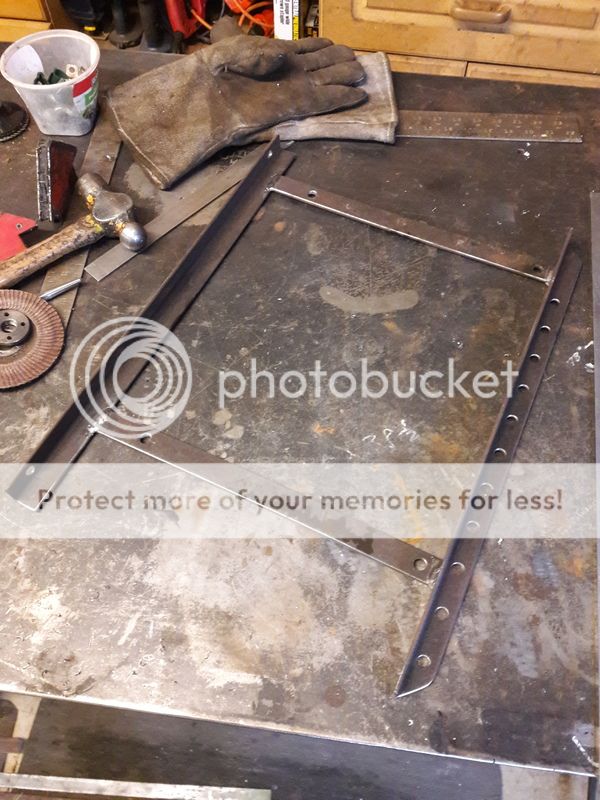
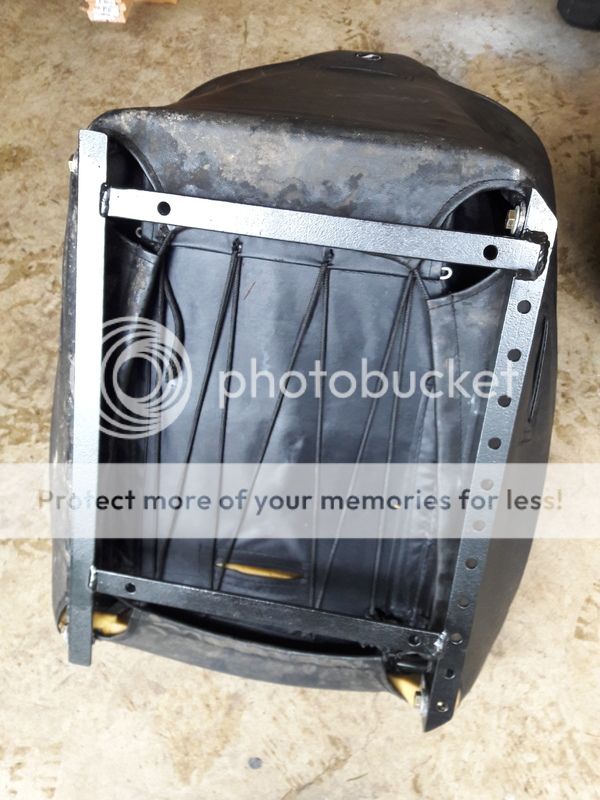
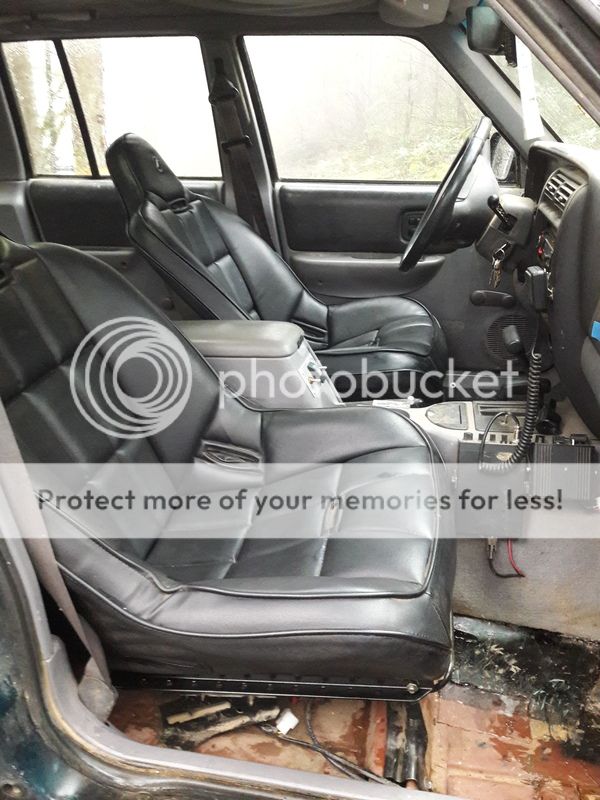
Yes, rule #1 do not move seat. I thought about welding the seat sliders in solid.

I haven't had reverse lights since I installed my quarter panel gaurds at the beginning of this build. The LED tail lights are bright enough that in a pinch I've always just ridden the brake a little. It's never been a big deal. However, with Trophy Challenge coming up, I feared some sort of a night time reverse slalom course (which actually sounds fun). So I recently came across some flush mount 18W LED's that looked like they would work perfect for my application.

After some layout work, I had two holes punched out in my rear bumper (note the grommet for the wiring!).
20170408_165026.jpg


I tapped the bumper for 10-24, and then installed the flush mount lights. I dig the look.
E5A2164B-7AB0-4943-9306-DA9A328B3F65.jpg


Haven't really tested them, but they're wired up to a toggle on the dash, not to the reverse circuit. I don't need them flashing like a strobe when I'm rocking the Jeep in the snow or rocks.

I also figured it was time for some maintenance. Did an oil change, which was about two years over due, and flushed the trans fluid. It was a bit scary seeing the fluid condition coming out of the trans, and that's with an external cooler! Regardless, some fresh fluids are always a peace of mind.

More parts on order, stay tuned.
 
I've learned before you start taking something apart, take a picture.
20170415_144844.jpg


Because shortly after, it'll look like this.
20170415_170828.jpg


Project of the day was swap out my exhaust manifold as it was shot, and leaking pretty bad. On a cold start the Jeep was sounding pretty asthmatic. I ordered an aftermarket replacement. I couldn't justify spending the coin on a header for a tractor engine. The aftermarket "flex tubes" supposedly help remedy the cracks from the thermal expansion of the manifold, we'll see.
20170415_170901.jpg


Back together. Intake/Exhaust bolts got torqued to 23ft/lbs, and I spent a little bit of time cleaning up the intake of the built up sludge and oil. After fuel pressure came up the Jeep idled smooth, no leaks, and it was noticeably quieter. Job complete!
20170415_190211.jpg


Suspect #1.
20170415_190358.jpg


Suspect #2.
20170415_190431.jpg


Suspect #3, which looks like it was welded at some point prior.
20170415_190345.jpg


The exhaust project still isn't done though. I still need to cut out the section on my down-pipe by that's smashed almost flat :gag:. I have a 180 bend of 2.25" that I plan to cut up and splice in. We'll see how that goes next weekend.
 
Last issue I had to deal with was my smashed down pipe. At some point it got into the rocks, and didn't fare too well. At the worst part it was smashed from 2" down to 3/4", so needless to say she wasn't breathing all that well.
20170422_122239.jpg


Ordered a u-bend of 2.25" to try and splice out the bad.
20170422_131159.jpg


Did some strategic cutting.
20170422_132450.jpg


Add new piping, and glue it together.
20170422_153752.jpg


Exhaust project is done, no more leaks, and she's now breathing better. If it happens again, I'm dumping it right after the O2.

In other news, I picked up a scissor jack to modify into a "race jack." It'll lift a full 24", which is nice because before I had to use a block of wood under the stock bottle jack.
8F1131EA-B330-4BC7-8ECF-853A31969E31.jpg


Added an aluminum base on the bottom for a little wider footprint for stability, and then made a new top piece to cradle the axle. Still deciding on where to mount it in the jeep. A 1/2 impact will run the jack, and pull tires off.
20170423_163137.jpg


I definitely want to get the Jeep out next month before OTC, who's interested in a quick day trip to Kingsley or TSF?
 
your rig is always an inspiration. mine has been down for so long now, seeing your project in the works makes me work on mine. just about got er running again, just need battery and some small items.
 
Ran the Nail Salon in Oregon Trophy Challenge again this year. I believe this is it's fifth year running the event. I didn't change much on the Jeep at all leading up to it. Just a good once over, checked fluids, torqued steering and suspension bolts, and greased the joints. Overall I only found a few loose bolts, and nothing else needing addressed which I was pleased with.

Packed the Jeep, and headed out to the event. Our team put in over 160 miles on Saturday.
20170603_194626.jpg


I did manage to explode a hub on a hill climb. The front end barely had any weight on it, so we suspect it might have been fractured earlier. Regardless, I had spares which we had swapped in quickly. Other than the hub, the Jeep took the beating of OTC like a champ.
20170603_162847.jpg


18839325_1471792726174256_1079902703036817502_n.jpg


In the end Team NAXJA took home first place again for the third time at OTC. Pretty cool that two station wagons continue to beat out the field. :cool:
20170604_143250.jpg
 
Impressive hub carnage.
20170610_115127.jpg


I contacted Robert at RWK (NAXJA 
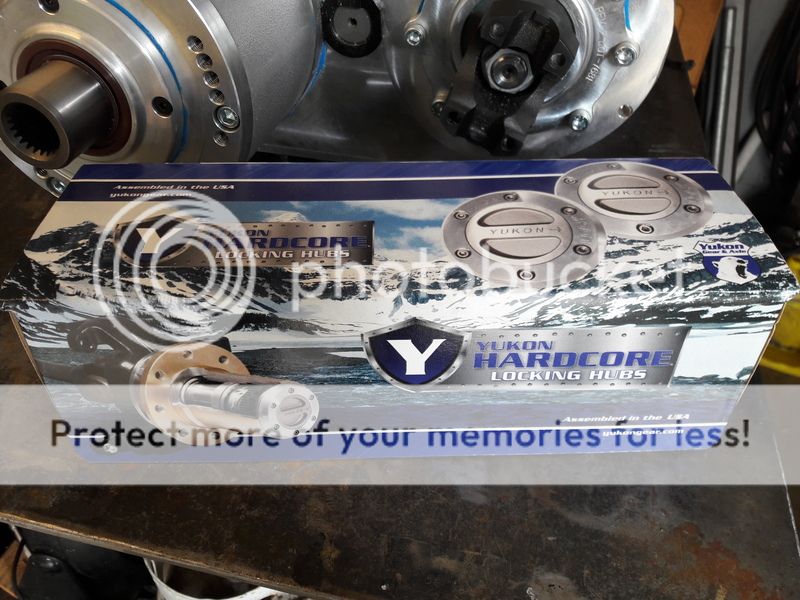
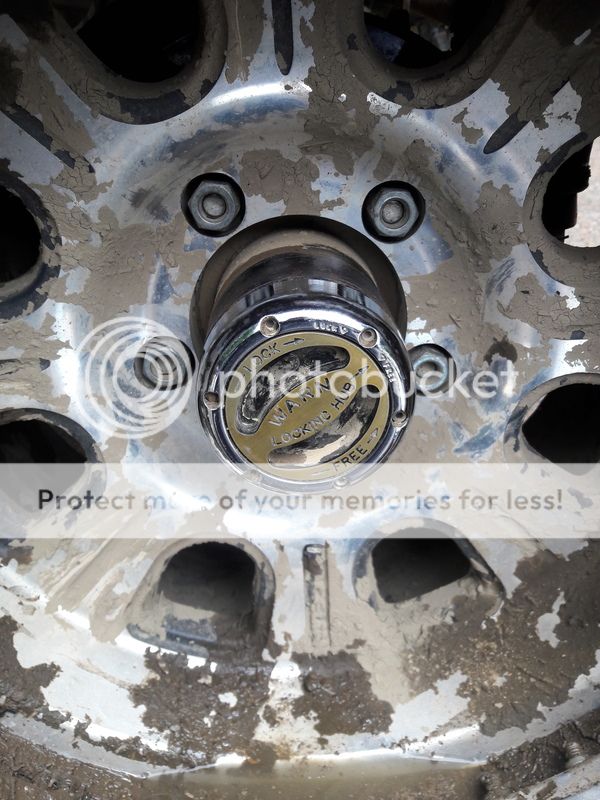
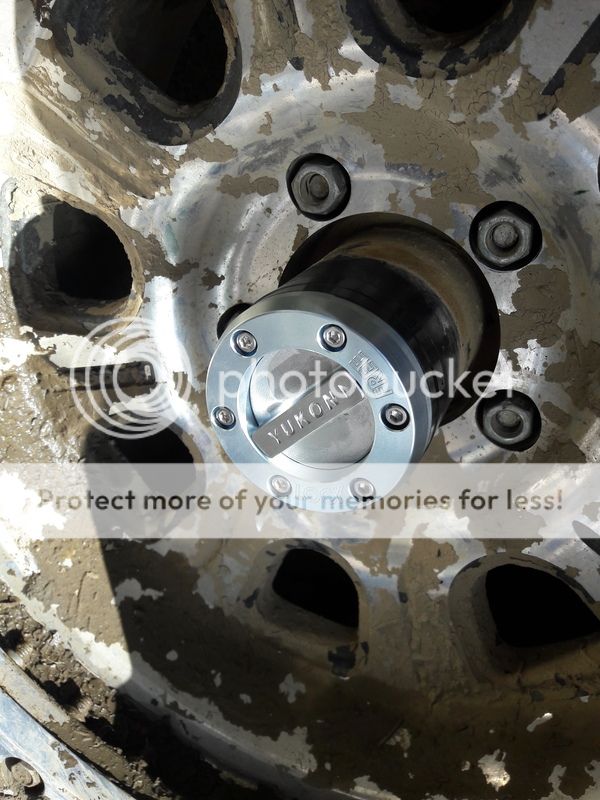
Sponsor), and he got me a great deal on some Yukon Hardcore lock outs to replace the Warn's. I was out of spares, so I used that as an excuse to upgrade, and try out the Yukon's. My Warn's will go back to spare duty.
20170610_115137.jpg


Old.
20170610_123707.jpg


New.
20170610_131821.jpg


I forgot to take some side by side pictures, but the Yukon's use a much simpler design that is supposedly stronger. After assembly and comparing the two, I believe it. Install went smooth, and the Yukon's are about 1/4" shallower in the wheels. 1/3 turn engagement vs almost a full turn on the Warns. We'll see how they survive over time. I considered going to a drive flange, but I really do like having the ability to disengage the front end.

Northwest Fest is 12 days out. Gotta decide what projects I want to try and tackle before. I have a few things to address after OTC (winch needs some TLC, a few rod ends need replaced, etc), and some parts are waiting to go on.
 
Back
Top