• Welcome to the new NAXJA Forum! If your password does not work, please use "Forgot your password?" link on the log-in page. Please feel free to reach out to [email protected] if we can provide any assistance.

The Lab Rat - SFR's R&D Comanche

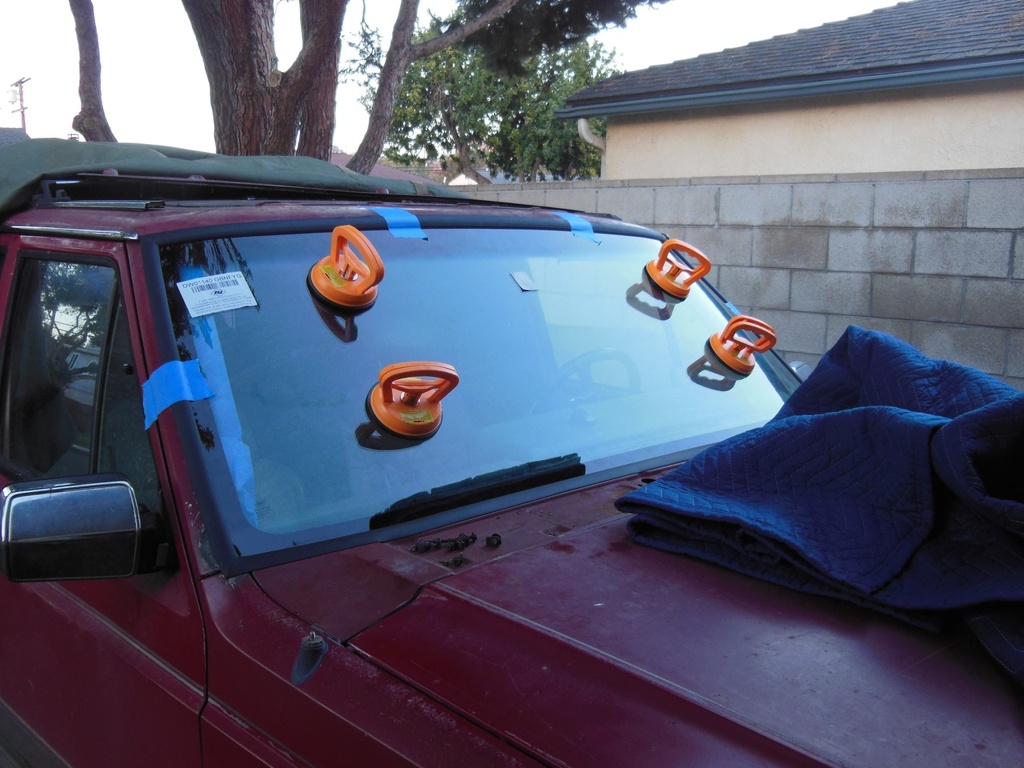
Two ideas for the windshield:

1: If you need replacement anyway grind the trim clip studs down in the windshield frame, prime it, then when you get a new windshield say it's a '96 and get a new rubber trim unit. This will be black and is less likely to trap dirt/debris in. Here is that in my '89.

Windshield_Repair_-_37-la.jpg


2: Scuff it up real well and maybe hit it with plastidip? The OEM black trim was actually the stainless trim with a vinyl covering.
 
I talked a while ago about replacing that disgusting old bench seat. Well I ordered up the new seats from PRP and they got them done in record time, and they have just been sitting in my garage for a while now. I wanted them to match the stock grey interior and I think PRP did an awesome job with them.

108-4989-r.jpg


I'm getting awful sick of driving around on that nasty old seat so I thought I should install the new hotness. I decided to use the original seat brackets as a base to make things easy. I'm pretty sure the bench seat brackets are the same as bucket seats, only with just one track riveted on instead of 2 per side. I drilled the rivets and spot welds out to remove the brackets from the tracks.

108-4983-r.jpg


Then I bolted the brackets back to the floor. Yep, that carpet is nasty as hell, which is why I don't feel the least bit bad about catching it on fire while welding. I've got new carpet that'll go in later anyways.

108-4983-r.jpg


I didn't feel like getting all over the top and elaborate with a simple seat mount that would never be seen so I just used some 1" square tube and angle iron to make up the mounts. For the drivers side I drilled 4 sets of holes for adjustment. I'm probably gonna be the only one driving this thing, but someday I may decide to let my daughter play around with it and might need to bring the seat forward. The passenger seat mount only got one position.

108-4983-r.jpg


Here's the finished mounting. I'm super happy with the seats, and there's a lot of space between them. I might have to build a center console now.

20161211-180157-r.jpg
 
Last edited by a moderator:
It just so happens that I have a set of PRP roadster seats that belong to another project. These are their more compact seats designed for dune buggies and samurais. They are a couple inches narrower than their other seats, and with less of a side bolster, which is fine for me because I'm not a real big guy. As it happens the narrower width also makes them fit quite easily in the MJ, and leaves a lot of room between the seats for........stuff I guess. My dog maybe.

108_4664-R.jpg


What didn't fit as well however was the headrest. Since it continues up at an angle it runs into the back glass before the seat gets as far back as I'd like. I'm thin, but also reasonably tall and like to have leg room. I decided to order lowback seats that'll actually go into this truck which will buy me about 2-3" more room. These seats can go back into storage until I install them in the other car.

no headrests, or are those taller than they appear?

Follow along junior.

Bench seat didn't have headrests either.
 
It's possible, if not probable. I need to dial in the design a little and figure out pricing.

Any update on the uppers?

I could use adjustables to correct the issues since my d44 swap
 
The little MJ has been getting ignored for a while but now that KOH is over and TDS is right around the corner it's time to get a little more work done. First up on the agenda was finally getting a little lift into it. It had some spacers in the front, but was still sitting quite low, or the back was high, whatever. I had some 4" lift coils so I tossed em in (without the spacers) and that got the front just a bit higher than the back. I really like the height it came to, so since it only needed a little in back I just fabbed up some longer shackles. They are 2.5" longer than stock, to net about 1.25" of extra height, which is all it needed to sit dead level.

108-5162-r.jpg


108-5163-r.jpg


108-5164-r.jpg
 
Last edited by a moderator:
Speaking of TDS, if you're anywhere near SoCal the first weekend of March you really should be there. It's a fantastic event, and Cal and I will be out there manning the SFR booth in the vendor area. This truck will be there along with 4643, I'll have a good amount of product on site and in the raffle, special pricing on a couple things and I'm hoping to be introducing some new product there as well!

https://www.tds4x4.com/55th-annual-desert-safari/

TDS-BACK_final-500x500.png
 
Looks great

Loving those bumpers. So simple and don't look too bulky
 
Ok so it's time to add a little flash to this thing. The digital camo came out pretty good, but I need this thing to be a little more eye grabbing. In the past that meant painting the whole vehicle neon green, obviously I went a different direction this time. Lime Green is still the company color though, so this one had to get some highlights, starting with some stripes.

First thing is to use that cut tape I mentioned earlier to lay out the shape. I thought it would be cool to do a bit of an homage to the original SporTruck hockey sticks that were on it before. They just seem to fit the era of the truck.
108-5168-r.jpg


Time to layer on some vinyl.
108-5169-r.jpg


Pull some strings and remove the excess and we have stripes!
108-5171-r.jpg


You may have noticed that I had put a stripe on the hood already. While doing the sides I also continued that one up and over the roof.
108-5174-r.jpg


All that's left now is to add some logos, which should be here in time for TDS next weekend.
 
Last edited by a moderator:
Back
Top