• Welcome to the new NAXJA Forum! If your password does not work, please use "Forgot your password?" link on the log-in page. Please feel free to reach out to [email protected] if we can provide any assistance.

The 4500 MJ Build

Sounds like a manageable list.... Where are you located? Do you guys have a chase vehicle figured out?
 
OUT..

Sounds like this build party would be productive, We all know that ain't my game :wave:
 
Sounds like a manageable list.... Where are you located? Do you guys have a chase vehicle figured out?
We're just north of Vancouver.

KOH is a non chase race. Instead there's designated pit areas along the course. If we race, we'll need to figure out a pit strategy, and have crews for main pit, remote 2, and remote 2A. It can make for a long day (unless you're winning!), but it's fun to be a part of the action. We'll definitely let everyone know if we're in need of pit help.

36835BD6-65C7-4FAF-BCDA-34911D5B3520.jpg


If timing works out I will help.
Count me in to
Thanks, guys. I'll keep that in mind, and pass it along.
 
In!, I need to make it to KOH and this will be all the more reason to get there next year.
 
I just discovered this thread and the build looks awesome! It's all the little details that make it. Excited for you guys and will be cheering ya on from my desk at work! :)
 
Looks like were in need of an update. I don’t have to many pictures of the rig in the current stage since I have been working Saturdays and long into the week nights. Thats been making it tough to make it over lately. Though its hard to communicate how much work is being done with pictures, especially when you spend hours in 1 spot soldering and heat shrinking wiring. I know the front ram setup is being worked on, also just a bunch of wiring bits being tied up. Time for me to get back over and work on the race rig. Not sure KOH is in store for the rig but Im sure as heck ready for Vegas To Reno this year!
 
Looks like were in need of an update.

Yes, yes we are. Work has been steadily moving forward this past month. I'll try and get some pictures of what's been happening soon. Car is pretty much wired. Still doesn't make noise, but it lights up the shop quite well.

158002E3-5AAE-4424-A218-90FBFAC297E3.jpg


Winton and I have been working hard trying to push forward and wrap things up. Axles housing were pulled, brackets finalized, gussets added, and then they were fully welded. Our steering system is pretty much done aside from the plumbing. We have all of our engine accessories, and just need to finalize their mounting on the motor. The tubing for our exhaust is sitting in the shop, and will probably be the next major thing we tackle. Still lots of work left to do, but it's looking more and more complete each day!
 
Update time!

As some of you may have noticed the 4500 MJ did not make it to the hammers this year. Winton and I pushed hard the weeks leading up to it, but it just wasn't meant to be. There was just too many loose ends to wrap up in time. Here's what we've been up to since the last update...


Winton headed up to BC for a bit, and brought back two bear and a moose. Dinner at the shop is always something to look forward to!
294A1F26-F48F-432C-B682-108BF505F24D.jpg


Over the next few weeks I worked solo on the build focusing on getting the wiring pretty much all ran and laid out. For chassis grounds, we TIG welded small pieces of stainless to the chassis, and then tapped them for a 5/16 and #10. These will provide a good common ground, while also minimizing any corrosion.
23D8CC72-9208-47A0-A5E4-16DDB453E825.jpg


One solid night was spent planning out the wiring for the switch panel, and another night was spent executing said plan.
0E40DA8C-F44A-4591-9BCC-14A67A176A13.jpg


Connected the power from the breakers, and then connected the accessory leads. Both wiring looms are ran through Weatherpack connectors, and can be unhooked to disconnect the switch panel for easy disassembly.
8BA62330-1C53-4F08-B570-C3B9A806BFDA.jpg


Then came the extremely stressful moment of powering everything up for the first time. Success!
158002E3-5AAE-4424-A218-90FBFAC297E3.jpg


BC998D38-02B4-471E-806E-2EEAAB1CCFE8.jpg


More boring wiring pictures. After the accessories were all wired, I moved onto the gauges soldering in the wiring for them. Still need to finalize the senders and wiring associated with them.
89EA004C-6E77-477D-AAE2-812EB72EE2F6.jpg


November at the shop had the MJ back on stands. We decided it was time to yard out the axles for final welding.
D4757E68-7A05-4E7B-8165-DC6613ED2F66.jpg


We slid the alignment bar through the axle to try and minimize warpage of the housing. Even with the solid bar they did twist on us. We played around a little bit with heat and force in strategic spots, and got both housings dialed in good.
8DE5A0DC-BB1D-42A4-9262-F227B82C78A8.jpg


After a bunch of thought and brain storming, Winton decided to build the exhaust in house. Farming the job out would take time away from the build, and bring compromises. We knew this truck best, and knew what we wanted done with the exhaust.

Our aftermarket center dump headers weren't going to work with the starter, and our stock manifolds dumped too far rearward. Winton then came up with a plan to essentially build custom manifolds for our application. These use 1.75" stainless off the block, and dump into a common 2.5" stainless tube. While they might not be your run of the mill aftermarket header, they suit our needs and space confinements perfectly.
45E69482-7C8D-405E-A9B9-9202ABEEB259.jpg


TIG welding on V-band clamps for the rest of the 2.5" tubing.
048E8371-FF92-404A-9928-E5E347F4372D.jpg


Overall the exhaust on this build turned out amazing. It hugs the frame tight, doesn't hand down, and looks awesome. No cross over pipe in the front to deal with, just single pipes down both sides exiting through two Borla stainless bullet mufflers. Can't wait to hear the LS sing.
EB98CFB5-5A2F-476A-9E06-39127066A18E.jpg


In the above picture you might have noticed our new 7075 solid aluminum links. Mike at Crossed Up Customs had been a big help on the build, and offered to help us out with the links.
1722D3F3-E975-4258-9B43-C756DC60C823.jpg
 
#Racecars.
BDD118BE-56E6-4641-BEBE-F14DE5EB77B4.jpg


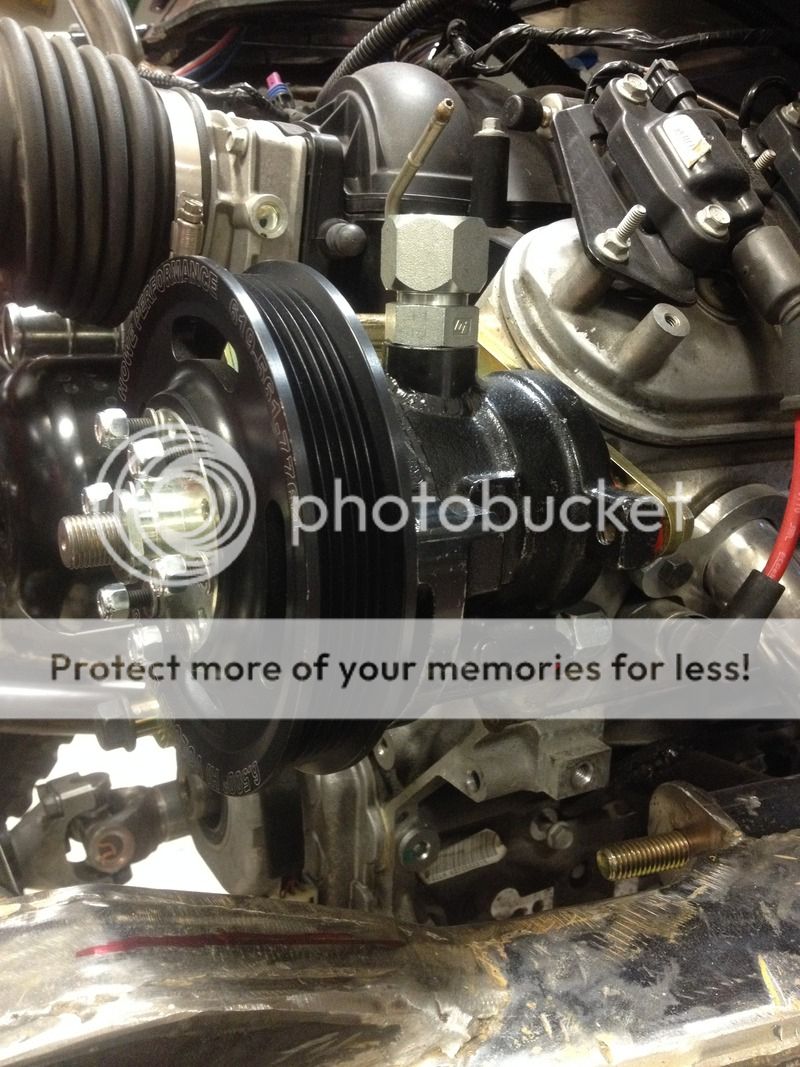
Steering has been an on going project for several months. We called up Jeff Howe, and picked his brain on the ideal setup for the 4500 class. For the pump, Jeff recommended using a Trophy Truck series pump. A power steering system ultimately comes down to flow, and these pumps deliver. We got the pump from Jeff, but quickly found out Howe's bracket wasn't going to for us (this isn't a trophy truck). We reached out to Drew at Goatbilt, and got Drew on board with prototyping a LS based bracket for this pump. By the end of summer we had our monster pump mocked up. Drew also hooked us up with one of his alternator relocation brackets as well, which mounts our alternator up top on the passenger side out of harms way.
102B81D8-0341-4352-B1EF-AF85F4CBBEC6.jpg


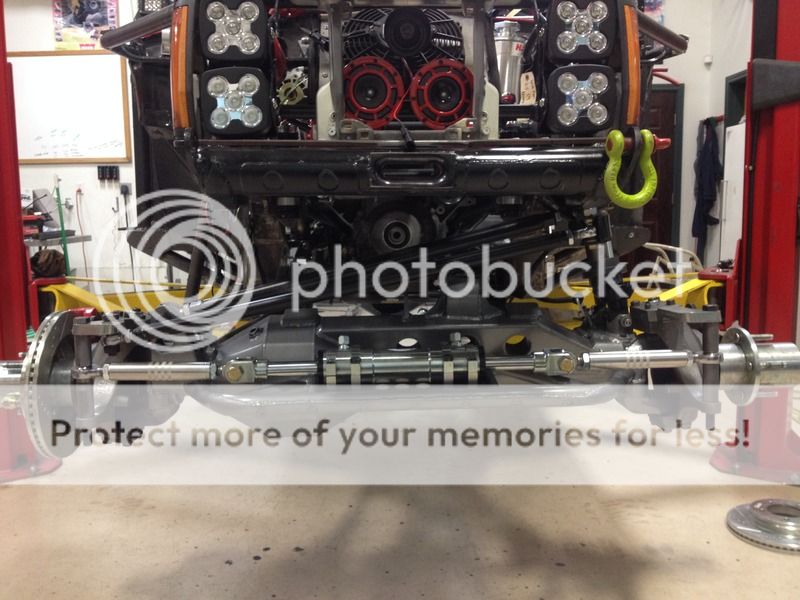
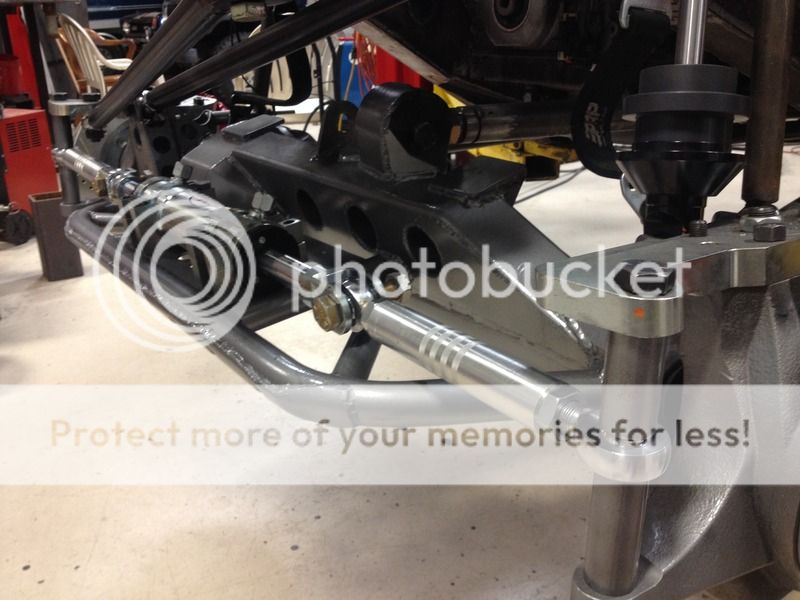
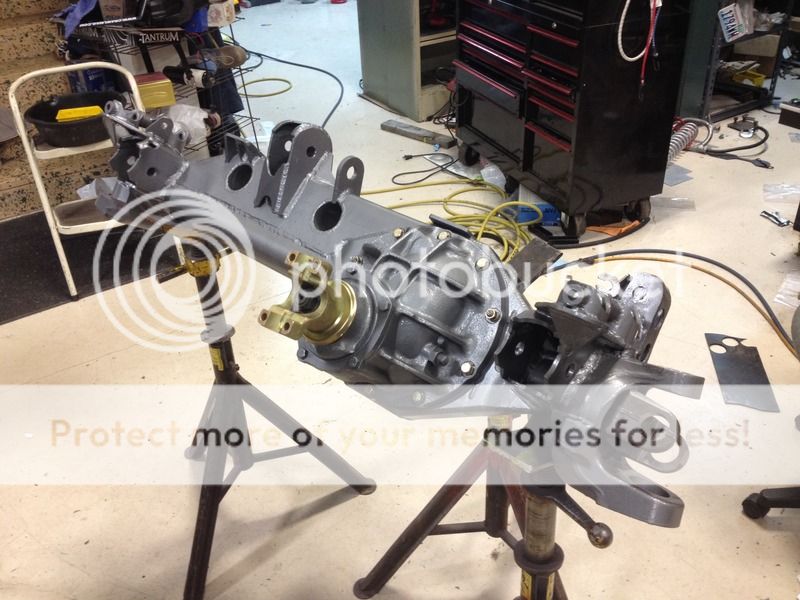
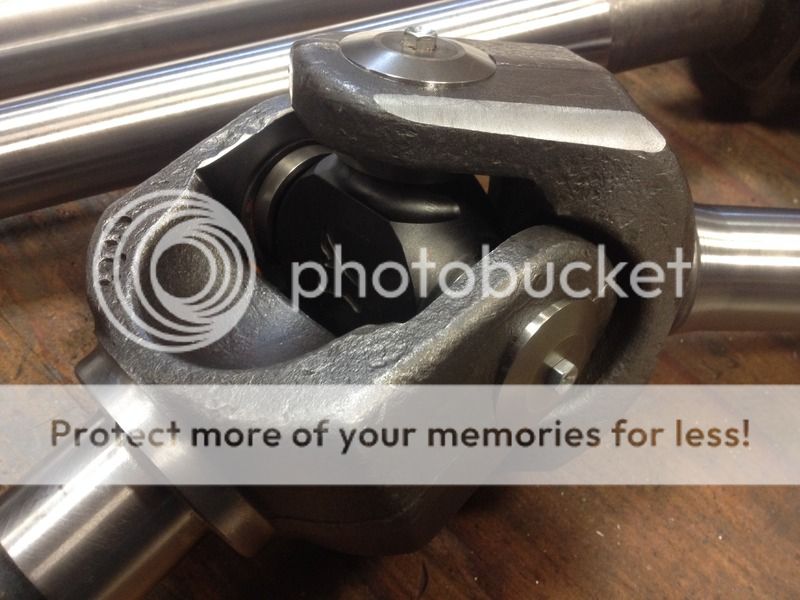
In combination with the Howe's Trophy Truck pump, we're running a 2.5" double ended ram for assist duties out front. We still have our Howe modified Scout steering box to stay class legal, which is connected via mechanical linkage through the drag link.
BEF3218F-B738-4822-AC93-0CCB33A9A804.jpg


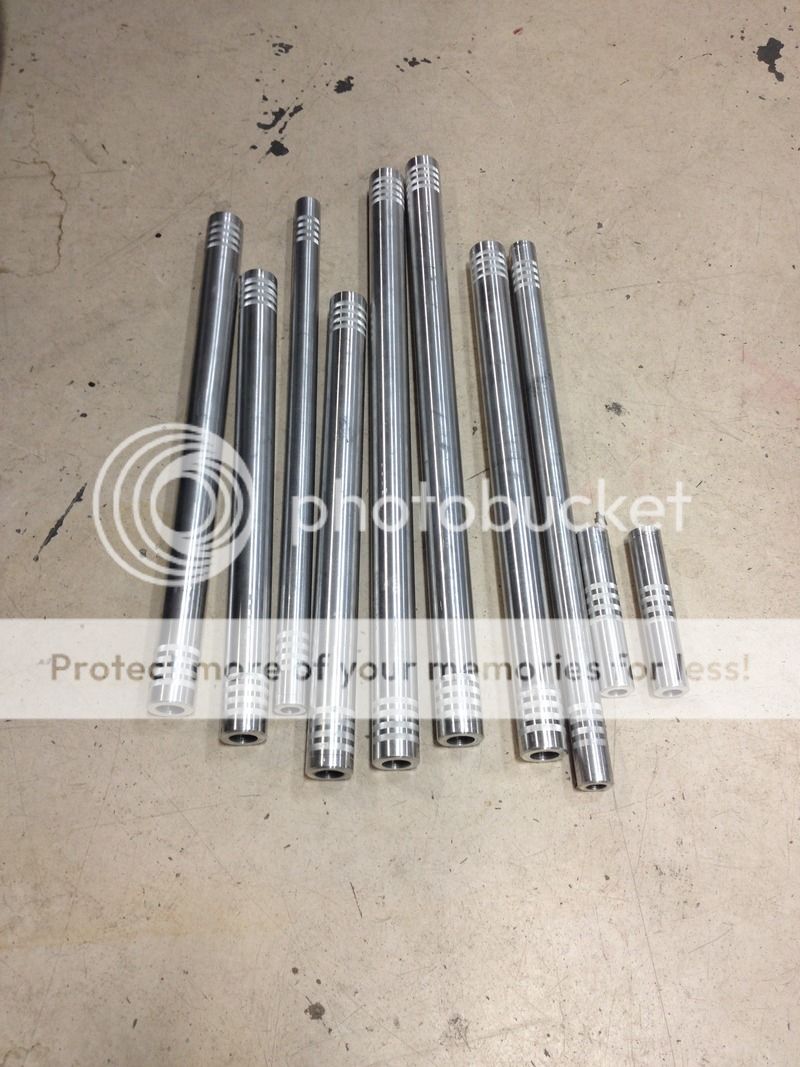
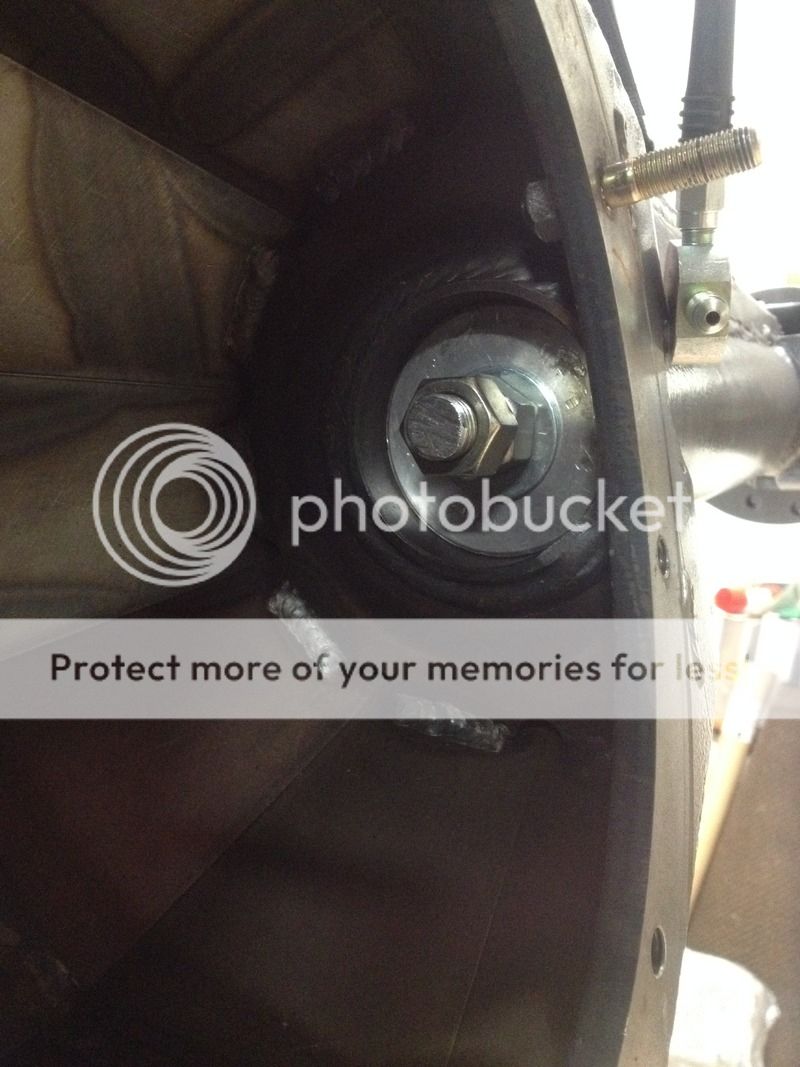
We built a ram mount on our front axle, doubled up the wall thickness on the outer edge, and added some sweet 7075 aluminum tie-rods to the setup. We tried not to cut corners on the steering as it's a critical system that can end your day quick if it's not up to par.
49FC9892-8078-4BFC-A837-B7E0C997052C.jpg


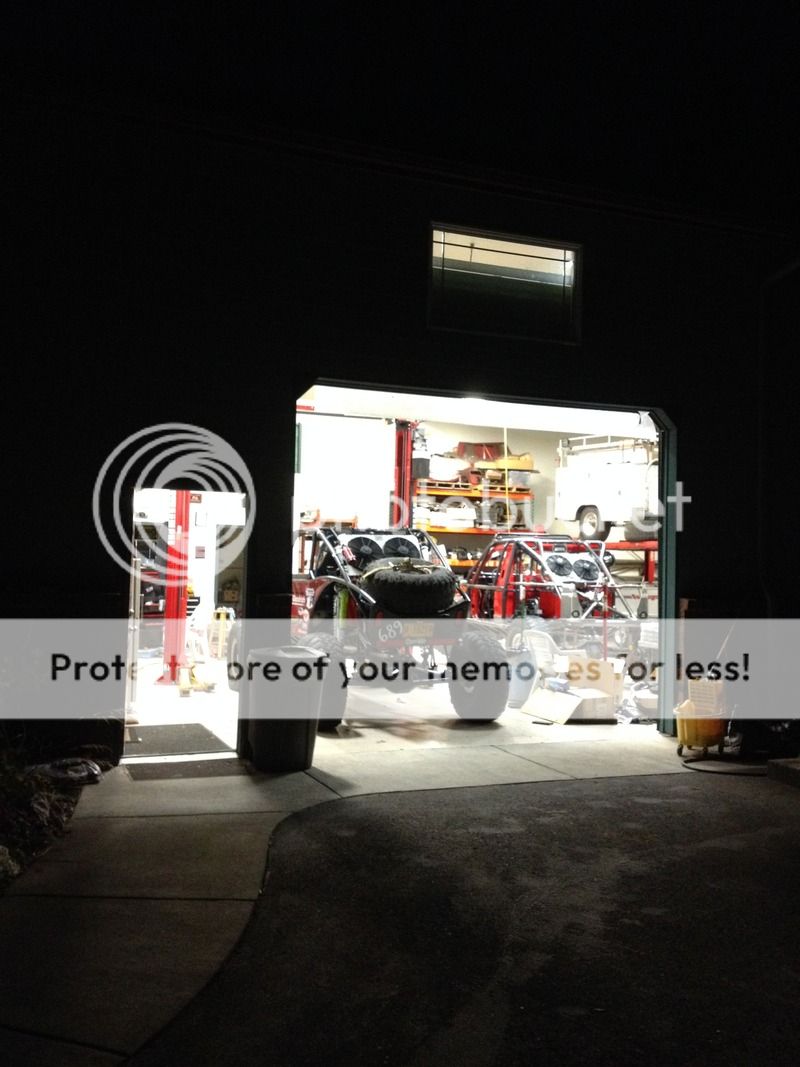
After getting our steering pretty much completed Winton and I put in a late night at the shop trying to tie up some loose ends to get the car ready to go in for plumbing. Oil Filter Service in Portland offered to let us bring in the car to plumb the brakes, trans, radiator, and steering. Much easier than making 37 trips back and forth for fittings. They saved us a ton of time, and really helped us out with the plumbing on this project!

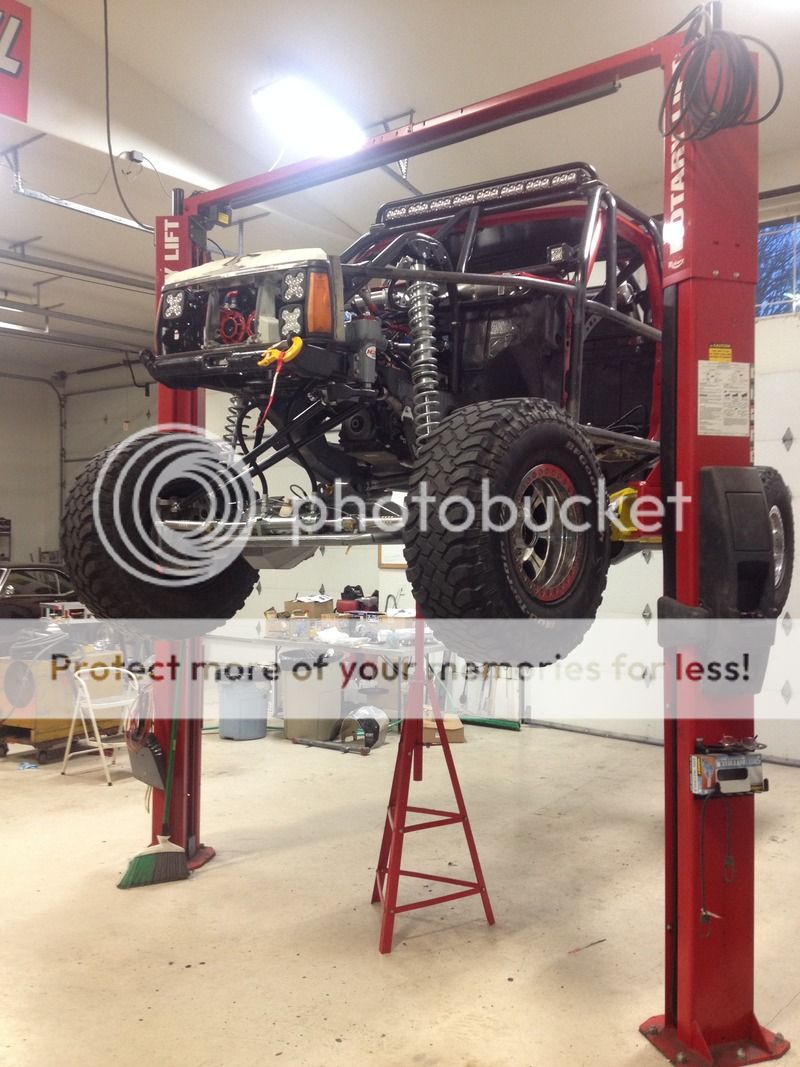
Back from plumbing we tore back into it on the lift.
D7DB9822-9F81-40E2-ADCA-B88534C6F80B.jpg


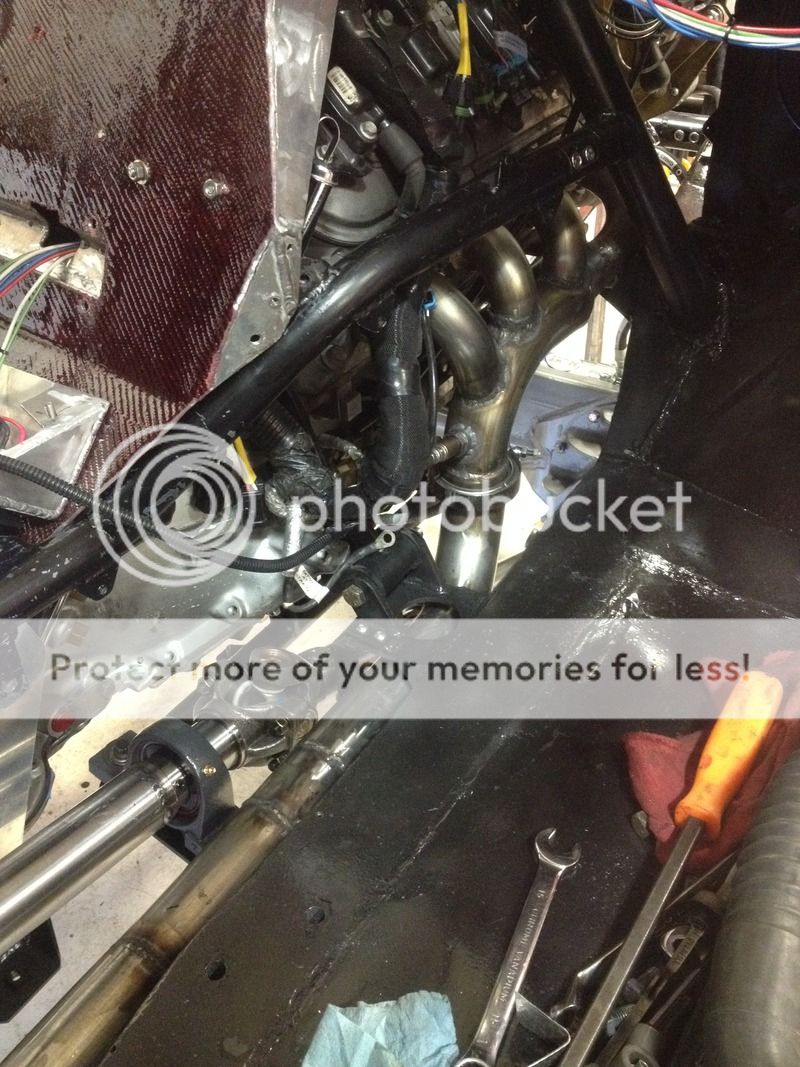
Out with our mock up transmission, and prepping for final install of our ready to run transmission packed with some billet goodies and a custom A1 torque converter.
8B75E845-BD16-4070-A156-4E1504639140.jpg


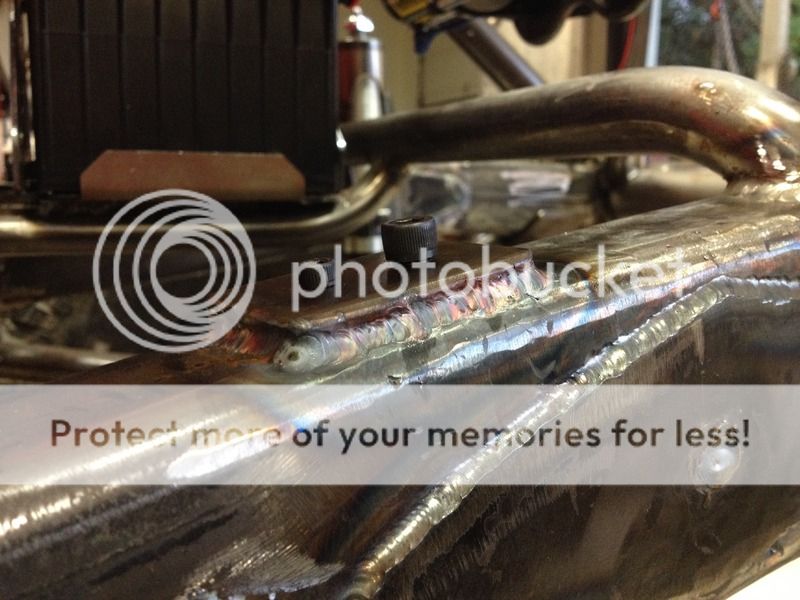
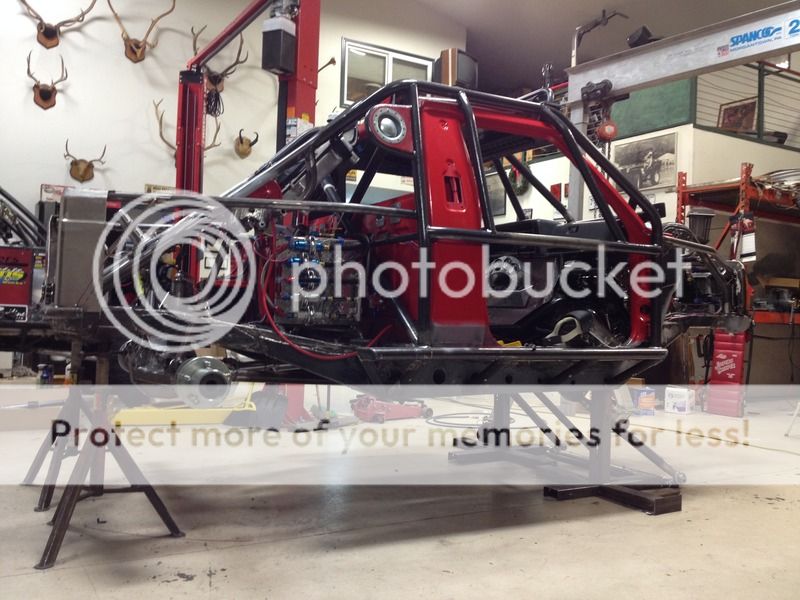
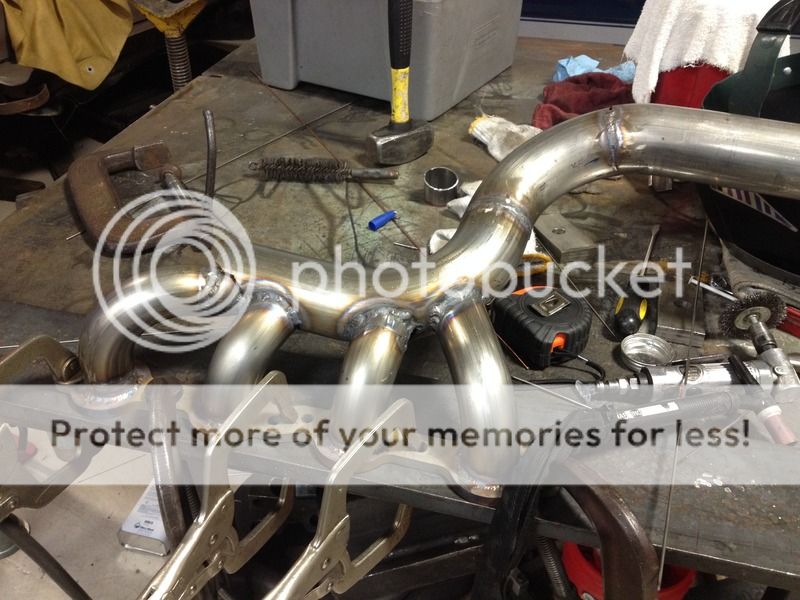
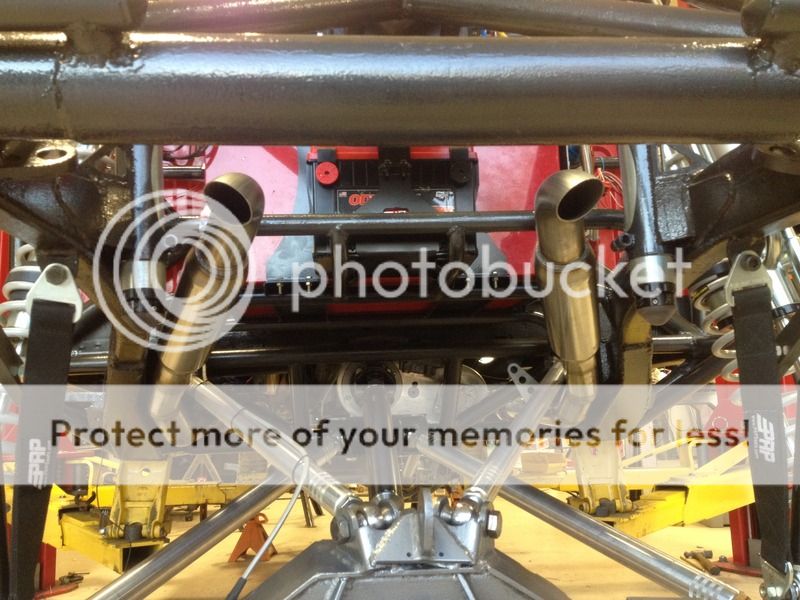
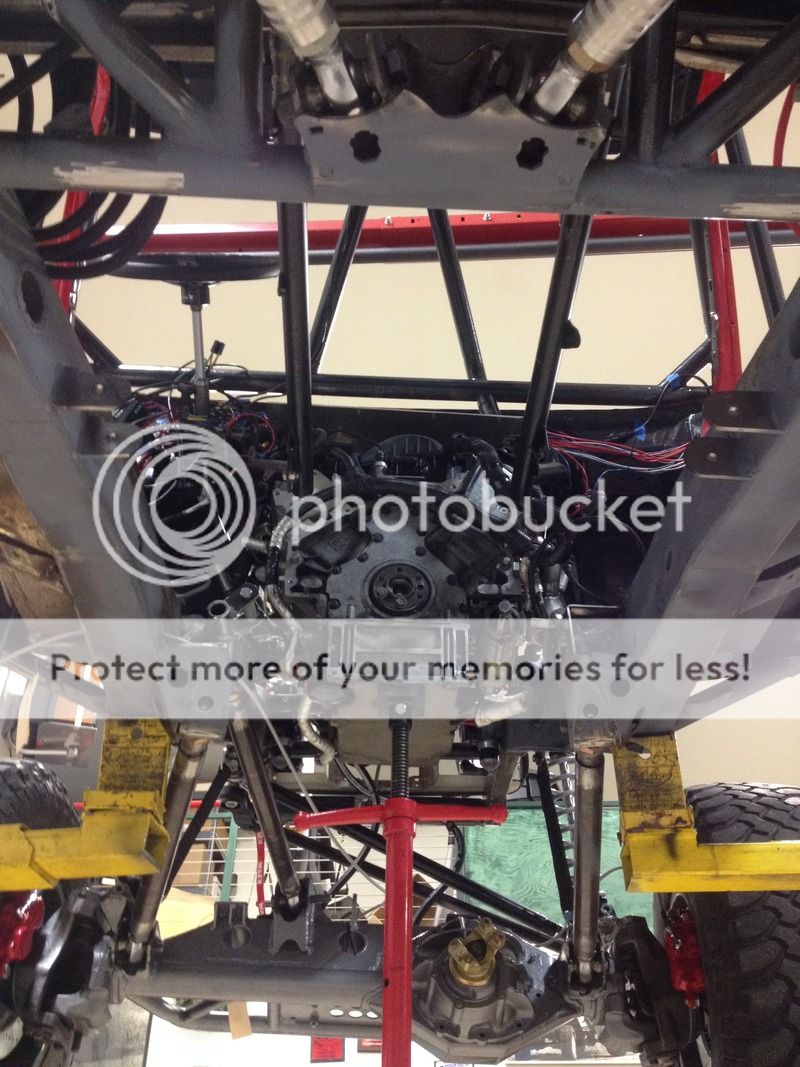
Here you can see our mid-plate mounts in, transmission in, drive line on with pillow block mounted, exhaust in, and a whole lot of painting got done. Suddenly all that space we started with was now non existent. However, the extra time we spent to make this thing easy to service sure paid off.
8D483E77-7805-4638-8CE1-BCEED09E1E0A.jpg


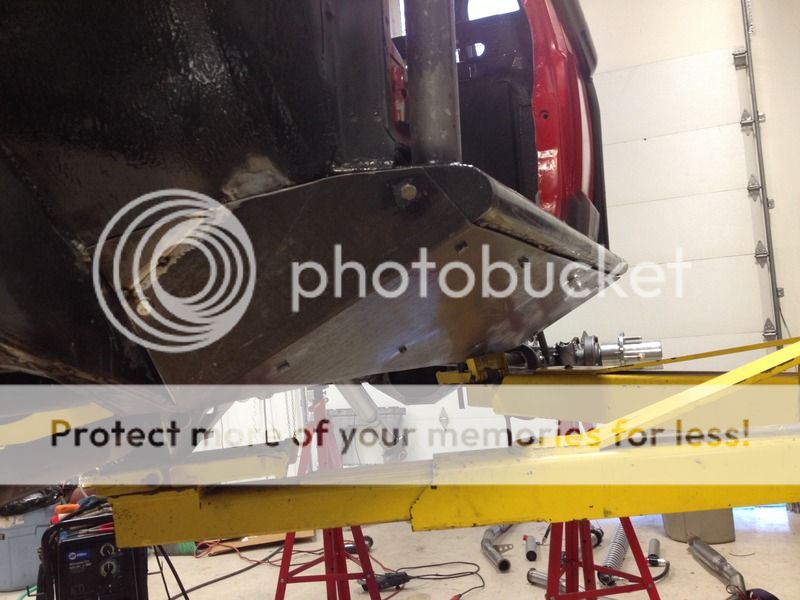
One of the few remaining fab projects was our boat side armor. We chose to use .125" Hardox hardened steel plating. We've been running similar stuff on our #689 Ultra4 car with great results. This stuff is not fun to drill or cut, but we managed to get both our boat sides bolted on. We could have welded them in solid, but we liked the having option of not running them for races such as Vegas to Reno where they just aren't needed and tend to pack full of silt.
F3CC379F-ECF8-478E-8AE9-4816885F2B68.jpg


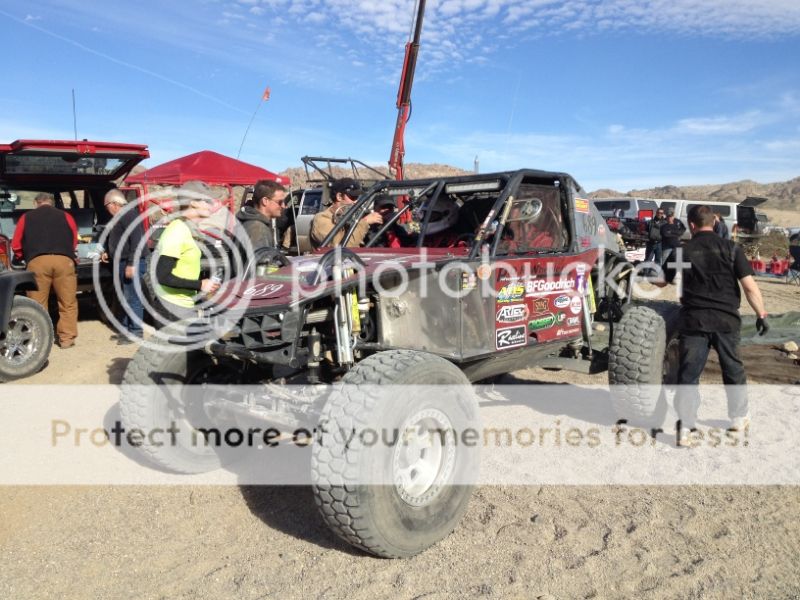
It was around this time when left MJ behind, and headed down to KOH. While it was disappointing not having the MJ there, KOH is a total blast regardless. Here's a few pictures from the trip...

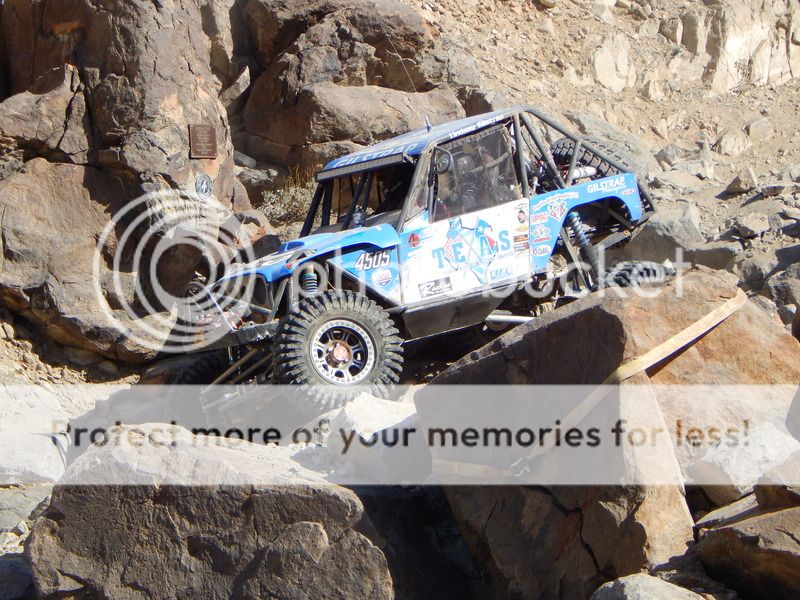
Lindsay Gilstrap in the 4500 class dropping down Jack Hammer.
DSCN2819.jpg


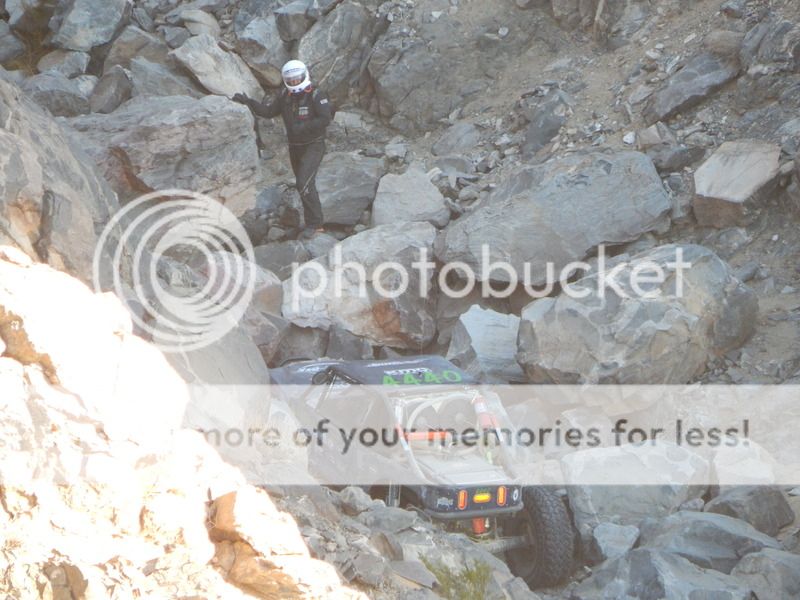
Larry Nickel 4500 class at the top of Jack.
DSCN2885.jpg


Note to self, keep it rubber side down.
DSCN3062.jpg


Absolutely beautiful down there.
DSCN3174.jpg


Sledge Hammer is no joke.
DSCN3164.jpg


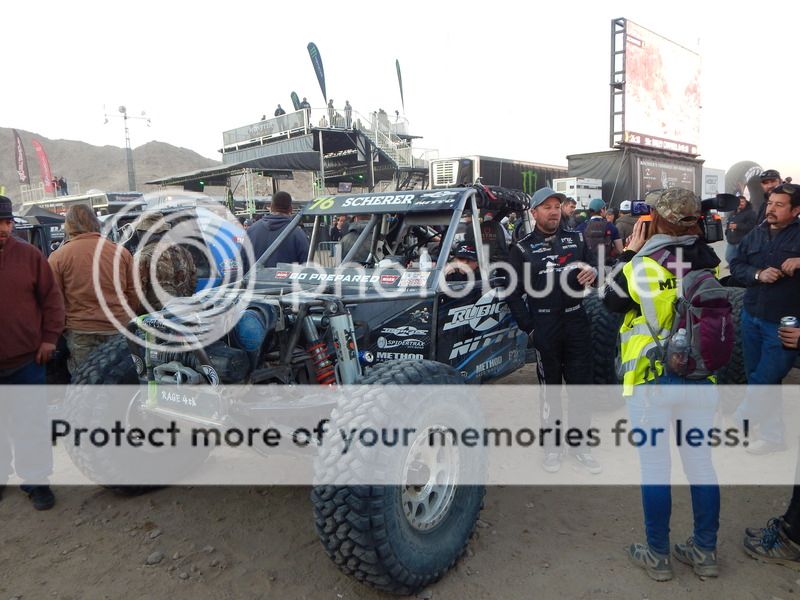
Schererererer takes 2nd overall in the main race.
DSCN3193.jpg


Read more about my trip HERE.
 
After getting back from KOH Winton and I had some new motivation brewing. I walked into the shop one day to find a stack of new tires. General Tire got on board with the build, and helped us out with some new shoes. These are 37x12.50R17 General Grabber's, which should be available to the public shortly. They're a proven desert tire, we'll see how they hook up in the rocks.
1F39ED50-76BC-4DD9-8933-81036365B098.jpg


Even color matched for the truck.
584CE869-150D-4E04-B9D4-425BE407AFE1.jpg


Pulled the axles one final time for final assembly. Winton machined this slick aluminum puck that slides into the inner axle seal, and allows some threaded rod to pass through. You can then use the threaded rod to easily pull the seal into place.
1101E846-DF84-41F1-B663-84EC457C6347.jpg


Front axle all painted up and Yukon third member bolted on with a Lube Locker gasket.
F1848CEE-819C-40F3-965A-4D70A161C71A.jpg


Joey swung by the shop one day, and assembled our Yukon 35 spline shafts with our Yukon Super Joints. It's going to be a peace of mind knowing these are in our front end.
168F0316-CF4B-4BF3-8967-AA0B52BD486C.jpg


That's pretty much where we're at to date. Right now we're mainly focusing on final assembly. We're taking care of a lot of miscellaneous painting (it never ends!), getting the correct bolt lengths and fasteners, final adjustments to the interior tin, and hopefully wrapping up the last of the wiring.

This thing should be making noise and moving here in the next month or two. After we reach that milestone, we'll wrap up the last few fab projects of the belly skid, and skin work.
 
Love this rig!
 
It has been awhile. Is this project still moving? By now is should be at road testing phase broke and back to the shop for upgrades for the third time.
 
Back
Top