• Welcome to the new NAXJA Forum! If your password does not work, please use "Forgot your password?" link on the log-in page. Please feel free to reach out to [email protected] if we can provide any assistance.

O.K. B's Build Thread

Since i Mentioned the Headlight upgrade i will cover that as well tonight

While i was doing the alternator and wiring upgrades a buddy of mine with a 98 xj asked me to figure out a wiring issue for him . he was having issues with his headlights being too weak and one was dimmer than the other (probably bad ground on that side).

In looking into his issue i came to notice that my perfectly working stock ones were pretty weak with the stock sealed Beam headlights that put off that awful Dim yellow light. And Rather than troubleshoot a system that wasnt enough in good working order we would upgrade (I decided i would do mine too)

So we got the Eautoworks Headlight wiring harness upgrade (to ensure we allways get full power to the lights).

And Ordered Us Some Autopal E-Code Glass H4 headlight housings w/bulbs

The European Code headlight housings are way nicer than what ive seen in the D.O.T. housings (not that im an expert) .

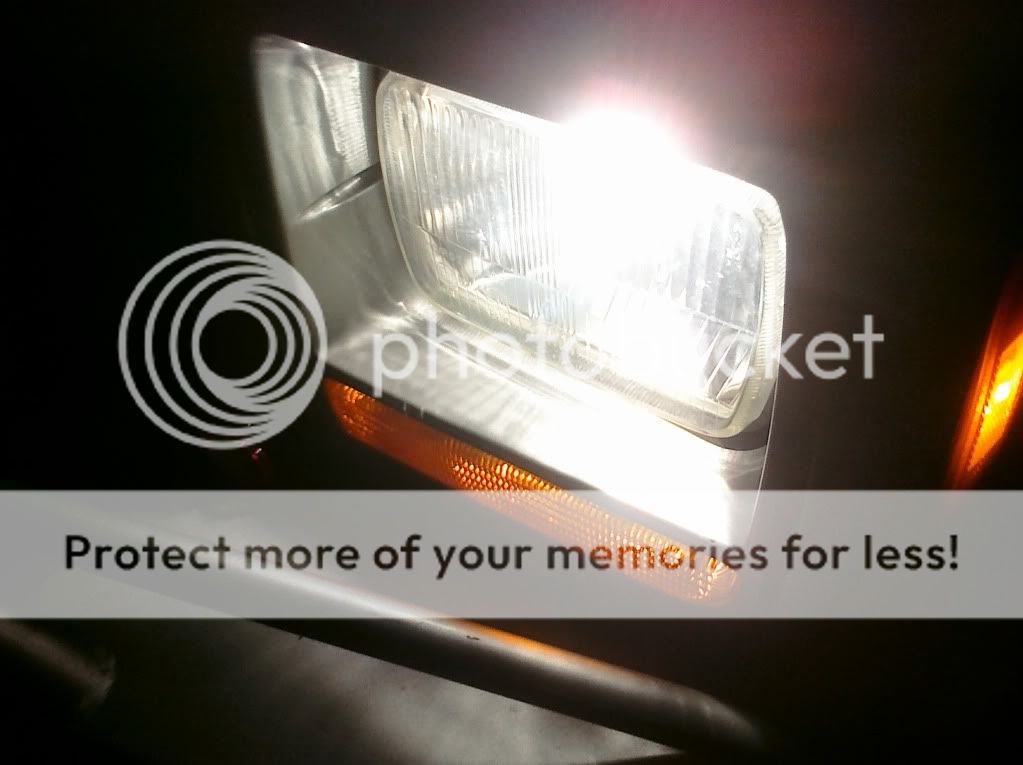
Not only did the housings and wiring kit give me the ability to run H4 Halogen bulbs but they have a Nice Clean Cut off at the top so you are not blinding others on the road.

You can really see the clean line at the top of the light output where it wont shine above when you pull in the garage and shine them on the wall..

I think they came with a 55/80 watt or a 55/100 watt (low/high beam) set of H4 bulbs
that are still going strong after about a year and are a noticable improvement. however i think when they do burn out i will probably go up to a 80/100 watt bulb .
(i have kind of poor night vision)
 
Last edited:
Here You can see the Headlight Harness Runs over the Radiator
(the same route as the return trans fluid line from the in Radiator heat exchanger to the Trans)
xxxsdfc.jpg


And a Pic Of the Results

CIMG0010.jpg
 
Yep.
with the exception of 2 grounds :
Neg. Batt to Fenderwell
And Neg. From Block to Firewall

The original wiring may not be doing alot since the electricity will follow the path of least resistance.
(wich is also why it won't blow the original fused link that would blow if I didn't upgrade)

while I was researching this I found that apparently alot of the audio guys do it this way to keep it easily transferable to another vehicle without making the vehicle no longer work.
Since they weren't having any negative effects from doing this it actually seems easier to me and at this point made sense as every mod at this point was bolt on.
Also it saves it from hanging there unused looking trashy or cut out

Also I noticed the in dash voltage gauge reads a bit lower with the stock wiring detached.. (not shure why)
which was also a reason I left it connected..
For the first week I left them detached and although it read a bit low I couldn't get the voltage to drop with the ac headlights and subwoofer...
The only change when I hooked up the old wires as well was it reads at where it allways did and once again doesn't move..

in the past I could really push the subwoofer and see the gauge slowly fall and then the headlights would dim with the bass and then lose power to the point of the head unit powering off..

I am extremely satisfied with the results . (after having plenty of time to test the setup)
 
Last edited:
Okay so i'm back at work full throttle (12-14 hrs 6-days a week)
So i havent made any progress on this build thread even though i have the pics and stuff together.

Anyway im pretty shure this is getting all out of order but i figured i'd share my modified Front stock skid plate i found from a member of one of the local clubs.

Someone added light boxes with cages to protect them and welded a peice of angle iron on to reinforce the bottom lip.

I bought some 1" square tubing and made a 1" Drop for the skid so it would actually cover my steering ..

I only paid like $40 for it with the lights. all i did was take the lights out clean it up and paint it.

Heres my spacers

CIMG0hgjthj004.jpg


And the repainted skid

CIMG0003.jpg


CIMG0001.jpg


and the lights


vxcvxcv.jpg


I don't have a clear daylight picture of it from the front but i will get one when i pickup my jeep from the engine rebuilder.
 
That's a pretty good way to keep lower lights from getting trashed.
 
OK so back on to some of my jeep..
After taking it into a mudhole without checking depth (idiot)

I ended up with a flooded rig with water in the motor so i pulled the plugs ang keyed the starter untill all the water squirted out and cleaned out the intake and after waiting some time she fired right up and ran fine (for about a year after anyway)

As a result of this i noticed that mine did not have floor plugs in the front so i added one on either floorboard at the feet of the passengers .

And when i replaced the carpet (from one of our parts rigs) i cut it so that it just tucked under the trim . and cut it into 5 removable sections

1. The rear cargo carpet peice (cut with a tab to go under the rear seat a bit)
2. the rear under seat area is one peice
3. The rear floorboards are all one peice (cut halfway under front seats)
4. The drivers Side floor (same cut under seat)
5. And the front passengers (also same cut under seat)

Now my carpet is easily removed and left at the home garage so i wont have to replace my carpet ever again.

Here you can see how there's just a bit to tuck under the trim making it easy to remove. I think the most carpet was cut out from the under console area

Removablecarpet.jpg
 
Last edited:
Ok on to some fun stuff !! My built Axles, Pneumatic switches , and On board air setup!

We will start with the axles themselves,
I got them from a member here and have been really happy with them and as expensive as it is to get some built i feel like i got a great deal on some stuff i would've liked to have had and maybe not have ever actually bought.
I probably wouldnt have sprung for the 30 spline alloy for the d30 or the 29 spline alloy for the 8.25 and maybe not the diff covers.
because gearing and locking wouldve been expensive enough! ( and i don't plan on going any larger than 33")

Heres a link to the for sale thread http://www.naxja.org/forum/showthread.php?t=1066348

And a description for the click lazy:
Front is a h.p. dana 30 with 4.56 gears, ARB locker, 30 spline chromoly shafts, tube seals, spicer u-joints, lower control arm skids. and Riddler Heavy Duty Diff. cover
Rear is 8.25 with 4.56 gears, ARB, 29 spline chromoly shafts and Riddler Heavy duty Diff cover.

They were pretty dirty looking when i got them so i sanded them clean and repainted them And when we painted the riddler logo we left the leg off of the R so its like a "P" question mark..
Thats the first letter of my last name and what my friends call me.
 
Last edited:
The Track bar bracket was broken so we welded a piece of plate on the front and then cut an opening to get to the rear of the back part of the bracket and welded in another plate

CIMG0016.jpg


CIMG0019.jpg


We also boxed in the upper control arm mount with some scrap metal we had laying around (thats why its 2 peices)

CIMG0021.jpg
 
For my Pneumatic switches i cut a peice of metal out of the door of our green donor jeeps door and shaped it to fit the ashtray area ( i had cut out for this).

And Used 3 Safety cover switches .
and Clippard pnueumatic switches i think they were the mjtv-3 (3-way) switch but id have to check the receipts to be shure
And a cheapo switch for the Compressor .

I found some Neat Icon labels to label my switches on ebay that i think look really clean.
CIMG0045.jpg


It came with 2 sheets (white and black)

CIMG0070.jpg


CIMG0071.jpg


Here you can see the 1/4" o.d. Push to connect fittings i used to connect the airline (1/4" o.d. air brake line)

CIMG0092.jpg


CIMG0062.jpg


And when i shift down into 1/2 the shifter handle goes in between the switch covers and my fingertips can just comfortably reach the switches to operate them if i want.

CIMG0073.jpg

(i keep all the receipts so it'd be hard to find in the huge pile lol)
 
OK so on my On Board air I kind of made a mistake with everything being so expensive doing the axles and switches and air system all at once i ignored my research on a good compressor and took the "great deal" i found.

I ended up with a WARN spc air compressor don't end up like me its not nearly up to the task.
It was rated for 150 and after talking with warn's techs i bought the 145 off pressure switch and after my setup was complete it filled the tank and cut off one time and was making a funny noise.

After that it could not fill the tank up enough to turn off the compressor so i worked my way down to the lowest pressure switch i could find. and the thing failed completely so i disassembled it and the ring around the piston was pulled off so that there was no seal. I was able to get the seal seated but it is sctretched in one spot and doesn't fit properly.

Between that and bypassing the thermal safety kill switch it was back up and running but can barely get the tank up to 90 psi and not all in one run without overheating.

Warn ignored my e-mails about it wich was kind of surprising after how helpful they were when i had questions while refurbing my old 8274 winch.. ( i didnt disassemble until i was shure Customer service wasn't coming)

Regardless Don't buy one I only paid like $50 for mine wich is like 1/3 of the price it was supposed to be and it still wasn't worth it.. Well maybe it was i needed a compressor to get this thing set up and tested at least .

it works enough for temporary until i can get a better one and the way i setup my tank it can be used and filled like a portable tank so i fill it to as high psi as i can with a garage compressor before i go on a run and usually my compressor doesn't even need to be turned on.

Anyway enough of the negative part lets get to the rest.
 
Last edited:
OK so for my air tank i used an old compressor i found on craigslist and removed the tanks I had read somewhere having at least a 5 gal tank would help the compressor not run as much.

But in retrospect i probably should have used a small tank i could of hid inside the rear fender unseen and it would have been just fine since really just the initial blast from the 5 gal is any help airing tires and probably doesn't save that much time.

anyway heres a pic of where i cut the frame in the rear and bent up the two metal straps that the motor had been bolted to..

CIMG0051.jpg


This is after cutting the front frame off , I had intended on using the old guages regulator and manifold but after getting pressure to the,m i realized that they were all leaky so they would not be used.

CIMG0053.jpg
 
I wanted to be able to fill my tank in the event my compressor failed so i put a schrader valve on where the drain is so that i can fill it like a portable tank.

To that same end it is mounted on removable pins to the vehicle and connected to the compressor via Push to connect fittings that are easily removed and reattached. so i can quickly completely remove and use as a portable air tank.

Schrader.jpg
 
Heres the replacement manifold setup i pieced together to have a regulated output to my lockers and a unregulated one for filling tires.

CIMG0004.jpg


To secure it to the vehicle i used my trusty old scrap door to make an indented plate for my studs to sit in (jb welded to the plate)
and then drilled into the wheel wells and welded the plates in to hold the studs in place ..

CIMG0031.jpg


CIMG0032.jpg


Then i Bent the 2 Metal straps that the motor for the compressor had been bolted to to fit tight against the wheel well and drilled holes for my studs

it ended up something like this
CIMG0010.jpg


Here you can see that it sits nice and tight against the wheel well

CIMG0118.jpg


For all of my fittings i used Push to connect fittings and 1/4 o.d. Air brake line . I used airridefittings.com because they had lots of little air fitting pieces that i was having a hard time finding.
CIMG0086.jpg
 
Last edited:
I found that i could mount the compressor inside the rear passenger fender so we welded a little shelf in there for it to bolt down to.

heres the piece we cut and fitted to be tacked in (also from our donor 'rokee)


nvcv.jpg


Here it is all welded and bolted down. You can also see how i used a T fitting to have a pressure safety relief so that i dont ever accidentally put to much pressure to my lockers and blow the seals

CIMG0116.jpg
 
Now the way i am i just had to cover that hole and mediate some of the noise of the compressor so once again we called upon the donor cherokee for metal and this time a cherokee logo

CIMG0038.jpg


And since my rig isnt green we painted it

CIMG0041.jpg


And i ended up with a nice clean cover but of course with my husky liner in it covers my cherokee logo up .

CIMG0046.jpg
 
Back
Top