• Welcome to the new NAXJA Forum! If your password does not work, please use "Forgot your password?" link on the log-in page. Please feel free to reach out to [email protected] if we can provide any assistance.

Expedition Build: Yellow Jeep XJ

Thank you both for the links.
I have been looking into those extended range 30 Gallon gas tanks lately.
Also like that fact that it is a rugged construction.
There is a few different brands out there making them, however I like what I see so far from the Genright one.
Definitely interested, and on my list of future mods.
Price is a little tough to get my head around at first, but once you start doing the math it's less of a sting.
I thought I remembered some other option for a bigger fuel tank for xjs...just can't remember right now. I just could never pay out genright money for only a few extra gallons. :eek:
I'd do rotopax before that. Let me see if I can find ya options... :)
 
Aero tank makes a 30 gallon tank for 610. Call em and ask if a later model sending unit will work and your in for less than the genright or transfer models. I am now curious and want to pull a tape on mine. See the dimensions and if a different factory tank from ??? Would work.
 
The thing I liked about the Genright is it does not sacrifice ground clearance and includes a 3/16" skid plate.
 
Aero tank makes a 30 gallon tank for 610. Call em and ask if a later model sending unit will work and your in for less than the genright or transfer models. I am now curious and want to pull a tape on mine. See the dimensions and if a different factory tank from ??? Would work.

Thanks for the info, much appreciated. I like the price tag of the Aero, but the construction of the Genright. Decisions...
 
The thing I liked about the Genright is it does not sacrifice ground clearance and includes a 3/16" skid plate.

Absolutely. Looks like it takes up the same amount of space as my stock gas tank and JCR skid. I might be sold on this.

Only con is that it would add more weight. 1 gallon is about 8 1/3 pounds, so 83lbs in extra fuel not counting the weight of the unit itself minus the oem equipment weight. So I'm guessing at least 100lbs of added weight when all is said and done.
So more weight to carry more fuel to compensate for the existing weight... it's a vicious circle.

But I still like it.
 
Whoever made that roof rack needs to be a slim shady and stand up. I want to know more.
 
Whoever made that roof rack needs to be a slim shady and stand up. I want to know more.

I got these second hand off a guy that couldn't tell me where he got them from.
Did some research and found some older threads here in NAXJA with a roof slider kit that looks similar.
If I had to guess, I would say the roof sliders were made by H.D. Offroad Engineering LLC. Or at the very least based off the design.
Found his website, and didn't see the sliders there so I don't know if he still makes them.
Keep in mine that I had to alter mine, most noticeably my rails are flipped up. But it looks like the same rack.

Here are some links:

http://naxja.org/forum/showthread.php?t=1008853&highlight=roof+slider

http://www.naxja.org/forum/showthread.php?t=1009917

http://www.hdoffroadengineering.com/
 
Last edited:
Any chance your top two gear boxes would fit across the top of the back seat? that would get the load height lower, could stack the shorter plano boxes on them, maybe even standing up.

Very cool build.

Looking at the vendors listing the Gen Right tank I'm unsure why we would want to spend an extra $100-131 to buy from them rather than getting it straight from Gen Right for the even $1000 which is high enough.
 
Looking at the vendors listing the Gen Right tank I'm unsure why we would want to spend an extra $100-131 to buy from them rather than getting it straight from Gen Right for the even $1000 which is high enough.


Because the supporting vendor can sell it cheaper. You just have to ask. Even the biggest corporate off road company
 
I got these second hand off a guy that couldn't tell me where he got them from.
Did some research and found some older threads here in NAXJA with a roof slider kit that looks similar.
If I had to guess, I would say the roof sliders were made by H.D. Offroad Engineering LLC. Or at the very least based off the design.
Found his website, and didn't see the sliders there so I don't know if he still makes them.
Keep in mine that I had to alter mine, most noticeably my rails are flipped up. But it looks like the same rack.

Here are some links:

http://naxja.org/forum/showthread.php?t=1008853&highlight=roof+slider

http://www.naxja.org/forum/showthread.php?t=1009917

http://www.hdoffroadengineering.com/

I just made a big order from Webdog at DirtBound. I had plans to order from BRIANHO13 as well but was waiting until I had enough things to order to make it worth it. Looks like I might have something to talk about now.
Thanks!
 
I just made a big order from Webdog at DirtBound. I had plans to order from BRIANHO13 as well but was waiting until I had enough things to order to make it worth it. Looks like I might have something to talk about now.
Thanks!

Excellent! Maybe you can get a set off him.
Great sliders, definitely rugged.
Just about useless for cargo, but that's not what this design is intended for.
 
Excellent! Maybe you can get a set off him.
Great sliders, definitely rugged.
Just about useless for cargo, but that's not what this design is intended for.
Seems these cant be made anymore. =(
 
That's a major bummer man.
I can always take some pics and measurements to give you a general idea if you want to fabricate them.

Thanks for the offer but no worries. I think I can make something like it and put my own twist on it.
 
Alternator Relocation

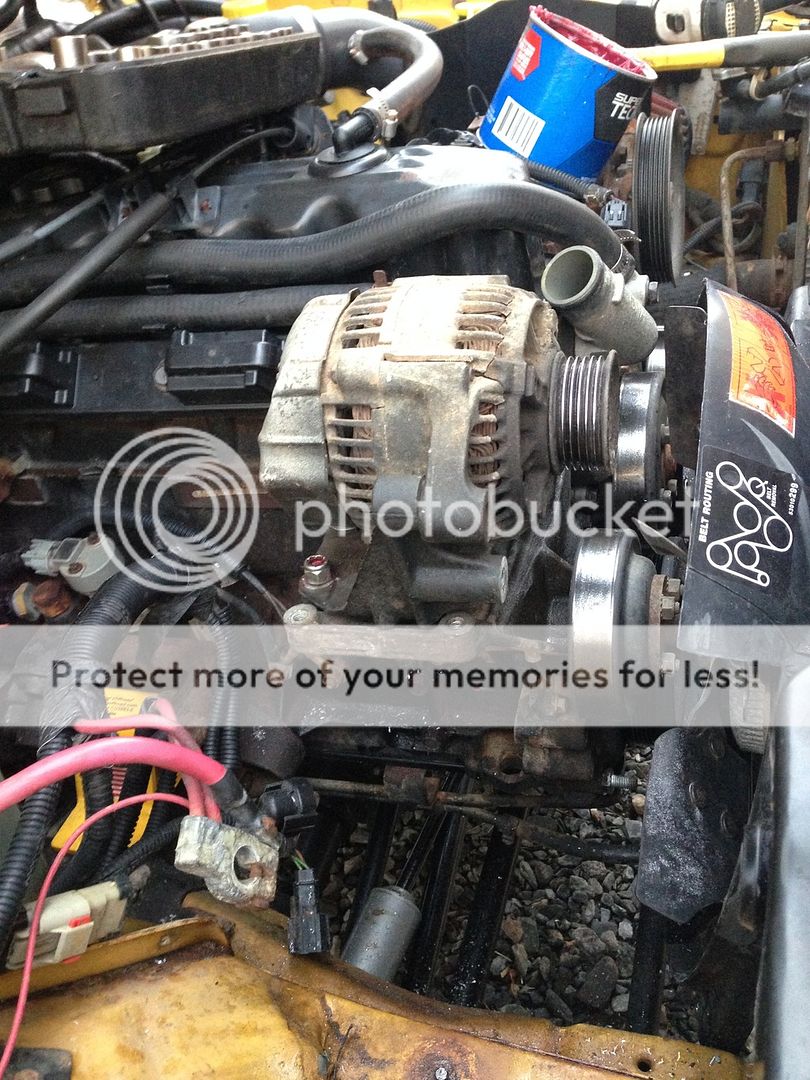
Decided to relocate my alternator to a more elevated position.
I will be installing it where my Air Conditioner Compressor was.
I don't like AC, it's a Jeep and I drive with the windows down.

I had previously completely removed my AC System (compressor, condenser, canister, hoses etc) and had a basic bypass pulley in place.
So I decided to relocate my Alternator to where my AC was, like it is on the Grand Cherokees. Makes more sense to me, it is up higher, more out of the elements.
Bottom of the engine will get more water and road/trail dust, and wear out alt's rather quickly.
I live in the "North Country" and as such I do a lot of water crossings.
This will be the 2nd alternator i will be replacing in as many years.
So before I get a new alternator, I am going to relocate the old one and field test it.

Keep in mind that as usual I did not take a lot of pictures. I always seem to forget to take pictures while in progress of vehicle modifications. It is usually an afterthought when I am done.
And lately when I do remember it's now December so it's cold and my cell doesn't like to take pics and shuts down. So limited pics.

Parts Removal

  1. Loosened Idler pulley
  2. Remove Serpentine Belt
  3. Remove or unbolt Clutch Fan Shroud
  4. Remove Radiator Hose
  5. Remove Battery and Tray
  6. Remove AC Bypass Pulley
  7. Remove Alternator and Brackets
Getting as much out of the way as possible so that we had more room to work with. Pretty standard stuff so far.

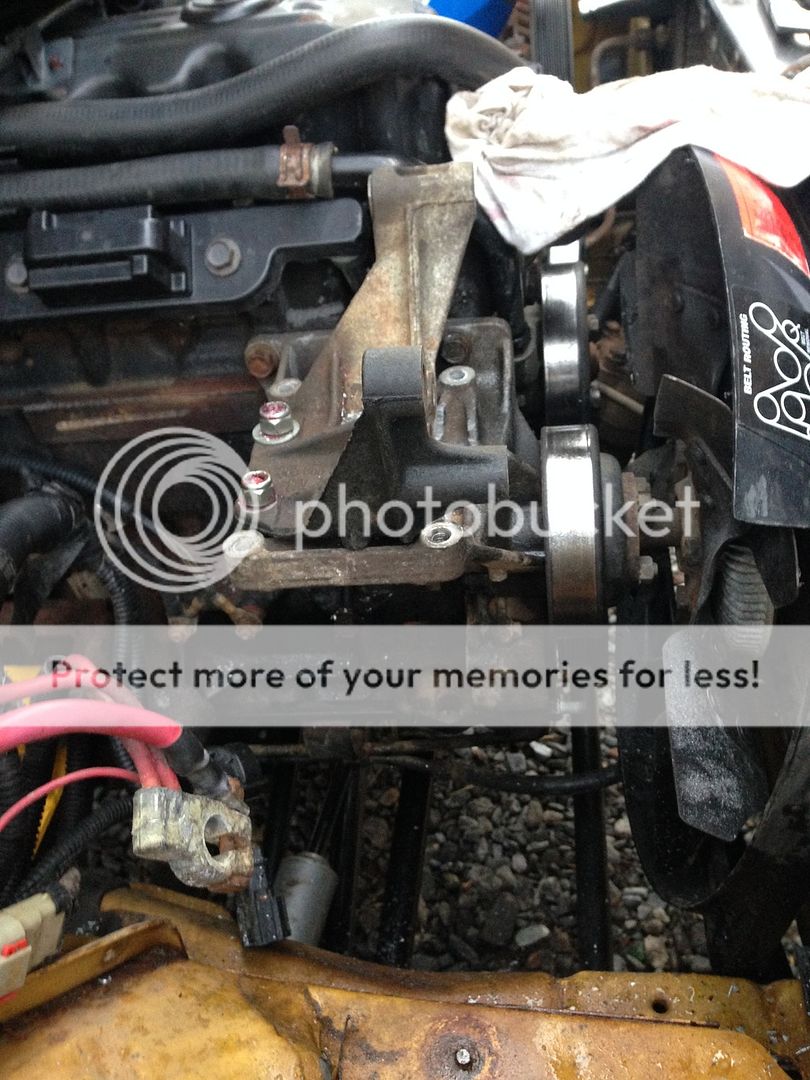
I will be using the AC bracket, so we left it connected.The Alternator bracket we will save, and mount it to the AC bracket up above.

Modifications

We line up the Alt Bracket onto the AC bracket, decide what we need to grind down to make it fit flat, and make the necessary alterations.
We then drill holes through both brackets, secure bolts and attach Alt bracket to the AC bracket, thus becoming one Alternator bracket.
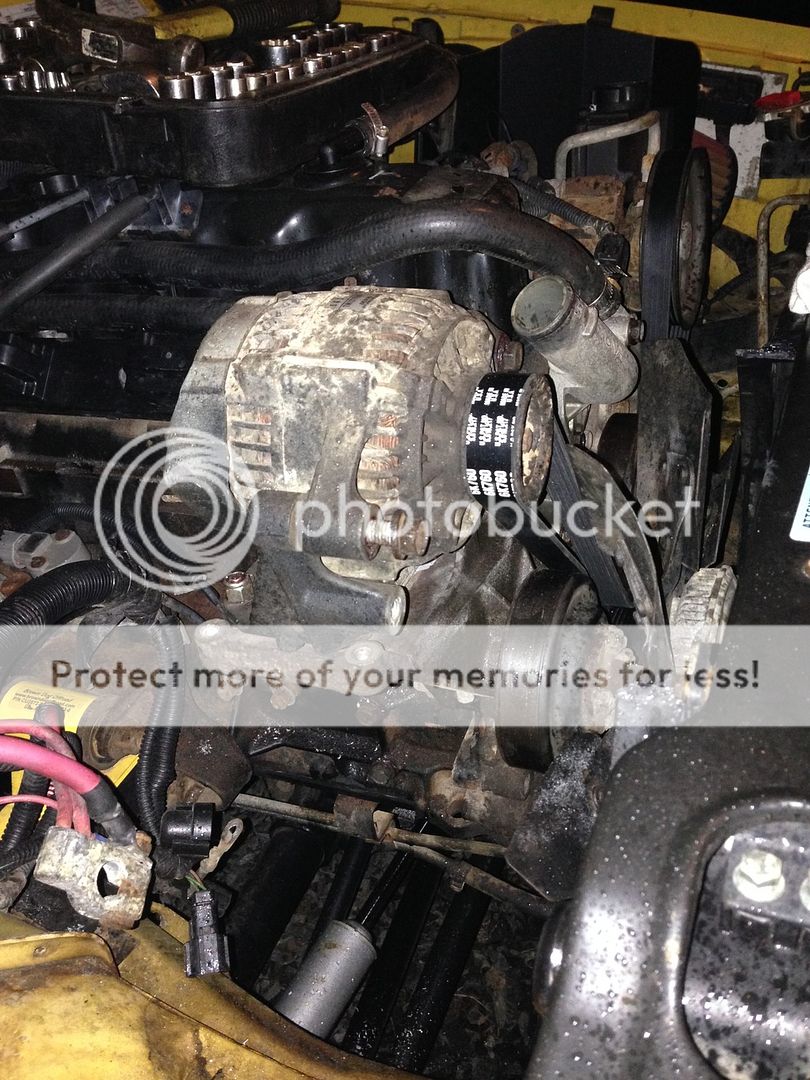
We then test fit the Alt in the new position, and take measurements for a new length belt, as we now have one less pulley. Due to clearance issues we will also need a new radiator hose, as the old one is too short and sits on top of the Alt, becoming compressed when the hood is closed.

Parts Needed

  1. Nuts and Bolts
  2. Serpentine Belt (76 1/2")
  3. Radiator Hose (94 and older XJ Rad Hose worked)
Tools Needed

  1. Sockets and Wrenches
  2. Drill
  3. Grinder
Results

Currently my new favorite mod, and I will do this to every XJ I own from here on out.
Keeps the Alternator high in the engine compartment so as to reduce contact to elements, allows ease of access to Alternator, removes a pulley from the equation so less draw on the engine and adds more space to the engine compartment.
Now that I have the Alt up and out of the way, I will invest in a better quality, higher amperage Alternator and cables.

Eventually I will delete the clutch fan in favor of two driver controlled electric fans, thus removing another pulley and needing a shorter serpentine belt. But that is a project for another time.
If I had the time and the temperature was better I would have done both mods simultaneously.
This is what happens when you work on a Jeep in your driveway in December in New England. You cut projects short and get it done ASAP.

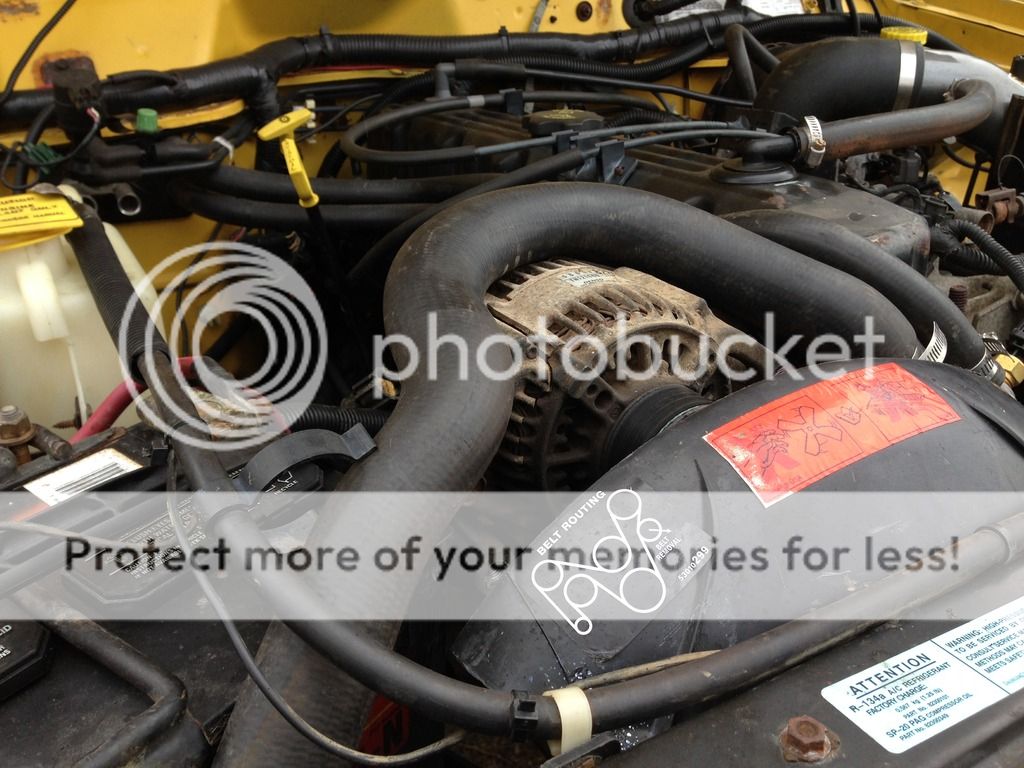
Mounted Alternator Bracket to AC Bracket
IMG_0312_zpsgjgzbdmx.jpg


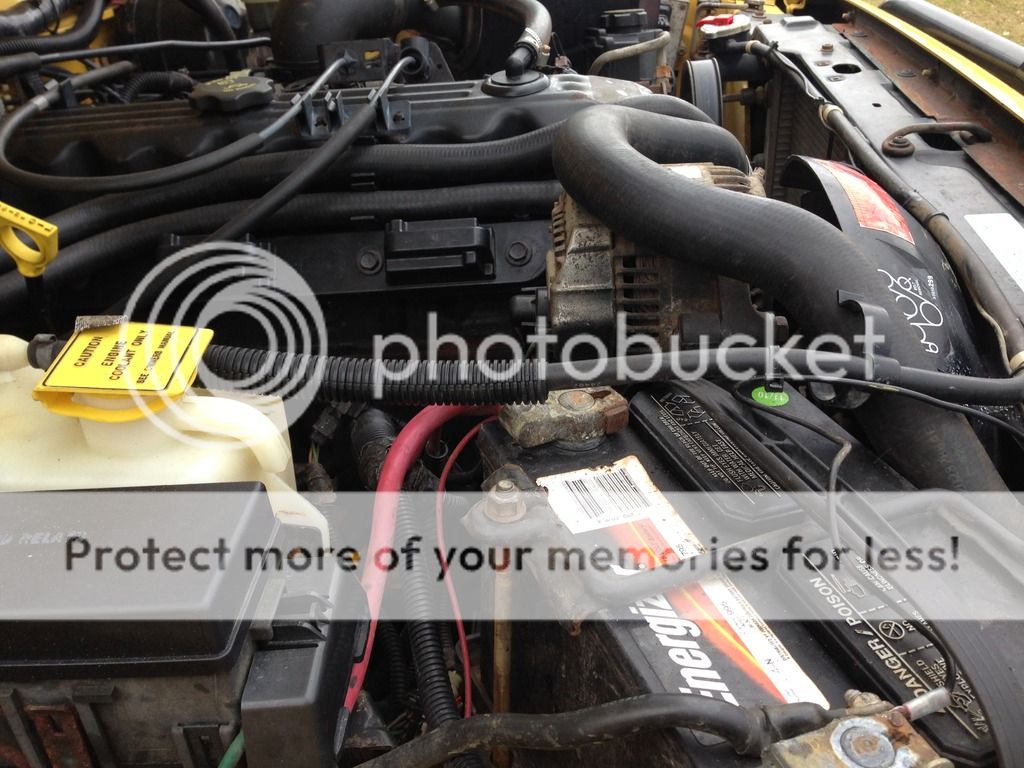
Alternator Test Fit Mock Up
IMG_0318_zpswpgjjkuh.jpg


New Serpentine Belt Route
IMG_0319_zpsxicjiw4h.jpg


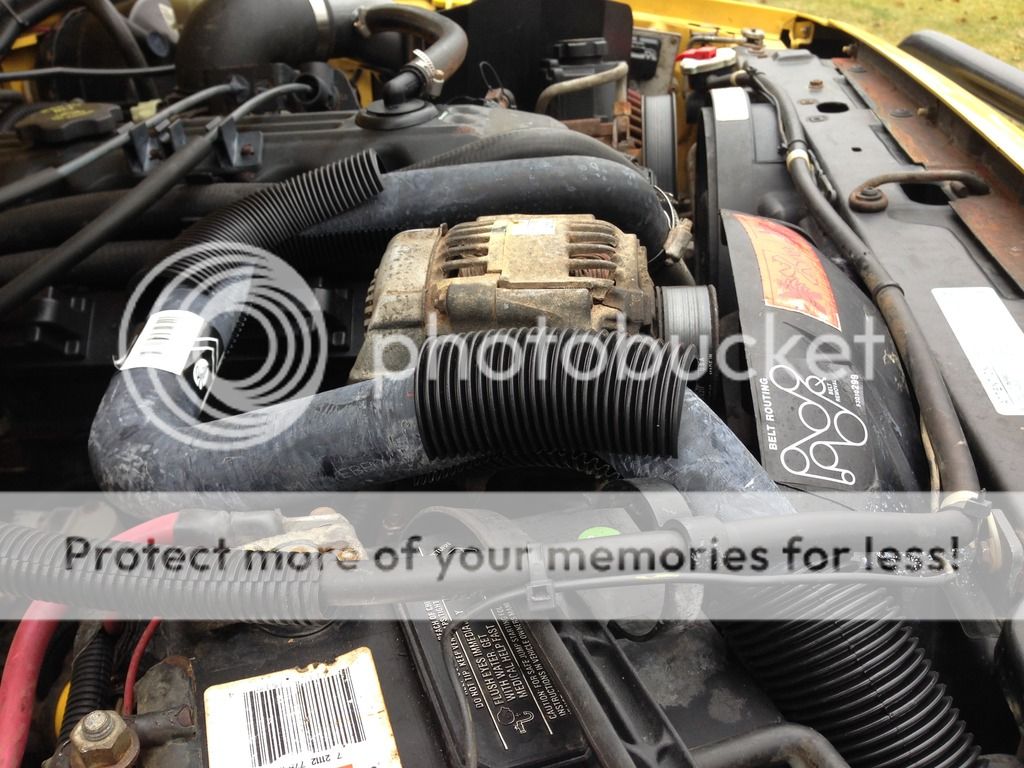
Stock 01 XJ Radiator Hose Clearance Issue
IMG_0327_zpsgzjexlh8.jpg


IMG_0324_zps63yokm7t.jpg


94 & Older XJ Radiator Hose Fit


IMG_0345_zps2i5efyzw.jpg


IMG_0350_zpscaxbxumg.jpg
 
Great job on the move. That would have been a great time to step up to the upgraded output alternator. Durango or zj or... can't remember which one has the higher output.
 
Great job on the move. That would have been a great time to step up to the upgraded output alternator. Durango or zj or... can't remember which one has the higher output.

Going to pick up a 160A Alternator and a 2 gauge electrical upgrade for the Battery, Alternator and Starter cables.

I used my old Alternator during the install to field test the setup before buying a new one. Very easy to change now.
 
Nomad Expeditions

"Nomad Expeditions" is a new Facebook page I started focusing on my Travels and Photography. This forum is where I post what I have done to the Jeep, on Nomad Expeditions I will post where I have gone with it.

I have been taking some time hitting some trails across the United States. I will be posting pics, and eventually videos of some of these trails, and provide information.

You are all invited to stop in and check it out.
It is just starting out, but there will be content posted on a regular basis.
If you like it, then like the page. I will eventually make a section for other fellow forum members to post their trips as well if there is interest.

I'll get a website together eventually, but for now this is what I got for you. If you are interested in Jeeps, Traveling, Off-Roading, Overlanding, Camping or Photography, take a look.

Thanks in advance for stopping by and checking it out.

Safe link to my "Nomad Expeditions" page: https://www.facebook.com/Nomad-Expeditions-1702214623365008/
 
THIS is a great build! I will definitely be consulting it through my build! :)
 
I also meant to ask OP: where did you get hose gun racks? I have kind of been searching but ceased when all I could find were cheapies...I want something heavier duty like yours for sure!
 
Back
Top