-
Welcome to the new NAXJA Forum! If your password does not work, please use "Forgot your password?" link on the log-in page. Please feel free to reach out to [email protected] if we can provide any assistance.
- Home
- Forums
- NAXJA Unibody Jeep Technical Forums
- Jeep Cherokee XJ (1984 - 2001)
- Modified Tech Discussion
You are using an out of date browser. It may not display this or other websites correctly.
You should upgrade or use an alternative browser.
You should upgrade or use an alternative browser.
Home Fabbed Bumper
- Thread starter HaZakated
- Start date
HaZakated
NAXJA Forum User
- Location
- Fairfield OH
We'll just have to wait and see what happens. I'm not really sure which direction I will be going. Maybe I will have the cable clamps hardened.......lol....Joke.
Thanks for all your help. I will post pics after I redo the clevis mounts.
Thanks for all your help. I will post pics after I redo the clevis mounts.
PornstaR said:I belive this is what he means. I did this on mine when i built it. The recovery point is two peices. The 1/2" on the right side goes through and is the bracket. Added a peice to the left side (another 1/2"). 2 reasons for adding it.
1- so it would have no chance on bending either side to side
2- so the clevis wouldnt bang around and would fit much tighter
1/2"??? as in .5"???? And I thought I was going overkill with 1/4"")
TXRIVERRAT
NAXJA Forum User
- Location
- Mansfield, TX
If you're still unclear about the mounting points, check mine out a little ways down on this post. I did lots of research before building and I think this will hold with no problem.
http://www.naxja.org/forum/showthread.php?t=906563&highlight=bumper
http://www.naxja.org/forum/showthread.php?t=906563&highlight=bumper
Yep 1/2in which makes my attachement point for my clevis to be 1in thick. Wanted to be able to pull sideways with a good jerk and not have to worry about draging the intire bumper with brackets to one side. Heres a close up pic before i painted it.fuzzydog said:PornstaR said:I belive this is what he means. I did this on mine when i built it. The recovery point is two peices. The 1/2" on the right side goes through and is the bracket. Added a peice to the left side (another 1/2"). 2 reasons for adding it.
1- so it would have no chance on bending either side to side
2- so the clevis wouldnt bang around and would fit much tighter
1/2"??? as in .5"???? And I thought I was going overkill with 1/4"

How are you guys cutting through the face of the bumper so nicely? With an angle grinder? I have pretty basic tools to work with but nobody explains in their write ups how cut through the face to weld the frame mounts on...
If I don't have the right tools, I was thinking about bolting my bumper to my frame mounts...bad idea? Basically what I was thinking for this... have my frame mounts extend out, then bolt 2 pieces of angle to both mounts (4 pieces total). Drill through the face of the bumper and the angle iron, and bolt it up...Have a recovery point tied into the mounts as well bolted obviously if I have to...
Only probably is I want a front class 3 receiver in my bumper, and that pretty much needs to be cut through the face of the bumper, so what the hell do I do!?
Basically what I plan on doing as far as the mounts go, 3 stock holes each side, steering box tie in... What do I do for the passenger side? Drill through the frame and make a nut strip to sandwich the rail? I haven't took my front bumper off so I don't know what it looks like for mounting... all the pictures I have seen are just the drivers side tieing into the steering box...
There is a link a couple posts above where the guy tied into the rad support, I will probably do that as well...
Last edited:
IntrepidXJ
NAXJA Member #647
- Location
- Grand Junction, CO
J-Roc said:How are you guys cutting through the face of the bumper so nicely? With an angle grinder? I have pretty basic tools to work with but nobody explains in their write ups how cut through the face to weld the frame mounts on...
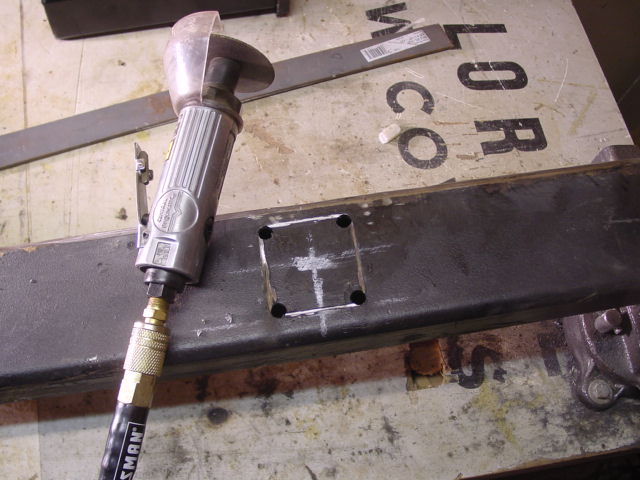
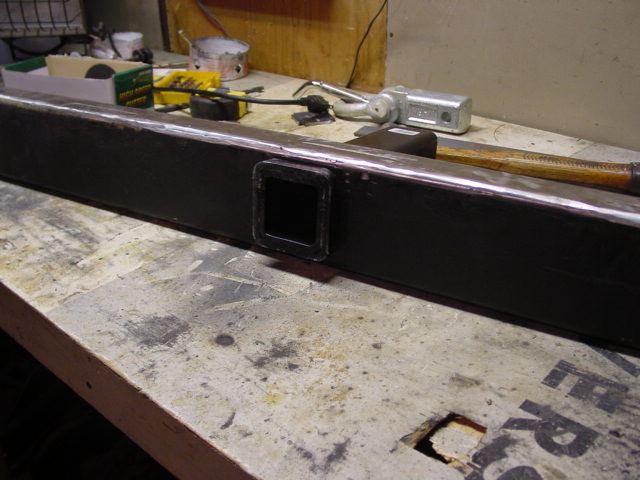
I either use a 3" air cutter for the smaller holes in the face of the bumper like this:

or my plasma cutter
here, i'll give you a short writeup how i did mine with the 3" cutter before i had a plasma. with pics
cutting for a receiver:
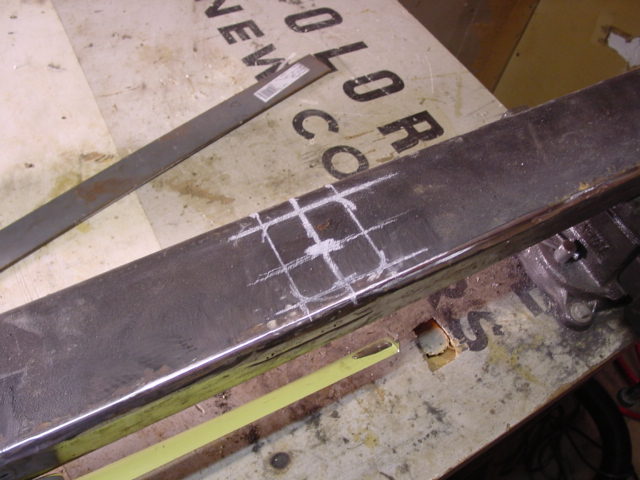
i drilled holes at all 4 corners all the way thru, so it would line up on both sides
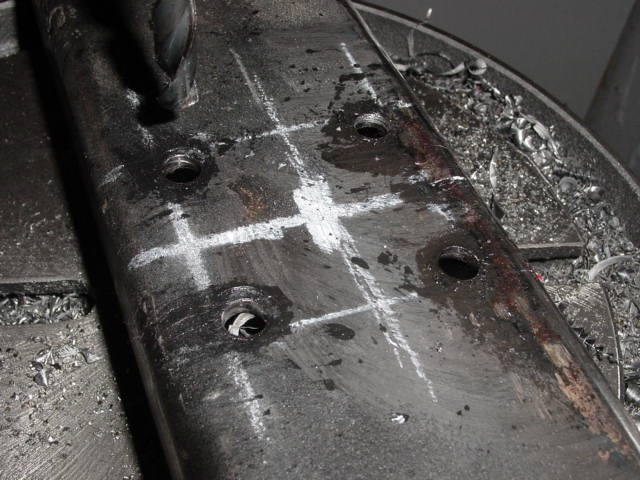
then cut
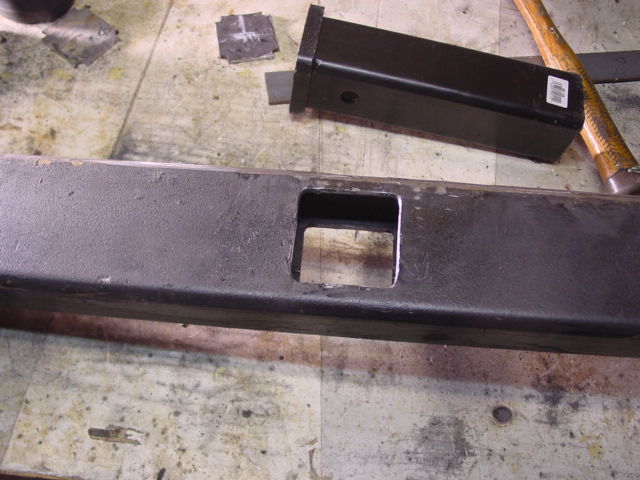
done
same thing for my brackets, exscept i drilled smaller holes at each end of the angle I used for my rear bumper
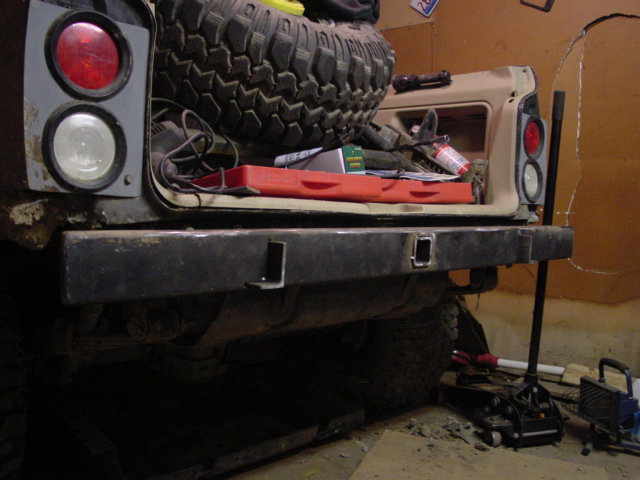
HTH
Last edited:
vetteboy
NAXJA Forum User
- Location
- morganville, nj
I did the same thing, except using a metal-cutting blade on a regular circular saw.

For that matter, I did all the cuts on the bumper with the circular saw, even the mitered edges for the angled sides.

Not a bad way to go, certainly a lot cleaner than a torch, just be sure to avoid blindness or clothing fires from the sparks.
For that matter, I did all the cuts on the bumper with the circular saw, even the mitered edges for the angled sides.
Not a bad way to go, certainly a lot cleaner than a torch, just be sure to avoid blindness or clothing fires from the sparks.
Yep drill out the corners. Mine was pretty easy.... cleaned up with metal file before fitment since the air grinder is quite hard to get in that tight of a spot. Not really like you are doing surgery....... unless you know the tin man quite well .............LOL. But thats the great thing about metal, is that you cant really screw it up too much. Welds can be chizzled of with a cold chizzle and cleaned up with a blender to weld once again. And if ya cut something out and only measured once..... weld it back together and measure again. Obviously depends on skill level but its not like the end of the earth if you mess up. It really only comes down to this......... its just a bumper not a high tech peice of equipment. Good luck and post up your pics...........
HaZakated
NAXJA Forum User
- Location
- Fairfield OH
If you have a welder, you don't need to drill out the corners. Just go ahead an cut over the lines, then fill any imperfections with some welding wire. After that, use a sanding blade to grind the excess weld.
IntrepidXJ
NAXJA Member #647
- Location
- Grand Junction, CO
HaZakated said:If you have a welder, you don't need to drill out the corners. Just fill any imperfections with some welding wire, then use a sanding blade to grind the excess weld.
i like as close to a proper fit as i can get for a welded joint.....
IntrepidXJ said:i like as close to a proper fit as i can get for a welded joint.....
X2 then chamfer before welding!!!
- Location
- Lafayette, CA
Dang thats a lot of work. When i did mine, I just used a plasma. I know that isnt an option for most people, but it made life so much easier.IntrepidXJ said:I either use a 3" air cutter for the smaller holes in the face of the bumper like this:
or my plasma cutter
here, i'll give you a short writeup how i did mine with the 3" cutter before i had a plasma. with pics
cutting for a receiver:
i drilled holes at all 4 corners all the way thru, so it would line up on both sides
then cut
done
same thing for my brackets, exscept i drilled smaller holes at each end of the angle I used for my rear bumper
HTH
That and I hate grinders.
- Location
- Minneapolis, MN
.J-Roc said:I was thinking about bolting my bumper to my frame mounts...
Heavy Duty bumper and D-ring shackle mount
.
Use this drawing to make your bumper mounting brackets. Extend the front end as far as needed for your design. Both sides are exactly the same. Some of the frame holes just need to be cleaned out a little bit.
Front crossmember reinforcement brackets like the factory system are a good idea too.
.

IntrepidXJ
NAXJA Member #647
- Location
- Grand Junction, CO
Starboard M said:Dang thats a lot of work. When i did mine, I just used a plasma. I know that isnt an option for most people, but it made life so much easier.
That and I hate grinders.
when i did mine, i didn't have a plasma yet.....but now that i own one, that would be what i use now, too
HaZakated
NAXJA Forum User
- Location
- Fairfield OH
IntrepidXJ said:when i did mine, i didn't have a plasma yet.....but now that i own one, that would be what i use now, too
Who provides the best bang for the buck when it comes to plasma cutters?
IntrepidXJ
NAXJA Member #647
- Location
- Grand Junction, CO
HaZakated said:Who provides the best bang for the buck when it comes to plasma cutters?
I got a Mitech Cut 40, based on the experience a few of my friends had with them and some threads on Pirate. It has worked well for me so far, and was well worth the money I paid. IIRC, it was around $400ish
jeeperjohn
NAXJA Forum User
- Location
- Temecula, CA
I have a suggestion for your cad design. Install triangular gussets between the bolts that hold the d-rings. Two on each side. That will greatly improve lateral stability if you tug on the d-rings from the side of the vehicle and prevent the frame mounts from buckling sideways. Also, I think if you include an integral steering box brace, it will make it far more marketable. Nice design BTW.


Similar threads
- Replies
- 2
- Views
- 2K
- Replies
- 0
- Views
- 920