• Welcome to the new NAXJA Forum! If your password does not work, please use "Forgot your password?" link on the log-in page. Please feel free to reach out to [email protected] if we can provide any assistance.

D60 Install

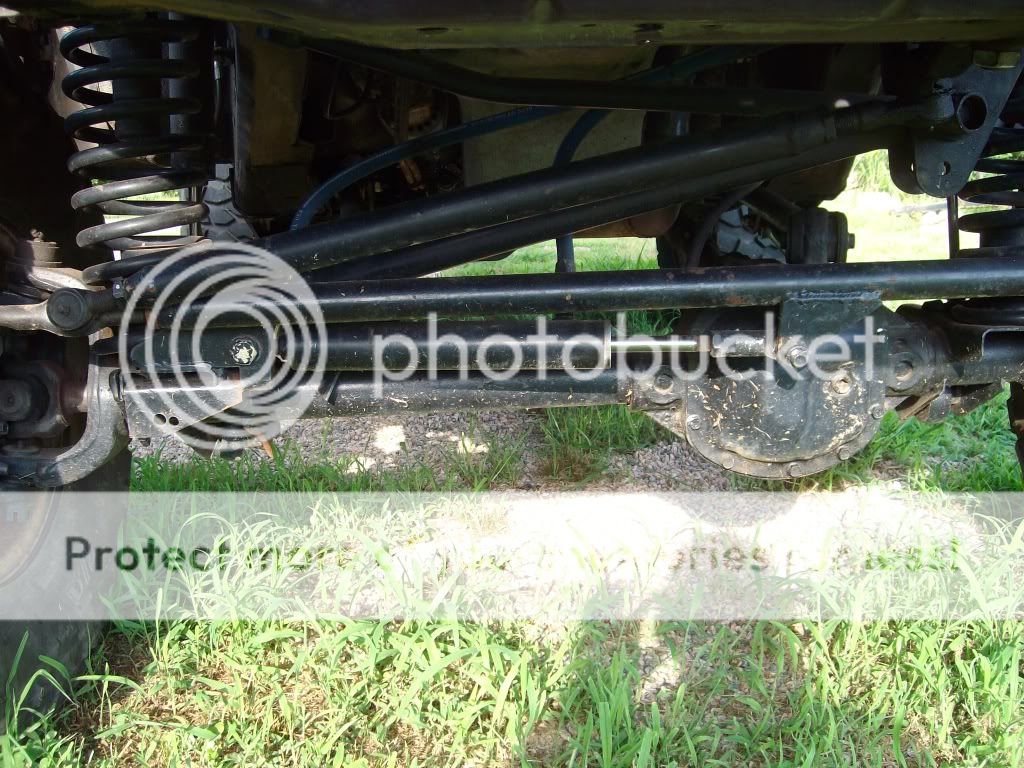
when i have helped buddies that have welded diffs they do it with the carrier in the axle. they pre heat it to burn all the diff oil off. then work on welded the spiders together. then just start filling it with weld. they even weld bolts in there to beef it up a little.
 
As bad as I hate to admit it, pull it to weld it. I have spent the last three days searching the forums, Google, and several other sources.
A “Lincoln Locker” is only as good as the weld, and every one that was done and lasted more than a trip to the corner store was pulled out.
Too much heat will melt the seals and heat is the primary goal as I read it. Don’t get me wrong, I have never done it, but you know “it’s on the way” for my Disco. So there’s my .02 worth.
 
Ive welded the carrier while inside the housing and outside the housing. It works both ways just depends on how much "work" you want to do to get the job done.

I prefer to do with the carrier inside the housing and just take my time doing it opposed to pulling it out and welding it on the bench.
 
Update time: I got the diffs welded and every thing together. Drove her on the flexin rock and the pile'O concrete around back. The last two eveingins I have been working towards Hydro assist steering. Have a look see and tell me what you think. I have never done this and am winging it.
I think I may have to raise the left side so it is more level. Or lower the right side that mounts to the Tie rod.
Picture019.jpg


Just a couple of tacks to see if it all lines up.
Picture020.jpg


Left side, axle mount.
Picture021.jpg
 
Just a thought: What orientation are the front wheels?
I’m thinking for example, if the wheels are full right turn, the assist shaft would be either full open or fully retracted. And consequently, if the wheels are centered and pointed straight ahead; the piston in the assist would be protruding at some midpoint.
Or full out= full left turn
Full in=full right turn
You understand grasshopper?
 
Full in right turn.
 
Unless I can't see it in the pics, you'd like to have both ends in double shear as well as heims.

My pic-phone commited suicide when it jumped from my Jeep this week. I'll post up pics of my set up soon as I'm able.
 
:roll::laugh2::roflmao:

I could not hold it in dude..​
 
Will be testing it out this afternoon after I get my foot out of oldblues azzz! Apparently in my rushed/dyslexic mind I inadvertanly instaled the lines in reverse. All appears well atm. Will be testing it on the rocks around back after woork.
 
what were your old axles 44, if so did they have locking hub. also if so do you still have them?

Axles were 9"/44 and they are gone.
 
Ok done. Somewhat. I'm going to have to go back at the rear and trim some more. But it felxes nice and is good to have it back movable!

Aiken031.jpg


Aiken032.jpg


Aiken029.jpg


Aiken027.jpg


Aiken034.jpg
 
Is the rear hitting the bump stops in the pic? It looks like you have more upward movement there. Hard to tell, you might be ready to carve out the fender wells and skin some new ones.

Looks monstrous.
 
Is the rear hitting the bump stops in the pic? It looks like you have more upward movement there. Hard to tell, you might be ready to carve out the fender wells and skin some new ones.

Looks monstrous.

Yea it is touching in the rear. There is about 3 - 4 inches of more travel up. So, I'll have to perform some more surgery on the rear 1/4 panel before I go.
 
I envy you that; the fact you are going and I'm not. I can't get ready in time. I need a tow rig and trailer too. Just can't be accomplished.

So, do the trim, enjoy the cold snack, and come back prepared to spin a yarn.
 
Ok all done for now. It's wheelable but will need some things changed. H=Final cut on the rear till I return.

Aiken001.jpg

If I have internet I'll be updating daily. Now its off to the Crawl.
 
Back
Top