ROKRWLR
NAXJA Forum User
- Location
- Arvada, CO
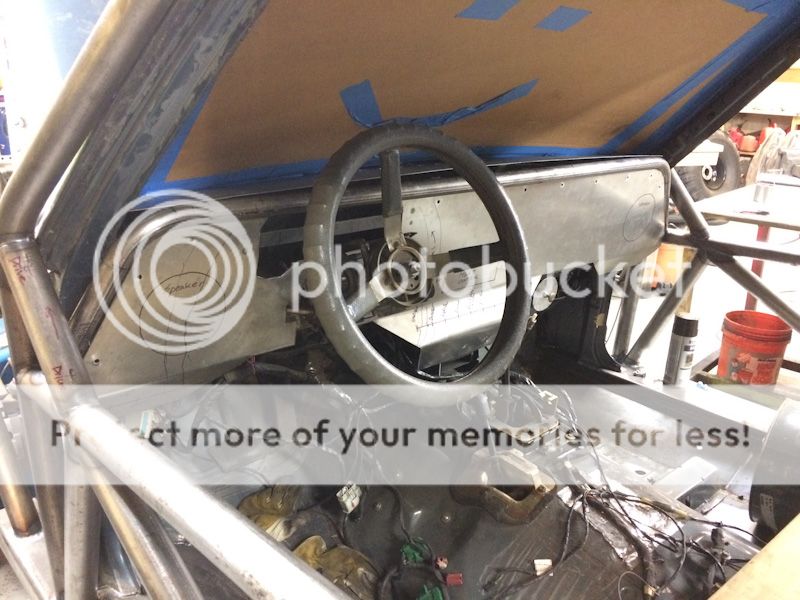
Cool, thanks for the tips and pics! I dont have A/C but I did keep the heater core and made a burrito cooker out of it. I am also putting holes in the top of the dash to keep the defrost available. And maybe some holes on the front to direct warm air at my face.
Here is a video of that Car-B-Que: https://youtu.be/oBPV4VwBfVg
I keep finding this that I missed in my original list like 9V charger and USB ports that need to be added... good news is the dash is still very empty!
Problem now is the throw for the shifter and 4x4 selector are on different planes so that will make the console more complicated... any ideas there? looks like you have custom cable shifters?
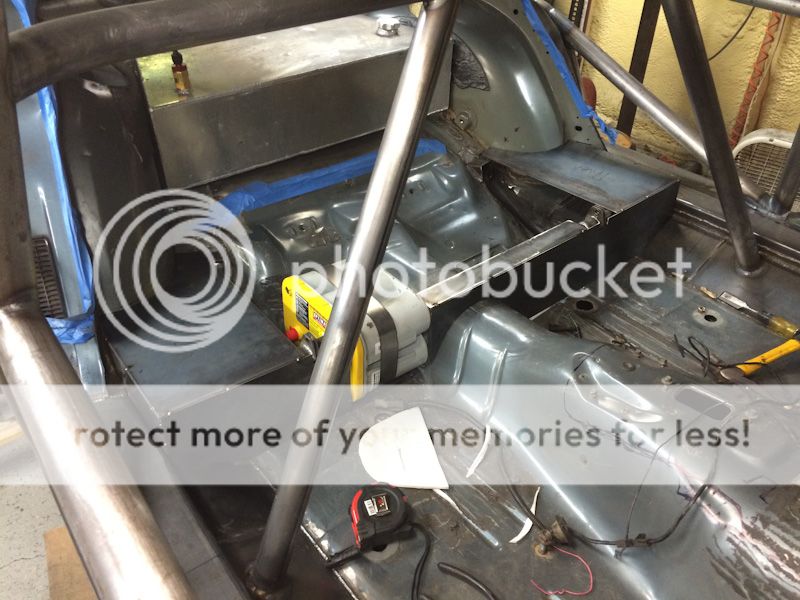
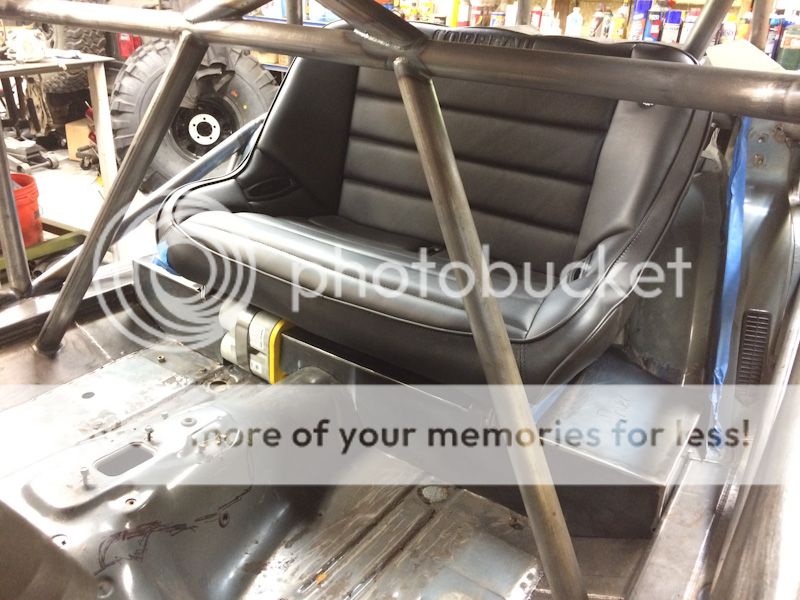
I still have the original trans shifter (I really wanted to do an Art Carr but ran out of budget), but I moved it up and mounted it to the center console. I did not reuse the indicator that says what gear you are in, and I just made a few indicator lines that line up with the back of the shifter. For emissions testing, I put a post it on with P,R,N,&D labeled for them. I did cut down the height of the shifter and shorten the plastic push rod inside. I removed the t-bar and used a Sick Speed brand adapter knob that is just push down to shift.
For the x-fer case, I made a cable shifter so I could put the shifter where I wanted it instead of trying to modify and lengthen the shifter on the factory linkage one. It works much better than the old shifter and allowed me to put the throw exactly where I wanted it. It was a pretty simple change overall.
Here's how I modified the bracket at the case. I can't remember if I flipped the t-case shift tab or not??? I trimmed the factory bracket and welded on a flat bar for holding the cable:

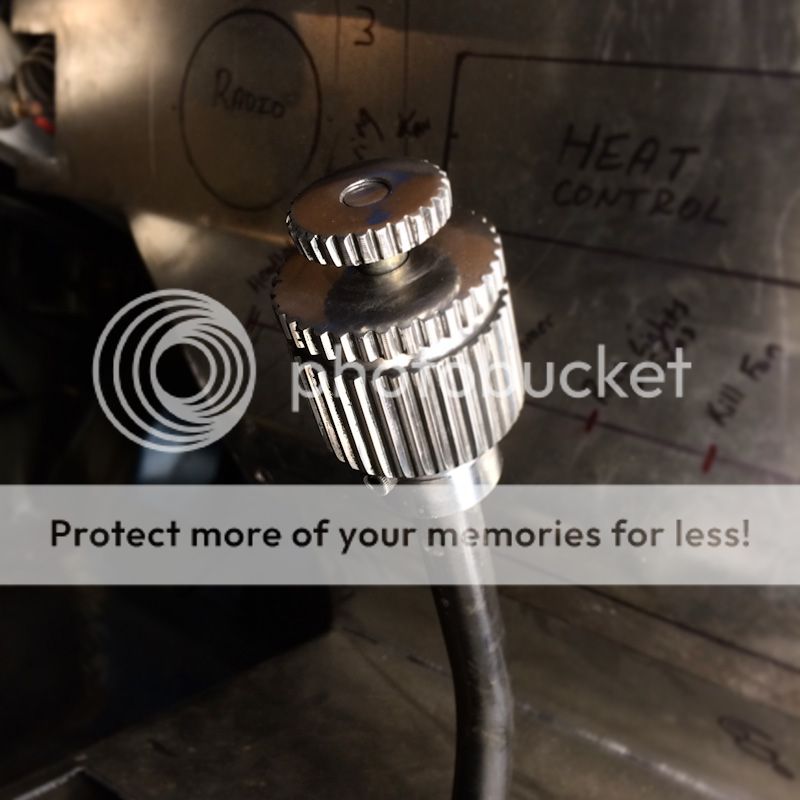
The shifter itself is a solid bar welded to a piece of tube with a bronze shoulder bushings in it. There's a tab under the pivot tube for the cable to attach. I welded a bolt to the top to hold the knob since I don't have access to a lathe.

I bought my cable from Midwest Control www.midwestcontrol.com . You can design custom cables on their website reasonably. in 2015 it was $45. I think I used a 2" throw with bulkhead ends. I'll try to dig up the info if you need it. The ball ends came from Ace hardware.
I've seen lots of creative ways to do the cable shifter, but this was a simple straight forward way that worked with my tube center console.
Last edited: