• Welcome to the new NAXJA Forum! If your password does not work, please use "Forgot your password?" link on the log-in page. Please feel free to reach out to [email protected] if we can provide any assistance.

The Bronzewyrm Evolution

Got a winch.
S7300175.jpg

S7300180.jpg

in cab controls
S7300179.jpg
 
Installed my Air-Aid intake. this was the first time EVER I have been compelled to "scrub" the under side of the jeep hood. I think it was worth it!
IMG_20140301_102223_zps2f4c6ea2.jpg


I posted a week or so back that the heater core was leaking. fortunately this is NOT true. although I may not be in much better shape. Im trying to address "sweet smell" inside the jeep while driving. (coolant leek) and the carpet being wet constantly on the passenger side floor board. after letting the jeep idle in the shop for 20-30 min I found a under hood coolant leak, and a "rain water" leek on the floor inside. I have a combo pack of things going on.

first, about a month ago I found a slice in the upper radiator hose in the jeep, I changed it out Post Haste and all was well. so I thought... In my Haste I had not put the clamp back on it the right position. it had then developed a leek. not so bad it was steaming under the hood, but bad enough that coolant was running along the top edge of the valve cover, and dumping/pouring off at the rear of the motor near the firewall. causing the leaking coolant smell inside the jeep.
IMG_20140301_102802_zps81d35121.jpg


second, I have/had 2 rainwater leeks on the passenger side near the heater box area. it was keeping my carpet nice and wet over there, and muddy too... apon further inspection I found where the majority of the water/mud was coming from. The foam gasket around the heater box where the box is mounted to the firewall is leaking. BAD. its up under the dash and pours directly behind the carpet, jute, and water barrier.

EWWWWW!
IMG_20140301_102406_zps2a33c6fe.jpg

This is the bottom of said box and gasket. you can see what is coming in from this leak.
IMG_20140301_102529_zps7d5a59b7.jpg


But this was only 1 of 2 separate leaks I knew I had over there. there was also a drip that had developed over there. it only seemed to happen with the nose of the jeep pointed up slightly, and in fairly good rain. you can see in this pic, where leak #2 was hitting the back of a piece of plastic and running down it, pooling up enough to spill out and soak the carpet. this lead me more twards the windshield seam and away from the heater box.

IMG_20140301_102439_zpse93a77e2.jpg


Having worked with R.V.'s I know all to well how to track water leaks (rainwater or plumbing) I knew what I had to do. Garden hose tests!!! Yeay! well after douching the jeep for a good while I found out that my hood to cowl seal is bad, my hood hinge seal on the pass side had popped loose, and there was a big fat seam that did not look to be fully sealed. I spent my lunch break sitting at the NAXJA and came up with a theory and plan.

This seam WAS back feeding water into the passenger compartment and needed to be resealed. as well as the shitty factory seam-sealant that needed fixed.

Take a look!
IMG_20140301_102603_zpsd58dd373.jpg

IMG_20140301_102244_zpsd2fa880b.jpg

IMG_20140301_102251_zpseb0a80eb.jpg

IMG_20140301_102259_zps994bb299.jpg
 
So I started to collect things (including my thoughts) and got to work on fixing things up. first off was to get ready to seal up that bad seam. I knew that leak was on the pass side. but if its leaking, the rest of the seam is not too far behind. so I planed on sealing it all the way across the firewall, and up to where the hood runoff would come into play.

First was to remove the factory wiring loom from the way of my working space. If you have ever cussed and thrown stuff cuz those stupid plastic clips, plugs they use in everything are such a PITA to remove?
IMG_20140301_103705_zps383c5ccd.jpg


It cuz you need yourself one of these bad boys, no pare of pliers or screwdriver will work for these like this does! yes you can pull them out with Brute Force, but good luck reusing them lol
IMG_20140301_103452_zps4daf64ad.jpg


I also removed the 2 10mm bolts holding the map sensor onto the firewall.
IMG_20140301_103838_zps978aca1a.jpg

once I got the wiring out of the way and went to clean everything up I found a little factory foam sealant on the seam in question, but as it got closer to the passenger side. it all but is gone...
IMG_20140301_104734_zpsec34102d.jpg


I dried the area with compressed air and paper towels, then some wax and grease remover.

There are several things you can use to seal seams up with. RTV, silicone, Baby Batter, chewing gum, duct tape, W/e's... In my world I like to find the product that is intended for doing what im about to do.

insert:
IMG_20140301_103030_zpsbac84b47.jpg

its not magic, and its not a trade secret, go to the parts store and ask for "seam sealant" yep that's what they call it!

Now normally id tell you to use a 20-40% soap in water solution to lube your hands for the next part, (if you have ever bubble tested gas equipment, that will work too) while searching the house for the last place I left my bubble test squirter I came across this. Im a big fan of using what you got around at the time so this worked great!

MR-Bubbles!
IMG_20140301_105423_zps7a3e974a.jpg


the object here is to keep the sealant off of your skin! as soon as you get any of the sealant stuck to your skin, you will begin to make a mess out of things that you will not be able to control. just wipe your hands clean, re-lube, and start again. (He said LUBE!)

when it looks like this
IMG_20140301_105740_zpscb2a9185.jpg

don't fret, use a well lubed finger nail and scrape off any excess after you have "swiped" the sealant into the areas you are trying to seal.
IMG_20140301_110139_zps59f50669.jpg

Flick! and you can keep going, just pay attention to where you flick the stuff. it may end up in the jeep or house carpet later if you don't watch it lol
IMG_20140301_110124_zps5f836364.jpg


And all put back together! I used a clear sealant, because I didn't want to have to repaint in the engine compartment after this job.
IMG_20140301_113034_zpsdc0edf12.jpg

IMG_20140301_113050_zps370c8bf1.jpg


Now I got to address the foam gaskets leaking at the firewall itself, but at least I know for sure what im dealing with at this point. with all the late model owners popping up in the chapter, I hope this helps somebody else here soon.

I think it turned out well, and thanks to NAXJA for the support:loveu:

Bronze.
 
Thank you man, might give me a few areas to check out for my leak.
I know a definite leak is same place as yours with the plastic piece you showed.
husa5u2y.jpg

Look into your heater fan resistors,
looks like this:
bama7e9e.jpg

it's above that plastic piece, and that's where my water is leaking in to my passenger side from. Thinking either my passenger cowl is clogged or something
 
How do you like the new intake ? What all are you running lift wise in the rear ? It looks like it sets very even and that's what I'm going for. I love the look of those 305s on there I was going to order 285/75/16s... But it looks like I could fit more when I go 4.5
 
I love the intake. its not really as sealed as I thought it would be for being a "cold air" system. but the oiled filter will go 50k before cleaning, and I seem to have a bit more torq on take off. There is a substantial gain in the amount of sound you will get in the cabin via intake noise.

the rear lift was a bastard pack made with xj mains stuffed with a Dodge main that I had cut down. this all sat on some custom perches that were about 2" taller that stock.
I just redid the rear bastard packs, shackle location, and spring perches. going back to u-bolts. ATM im waiting on a drag link before I can move it out and take a look at its stance and get a feel for the stiffness.

On 4.5" with my tires I have been more than pleased. we bought this xj when my son was born, we needed and still need it to be a "grocery getter" Just a little over built. I tow with my jeep to the trail, not tow the jeep to the trail.

Bronze.
 
so ive got to back up a bit here and get this thing up to date.... sometime last summer I lost a rear axle tube seal. I didn't think this was going to be a big deal to replace until later. it turns out to remove the axle shaft from a 8.25" rear axle you need to remove the lunchbox locker(if you have one) to get at the "c" clip in order to remove it and the axle shaft. this means I got to figure out how to setup a locker On the fly. (just never done one b4 this one was setup for me already when I got the axle)


As you can see the shoes were wasted from gear lube.


so rather than throw $$ at the Drums, I decided to go with a disk break upgrade.


Once the shoes and shafts were out of the way I got down to the axle itself.


I got the disk setup out of a 98 grand Cherokee with the d35 rear and disks. I had to grind the center of the new backing plate out about 1/16" but it was EZ. everything bolted right up after that. When I ws pulling the disk setup from the donor. I took EVERYTHING. the cables, backing plates, bolts, and even the body side e-brake cable mount. This proved to be a good thing later.

I went with cheep pads, and Gold series e-brake shoes. Yes I Have an e-brake still :D


brake lines were simple


Then it was off to the task of setting up the e-brake cables. I have had parking Mechanisms fail in a trany or two, ive never trusted them, so this was a priority for me.

The problem us late model owners face, is that the e-brake setup for disks are setup for the cables to be mounted in the center of the vehicle. making the cables the same length. Out Xj's are setup for the mount to be on the driver side frame rail, making the passenger side cable longer in order top reach the mount.

I was able to mount the ZJ body side cable mount under my rear seat! right in the center, and everything works great!


I started by drilling them with self tappers, then changed them out one at a time for through bolts. right in the area under the rear seat @ the hump is where they cam through. I was feeling good when this all came together.
 
the seal, and disk swap was not hard. there were just a few things I had to take my time on to get right, the seal was a MUST. you do have to make up your own center adjustment point for the ebrake cables, as the xj stock one is too short, and the zj one is a little funky. I combined the 2 to make a custom one for my xj. Sry no pic on that one.hasta

Bump Steer at this point was just unbearable anymore. I had shot myself in the foot on the original build. I didn't do proper research and had put a Panhard bar kit of from ruffstuff, but didn't realize that that kit was for changing the geometry of the front steering, and also would require me to go higher with my Steering TRE's. the short and simple solution. Go to OTK steering. there were 2 major company out there at the time doing 1ton OTK stuff. I chose JCR, D/T the fact that the tubes were already cut to length and threaded, I would not have to cut/weld/ and figure out my own lengths with the Ruffstuff kit. I chose Wrong....

(Quote:
Originally Posted by 
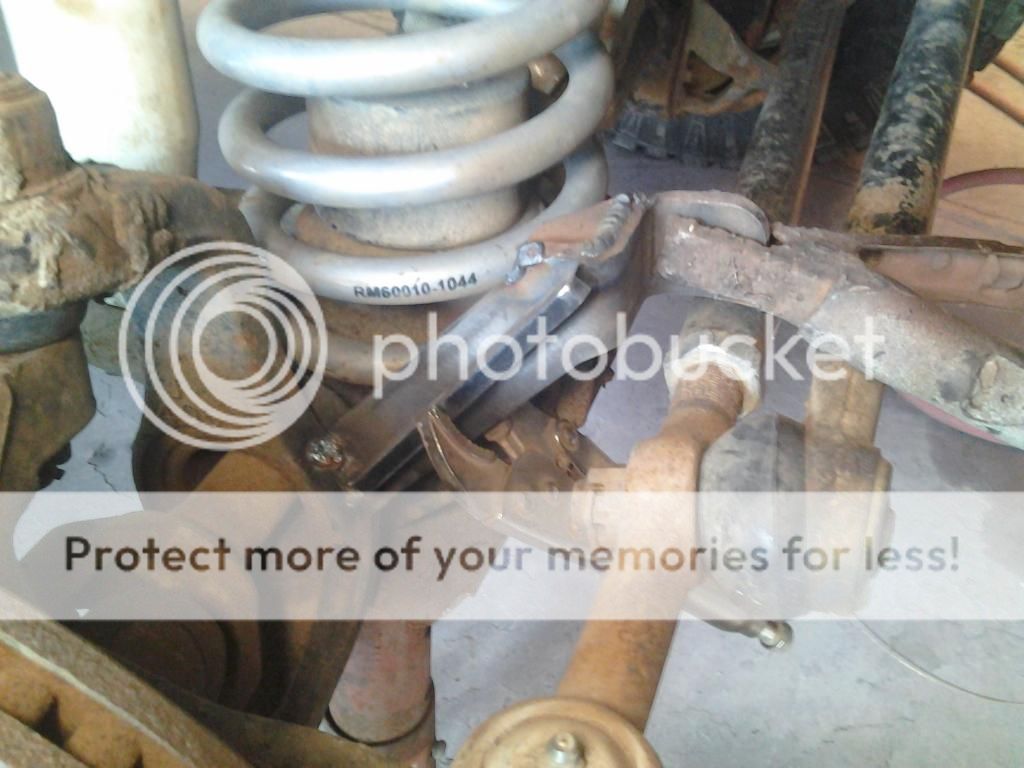
Bronzewyrm
So I installed a JCR OTK steering kit about a year ago now. sunday I went to adjust the drag link and re-grease all the tre's. I tried to lock down the jam nut on the axle side of the drag link, but it was striped. (I think I did that) At this point I needed to remove said TRE and replace the 7/8-18 LH jam nut. well after some brute force, four letter words, and a few funny looks from larry it finaly came out of the dom. The last 1/2" or so of threads on the tre were completely striped off! WTF I thought to myself... how could this be? Well the dom did not get threaded deep enough to accept the TRE. When I install everything the 1st time, I smashed a 1/2" of threads into an unthreaded tube. Then, when I took it apart, it drug all that loveliness back through the threads I did have.

This was a year ago and I was really fear full that jcr would tell me to E.A.D. I left a couple voicemails with no response, then dropped an e-mail. they got right back to my mail. Allen @ JCR asked that I disassemble the entire system checking each part for flaws. He said that he would then have new replacements made up and sent out to me.
understanding the situation, and that he knew this would be a problem I would not find until now. we will see tomorrow how shipping will be handled.

I know I have recommended this kit to a few members here in the NWC so I wanted to get this info up as fast as I could.

if your parts seem abnormally tight when you go to adjust them, id be real suspect...

Bronze.


Logistics on this have been crazy.

Jcr sent me a shipping invoice via e-mail. they wanted me to put the bad drag link, and tre, in a box (that I did not have) and drop it off to be shipped out (witch was hard cuz I cant drive the jeep) before they would even make up the new parts, let alone send them out. Im not sure why I needed to send back useless parts, they had the pictures. And both of us were in agreement on what had happened and what needed to be done to make it right. I need the parts and beings it was not my fault they were bad in the first place I was left with no choice but to "play ball" I dug the printer out, boxed up the stuff, borrowed grandpas truck, loaded up josh, and dropped off the stuff. Of course the address was wrong so I got to drive all over indy looking for the one FedEx drop-off in town. I also asked that a new poly spacer be thrown in the box, and that the jam nut needed to be there as well. He said he talked to the steering guy, and that they would be made up and shipped out 1st thing in the morning. This was last Thursday April 3. keep in mind I found this Sunday march 30th. So I got a tracking number the next day and it said arrival date April 10th. DAMN! I got to wait another WEEK! omg, ok, I have a bunch of stuff to do to the jeep. I now have the "down time" to do some of it... :explosion and say what you want, JCR is standing behind there stuff and sending new stuff out.

Well I woke up to another e-mail from jcr today.(April 8th) @days before I was to receive my replacement parts. By this time there are 13 messages back and forth about these issues. They say that they got my stuff back, opened the box, and realized there was a problem. They made up a Tie Rod, not a Drag Link, and had sent that out to me... When he opened my return box he knew there was a problem and got a hold of me the same morning. His response to the problem was to sent out the rest of the kit, the pieces that he had not sent out already making it a full bran new kit. I asked him if he could send out the parts next day air, or at least priority this time, beings I had already been waiting 2 weeks with no steering in my jeep. I have not received a tracking number for the second shipment as of yet, nor a response about upgrading the shipping.

Im VERY disappointed in my decision to buy this kit from JCR after all this. I have done loads of business with Ruffstuff. there steering kit is almost the same. the difference being that you have to measure your own tubes, and burn in tube adapters. the price is the same. I went with this JCR for ease of install. Keep in mind jcr does not offer tapered adapters for the tre's, only the reamer, so I was making a order with ruffstuff anyways. I had a similar problem with some heim joints on my ruffstuff order. In one e-mail to dan @ ruffstuff. they had pulled my original order, looked up my parts, looked into my description of the problem, pulled new parts, packaged them up, and had them sent out free of charge and was sending me a reply to let me know all of this and give me a tracking number. 2 days later I had my parts. With no mention of the old/bad parts, or what to do with them. I don't know why its taken 15 emails, 15 days, 3 shipments, and 10 pictures to get the parts I need. I don't know why I needed to send the parts back. I sent pictures, we agreed that it was a manufacturer fault and that I would not have found it until now. There paper weights now right? I don't know why you got the parts from me 2 DAYS before I got the 1st shipment from them. And im not sure why there is not a little more urgency on there part. They have competition!


My jeep is sitting out back, with nothing under it for steering, has been for 2 weeks, and im still not sure when im getting the right replacement parts to fix it. NONE of this being my fault, or that I could have done something to prevent it from happening. JCR IS getting this taken care of, But Supper slow, and with very poor communication. I Now have a bad taste in my mouth. And I also regret all those recommendations I have made to all of the people , Boasting the JCR stuff.

I just hope the parts get here soon. I Want to go wheeling, shopping, and maby some other things that normal people do. (normal being With Car)
Rant over! That's where I AM with JCR. looking forward to being done with this none since.

Bronze. )

Once that was all over, I had a fully functional no bumpsteer front steering setup. plus no more worries about blown TRE's


When you got OTK, you have to cut the sway bar mounts off of the axle. hence No Sway bar. This proved to be sketch while pulling my Sleeper up windey roads. so after a while I broke down and bought the stupid JCR front sway bar relocaters. They suck, I hate them, and yeah, they suck.....


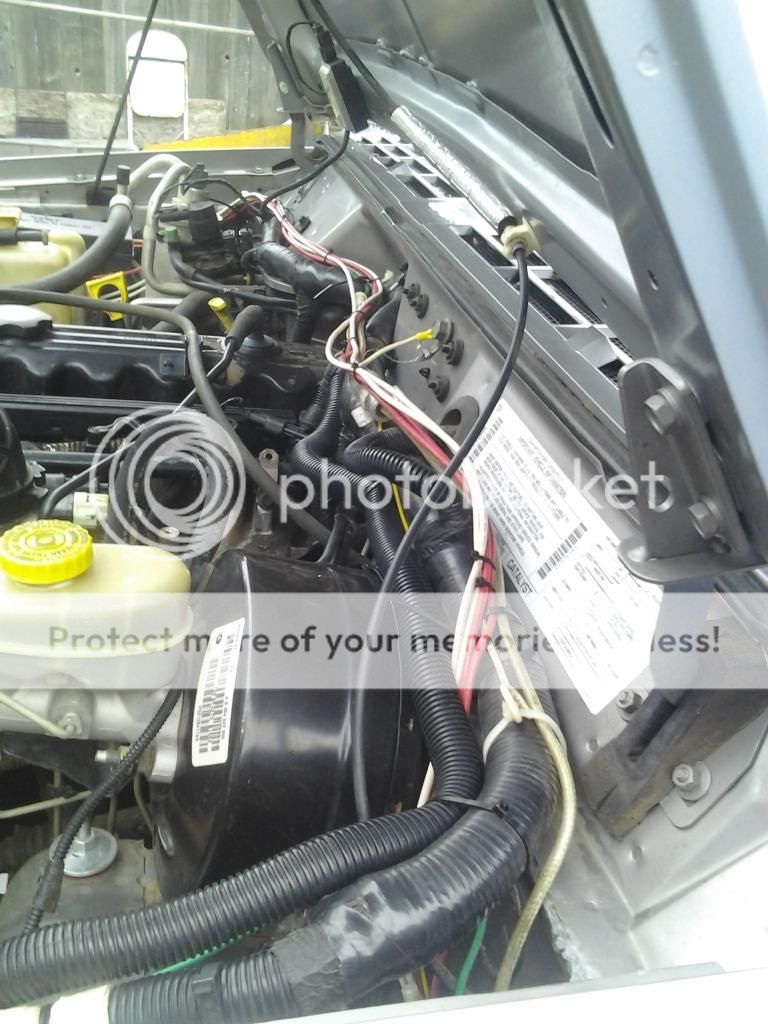
I was feeing really good about my jeep now. Feeling like my OVER BUILT status was doing good, DD's was going well. It was time to wheel her a bit again. This proved to be the beginning of the end for a while. I set off a chain of BS that took me a couple months to get past. My battery went dead... I needed the winch for just a few pulls at the farm. (dodge recovery) so I grabbed a spare battery and headed out. I made the pulls fine, got out of the field where the jeep died via charge loss. I pushed the battery (and alternator) to the pint of the fuel injection cutting out on me b4 it died. I slapped the new battery in it an drove home not thinking anything of it. Weeeeeeeeeelllll That was a little much it turns out for the jeep. I fried the alternator, battery, and my electronics inside the jeep all started to act up... I was about to freek! I went through 2 bad batteries at the parts store b4 they gave me a good one(this did not help diagnosis at all) I replaced ALL of my alternator wireing Via 5-90's posts, then did some research about the upgrade to alternators. It turns out the zj 145A and the Durango 160A alternator have the same size case and bolt pattern, the Durango runs a 7slot pulley, the zj/xj run a 6 slot. I decided to go with the Durango 160A flavor. As I run Bumps with my winch from time to time...

I needed to adjust the drag link some time later, this is when I found the problems with the steering system. (above) so while I waited for that mess to get sorted out I decided to dive into a couple other things I had been meaning to do for a year or more...

Parked her for another round!...!...!...!

This time it was going to be Upgrades! YEAY!
 
On the list, Dakota leafs, Roof sliders, Shock Relocation, U-bolt eliminator elimination, rear bumper/swing away build, and front fender armor.

In the time that I had been doing all of this I did wheel it, quite a bit actually. And Met someone new, who has turned out to be a good friend over the last couple years. he had build his 1st jeep wheeled it and parted it, all in the time that this build was going on. Bmikes! Brandon had parted out the chop top, and I had my eye on the rear bumper. He soon dropped off this hunk of steal to me, right out of the back of his New-to-him Late model (The Red Rocket) at the time it was still His Ltl red rocket:scared:


I did some chopping and whacking on it, then moved on to prepping the jeep. I had saved some uni frame inserts from the bunk rear WP bumper I had on my 92. I had a good plan for this


Had to make room for the inserts. I Know several bumper designs use the uniframe and hitch to reinforce things, on mine I wanted to sandwich the rear uniframe, and basicly clamp the rear bumper, hitch, shackle relocation brackets, and skid plate into/onto the factory locations.


I wanted to keep everything as tight to the body as possible, there are several tings I don't like about rear tire swing outs. and my plan was to minimize the problem areas I had drawn out in my head.


It was looking good at this point, but in the end It was just a little to tight, and I needed about 3/8" more that what shows in this pic.


This is after I had mock up done, and was ready to burn it home and begin finishing her off. You can see how I made a bottom and top mount to tie everything together here.


there are so many pieces to the rear of my jeep that I had to plan out how I was going to mount it all up, and there was going to have to be a 1,2,3,4 kind of routine to putting things together. Next was the hitch and tank skid. Kandrew's posts were flashing in my head at this point, and this is what I had come up with.


Thanks to Larry I was able to get it back together, start the process of rebuilding the Balistic LCA joints, installing my skid plate, and retorqing my rearend:pirate1: (I had fallen and broken a couple ribs and was totally useless)

AND while cutting the rear hitch I decided to look for my figure bone.

Joshua was less than pleased "You should have been wearing gloves DAD..." I had been wearing them, just not thick enough I guess.


These are a PITA to say the least. And when the LCA's are mounted to your trans crossmember, it double sucks...
 
Larry and I managed to get the LCA joints rebuilt, and had moved on to installing the t-case skid that I had made up during the work party recently held here at the house.


Front fender skins! the cuts were good, much better than the JCR stuff I have worked with. Thanks JeepTubes! and Bmikes! I gave them a roll by hand to shape them a little better to the body.
 
We're you the person that said they needed some leaf spring degree shims (or whatever they're called)??
 
Ok, I thought so. I found them this weekend, and I have no use for them. Are you going to be around the Portland area anytime soon?

If not I can send em to ya, not like those flat rate boxes are expensive.....

Jeeps coming along nicely btw!
 
here are a couple more of the t-case skid plate I built.


Then I set out to take care of the rear leaf packs. I had been running a AAl for all this time, and it was time for an upgrade. between the towing and the trails, the factory packs had seen batter days.

I wanted to run something with more length(down droop) and that would support the trailer better. Dodge 1/2ton van is what I had planned on. but after more research I came up with a set of Dakota leafs. they are about 3"longer and move the axle center point back about 1.5"


here you can see the arch/length difference


Install was straight forward. I had to grind a little off the back steel sleeve in the bushing(rear) it was too wide for the shackles, the front bushing needed a washer thrown in it.

I knew if I was doing this, I was going to have the rear axle out anyways. time rid myself of the spring perches and home brew ubolt eliminators, reset the pinion, and weld my new perches and shock buckets in. plus some paint. ya know...


Bye Bye


dad was cussing and yelling out in the shop trying to get my perches off. "somebody welded the SHIT out of these" he says. I didn't have the heart to tell him HEhehe


tubes all cleaned up


once I got that done I had some ruffstuff to install

 
Then Paint!


And installed. I find it ironic that I had rags on the floor jack preventing scratches to the paint as I installed it, On My Trail Rig:D:roll::sure: I wasent sure how to or what to justify at this point...


i went through a couple different version of bastard packs, in the end it all Dakota to the bottom, with the bottom short leaf from my Cherokee packs IPO the long flat "rebound" leaf in the Dakota leaf. in the end (might take me a min to to get there) im really happy with it.
 
next up was the roofsliders that I had picked up from Olysteve. he switched over to a tj a few years ago and I got these from his 2dr part out. There the old HD engineering sliders.

removed the headliner


all the slider pieces out and prepped for paint.


I have used several different types of flat black. this has proven to be the best for the money. simple and easy, comes out great every time. and you don't have to be scared about getting wax on it as it will actually clean up and stay "flat"


I then removed the factory roof rack and the nut inserts. my xj had the short factory rack on it so I would have to drill some new holes to get it all mounted up.


This was all to prevent another one of these from happening...


I got it all on and bolted into place. (that was a chore) I used shouldered nuts on the inside under the pillars and ran a bolt through the top to secure it. I used a really good sealant called "siliprene" in between the roof skin and new rack mount. I made sure to hit the bolt threads to so that water could not run down the threads causing a leek later.
 
Back
Top