• Welcome to the new NAXJA Forum! If your password does not work, please use "Forgot your password?" link on the log-in page. Please feel free to reach out to [email protected] if we can provide any assistance.

Project Jevy - A sequence of events

Once the axle was installed and the jeep was drive able, I decided it was time for a cage.

This was on its way out to the cage guy.

12294668_10100105587364675_9109090561269515469_n.jpg


12804787_10100130461816075_5646237069518422617_n.jpg


12814230_10100130461796115_3156561875705709198_n.jpg


12794373_10100130461806095_6710628512902065264_n.jpg


12795483_10100130462215275_7024562549417555923_n.jpg


12794669_10100130462235235_1745160688778911103_o.jpg


12829204_10100130462120465_7604094749457502643_o.jpg


12237999_10100130462015675_5823163636470703759_o.jpg


And that gets this thread up to date

12669593_10100122731742205_1537555163629202515_n.jpg
 
Last edited:
If I remember correctly, I used the WJ booster and MC. I want to say I used this fourwheeler link as a guide for the upgrade. I have the 70s-80s 1/2 ton GM calipers on all 4 corners now and have zero problems locking up the brakes or getting it to stop. I haven't driven it at highway speeds yet, but I doesn't seem like I would have any issues.

In regards to the lines, I actually had those custom made locally. I am lucky enough to have Baker Precision Bearing nearby and I bring her the fittings and length I need and she does the rest. Pretty awesome place that I source a ton of different fittings, heims and other odds/ends.
 
In regards to the lines, I actually had those custom made locally. I am lucky enough to have Baker Precision Bearing nearby and I bring her the fittings and length I need and she does the rest. Pretty awesome place that I source a ton of different fittings, heims and other odds/ends.

Okay, I'm working at LAX and I need to make a trip to LGB soon to renew a badge. I'll bring my stuff to drop off to her when I go :)
 
Small update:

So I picked up a 4L60E a couple of weeks ago for the LS swap is that is coming soon, ordered up a complete Monster Transmission performance rebuild kit, Novak Jeep 23 spline billet adapter and 300m output shaft and had it all done. I then dropped it off at my buddy's house, where I will be doing the LS swap. Low and behold, apparently somebody thought they needed my transmission more than I did. My $2,000 transmission is now gone because some a**hole decided they needed it more than I did....

So instead of pouting, the frustration gave me motivation to decide to tackle my wipers.

My jeep has convinced me that AMC line workers were drunk constantly while building vehicles. None of my wires match the diagrams, none of the colors match the diagrams and things were just wacky. So after much trial and error, figuring out multiple generations of diagrams, different generations of switches, the random colors of oreillys service parts, snaking out the old motor with the cage crossbar, snaking in the new motor, I have wipers!!

Wipers, FINALLY!!!

Maybe not a huge deal to most, but it was a significant small win for me!
 
Last edited:
I haven't updated this in a while, but since I am waiting on my LS to get here and my parts for the 4L60e to arrive(again), I have been doing minor things. These are the small things that make a wheeling trip or simply driving the jeep to the store a whole lot better for an aesthetics aspect and this helps motivate me to keep working on this.

I got all of the passenger trim back on, which was kind of an ordeal with the cage in the way, but I got it to the point where I am fairly happy with it. So, all of the trim from the passenger front door to the quarter panel trim is in, which is a pretty big deal for me since this thing hasn't had trim in 2+ years. I even decided to get fancy and actually use the "cubby hole" space behind the driver side quarter panel trim piece for storage. There is some serious room in there and I would like to use it to keep ratchet straps, air down tool, bungee cords, etc. It wasn't something I decided to do by choice, but the trim panel would not fit with the cage in place and I was forced to trim a TON of it off. So I hope this makeshift idea works out.

If anyone has any ideas as to how to attach the door and keep it in place, i am ALL ears. I cant make a hinge since the cage limits access to the door opening, so the complete door has to come off for access and then go back on to keep honest people honest.

12961468_10100140012646135_5986850129452593673_n.jpg


12718191_10100140012641145_3458530055657767304_n.jpg


Additionally, a couple of you guys have asked what the plans were for the dash and up till now, everything was basically zip tied in place since so many things have changed over the last 2 years multiple times. Now its time to get this thing back to a socially acceptable condition, ha!, and bring some of the creature comforts back. Here is the pic of the recent progress of the center panel, which will house a majority of the items and an overall pic of the dash.

1501711_10100139998160165_2518368726429733498_n.jpg


The template is offset to the passenger side since I will be adding the headlight switch knob, 3.5mm female jack for the amp input and leave a little room to maybe add maybe other small things as the need arises.

12931247_10100139998165155_3169176939391776121_n.jpg
 
So I am not sure if anyone is actually following this, but oh well... We got progress!!

My 2nd Monster Transmission kit showed up, but this time I went with the HD version and opted for the 5 gear planetary upgrade.

13015638_10100143703255125_8294723459320574174_n.jpg


BEEF!!!!!!

13000109_10100143703250135_4009950692945437497_n.jpg


From there, I got an idea from a co-worker to solve my panel problem with some latches I bought off amazon. I am pretty happy with how it came out and I get to keep all the storage that's back there.

13007279_10100143704258115_2622908116869140436_n.jpg


After that was done, I decided to move onto the dash. I finished cutting out the panel from last time and mounted the HVAC unit. From there, I decided to once and for all finish setting up the dash.

Don't mind the mess. Some mock-up of the final location of the Racepak and HVAC unit.

13051603_10100143702366905_1129258128780048566_n.jpg


Then I finished roll bending the tubes and added a 180* bend for the steering column. Its still not finished since I plan on cutting the bottoms off the 180* bend and then cutting them at a 45* towards the inside. From there, I will make some filler plates and weld them in.

13015578_10100143702361915_3558530681863456012_n.jpg


12993456_10100143702371895_4847317760818897281_n.jpg


Once that is finished, my plan is to cut out the filler panels out of the same material I used for my cubby storage. Should hopefully look good once finished.

In other news, I was able to pick up another 4L60e core in order to, once again, rebuild the dang thing. Just waiting on the Novak 23 spline output shaft and transfer case adapter to get here.

13012871_10100143702910815_3126759221125489575_n.jpg
 
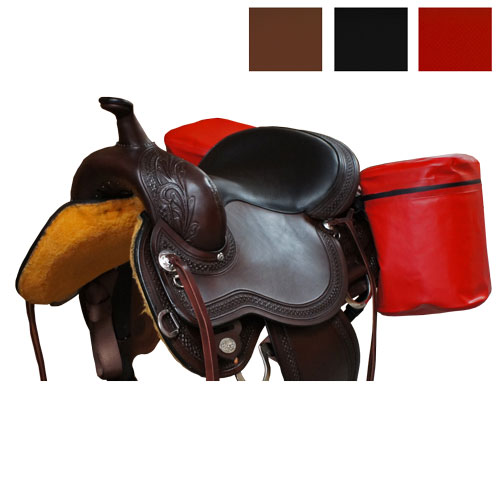
saddle coolers. im applying for a patent.


i would have done a hook and swing design on the cubby door. but it looks like you already got it together.

If I am thinking the of the same thing, then I thought about trying it, but I wasn't sure I was going to have enough room. As of now, the door has to be unlatched and it comes out vertically towards the front of the vehicle. The cage kicker is REALLY in the way. Oh well though, this method should work for a while.

Also, someone already beat you to the punch....

WTM701-Saddle-RD.jpg
 
So after nearly dying, I pulled this thing into the garage and the work began.

1468544_787072888265_957912492_n.jpg


Unfortunately, this thing came with the 2.8L. Since none of the gauges worked and I smelled coolant on the whole way home, I was pretty convinced that either head gaskets were gone or some other nightmare was present. So out it came in under 3hrs. As you can tell, there was a ton of vacuum lines and some that just looped around back to themselves... wtf?!

1005037_787072983075_37185064_n.jpg


1474487_787073003035_1423679816_n.jpg


486654_787073042955_858516506_n.jpg


1425501_787350691545_2051438988_n.jpg


I started tearing down the engine and after popping the pan, I found a lot of debris and some decent gunk. I decided to go further and strip it just in case.

1470398_792211580285_114510957_n.jpg


1476075_792211490465_476522648_n.jpg


Then I found this. 4 of the 6 pistons had rings that were broken into 3 pieces. To be honest, I am not really sure how this thing kept running..

1504935_799900396835_85301238_n.jpg


So then poor life choices were made and I decided to rebuild the 2.8, punch it out, cam it and slap a carb on it to get rid of the feedback carb crap that was on there.

1521663_801147572485_1611843506_n.jpg


1545689_801147612405_1124179276_n.jpg


1477835_792743140035_2118821088_n.jpg


1459191_792743164985_1544928619_n.jpg


1514334_792743219875_1139559001_n.jpg


12801113_10100130342525135_7502346121573596198_n.jpg
so you made it a 3.1 i guess probably would have been easier and cheaper to put a 3.4 from a 90-95 camaro
 
So small update from Friday and Saturday.

My woman is barely above 5', so she has somewhat of hard time getting in and out of the thing. Couple that with me always telling her not to put her full weight on the outer bolster of the corbeaus so that it doesn't collapse, she gets a bit grumpy, ha!

So my solution is to add kickers or sliders to the rocker replacements I did. Had a hard time deciding how far to actually have them stick out, but I ended up being happy with 2.75" from the 2x6. This get them tapered inward towards the nose and is just short of my overall width. Going to add 2 additional stanchions to prevent those things from buckling if I ever put full weight of the rig on a rock.

13076998_10100145215255065_6284792978339744119_n.jpg


From that, I jumped around a bit and started working on the dash again. Since I have all of the tube locations finalized and welded in, I started working on the panels to cover up the gaps. To be honest, I was expecting this to be a lot harder due to the compound bends and having tubes on different planes. It hasn't been a breeze, but not too terribly difficult. I think the biggest factor has been using the throat-less shear to cut the material. That thing is seriously a freaking great investment!!!!

13087641_10100145216537495_650399520780144876_n.jpg


Hopefully more progress later today. Going to finish watching powernation and then head back out to the garage.
 
How are you planning to attach the dash panels?

I'm going to see your girl at Baker this week, probably Weds.

I dont know yet. I thought about getting fancy with dzus fasteners, but I don't know if I want to deal with them or just use button head bolts and rivnuts to make my life easier. I still have some time to decide, but I am open to ideas.
 
So not much of an update, but an update nonetheless...

I finished cutting and notching the kickers for the sliders, but the tip on my welder crapped out and then the nozzle stripped so i wasnt able to finish welding them. Once those come in from Lincoln, ill buzz them on permanently.

13096249_10100146311832515_1968974217478592099_n.jpg


I also started shearing tabs on the throatless shear to mount the panels on the dash. I am still happy with the investment and it cuts like butter. Super smooth and quiet, just the way I like it!

13124436_10100146311852475_1083376979444011642_n.jpg


Lastly, I finally got the adapter from Novak after it being on backorder status for about 3 weeks. This thing is just gorgeous! Couple that with the 300m heat treated output and 5 gear planetaries, this 4L65E is going to be one strong cookie.

13082540_10100146487011455_2494521719202251919_n.jpg


13082765_10100146486976525_120913075689194526_n.jpg


Still waiting on the motor from Pacific Fabrication. It seems like every time I call, its always on a 2-3 week delay. Hopefully they give me good news after I call them again. Going on 2 months and still no shipment notification for the LM7.
 
So I got some progress done today and it was fantastic weather to do so. I finally got the parts from Lincoln to fix my welder, so I finished cutting and notching the tube on the drill press for the sliders. After that, it was time to buzz these suckers on there.

13119026_10100148978892705_9223045298547284513_n.jpg


13151790_10100148978912665_5704029350575435733_n.jpg


13118973_10100148979012465_4118458079822730908_n.jpg


13177425_10100148978882725_3446671827142575730_n.jpg


Next up is the trans. I finally picked it up from my builder and paid him to do this for a 2nd time, but boy did it come out nice. In case anyone is wondering, here is a build list of the trans:

2008+ Reaction shaft, torrington bearing and thrust washer
2008+ Rear Heavy Duty 5 Pinion Planetary (Planetary Only)
2008+ Front Heavy Duty 5 Pinion Planetary (Planetary Only)
All new Gaskets, O-Rings, Lip Seals & Sealing Rings
Upgraded aluminum Pistons - Quantity - 3
4L60E Corvette 2nd Gear Servo
4L60E Super Servo 4th Gear Cover
High Performance Kolene Steel Kit (5-Low/Reverse, 4-Reverse Input, 6-'3-4', 5-Forward, 2-Overrun)
High Performance Clutch Kit (5-Low/Reverse, 4-Reverse Input, 6-'3-4', 5-Forward, 2-Overrun)
4L60E Wide High Performance Band
Teflon Pump Bushing
Delco Front Seal Retainer Clip
4L60E Superior Shift Reprogramming Kit
Hardened Pump Rings
4L60E 13 Vane Rotor Gear
4L60E 13 Vane Rotor Guide
4L60E 13 Vane High Rev Kit
Heavy Duty "Beast" Sun Shell
Heavy Duty 29 Element Sprag
Heavy Duty Wide Rear Sprag
1-2 Shift Solenoid
2-3 Shift Solenoid
Manifold Switch
EPC Motor
3-2 Solenoid
PWM Solenoid
TCC Solenoid with Harness
Novak 23 spline 300M heat treated output shaft
Novak billet adapter to jeep style NP transfer cases

So I bought the monster transmission SS Heavy Duty kit, but I cant say I am completely satisfied with it. I upgraded a couple of the components outside of what came with the kit, which just got me doubles of some parts. Things like the molded pistons and a couple of the bearings are not up to what I would consider a 500hp trans, so I purchased aluminum pistons and different brand bearings. Probably the biggest complaint I have is how they do the front 5 gear planetary upgrade. Basically they tell you to put a 2008+ 5 gear planetary into an older transmission, which then creates a situation in which a rather critical bearing is no longer centered as it used to be and is just inviting failure. I can elaborate more if anyone is actually interested.

Onto the pics:

13179193_10100148978897695_4387152163587562229_n.jpg


13139172_10100148978902685_540610680047162644_n.jpg


Finally, I moved onto trying to get the dash done. I only took this one pic and it doesn't look like much, but I spent the better part of the day working on this thing. Its been a serious time consumer, but I am pretty happy with how its coming out. I need to get the final panel cut out on the drive side knee area, cut out some more tabs on the throatless shear, fit the panel, weld the retaining tabs in, drill out the panel and tabs, then mount it. Once its finished, its off to sandblasting and powdercoating.

I'll take some more pics of how I mounted the panels since some have asked.

13177517_10100148979007475_3524580347267812323_n.jpg
 
More dash progress.

Skeleton of the dash with gussets and panel mounting tabs.

13178849_10100150546012185_8479580747092299267_n.jpg


After I skinned it.

13237767_10100150546022165_4414872169730302721_n.jpg


After some sandblasting, 2 coats of paint, wrestling this thing back in and starting to skin it again. Just have to finish looming the wire and then finish setting up the HVAC vacuum solenoids.

13087932_10100150546017175_4009456519130571658_n.jpg
 
Back
Top