I had an annoying problem that every time i'd turn on the XJ's AC the whole damn jeep would vibrate. Also when the engine got a little warm it would start doing it, and I would always think that the engine had f***** up. Anyway, I found it as hard to believe as you probably do that the little auxilary E-fan could cause this problem... o but it can. I rigged up a battery and presto, one vibrating heep. This needs minimal tools: hacksaw or dremel (i used a hacksaw), drill and at least a 1/8 (i used 9/64) black oxide drill bit, and some 1 1/2 inch machine screws with washers and nuts. Of course a couple wrenches and screwdrivers are needed.
First you need a Procomp 1250 cfm 10" fan from this guy (it has nice low 8 amp draw, enough pull, and it will fit *inside* the old shroud.), like this one that i bought:
http://cgi.ebay.com/ebaymotors/ws/eBayISAPI.dll?ViewItem&ih=014&sspagename=STRK%3AMEWN%3AIT&viewitem=&item=330118132741&rd=1,1
Unplug the electrical connector and use a wrench to remove the hex screws at the top that hold the fan in place. Unplug the electrical connector. Mine was a bitch to remove, but a little wd40 made the job a snap. then carefully maneuver the fan and shroud out of the engine compartment.
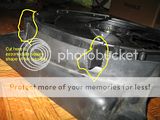
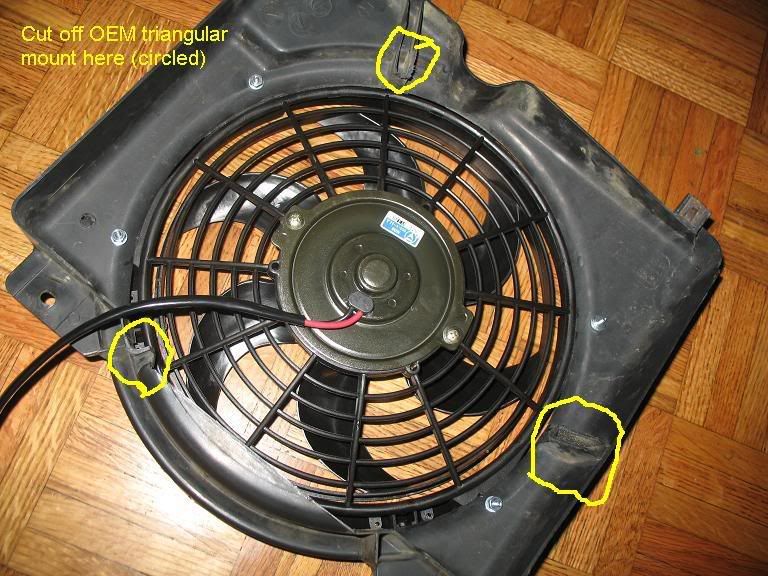
Use a hacksaw to cut off the old triangular mount, taking the old fan out with it. Locations to cut are shown in the pic.

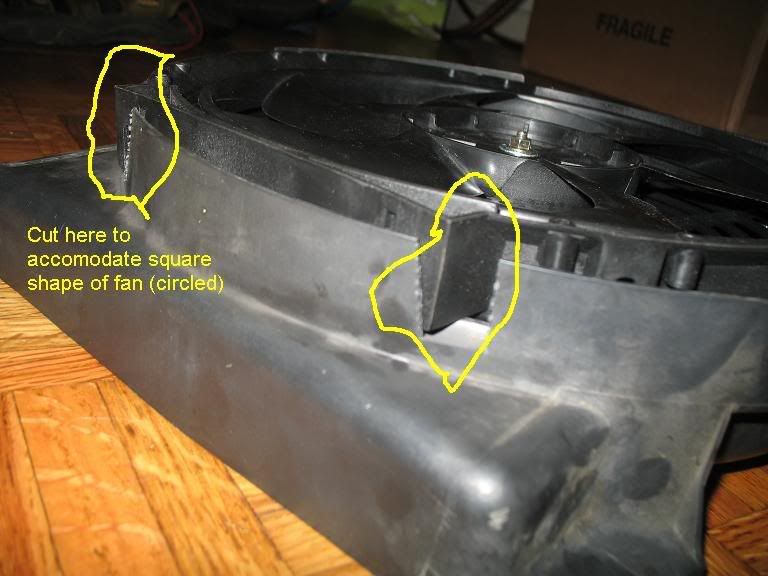
Place the new fan with shroud, grate side down, and mark the locations of the four squarish corners. Make downward cuts with the hacksaw, as pictured, and snap off the resulting tab. This will make it possible to accomodate the square shape of the new fan. Do this on both sides, obviously.
next place the fan in the shroud, again, grate side down, lining up the squarish part of the fan with the cuts you just made.
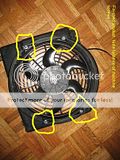
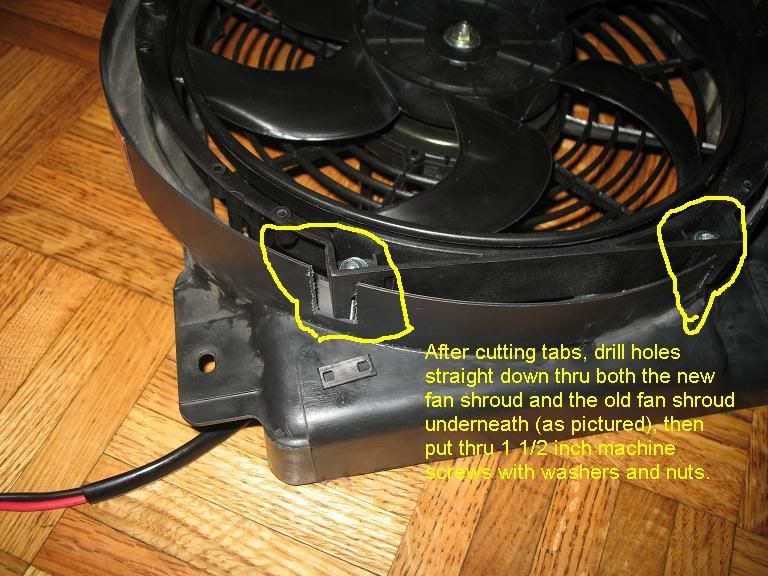
get your drill. Because of the manufacture, there are little circles inside each of the corners of the new fan. Drill straight down, through the little circles and through the old fan shroud. Place a small, thin machine screw, with some washers on both sides, through the resulting holes, and tighten down. Not too much tho, remember its plastic... Do this on all four corners. These pics should make the locations and idea clear...
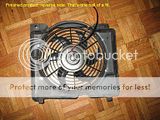
Voila! done! now for a beer! o wait, we're not done yet. This is another pic with the mounting finished.
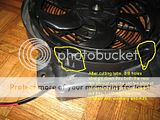
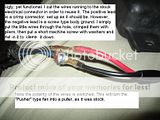
Here's how to do the electrical crap. Cut the wires that went to the stock electrical connector and attach them to the wires coming out of the fan. The fan ships as a pusher, and, contrary to the advertising, the blades CAN NOT be flipped. However, it is possible to turn the fan into a puller (necessary) simply by switching the polarity of the wiring, as I have done. If you cant see my pic with integrated further description, too bad, but this is not rocket science. You can figure it out.
Ok! now were really done! Oh crap, not quite yet, gotta go put it in...
...
...
...
I'm guessing you now have a perfect, working E-fan, as I now do. arty:
arty:
First you need a Procomp 1250 cfm 10" fan from this guy (it has nice low 8 amp draw, enough pull, and it will fit *inside* the old shroud.), like this one that i bought:
http://cgi.ebay.com/ebaymotors/ws/eBayISAPI.dll?ViewItem&ih=014&sspagename=STRK%3AMEWN%3AIT&viewitem=&item=330118132741&rd=1,1
Unplug the electrical connector and use a wrench to remove the hex screws at the top that hold the fan in place. Unplug the electrical connector. Mine was a bitch to remove, but a little wd40 made the job a snap. then carefully maneuver the fan and shroud out of the engine compartment.
Use a hacksaw to cut off the old triangular mount, taking the old fan out with it. Locations to cut are shown in the pic.
Place the new fan with shroud, grate side down, and mark the locations of the four squarish corners. Make downward cuts with the hacksaw, as pictured, and snap off the resulting tab. This will make it possible to accomodate the square shape of the new fan. Do this on both sides, obviously.
next place the fan in the shroud, again, grate side down, lining up the squarish part of the fan with the cuts you just made.
get your drill. Because of the manufacture, there are little circles inside each of the corners of the new fan. Drill straight down, through the little circles and through the old fan shroud. Place a small, thin machine screw, with some washers on both sides, through the resulting holes, and tighten down. Not too much tho, remember its plastic... Do this on all four corners. These pics should make the locations and idea clear...
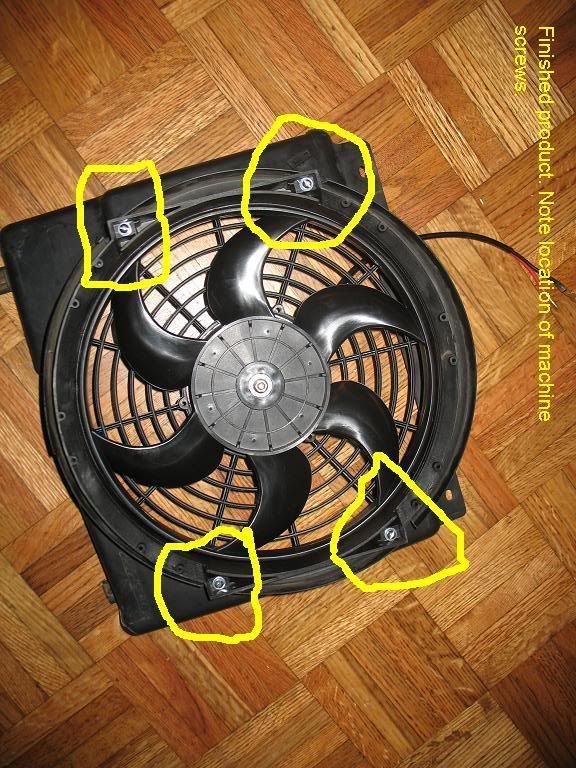
Voila! done! now for a beer! o wait, we're not done yet. This is another pic with the mounting finished.
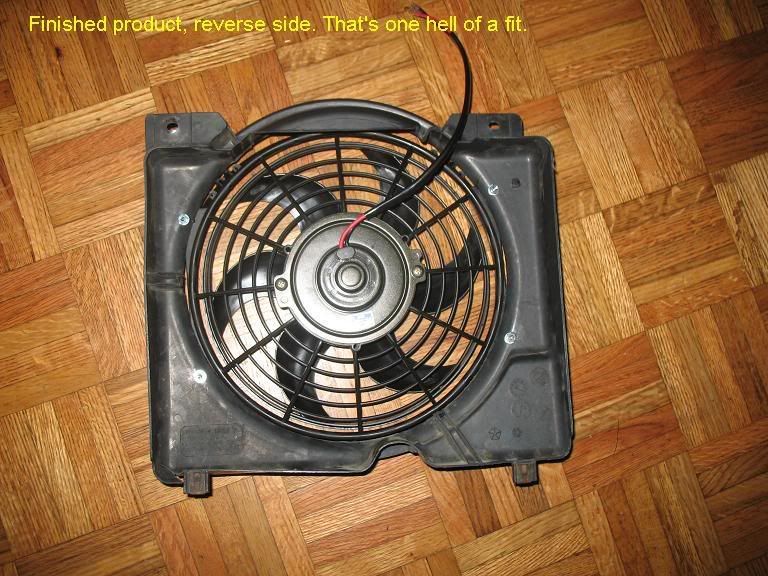
Here's how to do the electrical crap. Cut the wires that went to the stock electrical connector and attach them to the wires coming out of the fan. The fan ships as a pusher, and, contrary to the advertising, the blades CAN NOT be flipped. However, it is possible to turn the fan into a puller (necessary) simply by switching the polarity of the wiring, as I have done. If you cant see my pic with integrated further description, too bad, but this is not rocket science. You can figure it out.

Ok! now were really done! Oh crap, not quite yet, gotta go put it in...
...
...
...
I'm guessing you now have a perfect, working E-fan, as I now do.
arty:
