• Welcome to the new NAXJA Forum! If your password does not work, please use "Forgot your password?" link on the log-in page. Please feel free to reach out to [email protected] if we can provide any assistance.

beater!

Thanks for the tip guys, one of the local gurus said the same thing so I will try that when I get back around to it. I did get the stabilizer pin out--just had to put a deep well 19mm on the hex head and give it a twist.

Original_Stabilizer_Pin.jpg


All of the control arm bolts came off with cheater pipe. One of the LCA axle nuts put up a real hard fight but I finally got mad and said to myself that I am going to break an extender trying before I cut these off and then it released.

The UCA axle bushings were completely trashed. Right side inner sleeve had pulled all the way back but it came out with the HF ball joint press no problem.

Original_Right_UCA_Bushing.jpg


UCA_Ball_Joint_Press.jpg


Left side was actually worse. It had also pulled all the way back, but the rubber had also pinched out the side--only half the rubber was still in the axle, and once I pulled the inner sleeve out the rubber fell out. I tried to chisel it out for a while, but then got the sawzall and cut it out. Worked great.

Original_Left_UCA_Bushing_1.jpg


Original_Left_UCA_Bushing_2.jpg


UCA_Sawzall.jpg
 
I had picked up some WJ UCAs with intention of using them but they do not work in the XJ. The boxed design interferes with some of the plating on the unibody and so they don't droop far enough. I thought about notching them for a minute but that would really weaken the structural integrity. Here's a couple of pics to show how they get caught up.

WJ_UCAs_Mounted_1.jpg


WJ_UCAs_Mounted_2.jpg


You can see how much would have to be notched on the right side of this pic--too much.

UCA_Comparison.jpg


In the meantime I've reinstalled the original UCAs. Although the axle bushings were shot, the frame side bushings aren't too bad, mostly just dry-cracked instead of destroyed. I will replace them with something, just don't know what yet. I am planning to go long arm next year so I don't want to buy anything but I probably need to.

For the LCAs I went with the adjustable JKS and man those things are super beef. For right now I have them set to the same distance as the stock. I only have the 1 fat default shim in each LCA bracket right now so I ought to be able to do all of the alignment with the JKS screws.

LCA_Comparison.jpg


Here's the stuff reinstalled.

Reinstalled_CAs_1.jpg


Reinstalled_CAs_2.jpg


I test fit the JK shocks and did some other stuff in the last few minutes before daylight ran out altogether but did not get anything else bolted on permanently. Depending on rain tomorrow I will get the rest of it reassembled.

Probably worked about 8 hours on it, 3 of those were spent trying to get the hardware off.
 
It rained most of the day but it was clear enough to work for a little while, so I went out and banged on the pitman arm, but the TRE still did not come off. Looking around it seems like they are available for about $30 so destroying it in the process of removal was acceptable, so I got the pickle fork and engineers hammer and it popped off after a couple of two-handed baseball swings.

Surprisingly the TRE is still in good shape with fluid movement in all directions. No looseness or anything. Since I will need to replace steering when I do the axles I am trying to avoid buying those parts, so I will see if it still works. Now the mission was to find a new grease boot since I shredded the original during removal.

Dealer has them available at $28... the price of a complete aftermarket TRE. Energy suspension makes them but everybody complains they don't fit good. Googling around I found a reference to Dorman and sure enough they make a series of generic boots. I found one of the 5/8" boots for a couple of bucks (Dorman part number 13563), and it seems pretty snug when it is held in position.

Dorman_TRE_Dust_Boot.jpg


Since the TRE will be pressed in place the boot should stay in position pretty well. If it doesn't work I'll try to find some boots at the junkyard next time I'm up that way.
 
It rained off and on all day but I finished reinstalling the parts since the ground was getting muddy and soft

Last night I thought about the UCAs and what to do, and it occurred to me that the WJ UCA bushings were alright, so I decided to just pull those and transplant them into the XJ arms. However as you can see in some of the other pics the outer sleeves on the WJ bushings were pretty rusty, so I also had to clean that crap off before I could install them. What I did was soak the rust in PB Blaster overnight, use a wire brush on the drill to clean the flake, and then use a leftover 3M paint and rust stripping wheel to get the scale. In this pic you can see the one on the left has been cleaned and is pretty shiny, compared to the one on the right that has only been hit with the wire wheel. Once they were cleaned they popped right in so I have newer UCA bushings now.

WJ_UCA_Bushings_Removed.jpg


From there on it was basically just reinstall stuff. With the drag link disconnected I was able to use a pry bar to get the coils in. These are the RE1300 3.5" superflex coils with an extra .5" isolator at the top.

RE1300_Coils.jpg


The TNT Track Bar, which is like a steel brick

TNT_Track_Bar.jpg


The ZJ Tie Rod

ZJ_Tie_Rod.jpg


The JK shocks with the Rocky Road 1" BPEs, and the OME stabilizer up front

JK_Shocks.jpg


The JKS disconnects

JKS_Disconnects.jpg


... and the final stance back on wheels

Front_Lifted_Stance_1.jpg


Front_Lifted_Stance_2.jpg


Need to do a bunch of alignment and tweaking but will do that after the rear is installed. I suspect I need to point the pinion angle upwards more by pulling the LCAs inward some. I am really tempted to get some adjustable UCAs so I can push the axle forward a bit. Also even with the BPEs the shocks are limiting droop--the LCAs hit the coil buckets when nothing stops the axle from falling. The angles on the track bar and tie rod are pretty close but I have not measured the wheel distance or anything and it is obvious from looking that the drag link is off. I also need to do something about the brake lines. Lots more to do, hopefully it will dry out a little bit in the next few days.
 
Got started on the rear. The shocks came out okay but that is because I had already dealt with them. It took me a while to get the bar pins out of the JK shocks, but I finally figured out that a 3/8 extender fits right in the gap and works to push the bar pin through the bushing. I still have to remove the sleeve on the other end of the shock since it's too small to fit over the axle stud.

JK_Bar_Pin_Removal.jpg


The rear JK shocks are 3.5" longer than the ones I removed. The fronts appear to be only about 1" longer so I will probably have to get some of the YJ Monroes for the front but the rear are going to be okay. Interestingly the rear shocks had almost no action at all, even though the front did.

Rear_Shock_Comparison.jpg


The flare on the chassis brake line is corroded and won't spin so I will have to deal with cutting and flaring all of the lines after I finish with the hard parts.

The springs are kicking my ass up and down the block. I was able to remove the U-bolt hardware (surprise!) but ended up cutting the passenger side because it was faster in the end. I also removed the nuts on the lower shackles, however the bolts were frozen so I still ended up having to cut them off. The forward eye bolts would not spin at all so I also cut the springs just behind the eye. Here's a pic of what's left and some of the hardware--the rubber bushings all look surprisingly good.

Rear_Springs_Removed.jpg


The left eye bracket was already cut, and the weld nut was spinning freely. Judging from the shocks, I'm guessing this was done when the rear end got sideswiped--it got a new axle so it probably got new springs then too. I poked at it for a while trying different things, but eventually just cut the bolt on both sides of the bushing and let it fall out. FYI the weld nut is a 15/16" nut. I have not gotten to the right side yet eye bolt yet, but at this point I am really tempted to break the weld nut and do the same thing, unfortunately the bushing is preventing me from doing that so I will have to cut that out first.

Left_Spring_Eye.jpg


The last problem on the left is that the leaf will not reach the shackle, which is rotated all the way back. I tried taking the bolt out but it didn't start cooperating until it was almost dark. I also tried prying the shackle forward but it wasn't working and seemed to be pretty dangerous. I will try messing with the bolt more tomorrow and if that doesn't work I will try some ratchet straps maybe.

Left_Shackle_Gap.jpg


So basically I worked on it all day and still have 1 stuck eye bolt and 2 stuck shackle bolts.
 
For the passenger side eye bolt I am going to try cutting through the rubber down to the pinch seam in the bushing's inner sleeve, and then chisel it apart. Hopefully the pinch seam will be accessible. I cut the spring wrap and the outer bushing sleeve off the left side while testing access, and saw the seam there, but did not think to use a knife on the rubber. If this doesn't work I'll make a pocket in the bracket and try to snap the weld nut.

The shackles are quite a bit tougher. If I have to mess with them too much I will need to drop the bumper, which means dropping the hitch and gas skid, which would really suck. If I end up at that place I will pick up a pair of stock shackles with bushings and destroy these first.
 
Do you have a torch? Cook the weld nut until cherry red and it SHOULD break free.

Mapp+Oxy if you have it.

As far as the shackle, I installed that bolt first and had someone with a pry bar force the shackle forward as I installed the front spring hanger bolt.

If you have to remove the top shackle bolt, then I would drill a hole in the pocket where the weld nut is (~3/16") and get that weld nut cherry red.
 
I'm glad my rig came from Texas, i didnt have most of the issues your dealing with. Sure seems to be fighting you every step of the way.
 
Do you have a torch? Cook the weld nut until cherry red and it SHOULD break free.
No I wish I did. I could only use it on the eye bolt unless I was going to destroy the upper shackles. They are $50 at Lowes and the welder supply place for decent kit so trying to avoid that purchase right now with the other stuff that needs fixing.

As far as the shackle, I installed that bolt first and had someone with a pry bar force the shackle forward as I installed the front spring hanger bolt.
That's a good idea. Maybe a bottle jack behind the bumper would work too. I think I can bring it around though, since I had it more or less centered earlier and only pushed it back when I tried to loosen the bolt--with a few more twists I can tighten the bolt while pulling on the shackle and hopefully bring it forward.
 
I got the passenger spring eye out. Basic plan was to hack away at it removing pieces of it until I could get to the inner sleeve. I cut the wrap and outer sleeve with angle grinder and hit it with pry bar a little bit at a time, cut the rubber, then attack the outer metal again. After a couple hours, the outer spring turned on the bolt--just beating on it seemed to knock it loose. From there I was able to just back the bolt out.

Original_Right_Leaf_Eye_Bushing.jpg


The right shackle was already more or less vertical so I didn't need to do much there. For the left shackle that was giving me so much trouble yesterday, I just tightened the top bolt down and that put the shackle into vertical position again as expected. Once that was done I was also able to get the leafs installed by mounting at the rear shackles and then using a floor jack to lift the spring while using a crowbar on the eye bushing to guide it into position. Here is a pic after the rear was reassembled

Rear_Springs_and_Shocks.jpg


Final fender measurement is 21.5" rear and 22.5" front. That is 6" boost in the rear (or about 4" over stock ride height) and 5" boost in the front. The fenders only tell part of the story of course--there is a definite rake and the rear looks higher even if the fender line is lower.

Lifted_Stance.jpg


I got things straightened out enough to drove it up and down the street but not super fine-tuned. Overall impression is that it is MUCH more squirrelly but seems to be okay. Everything just feels loose, even though it has all been torqued to spec. I don't know how much of this is just taller leafs that want to roll more than the saggy stock leafs, or how much is alignment or whatever. Once I reattached the front swaybar it got a lot better, but still steering is kind of loose; it doesn't wander that I can tell, but the steering used to have more resistance, and it seems more eager to turn now. Honestly it feels like the wheels are on loose--very unnerving.

It makes a lot of noises. The springs squeak and I haven't lubed everything up yet either. The brakes chatter, but I think that is because I don't have the lines secured (I am going to cut and flare asap).

There is some rumble and vibrations at low-speed take-off but it cruises pretty smoothly, so I think I need a YJ slip yoke for the rear and will otherwise be okay without the SYE.

LCAs measure at 16" when torqued down. Front pinion is pointing about one degree lower than driveshaft. Yuccaman's table (see bottom) says I should have more distance, but I don't know. I haven't measured caster yet. However the LCAs were bumping the bottom of the coil perches at full droop and I am one degree low so I will need to look into this more.
 
Overall impression is that it is MUCH more squirrelly but seems to be okay. Everything just feels loose, even though it has all been torqued to spec. I don't know how much of this is just taller leafs that want to roll more than the saggy stock leafs, or how much is alignment or whatever. Once I reattached the front swaybar it got a lot better, but still steering is kind of loose; it doesn't wander that I can tell, but the steering used to have more resistance, and it seems more eager to turn now. Honestly it feels like the wheels are on loose--very unnerving.

LCAs measure at 16" when torqued down. Front pinion is pointing about one degree lower than driveshaft.
My eyeballs ain't what they used to be--the pinion angle was off by 6 degrees when I finally got under the jeep and measured everything. Driveshaft angle at the pinion is 10 degrees, while the differential cover was clocked forward at 4 degrees, which meant 6 degrees difference at the pinion joint. If I understand the math right, this also put caster at 5 degrees (9-4=5?) which was why steering was loose and did not want to center. When I extended the LCAs per the tables it naturally pushed the bottom of the differential housing out, the differential cover went to 0 degrees for 9 degree caster, which made steering great but it's tearing up the front driveshaft.

The FSM says to favor the pinion but too much angle will probably lead to DW and weird road manners. Since this is predominately a street vehicle I am tempted to favor the caster angle instead. Tomorrow I will set it to the mid-point and remove the rear driveshaft to see if any vibes are coming from the front shaft, and then go from there.

What do you lifted DD guys use for angles?

I setup the rest of the front end for zero angle and everything is very stable. There is a very slight pull to the right but that is probably just the crown in the road. The JKS LCAs are adjustable in really tiny increments, so assuming everything else goes okay I might set the final passenger LCA to 1/8th inch longer in hopes of counteracting the hump in the road.

It makes a lot of noises. The springs squeak and I haven't lubed everything up yet either. The brakes chatter, but I think that is because I don't have the lines secured (I am going to cut and flare asap).
It's not the brakes chattering, but instead is one of the driveshafts knocking around when I engine brake. Although the vibes are not constant and do seem to reduce a lot at cruising speed under slight throttle, they are still around. I might need a tcase drop but will isolate the problem driveshaft before doing anything else.
 
Last edited:
I ended up setting the pinion angle at around 6 degrees, with the LCAs about 15.25" long (a little above stock and much less than the 16.5" recommended in the tables). This put caster at (9-6)=3 degrees, and the pinion is only about 3-4 degrees below the driveshaft. The jeep is eager to turn and complains about small-radius turning, but it's not all over the road and returns to center alright. Also with the rear driveshaft removed there are no vibes so it seems the pinion angle is alright even though it is steeper than I would like. As the lift settles out a bit the angles should get better.

Most of the chattering is gone now--the front pinion was really complaining when the diff was set to zero degrees but stopped complaining when it got back to a reasonable angle. The exhaust was also banging against the rear leaf somehow (must have moved it during the install) and after prying it away a lot of the buzzing went away. Also greased up all the zerk fittings and the squeaking has stopped. Just a little noise from the vibes in the rear now.

Here is a pic of the alignment machine at Hillbilly Hall's Auto Body and Alignment :rof:

Caster_Adjustments.jpg


With UCA and body-side LCA hardware loosened up the front axle can be dragged forward or back and it will pivot under the UCA mounts. Once the angle is where you want it, set out the LCA distance and bolt them down.

I need to get this to a professional alignment shop and have them clean up my work. It also still has a slight tendency to the right that I was not able to correct by extending the passenger LCA so I am guessing there is something else pulling it over. For now it's drivable however and I will proceed with the work list.
 
I got the rear soft line replaced after some effort and aerokroil. One of the front soft lines is willing to come out cleanly, but the passenger front appears to have been installed with vice grips and refuses to budge. I need to get down to the shop and have that one replaced.

I also messed with the rear parking brake some. I was looking at YJ cables but the cost for two is more than I care to pay right now so I started looking at options to moving the cable brackets back a few inches with some small pieces of angle iron, but when I disconnected the springs holding the cables up they had plenty of slack in them. So for now I've put a long spring on the passenger side to keep the cable from bumping into the exhaust, and the driver side is hanging free (but not 'loose') until I can get another spring. I'll go look at the junkyard for some that are the right lenght and have the right bends in them.

After all the above, some more rattling went away, and at this point I only have rattles from the little bit of vibe at take-off.

Also measured my rear drive shaft angles thinking that I might need to shim the rear to get it parallel with the tcase output, but the pinion is 2 degrees less than the slip yoke already which is the happy range. Looks like the slip yoke is the source of my remaining problems.

The front-end is kind of bouncy. I mean I go over a bump and the whole front end does five or six bounces. I suppose the JK shocks are too soft for the spring rate of the taller coils. I need to replace them anyway due to lack of travel so this isn't a huge problem.
 
Front brake fittings replaced and soft lines replaced. I thought I'd bought the stainless armored hoses but I guess not :(

Extended_Front_Brake_Line.jpg


I also bought some of the one-man speed bleeders from the Help! section, those are real nice to have for self-bleeding
 
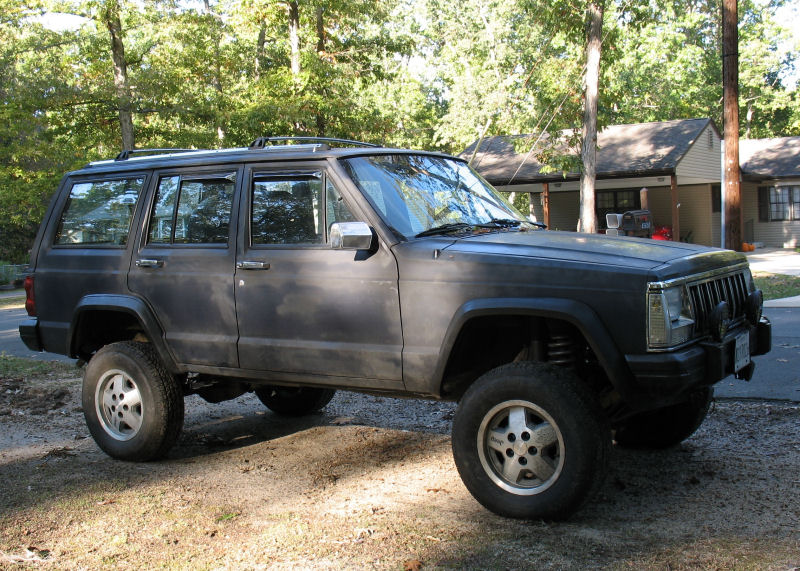
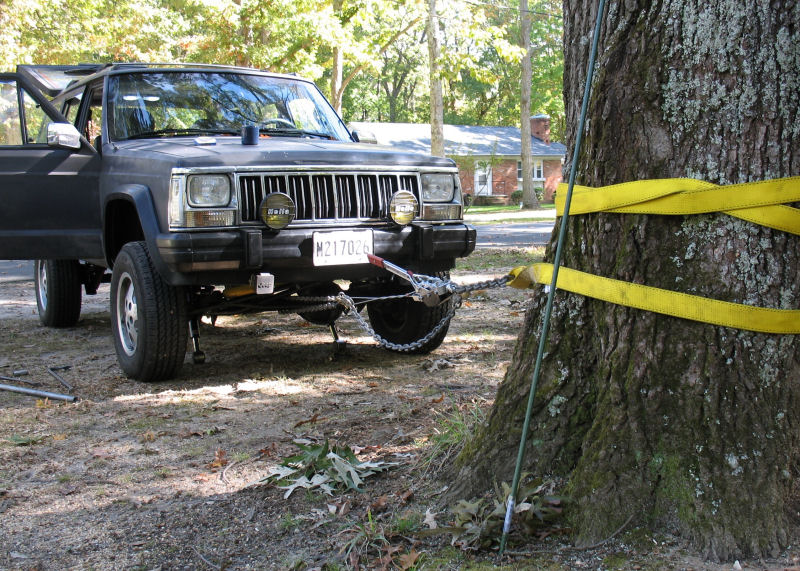
I had to make a junkyard run for a couple of things and ended up fixing a few other unrelated problems as a by-product

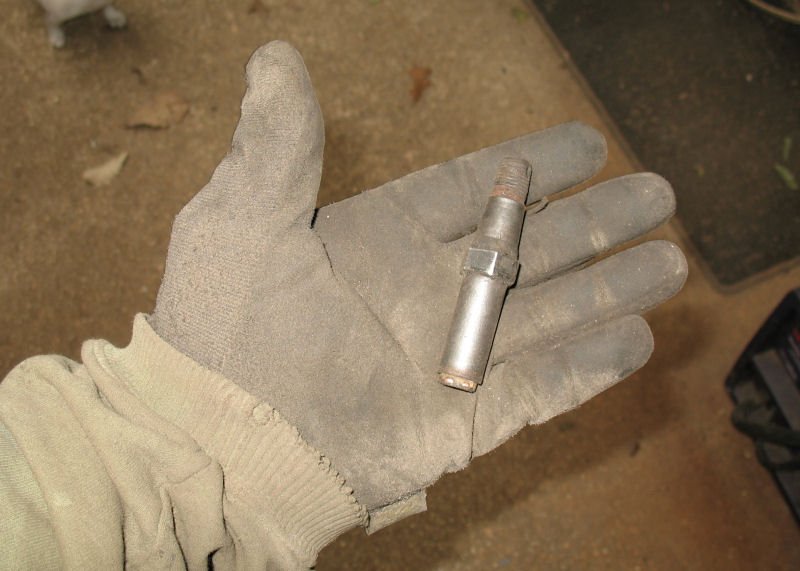
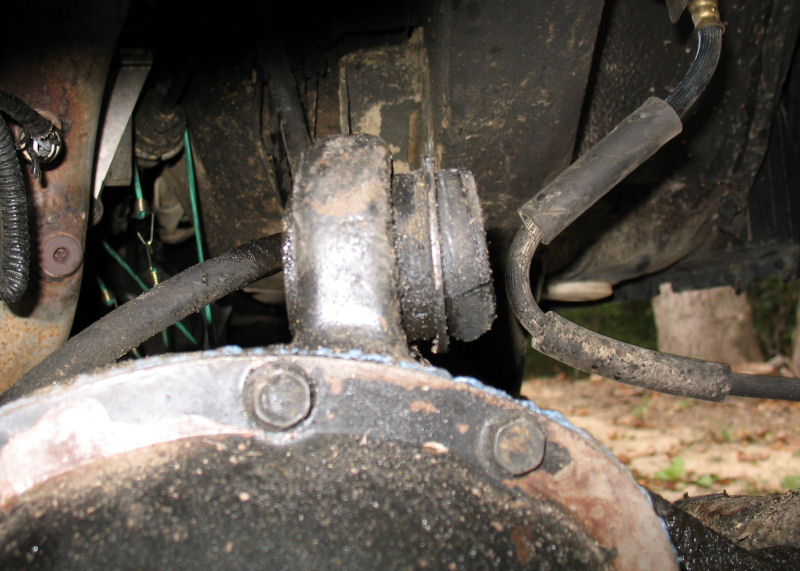
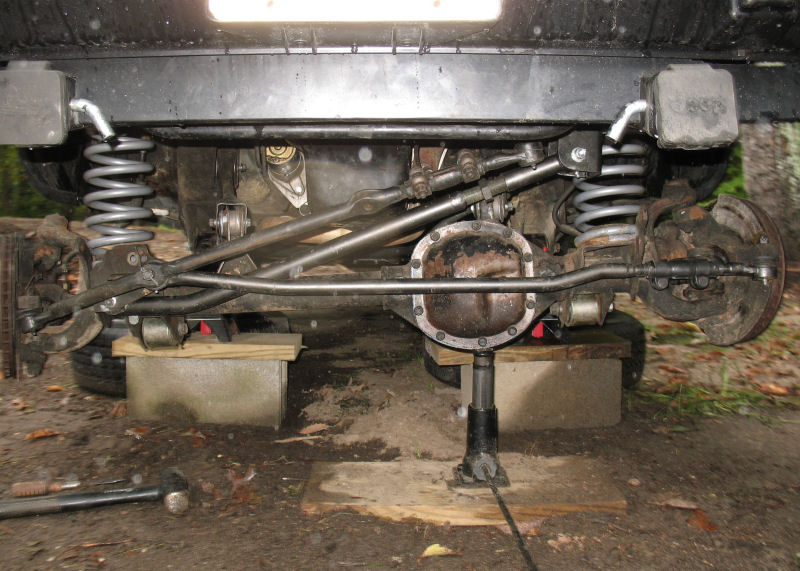
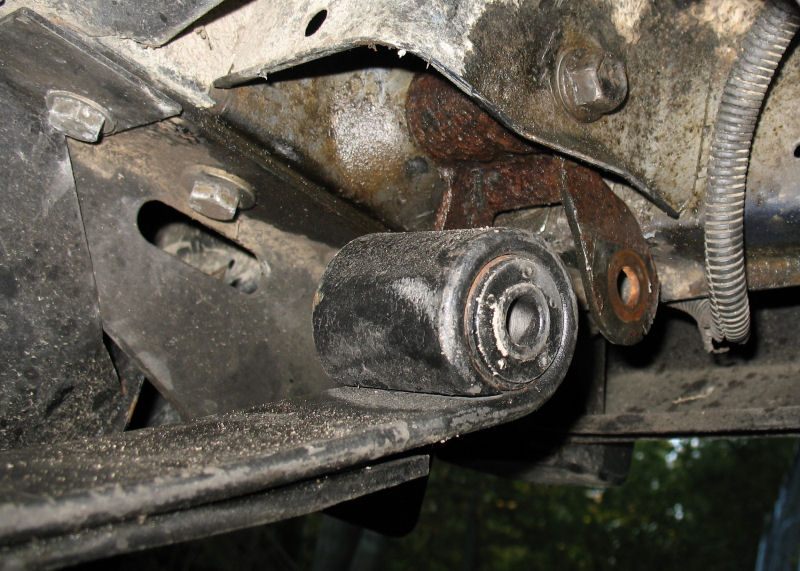
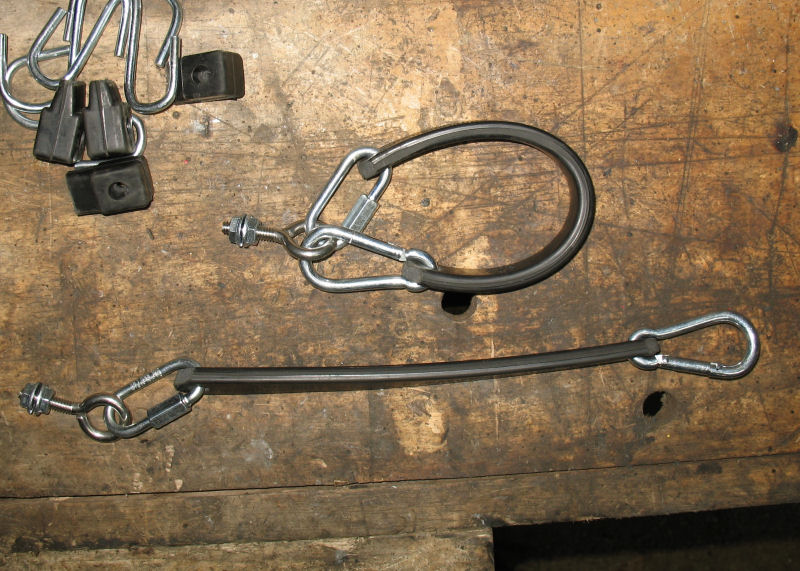
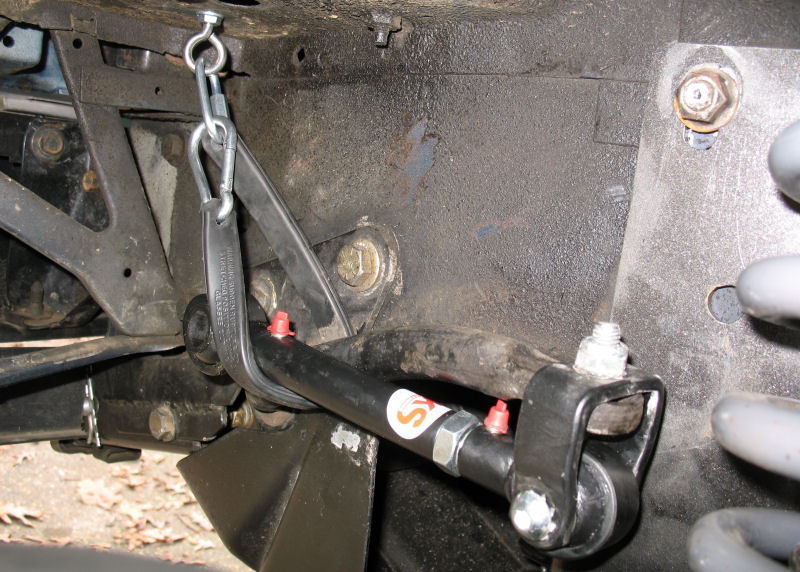
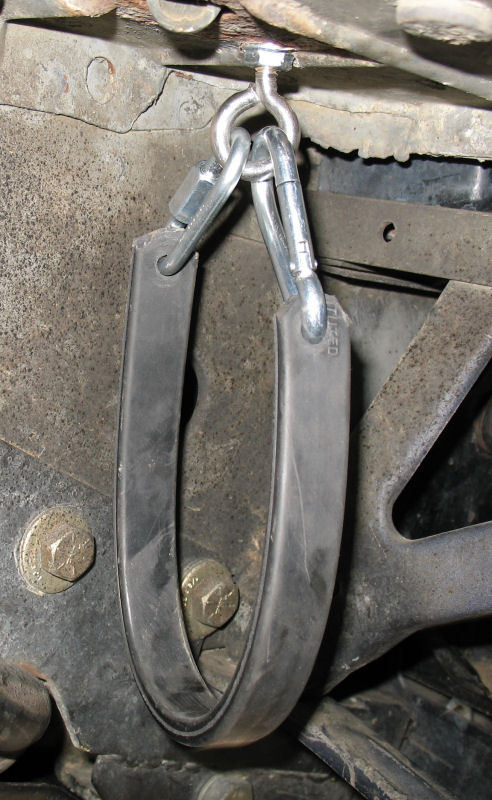
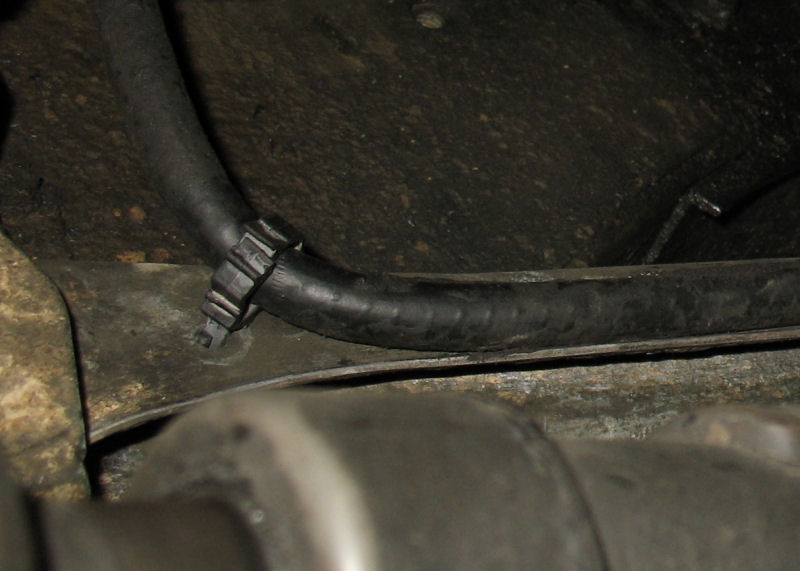
One thing in particular the clips that held the front axle breather hose to the left UCA had long since disappeared, and I did not like having the hose flop around. While I was at the junkyard I noticed a headlight wiring loom that had the GM style circular anchors, so I grabbed a few of those and they work perfectly for the breather

UCA_Loom_Clips.jpg


The right rear exterior door handle has always been hard to activate, requiring a deep push on the thumb button to release. However when I was pulling the jack in and out from under the seat, the thumb button decided to just stop activating altogether and I had to start opening the door with the inside handle (which still worked fine). I figured that it was probably a latch or the handle, so I grabbed one of each at the junkyard, and replaced them both. Unfortunately the handle still didn't release the door easily. After futzing with it for a while, I noticed that the door appeared to be slightly wider than the others and that the latch assembly was not pressed up against the inside skin... here you can see a large gap about 1 mm in size, while all of the other doors are flush

Right_Rear_Latch_Gap.jpg


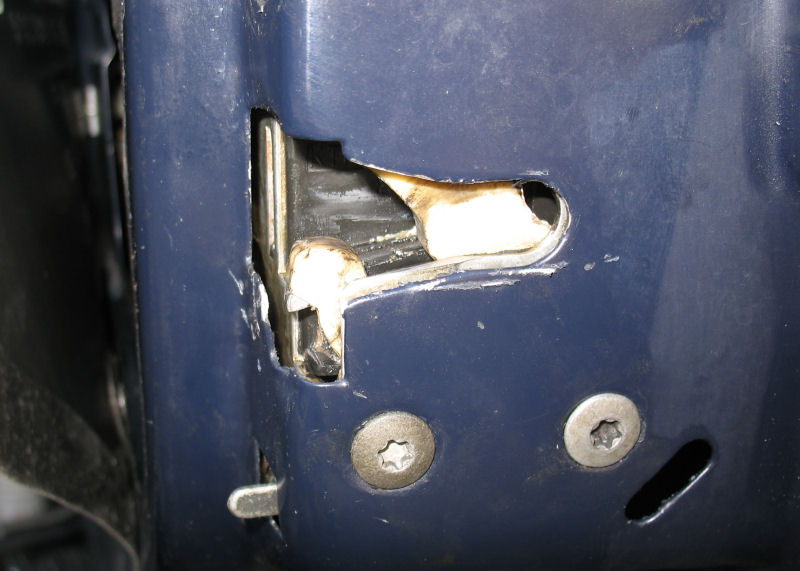
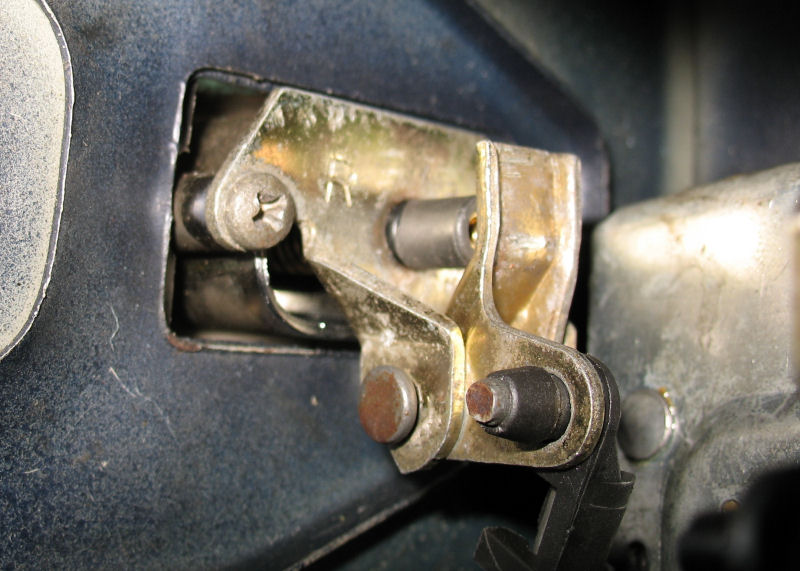
Looking at the problem some more, I also noticed that there was also a gap between the plunger under the thumb button and the lever that it pressed onto, which is why it was always hard to engage the door. Clearly the door is too wide for the hardware. This is quite curious--I had thought about replacing the door but as best I can remember I didn't do it. My guess is that the door was replaced when the rear end damage was repaired, or it was damaged in the accident somehow. I don't believe I've ever seen another door that was this wide so I have no idea what is going on.

Anyways once I figured out what the real problem was, I decided to try to bring the lever closer to the thumb rod. Because of the way that they connect it is not possible to really bend this up, however I thought I might be able to glue a nut to the lever so that there was something closer for the rod to press against. Looking through my drawers I found some #8 rubber well nuts which worked even better. By cutting the lip off the exposed part of the plunger rod fits with no slip, and the brass threaded insert provides a firm extension. PRoblem fixed--the door can be easily opened from the outside after who knows how many years

Right_Rear_Handle_Gap.jpg


Another problem I've been having was minor leaks from the hatch. When we had the four days of rain during the lift this became a real problem since water was pooling up with the tools and parts in the cargo area. The problem is that the roof sheetmetal at the hatch opening does not run straight or even, but instead has minor indentations near the hinges, which results in less pressure on the weatherstripping at those points. When I added the wiring boot to the hatch, the additional material is enough to keep the hatch from sealing at that point and little drips were creeping in. I fixed this by getting some door edge trimming from autozone and cutting a couple of six-inch strips, and pushing them onto the pinch seam at the indented areas. This is enough to force the weatherstrip outwards, so that it can create a good seal against the hatch. This pic shows the difference--the overhead trim piece shows the original curve of the hatch line, and the weatherstripping shows the new straight seal. No more leaks

Hatch_Weatherstrip_Gap.jpg


One other cheap fix was the 1.5" floorpan holes in back seat area. When I was at the junkyard I noticed the Durango has large body plugs in the A-pillars at the fender, and they work pretty well in the back floor. Although they are deeper than optimal they are cheap and work, and keep water and cold air from splashing into the back until I get around to a permanent fix using marine drains

Durango_Body_Plugs.jpg
 
I liked the swaybar disconnect tethers sold by DPG but thought there was some room for improvement. This is what I came up with.

First is an eye bolt with 1/4" machine thread, and two flange nuts. These go in the holes that already exist in the inside front corner of the inner fenders. From there I used a locking ring to secure one end of a rubber strap, and a caribiner to secure the other end. Another option is to use caribiners at both ends but this design gives a little more room. Total for all the hardware needed for both sides was about $12. When you buy the hardware make sure it is the right size to fit over the rubber.

For the rubber strap I used some black tie-down things and cut the oversized end pieces off, then cut the remainder into sections of the desired length, rounded the corners off and drilled 1/4" holes in the ends. Here is a pic showing a couple of 7" pieces, but I eventually ended up using 12" pieces with 11" distance from eye-to-eye.

Swaybar_Tethers.jpg


Here's a pic showing the tension on the final pieces. They are stretchy enough for the caribiner to hook onto the eye hook, but the caribiner can be hard to remove and this tension secures them alright. You could cut them longer so that the caribiner would reach the top, however this way gives your hand more room to work. Also this design leaves enough slack so that you can hold only the swaybar itself (minus the disconnects) by lightly stretching up to the eye-hook.

Swaybar_Tethers_Installed.jpg


The distance is also good for when the tethers are hanging loose. They are not so long that they are in the way, but they are long enough that you can hook them around the fender support brackets in the front.

Swaybar_Tethers_Relaxed.jpg


My only real concern is that the rubber may get weathered and brittle, but no way of knowing how bad or how long it will take. I would also like to put grommets in the holes, but I think the rubber is too thick.
 
Back
Top