• Welcome to the new NAXJA Forum! If your password does not work, please use "Forgot your password?" link on the log-in page. Please feel free to reach out to [email protected] if we can provide any assistance.

beater!

If you need a place to hammer out some bolts, I've got a 6.5 horse, 60 gallon compressor at your disposal-- you can't be "that" far away-- lemme know if you need to come down and use it. It won't be free bye the time you come across the bridge-tunnel, but once you're here, the facilities are free-- don't forget, I still owe you $20.00....
 
As I wrote before, I am adding a bunch of crap to the replacement hatch, and needed to run more wires. I could not reuse the stock wiring loom, so I enlarged the hole to hold a door bootie and ran the wires through that. Here are some pics of the bootie installed. Since it is in there pretty tight and the body side has the plastic trim piece over it, the thing should not leak, but we'll see how it goes after the next good rain.

Hatch_Wiring_Boot_1.jpg


Hatch_Wiring_Boot_2.jpg


Hatch_Wiring_Boot_3.jpg

I wish I would have seen this a couple weeks ago! Very good idea!
Billy
 
The local 4wd club had a lift party for a member's TJ and while I was there I put the big Snap-On 1/2" impact driver to my beater to see if I could shake the hardware loose, and the stuff did not budge at all. Even the nuts on the LCAs are frozen to the bolts, nevermind the bolts being frozen to anything else. At this point it's pretty clear that I am going to have to use a sawzall and cut through all of the bolts on the LCAs and the leafs before I can install my lift parts.

It looks like Fastenal has some 14x120mm 10.9 bolts that will work and are reasonably priced so I will order that stuff and see about using a friends lift. I will probably replace the hardware on the shackles and the UCAs while I'm cutting everything else off, even though I am not replacing that stuff this time.
 
PB for sure. MAPP gas is best.
For the really rusted bolts I usually go through a few cycles of heat and PB.
I will also give some serious shock with 8# BFH, place socket on nut and hit it pretty solid to break rust, then give a little nudge to the right then to the left and just work it loose. I even removed the rear upper shock bolts on my 1987.
original.aspx

But to be honest with I'm sure your rust may be a bit more heartier than ours here in the Sierra Nevada Range with your generous helping of salt and all.
That stuff kills our trees and all and the tree huggers don't like to hug dead trees, damn discriminatory bastards.lol
 
Thanks for the tips. My plan now is to just cut through the old junk wherever there is a nut and bolt, and to try and massage whatever bolts have hidden weld nuts. There are a couple of guys with plasma cutters in the club so cutting the old crap off will be fast and simple. Also the less time these clowns have a torch is less chance they will light my jeep on fire.
 
this makes me want to clean up my rig. amazing and inspiring job!!:worship:
 
PB for sure. MAPP gas is best.
For the really rusted bolts I usually go through a few cycles of heat and PB.
I will also give some serious shock with 8# BFH, place socket on nut and hit it pretty solid to break rust, then give a little nudge to the right then to the left and just work it loose..

This is the way i go about it also.. but usually not heat near a bushing. If you remove the rear bumper you can get penetrant directly on the upper shackle bolts with the straw attachment. The PB shines here..
 
I'm almost done with preparing for the suspension swap and have begun doing some light preliminary work. John sent me a bunch of M14 bolts and I went junkyard diving for some other bolts and the compression nuts, so I now have slightly used but very clean factory hardware for the leaf springs, LCAs and UCAs. I forgot to get a tab bolt for the trackbar axle mount, but that should be the last piece of oddball hardware and everything else can be gotten at local stores.

EG, I was at Advance for something else today and found a box of M8x1.25x30 grade 10.9 flange-head bolts (Dorman 980-430), which is almost exactly correct for the rear shocks (biggest difference is 12mm head instead of 13mm head). So I bought those and replaced the stock hardware. All of the originals came out no fuss

Rear_Shock_Bolts.jpg


I also picked up some take-off WJ UCAs -- bought four and ended up with 2 that were good, but only cost me $40 total so that is still cheap. I also bought the Moog bushings for the UCA axle mounts and we'll see how much fun that is. Here are the WJ UCAs--they are boxed instead of U-shaped, are curved to clear the frame, have a scallop to clear the transmission cooler lines, and have better bushings. I bought adjustable LCAs for the RE 3.5 springs but am planning to go long-arm next year and am trying to avoid unneeded costs so this seemed like smart play versus $200+ adjustable UCAs.

WJ_UCAs.jpg


I also got my brakes in order so that I would not run into any surprises during the install. Long story short is that my adjusters were not engaging, so I bent the springs and used washers to push the springs further back, and now the levers are nice and tight against the adjusters. Then I tried bleeding the brakes and the bleeder valves broke so I bought new wheel cylinders. When replacing those, the hard lines on the axle also broke, so I bought new armored line from NAPA too. After it was all back together the rear brakes are working now (shoes looked like new since they had not been engaging), and I should be able to replace the soft line without incident. The fronts bled fine without any drama and should be good to go.

At this point I am just waiting on the Moog UCA bushings and the trackbar tab-nut, and I need to get some MAPP gas on hand for heating the leaf hardware, and then I can begin.
 
Prep work is almost done. I got a nice and clean track bar tab nut from the junkyard, and the local True Value has some M10x70mm class 10.9 flange nuts so I got a set for the lower track bar and upper UCA mounts. Front shock lower bolts were replaced with clean class 10.9 hardware no problems. I was also able to turn some of the leaf nuts by hand even though impact wrench did not budge them. This is reminding me of when I removed the original hitch: I could not get the hardware off until I slowly turned a breaker bar with a cheater pipe and then everything came off fine, and I suspect that it will be the same for the suspension.

The Moog XJ bushings arrived. Unfortunately they have the folded metal inner sleeve with dimples and I thought the Moogs would have solid sleeves like the WJ bushings, but I guess they are closest to spec. They will be used in the UCA axle mounts so I dont think it will matter.

How much should I worry about the drag link? I am planning to disconnect it so I can drop the front axle and also need to remove the tie rod and stabilizer. Should I get a spare drag link and just chop and discard the old one?
 
Started the real work on the suspension today. Most of the stuff is coming off without any trouble although some of it is giving a good fight. I'm following the instructions for the RE 4.5 kit even though I have a piecemeal kit that is based on the 3.5 springs, but the 4.5 kit is the closest match to what I have, and I figure they know the best order by now.

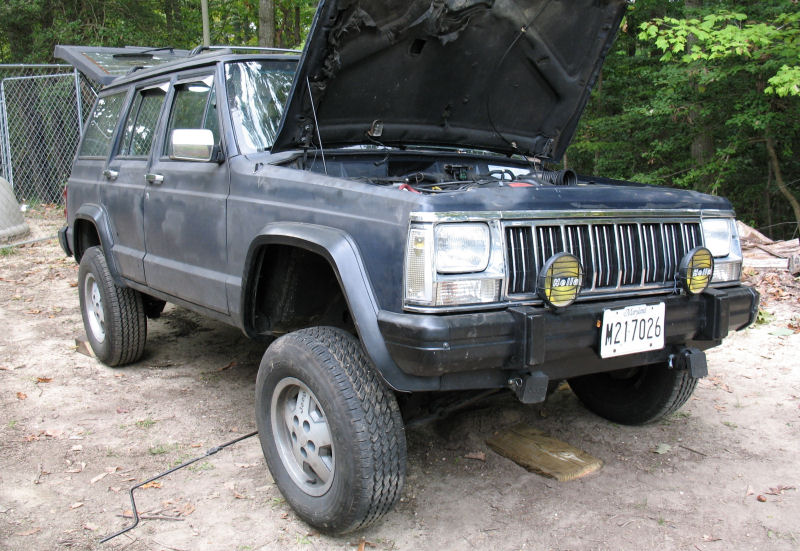
Measurements from center of wheel to bottom of flare was 17.5" front and 15.5" rear, so leafs are sagged but the front was in okay condition. I took a couple of poser shots and you can see that the front had a lot of uptravel and the rears compressed pretty well.

Original_Flex_1.jpg


Original_Flex_2.jpg


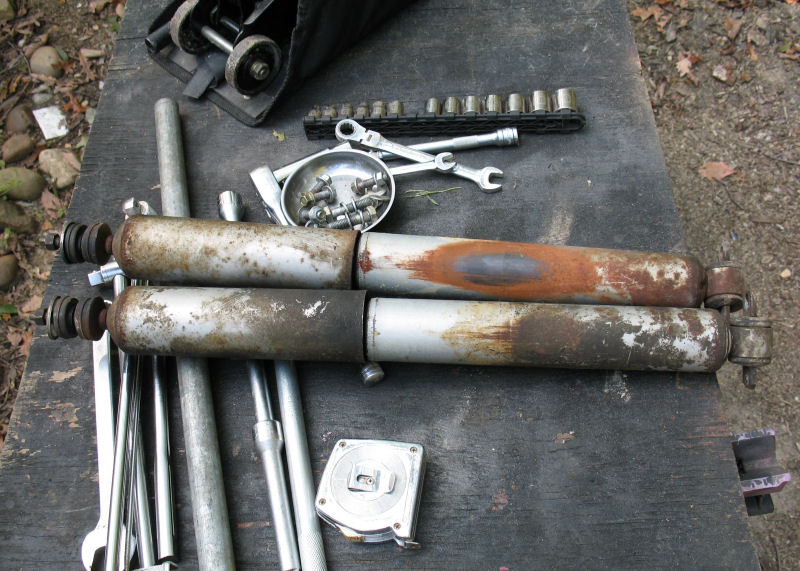
Front shocks came off surprisingly easy. I thought the nuts in the engine bay would be really hard to get at but they came off easy. I can't make out what kind of shocks these are but they are obviously pretty old. They still have action.

Original_Front_Shocks.jpg


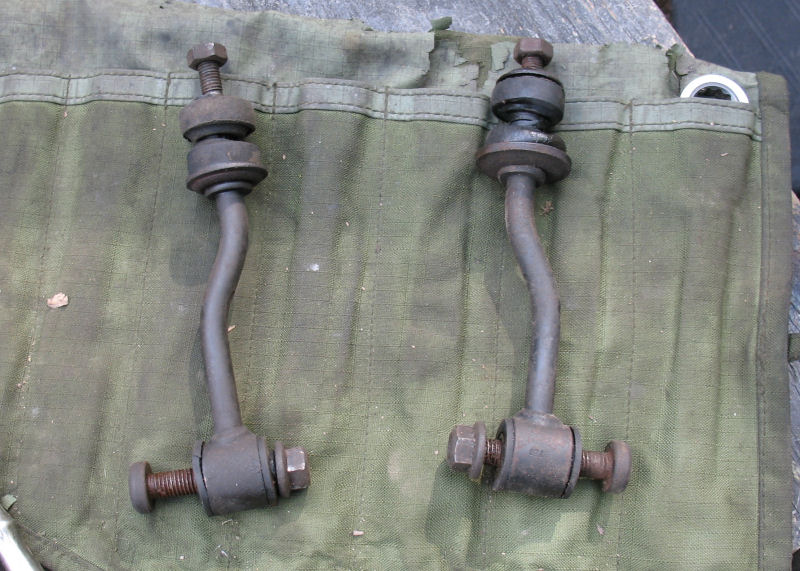
Swaybar links also came off pretty easy once I got the cheater pipe working. Interestingly the pressed-in torx studs twisted free during removal, so I did not have to fight them either.

Original_Front_Swaybar_Links.jpg


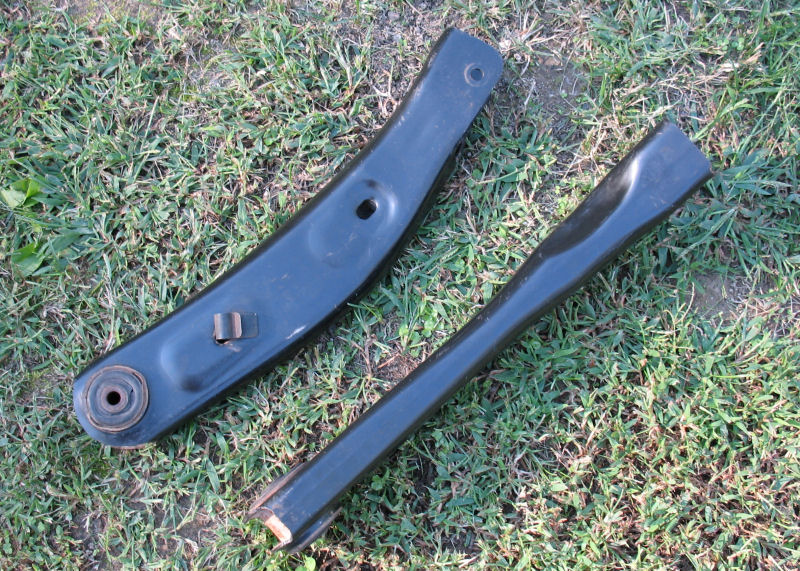
Track bar also came out easily once I figured out what to remove--I damn near twisted one of the weld nuts off.

Original_Track_Bar.jpg


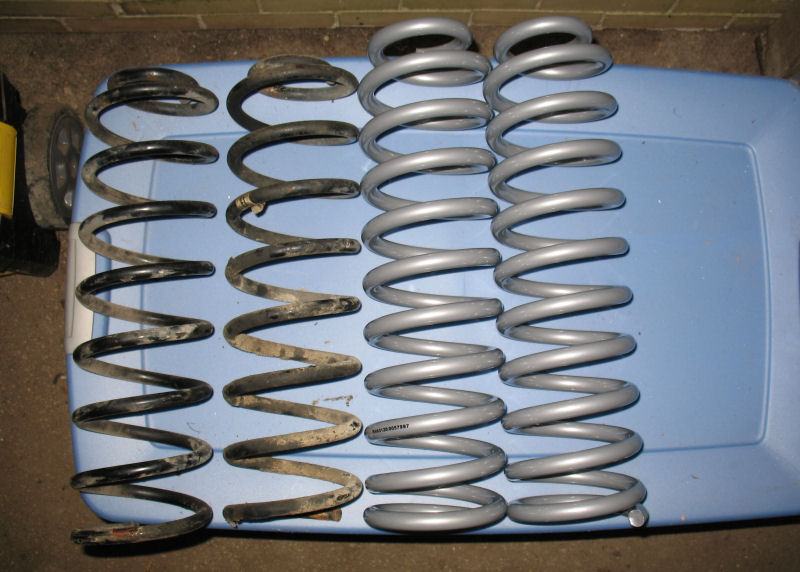
With all that out of the way I was able to use a pry bar to pop the springs out. Here are the stockers next to the RE 3.5 coils.

Original_and_New_Shocks.jpg


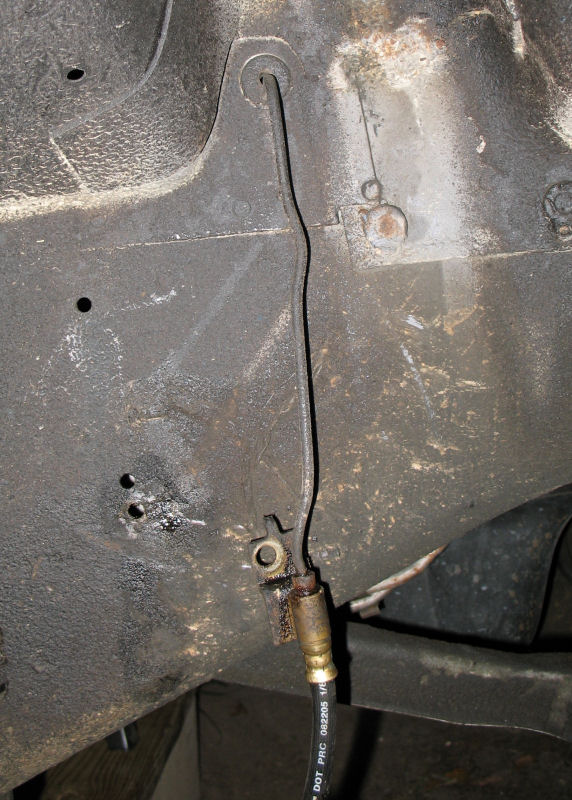
Up til now everything more or less went well. But from here on out there was some fighting. First the brake fittings are corroded where the hard and soft llines meet and they do not want to come off. For now I've bent the line, but I will have to cut and flare the hard line, or drill and attach the line. I'll deal with that later when the new stuff is installed.

Original_Brake_Lines.jpg


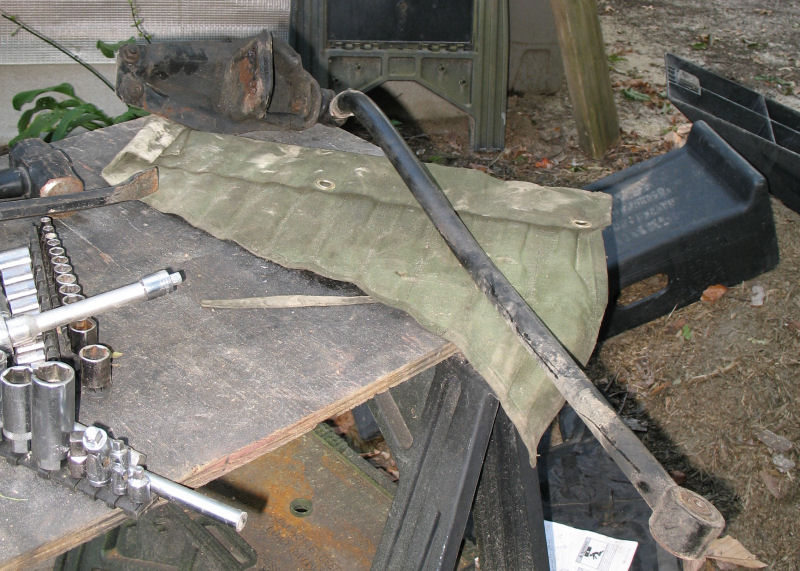
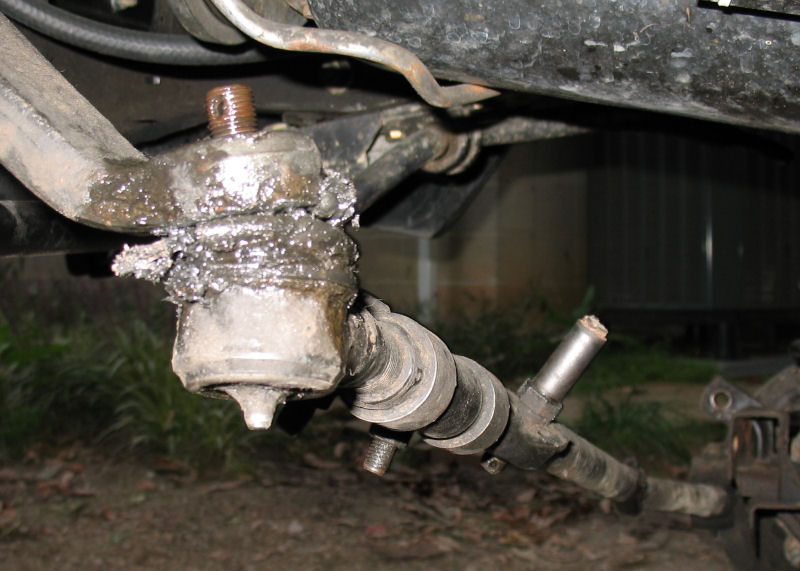
The tie rod came off alright, but the stabilzer ripped through the bushing when it was removed. I have replacements for both so I don't care about the damage here, but the stabilizer sleeve is still on the drag link.

Original_Tie_Rod_and_Stabilizer.jpg


The drag link will not come off the Pittman arm. I've shredded the TRE on it with pickle fork, beat on it, nothing is working. I want to get it off so I can drop the axle to the ground but at this point I am tempted to leave it in place and deal with it after the new lift parts are installed. I may will try disconnecting the long and short TREs so I can focus on the Pittman end with no stress on the long link (short is $10, long is $80). The stabilizer bushing sleeve is still attached too... Figures that since I didn't buy a new drag link this one is getting destroyed.

Original_Drop_Link_1.jpg


I also spent some time trying to turn some of the control arm nuts but ran out of daylight and didn't want to push my luck. With some luck I will get the front removed and reinstalled tomorrow. As of now I have about 5 hours into it.
 
Last edited:
The drag link will not come off the Pittman arm. I've shredded the TRE on it with pickle fork, beat on it, nothing is working. I want to get it off so I can drop the axle to the ground but at this point I am tempted to leave it in place and deal with it after the new lift parts are installed. I may will try disconnecting the long and short TREs so I can focus on the Pittman end with no stress on the long link (short is $10, long is $80). The stabilizer bushing sleeve is still attached too... Figures that since I didn't buy a new drag link this one is getting destroyed.

Original_Drop_Link_1.jpg


I also spent some time trying to turn some of the control arm nuts but ran out of daylight and didn't want to push my luck. With some luck I will get the front removed and reinstalled tomorrow. As of now I have about 5 hours into it.

i had the same issue when i upgraded to OTK steering. couldnt get the pickle fork to work either. but then i was told take a 5# mallet and hit the pitman arm. and it will unfreeze the TRE. we fought it for a good hour. pulled out the mallet and smacked on it three or four times and it dropped straight out. worked like a charm.

keep up the good work buddy
 
i had the same issue when i upgraded to OTK steering. couldnt get the pickle fork to work either. but then i was told take a 5# mallet and hit the pitman arm. and it will unfreeze the TRE. we fought it for a good hour. pulled out the mallet and smacked on it three or four times and it dropped straight out. worked like a charm.


Yep, smack the end of the pitman with a BFH and it'll drop out... same with the knuckle ends.
 
I have always had good luck with heating them. Just a little propane torch, head it up and then whack it. They come out really easy that way.
 
Back
Top