• Welcome to the new NAXJA Forum! If your password does not work, please use "Forgot your password?" link on the log-in page. Please feel free to reach out to [email protected] if we can provide any assistance.

Anyman's build

The one item I have yet to cover on the double Sanden mod was the relocation of my fluid reservoirs, so I'll go over that now.

I had previously relocated my windsheild washer fluid to inside the engine bay where my air box use to be (this was necessitated when I raised my fender flairs 4" and cut my fenders sky-high to match.) And when I relocated my battery I installed a radiator overflow from a ZJ where my battery previously sat.

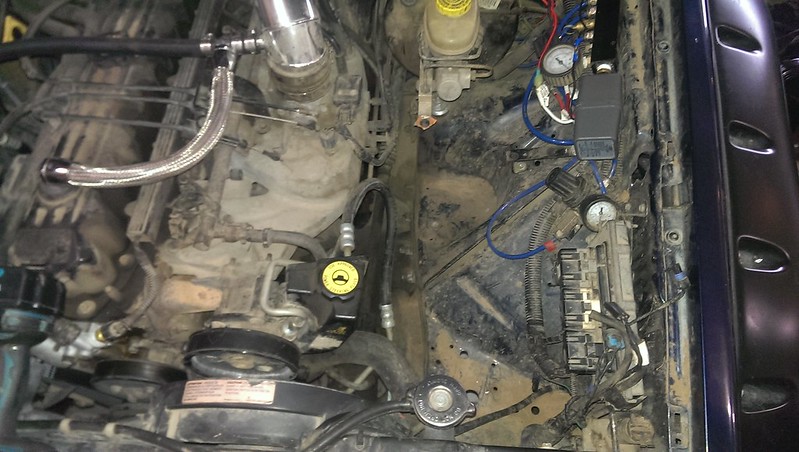
Here's a crappy picture of what I'm talking about, note the radiator overflow in the bottom left and the washer reservoir in the bottom right:

8449834046_507bf22bf9_c.jpg


Okay, so with the addition of the second Sanden I wanted to move the radiator overflow out of the area, and that necessitated changing my washer reservoir (which was always a temporary solution anyway.)

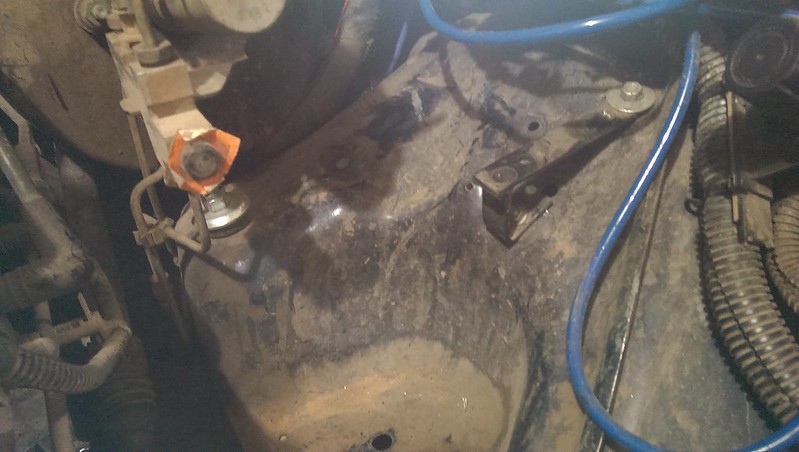
So here is the area on the driver's side I have to work with:

10048364436_a4ed35e57d_c.jpg


On a trip to the Pick-n-Pull sometime over the past year (knowing this day would come) I pulled a couple different radiator overflows and washer reservoirs so I had different sizes to choose from. (The local yard is VERY reasonable with misc. parts like this...) So here's what I ended up with, going back to my stock radiator overflow and an older model XJ(?) washer reservoir:

10048307894_436e1f5606_c.jpg


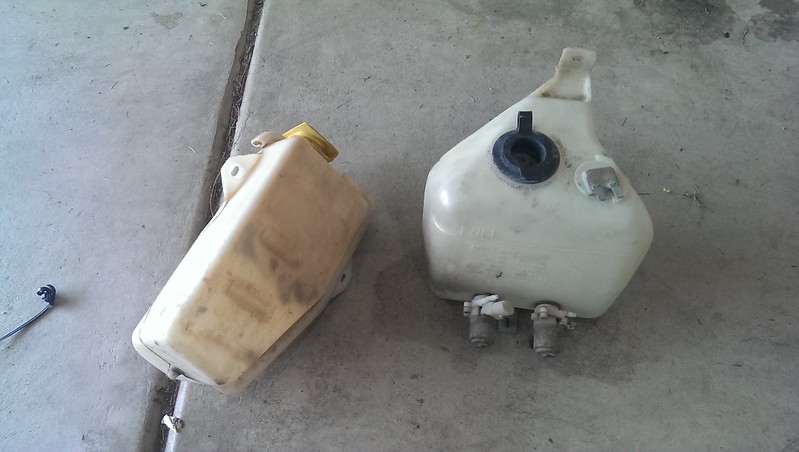
The great thing about these washer reservoirs, I could retain my newer year pumps, the holes are identical across the years (from what I've seen...)

So the washer reservoir was pretty straight forward, fit right in this spot where my air box used to be:

10048339705_2544dc21b4_c.jpg


I just had to build a little support bracket underneath to level it out - this is the first time I've used wood in a mod... what can I say, I was in a hurry to get ready for Moab!

10048449763_9e771b47e6_c.jpg


10048451553_4f8554f5b3_c.jpg


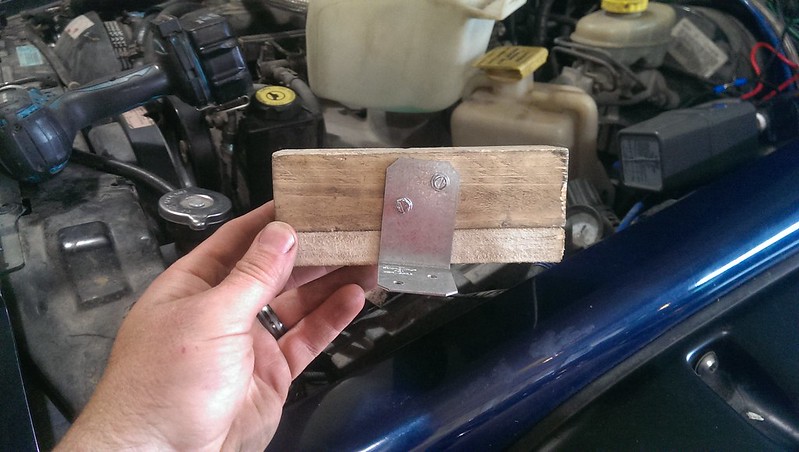
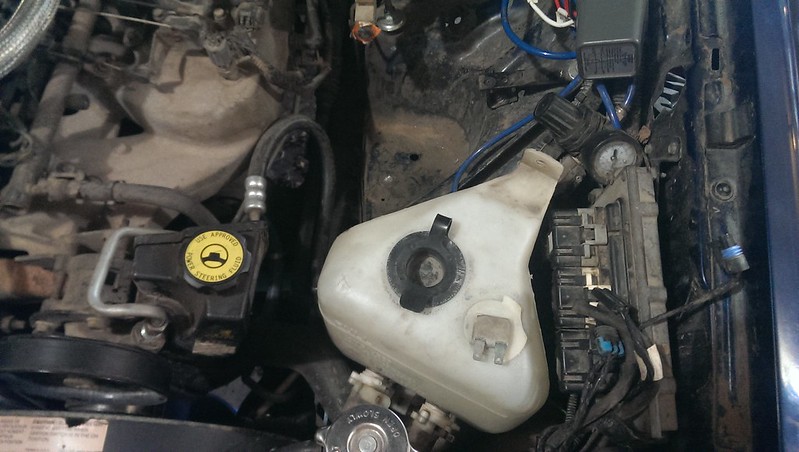
Next was the coolant overflow, which was only a little tricky. This is the spot I put it, and due to the space constraints it was necessary to orient it this way:

10048309694_bde29acb91_c.jpg


Luckily, the bracket I had installed for my old air compressor was perfectly positioned to help me mount the overflow:

10048339895_4d0ce38638_c.jpg


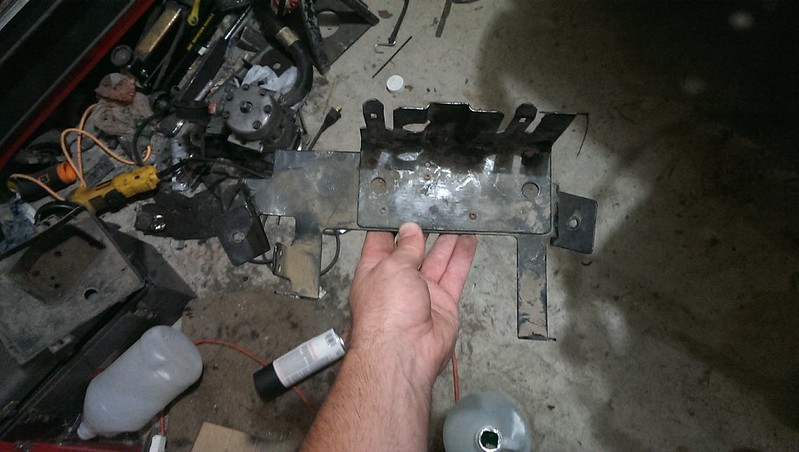
I used the stock mounting bracket and removed the rivits holding the portion that attaches to the electronics in the OEM location and made some cuts and drilled an additional hole to bolt to my old compressor bracket:

10048288014_2b7c4f50e4_c.jpg


10048450903_9629b4d465_c.jpg


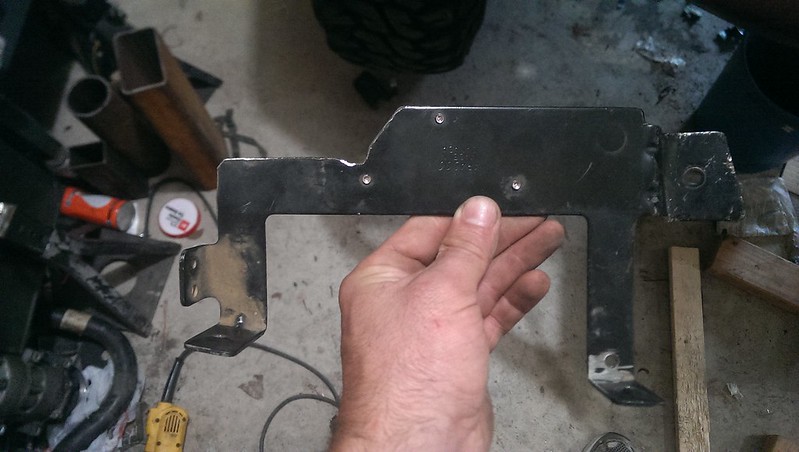
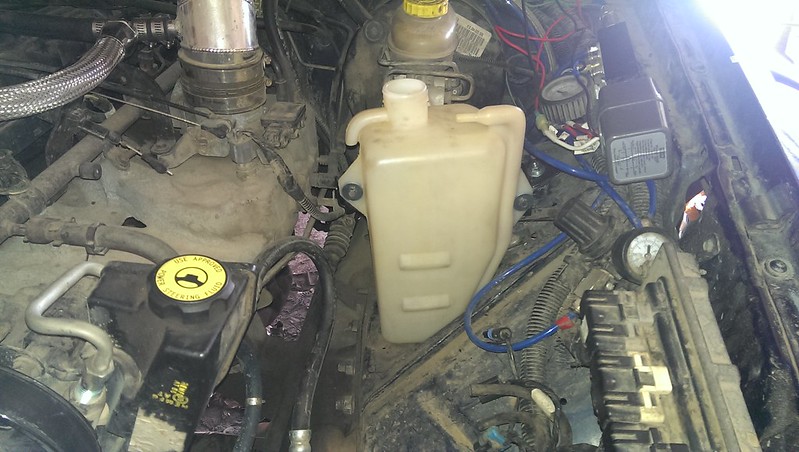
Here you can see the bracket installed and the two bolts - one coming up from inside the fender and one going through the old compressor bracket:

10048323375_7062fa0eb2_c.jpg


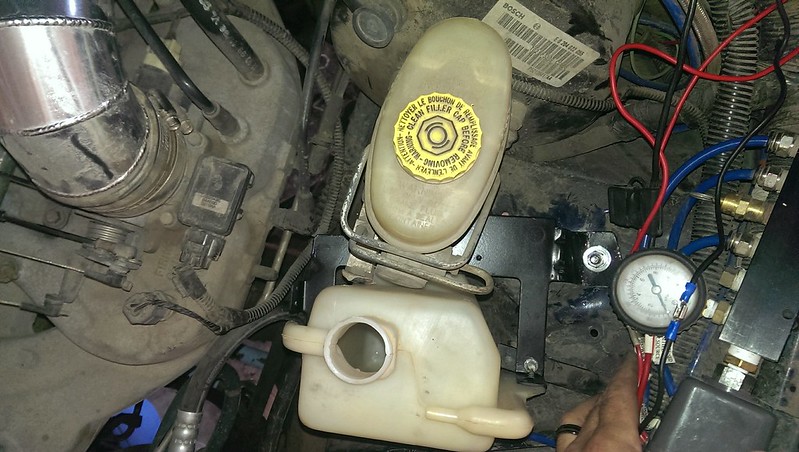
The reservoir looks closer to the brake master cylinder than it is, I have a good 3/8" clearance and it turned out rock solid so I'm not worried about it rubbing at all.

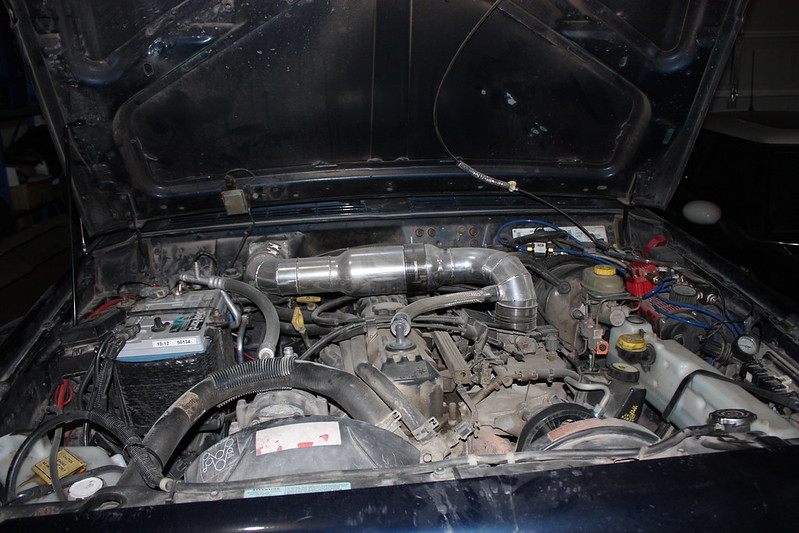
I don't have a pic of just the reservoirs alone, so here's an unmolested birds-eye pic of the entire engine bay as it currently sits:

10662942296_b1db60f713_c.jpg


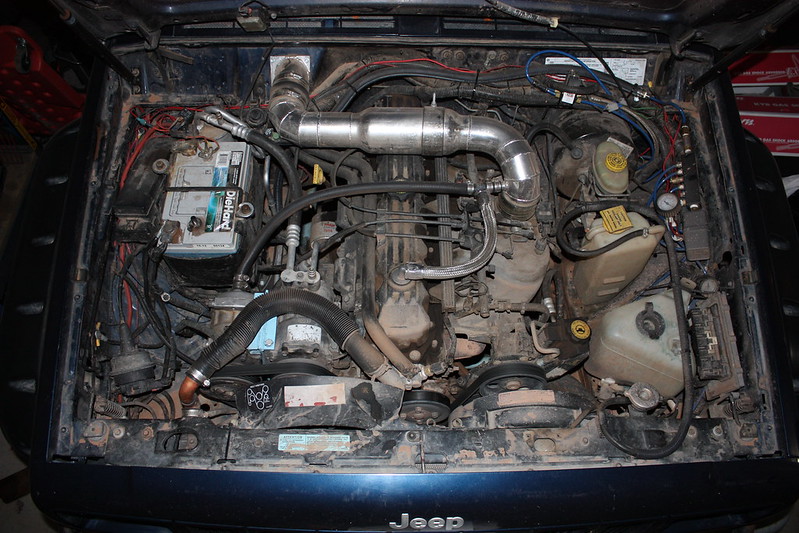
I still need to finalize securing the washer fluid reservoir, it is currently held down with zip ties ... :looser: (well, it held up fine in Moab at least!)
 
Last edited:
Hey, I am looking at mounting a yakima basket on my yakima rails and I really like how low you were able to mount your yakima rails and basket. Is there any chance you can post a photo of how you got it so close to the roof?
Thanks,
FH
 
I just want you to know how much I love you

Thanks buddy, I'm feelin the love.

Hey, I am looking at mounting a yakima basket on my yakima rails and I really like how low you were able to mount your yakima rails and basket. Is there any chance you can post a photo of how you got it so close to the roof?
Thanks,
FH

Man, it seems like people always want to see closeups of the stuff on my XJ that's a total hack-job! :D Alright, fine, nothing fancy but here's what I did:

Basically I tore apart the Yakima towers which attach to the factory rails and used the feet, the base-plate (the metal piece the feet attach to) and the metal "hoop" portion that wraps around the bar. The hoop I bent up at the ends to make "wings" and then I used the same bolt attaching the base plate to the feet to attach these hoops to the base plate. So the bolt goes through the wing on the hoop, through the base plate and into the feet. This way I was able to eliminate the tower all together. Make sense?? :roll:

OK! ... Less the 1000 words:

11959011456_bd181046d1_c.jpg


11958630654_e749cfe16d_c.jpg


In this next pic you can see how close it is to the roof in the center, it measures less than half an inch above those center ridges:

11958624574_7f691a9381_c.jpg


So with the clearance so low, the brackets that secure the rack to the bars won't fit between the roof and the bars in their intended location. I moved them as far outboard as I could. Then I used some pieces of rubber which I taped onto the cross bars where they intersect with the rack's support bars underneath. You can see the electric tape in the below picture. I don't know if this is really necessary as those bars would just arch down the 1/4" or so and make contact if that rubber were not there... (Again we have a very confusing paragraph here, but since you have the rack hopefully you understand what I'm saying! :eeks1:)

Here is the front view:

11958617914_1c6c52e02f_c.jpg


I planned on re-working my cobbled together brackets; I was thinking of using some pipe strap to tie into the plate then cleaning the plate up and painting it all black... But as with so many other projects I've done, once it's working and pressed into service I find the time to go back over it!

The rack is great to have for bulky lightweight items on overnighters - stuff like chairs, sleeping bags and pads. Personally I like the look of safari-type racks like the Con-Ferr and others a little better on an XJ, but the previous owner threw this one in with the XJ for an additional $100 so it was a good deal. I do like the bars extending out a little past the rack so that I can tie longer items directly to them when I want, but they also like to grab rocks and trees so that's a love-hate thing. I always thought I would get a bike attachment but someone gave me a spare-tire bike carrier (which I used once...) so I never did pick up any additional Yakima accessories.

Hopefully this gives you some ideas you can improve upon. Show me what you end up doing so I can copy it! :D
 
So, I keep not posting about my trip to Moab during the aneversary event because I keep waiting to have the time to sort through the HUNDREDS of pictures I ammassed from my group. Every time I sit down to do that I get caught up in looking at all the pictures and don't get anything meaningful accomplished! So screw it, I grabbed a few pics and I'm posting them and moving on.

Quick version: Moab Rocks. We had a great trip.

Long(er) version: ... keep reading

One of my in-laws fried his tranny pulling a zero-turn mower back to Reno from California. He had the tranny replaced only to find his T-case was also hosed. I convinced him to haul it to my place in Utah and we'd fix it before heading to Moab. So Tuesday morning I woke up and tore into his XJ while he slept in a bit, I got to here by the time he woke up:

13371734573_16dd0426c8_c.jpg


13371727053_32353ea1ea_c.jpg


We had sourced a new-used case but we needed to split them to swap in his SYE. Here is what we found inside his case:

13371976474_177507a073_c.jpg


13371737123_0517a7e3fc_c.jpg


Now, I've never looked inside one of these in person, but it didn't take a skilled pro to spot some issues! We suspect that the tranny over heating may have contributed to the problems, but also he has hydro-locked his engine a couple times up in the Fordyce area, which probably didn't help anything :dunno:

Anyway, it took a couple hours longer than we thought (discovered he BADLY needed a new transmission mount, so we had to source that) but we had it back together in relatively short order:

13371596415_a3e0f70379_c.jpg


We threw it in and a quick test drive verified that everything was now sound and he was ready for Moab! :clap:

But first, homade apple pie!!

13371976824_7ed596eac2_c.jpg


Alright! so then I actually had to pack! Well, I was finally on the road around 9pm, we rolled into Moab in the early morning hours.
 
After setting up camp the next day we decided to run Cliffhanger. We have tried to run this trail on two previous Moab trips but it was always impossible due to EJS locking it down. This year we weren't going to have that trouble!

Here is one of my in-laws climbing up out of the river:

13371743613_c023e6c649_c.jpg


As you will see, this trail was trouble for us again... it started with an amusing tire issue - how do things get stuck in there??

13372040004_f3e26bbb51_o.jpg


Not long after that, we came to a fun little ledge to climb. The first rig couldn't quite make it. I made it, with some work. When my brother in-law tried it, he took a hop and BOOM!! drive-shaft explosion:

13371669125_45cbf50ffc_c.jpg


(you can see remnants of the ears at the bottom of the above pic...)

The U-Joint must have been already weakened by years of wheeling, there's no way this should have happened considering what he was doing. But that's how it goes!

Well, we decided that it was late enough in the day we'd better head for town and source a replacement flange adapter and slip-yoke-thingy. I decided I'd "bomb" back down the trail and beat them to town before the stores closed. Well, not far on my way I came off a rock a little sideways and POOF. Lost a bead :rolleyes:

13371860473_a2b4f89afb_c.jpg


(Note to self: Hi-lift jacks are great for getting you out of holes, off rocks, etc, but SUCK for changing a tire! Keep your stock bottle jack under the seat!)

Of course, they caught up to me where I was properly blocking the trail, thanked me for "saving the day" while I borrowed their jack.

Well, I got the wheel off, re-seated the bead and then made it back to town. At Moab 4x4 Outpost I was looking for a used donor drive shaft slip-yoke-thingy and not having much luck. Then one of the mechanics remembered that one of their other guys had swapped out an 8.8 recently. They sold me a used slip-yoke-thingy and flange adapter (and u-bolt) for a song - especially considering it was 5:10pm on a Wednesday night in Moab! (FWIW, Moab 4x4 Outpost has a great bone yard of critical drive line parts and very reasonable prices - I've rummaged through their stuff on EVERY trip I've made down there :sad1: they have always treated me right.)
 
So the next day we were going to run Pritchett Canyon, but it was raining. Since that is the hardest trail we were running this trip we opted to run something a bit more tame and hold out for better weather later in the trip.

We ended up running Dome Plateau. We weren't with the NAXJA 
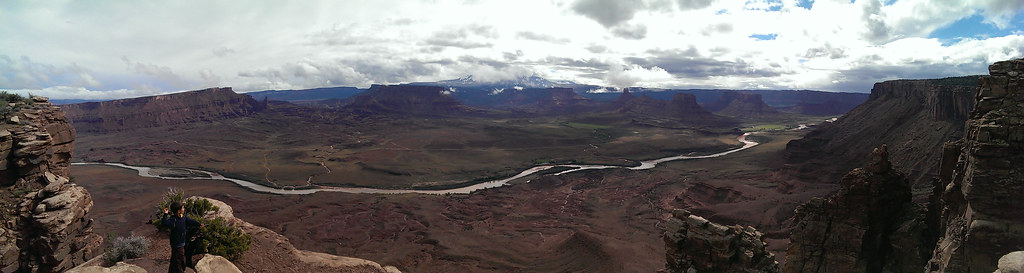
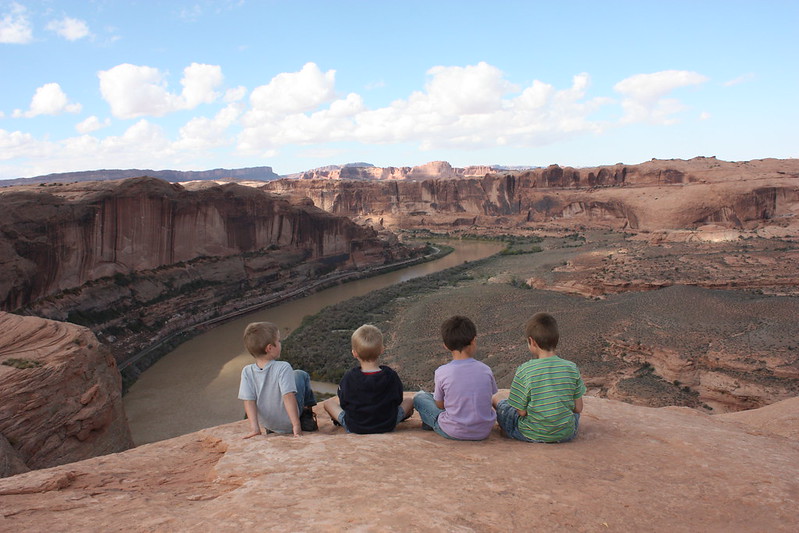
group but we did catch up to them at the scenic overlook, I can't remember the name - it was this one:

13371718045_05e90ecd0f_b.jpg


Nice view!

Later on the trail we came across this arch:

13371613795_305d3ac72b_c.jpg


Then we were in the flats, there was some water pooling:

13372107044_b8bd9ac610_c.jpg


There were also some caves and old abandon structures along the way (mining?). It was a nice, chill day with the family and friends.
 
Pritchett!!

The next day we decided to run Pritchett Canyon. Here again, Pritchett is a trail that has been evading us. The first time we tried to run it we went right past it and ended up in Kane Creek ... we were Moab virgins. :( The next time I broke my front drive shaft right off the bat trying to crawl a boulder. I was foolish and had taken the XJ to Moab after putting on my new TNT longarms and didn't get a shake-down run in.

But this year was the year! So we met up with Eric of Eric's XJ fame and set out to concur the canyon. First things first - I walked right over the boulder that claimed my drive shaft last time!

Eric took some pics I was able to put together and make this animated GIF:

fIpEja.gif


After that I was feeling pretty confident, but that was a bit premature.

Pritchett is one of those trails where obstacles that would have names on other trails don't have names ... there would be too many of them! The only time they get a name is if you pull up to it and say "holy hell, how do I get up that!"

Like this one, though I can't remember it's name...

13371806185_6a6fde06e5_c.jpg


Sadly, I did not concur that without using my winch... the wet sand on the rocks wasn't helping anything, but I still think I should have made it. I think my line was off, I should have used a little more of an angle. But that sucker was STEEP and an angle was muy high pucker factor. :eek:

Speaking of, one of the hairiest parts of the trail, for me, was this silly little section where you had to slide down a sand bank, off camber, and then climb some rocks to get out. Of course to the passenger side there is a drop-off. Not enough to kill you, just enough to put your rig on it's lid... I hated this section - here's my in-law climbing out of it:

13371703355_17f974cf38_c.jpg


Here is Eric at the end of it - his suspension is set up sooooooooooo nicely!

13371678255_c8db6158fe_c.jpg


Here is my in-law conquering another climb, I had to pull my winch on this one as well! Started to piss me off :cry:

13372173624_b6399270a4_c.jpg


At least I made it up Rocker Knocker!

13371696355_4c8a12bf0c_c.jpg


That reminds me: at the Rocker Knocker obstacle we caught up with a crew of LJs, TJs and JKs from some AF base in Texas. Holy crap, not only were they taking TERRIBLE lines (I blame the spotter - a loud guy acting like he invented crawling, but with NO CLUE how to get up an obstacle) but they also were not very skilled drivers. Half of the rigs were more buggy than jeep, but NONE of them made it up Rocker Knocker. Our little pack of XJs walked right up it. :laugh: There was a couple from New Jersey hiking the trail and watching the rigs move along - they were pretty much heckling the group in front of us by the end of it. They said things like, "Hey, hurry up, we want to see these REAL Jeeps climb that!" Oh man it was funny.

Well, all three of us made it out without any breakage. Here we are after the final climb up out of the canyon:

13372062194_64c33ac9f0_c.jpg


While I feel pretty good about conquering Pritchett Canyon, I'm not happy about winching up two obstacles... I shall return!
:banghead:
 
Last edited:
Hell's Revenge - because a trip to Moab isn't a Jeep trip if I don't run it! I love this trail - it's like a nice Sunday drive with spectacular scenery interspersed with optional moments of adrenaline rush. Fun for the whole family!

I like to put my tires up on anything I can find along the way:

13371758823_0ce831ee5f_c.jpg


Cousins chillin while they eat PB&J over a 1000-foot ledge, good times:

13372033834_4caac5a516_c.jpg


(Relax internet-safety-Nazis, they are deceptively far from the actual ledge. Trust me, my wife makes sure they are safe on these trips!)

So this little hill was a fun climb but oddly difficult for both me and my in-law this year... Our rear ends kept bouncing and hopping as we got half way up it. Not sure if that's what people mean by "wheel-hop" but that would be an accurate description for it. I'm wondering if new/better shocks would solve this? I actually have a video, I'll see if I can post it later.

13371787195_863be4bf95_c.jpg


One obstacle I've never conquered on Hell's is the Escalator. The first year at EJS I was too nervous. The next year it was late in the day and we were trying to get back to camp for dinner, so I skipped it again. This time I was game, so here I go!

13372132564_56cd29f63b_c.jpg


That first little ledge is hairy enough, but then you get to a narrow place with a bowl-cuttout area. One side is cutout deeper than the other so you have to manage the hole just right.

13372039884_67dd947c7e_c.jpg


When you're not getting it just right it starts to look like this:

13371803283_70e47ff1f0_c.jpg


And if you don't listen to your spotter and think you "know what you're doing" it gets a little worse:

13372003994_e787d9609c_c.jpg


(above you can see the passenger tire climbing out while the driver's tire still has more hole in front of it.)

If you're bull-headed or you already hit the throttle too much then you end up on your side in that crack. Fortunately I stopped short of that! It was a quick reverse and quarter turn of the steering and she sat down into position just right:

13371629275_636e59507d_c.jpg


Then some smooth throttle and she climbed right out!

13372007194_89ec543608_c.jpg


I saw several pictures of people on their sides from this year's trip - I think the water in the bowl may have been throwing spotters off... For me, all's well that ends well I suppose.
 
So that was Saturday and half our crew left after we got back from Hell's Revenge. A couple of us stayed the night and got some more geocaching in then headed out Sunday around lunchtime.

13371615095_5ee0593ba3_c.jpg


Of course it was a fantastic trip - Moab always is! There was a little bit of rain but enough sun to make up for it. (wife was happy at least!)

I'm looking forward to Fall Fling again this October, though I'm thinking I'll leave most the family home this year. It's too hard to socialize very well if I bring everyone. Probably just me, maybe the two older boys, we'll see.
:guitar:
 
I've been studying escalator videos for 6 months. Is there a way to hit that line without having to back up? Anticipating the placement of your rear tires going up the first hill?

I'm tapping that in 2 weeks. Any pointers would be great.
 
Re: Re: Anyman's build

...Is there a way to hit that line without having to back up?

Yes! People do it all the time, just not me. :D

If I'm not mistaken, you want to hug the passenger side as you get onto that ledge, right up until you just about start to climb out of it, then you go driver. That way your driver side climbs the side of the wall as your passenger climbs out of the hole. If you feel the passenger start to climb too much, stop, hold what you got and back up a bit. Then go more driver and try it again.

It LOOKS pretty intimidating, but if you get it right it's really not bad, I've seen low-slung XJs on 32's tackle it. But if you do it wrong ... well lets just say at EJS I've seen buggies end up on their sides in there. :p

This is a GREAT time of year to be in Moab, you'll have a blast!
 
Re: Re: Anyman's build

I've been studying escalator videos for 6 months. Is there a way to hit that line without having to back up? Anticipating the placement of your rear tires going up the first hill?

I'm tapping that in 2 weeks. Any pointers would be great.

It can be done easily without backing. Taken many rigs of all shapes sizes and build levels (including a liberty) through escalator with no/minimal issues. The trick is once your front tires climb up the first climb turn passenger and get up high on the wall which usually is just above the black marks. Then as you approach the hole turn hard driver into it, once in the hole straighten out and have your front driverside tires sidewall following the edge of the hole perfectly. Once you D side tire climbs out of the hole turn slightly pass. And if you did it right your rear should follow nicely on the upper edge of the hole. Then watch out there's still two more smaller holes that'll put you on your side if you fall into them wrong.


Hope that helps :)
 
Nice vids man.

That was a pretty awesome crab walk there Eric. Can hear you gettin pretty nervous there.

What's the rear shackle setup on your inlaw's rig. And do you have any pics or info on his rockers. Those mini boatsides look pretty sick.
 
And do you have any pics or info on his rockers. Those mini boatsides look pretty sick.

That's probably my favorite part of his rig. He followed Eric's writeup on trimming up the doors and then used some 7.5" x 2.5" angle under them and then flat steel back to the frame. He posted a writeup on Reno4x4 a while back, page 1 has the writeup on it but I think some (all?) of the pics are dead. Page 2 has some detail pics that are still live:
http://www.reno4x4.com/forum/showthread.php/25299-FUNJEEP-XJ-build

What's the rear shackle setup on your inlaw's rig.

His rear setup is a set of 4" XJ lift springs that are rotated 180° (long end facing forward) which combined with TNT U-bolt eliminators on the axle gives him somewhere around 7" of wheelbase stretch. Then he has it paired with some Teraflex Revolver shackles.

The setup is pretty contraversal in all aspects. I've seen lots of people say that rotating your springs backwards like that will shorten their lifespan dramatically and I've also read a lot of negative feedback on the Revolver shackles (unloading at inopportune times, etc.). All I have to go on is his experience with the setup, which is pretty great. He's had it like this for over 5 years now. It sees a lot of road miles and has great manners, and he obviously runs a lot of trails and it does great. My rear flex looks like crap compared to his! He has seen some unloading once in a while, but nothing to make him think about changing it up (and nothing a rear suck-down winch wouldn't fix...)
 
Back
Top