motown2
NAXJA Forum User
- Location
- Long Island,NY
ehall-sweet ideas in here man-what are those tail lights off of?
Yeah I've been thinking about that but then again it's one of those things easier said than done--you pretty much need 3 hands to keep the sensor leads from shorting in the water or to keep the wires from shorting against the pot. Also if this is a 230 switch then it'll be higher than the boiling point of water, which may be a problem. Maybe I'll rig up a coathanger and see what happens.
In the meantime I've looked at other switch options and decided to get the two-pin switch for the 85ish to 95ish BMWs. Most of these use the 3-pin switch I mentioned earlier but there is apparently a 2-pin on/off version that is supposed to come on at 203F (95C) and go off at 194F (90C). Four Seasons part number is 36511, the one I bought from NAPA was ATM part number 1435033. It's a basic 2-pin switch like the others except it is 14mm thread instead of 3/8 NPT.
I had a 3/8 to 1/4 NPT converter laying around so rather than buy another pipe I just drilled out the adapter to 1/2 inch and then used a M14x1.5 bolt to cut a thread in the adapter, then put the adapter into the existing hole in the tube. I also had to get a $2 tube of high-pressure/high-temperature pipe sealant from Lowes, since the thread on the pipe is getting worn from all my swapping switches.
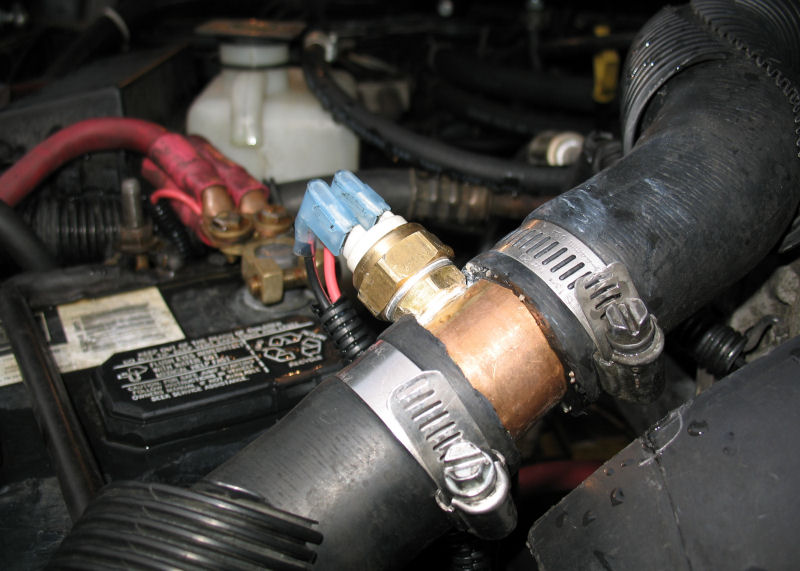
It seems to work a little bit higher than the stated temps but it works great where it is--the switch comes on right when the gauge needle goes to the top of the 210 hash mark and then goes off again when the gauge drops below the hash mark, so basically it comes on after a couple of minutes at a red light then goes off as soon as I start moving again, or after the fan has wicked enough heat off the hose and pipe. Basically that's perfect. I still want to do the 3-pin switch or the SPAL controller but both of those will require some wiring work and I want to get my relay/fuse box done first, as of now I'm very pleased with the way this is working.
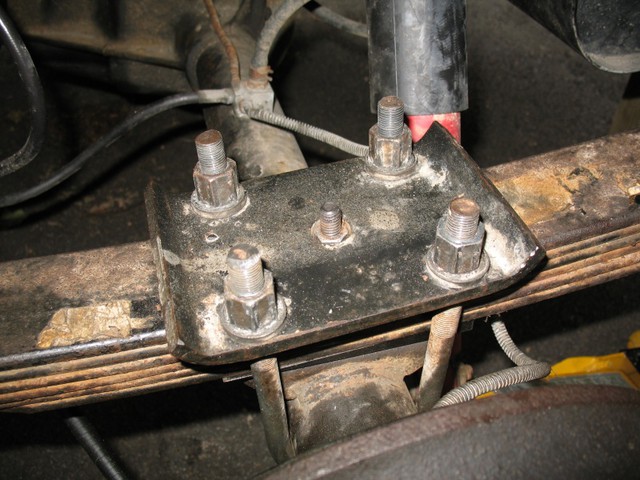
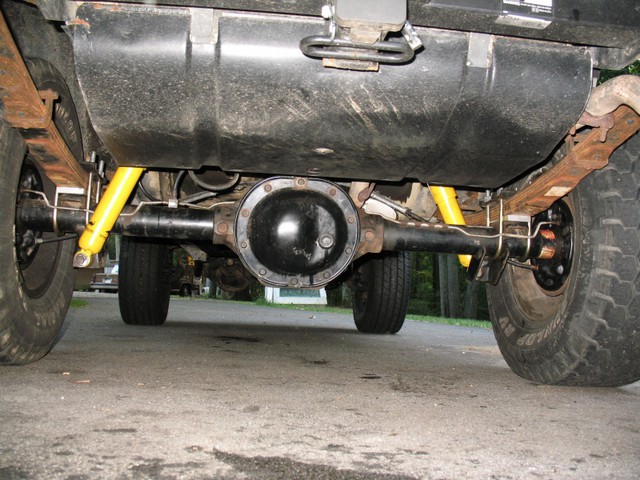
The source of my popping was the lower trackbar bolt, which I somehow stupidly never checked in all of my messing with the upper hardware. Since I was already down there, also decided to retorque control arm hardware now that the lift has settled a bit. The ride is nice and queit now, no more clunking around corners or crossing over road defects. My only real concern at the moment is that the OME steering stabilizer is awfully close to the drag link, and it looks like they might be rubbing in a couple of spots although I don't see any bare metal spots yet. Not sure what to do about that or if I should even worry about it.Last thing was to replace the trackbar bracket hardware with new nuts and bolts. I have been having to periodically tighten the original hardware, and some of the threads on the originals were flattened from rubbing on the bracket, so I figured I would replace all of the old stuff with new parts and see if that helped anything. I found some class 10 flange nuts at True Value, and some class 10.9 bolts in my baggie, and larded them up the red loctite. I still have some popping noises that I need to locate, but I'm pretty sure the bracket isn't moving around.
 :cheers:
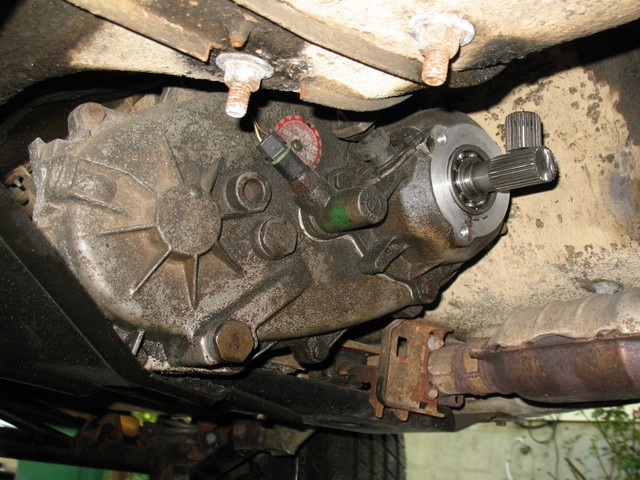
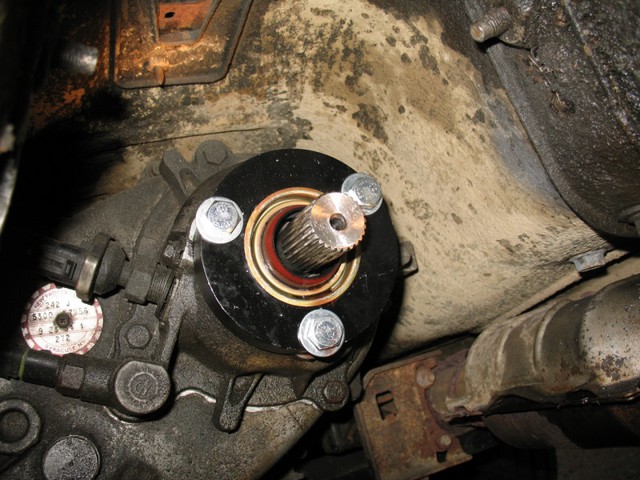
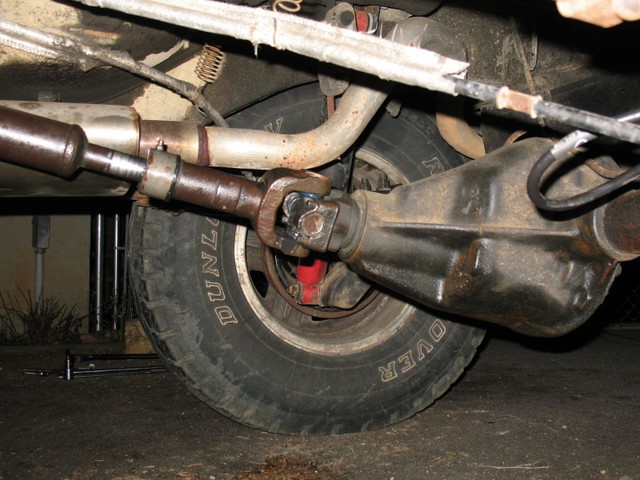
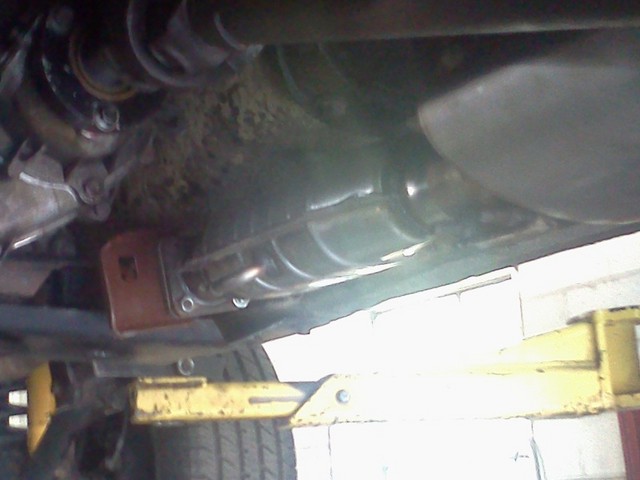
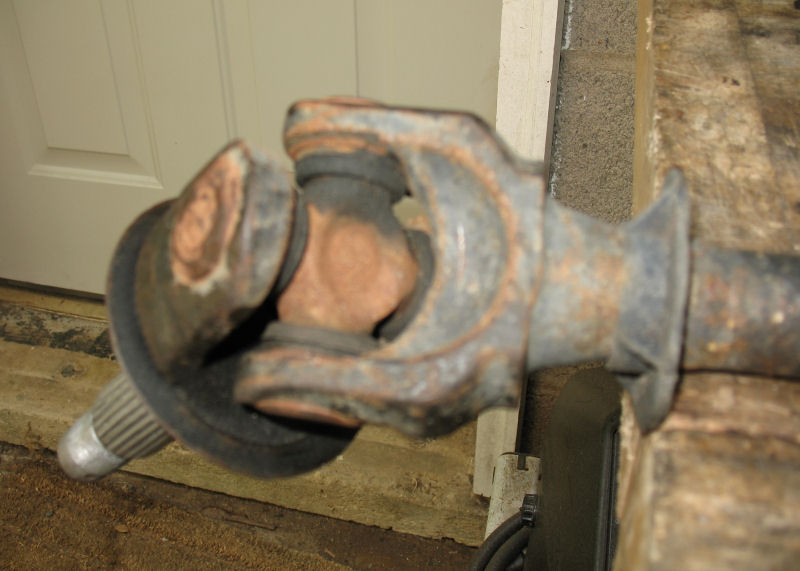
Last week I greased up the caliper bolts and sliders and inspected the axle u-joints. The passenger side u-joint was clearly shot. As you can see below, they are all dry, while the black stain is what's left of a needle bearing that got pulverized somehow. These are the 5-760x that I installed new in Dec 2007, so that is 30 months of use with non-greasable u-joints (sorry for the fuzzy pic).
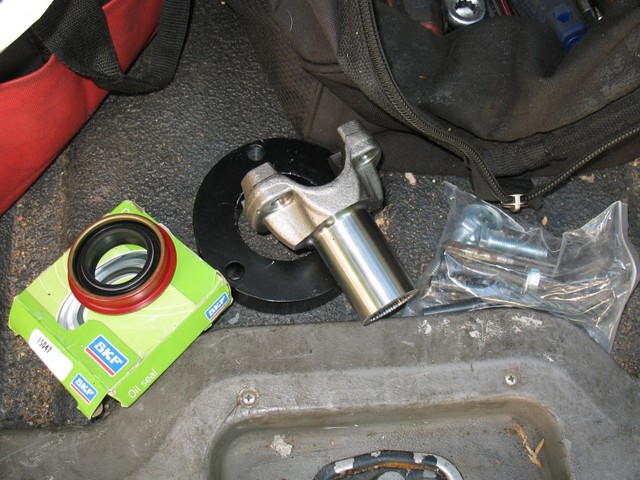
I really need to have greasable joints if I'm going to be doing snow and mud so I decided to buy the Alloy X-Joints. They are solid center like the 5-760x but have zerk fittings on the caps to grease the local bearings. I think Begster runs these on his trail jeep.
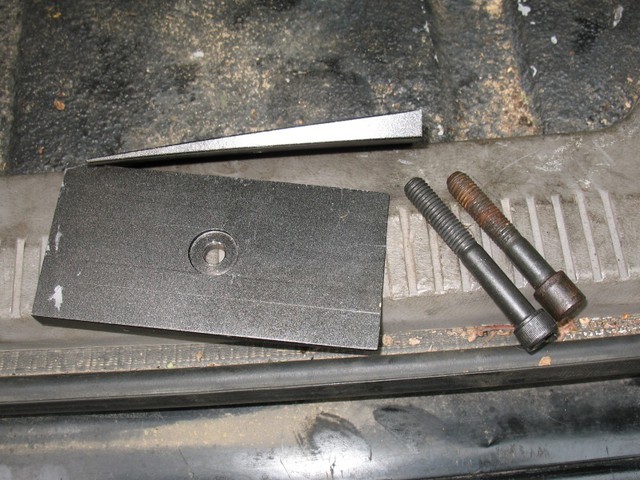
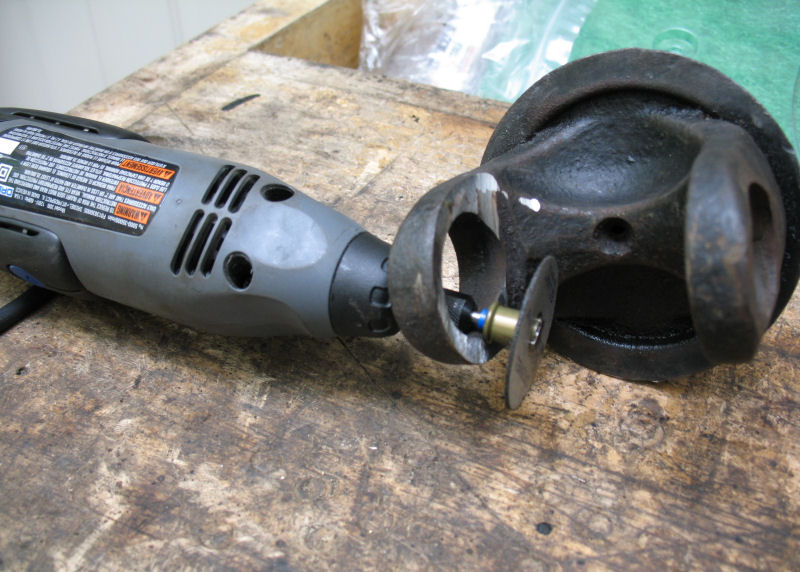
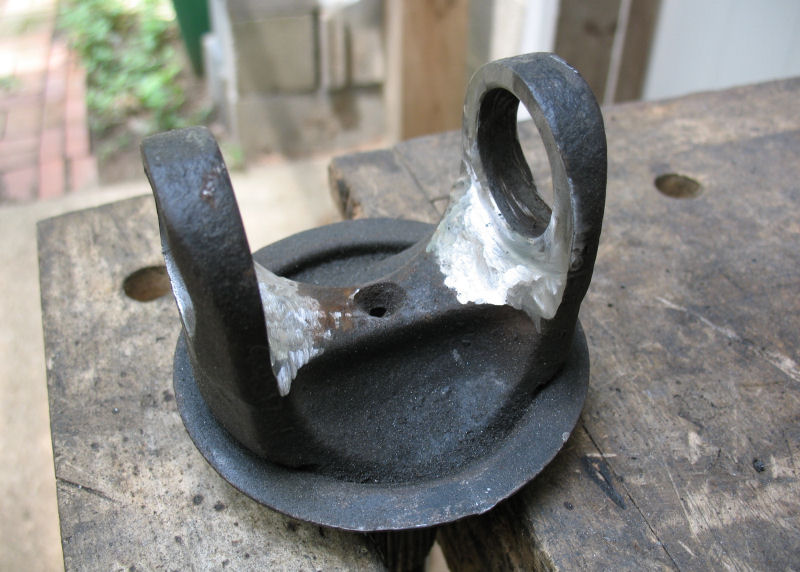
I also decided to clearance for full-circle clips since the Alloys include them in the kit. It looks like the best tool for this is an ~8" bench grinder but I don't have one of those so I had to figure something else. The only thing that worked in the end was running the Dremel through the ears, and clearancing from behind. Slow going to do 4 ears, I probably used half a pack of the reinforced cutoff wheels, but the job got done
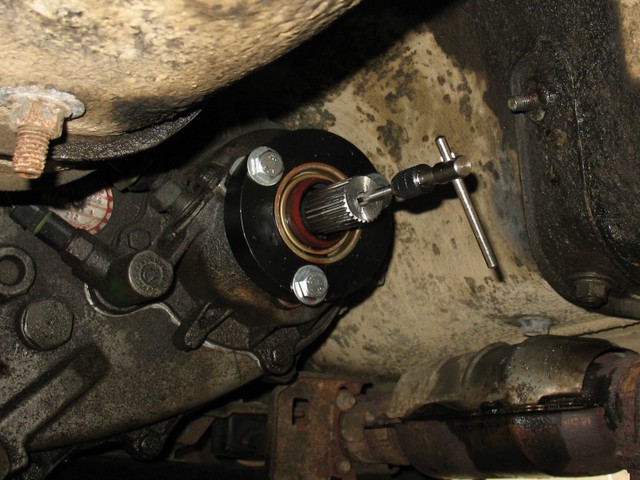
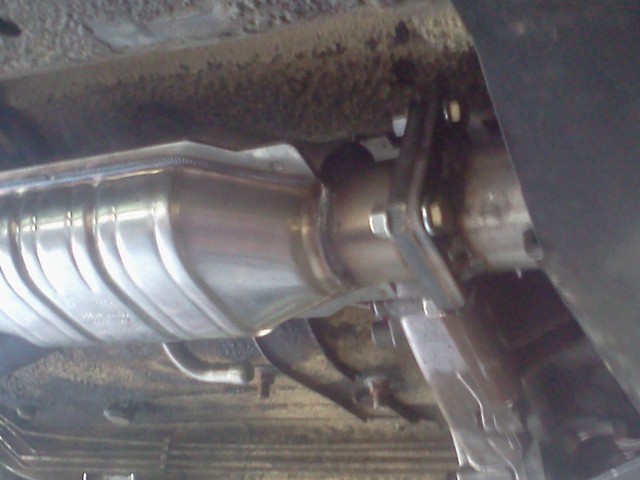
Here's a pic of the X-Joints installed. Smooth and quiet on the passenger side now.
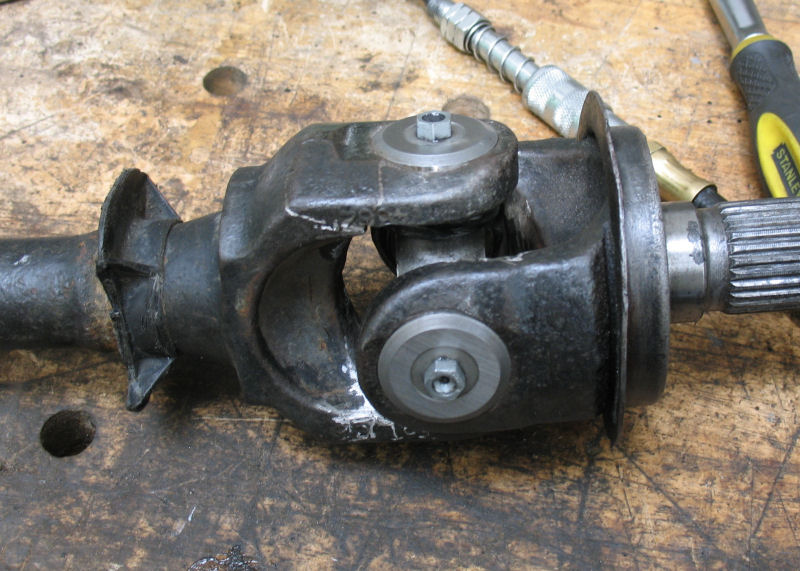
I have another joint for the drivers side, and will swap it out in a few days when weather clears up a bit.
I would probably call that Jeep my jack stand Jeep, rather than my trail Jeep, since it spends a lot more time on jackstands than on the trail.I really need to have greasable joints if I'm going to be doing snow and mud so I decided to buy the Alloy X-Joints. They are solid center like the 5-760x but have zerk fittings on the caps to grease the local bearings. I think Begster runs these on his trail jeep.


I was doing a bunch of work recently, and I was greasing the u-joints (which I really haven't done, and very well could be why one of them is already shot), and the little zerks wouldn't accept any grease. I ended up having to pull off the zerks and just inject the grease directly in there, but when I went to do the passenger side, there was a good amount of play in the joint, and this was the cause for the axle seal. I would say they lasted around a year, as the seal has been leaking for a while.
I wish you better luck with them than I had, just keep them greased.
The zerks wouldn't accept grease on mine either. Like you said, I pulled the fittings out and then filled the cavity directly so that they would have grease. I'd like to experiment with other fittings but for now this is good enough.
The previous joints were Spicers, and were installed soon after the engine swap. The one with the pulverized needle bearing only lasted a year or so I guess.
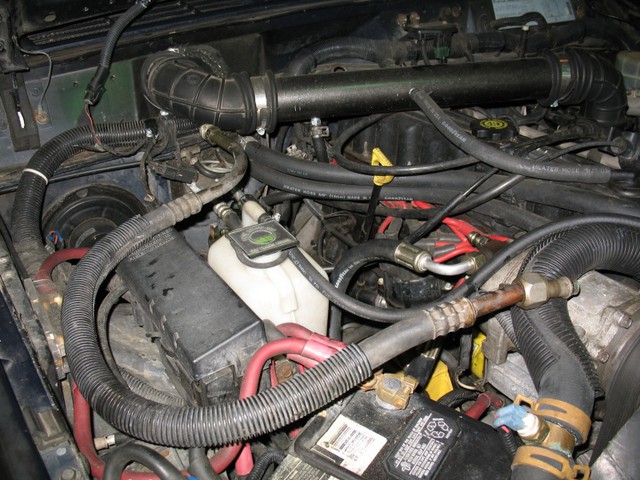
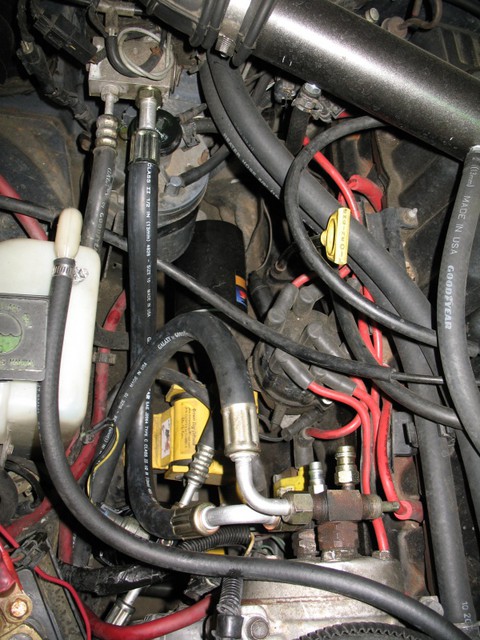
") On the RENIX and early 90s models, the A/C return line from the expansion block to the compressor goes against the passenger fender, behind the PDC, like so:
On the RENIX and early 90s models, the A/C return line from the expansion block to the compressor goes against the passenger fender, behind the PDC, like so: