87xjco
NAXJA Forum User
- Location
- Denver, CO
Xota build-up
This will probably make both Jeep guys and Toyota guys cringe. But, I
rolled my XJ and I have some bucks into the Detroit locker and true trac & 4.56 gears
in the differentials, and since the motor and trans. run real good. I
decided to do this project. I could of picked up another XJ body cheap
but it is hard to get big tires on an XJ and I find myself needing a truck
for hauling often.
I also didn't want to just chop the roof as I want it for cold weather driving.
So my solution is to buy a Toyota cab and frame (found one for $150.00)and use all the XJ
drivetrain and electrical.
Crazy? maybe. Cheap? hopefully.
I'll start with the XJ teardown.
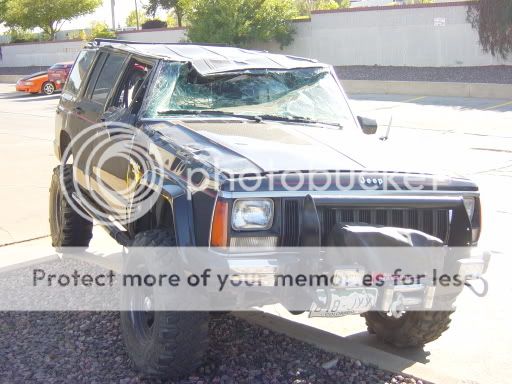
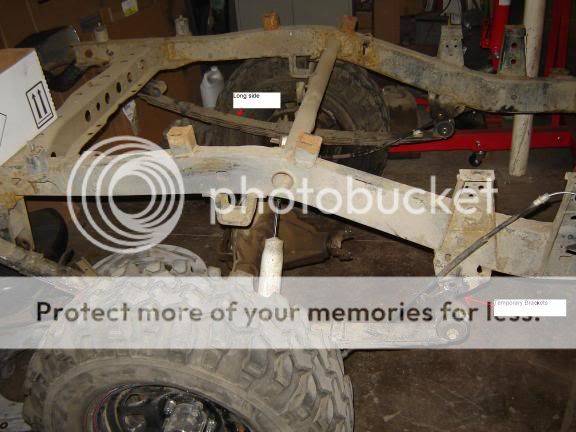
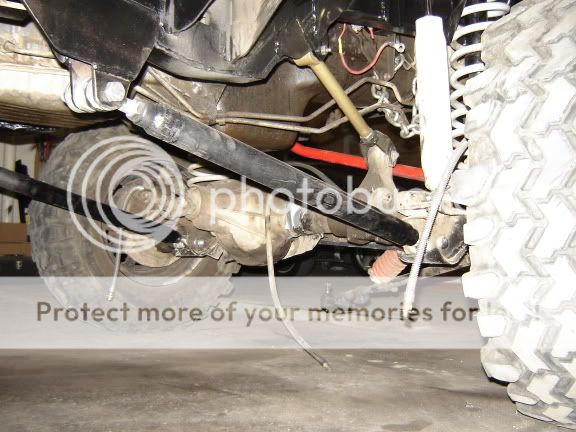
Before the roll

The XJ was rolled on "Widow maker hill" above Boulder Carnage.
10/2/05

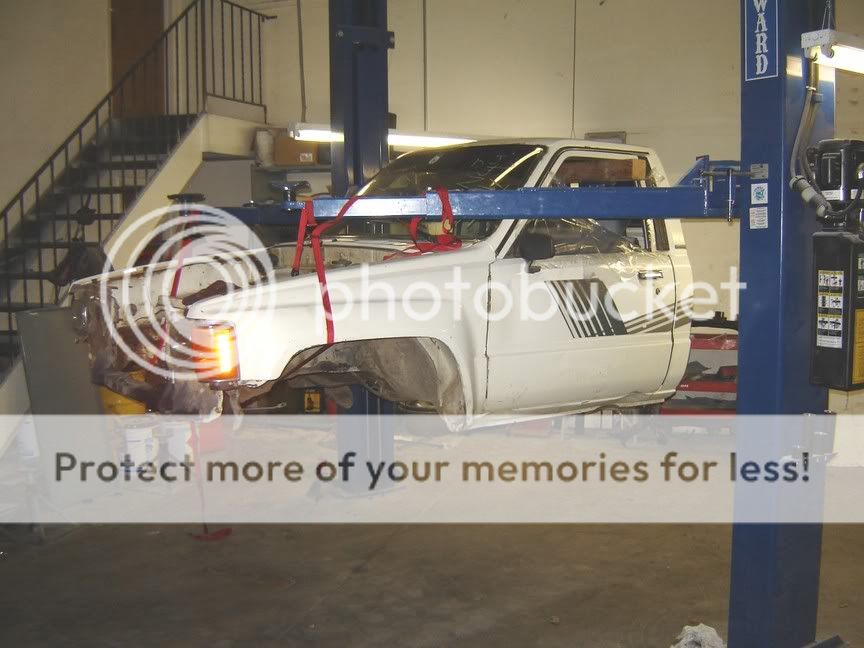
Used a sawzall to cut off the roof. I'll need to remove most of the dash to
get out the complete wiring loom and computer. The way the roof was crushed
in it would have been difficult. I will also probably use the console, front
seats, shifters, and who knows what else.
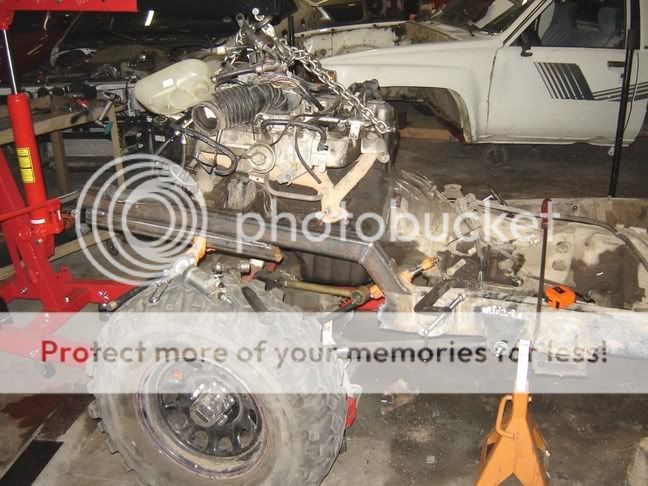
Engine is ready to come out.
10/11/05


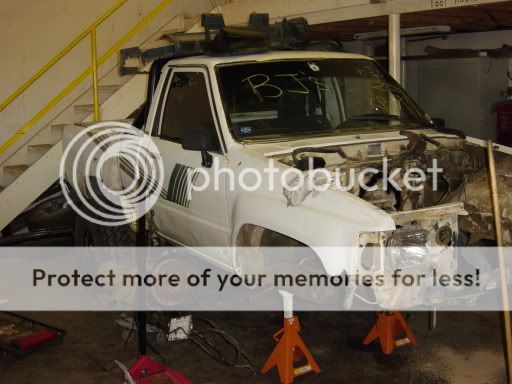
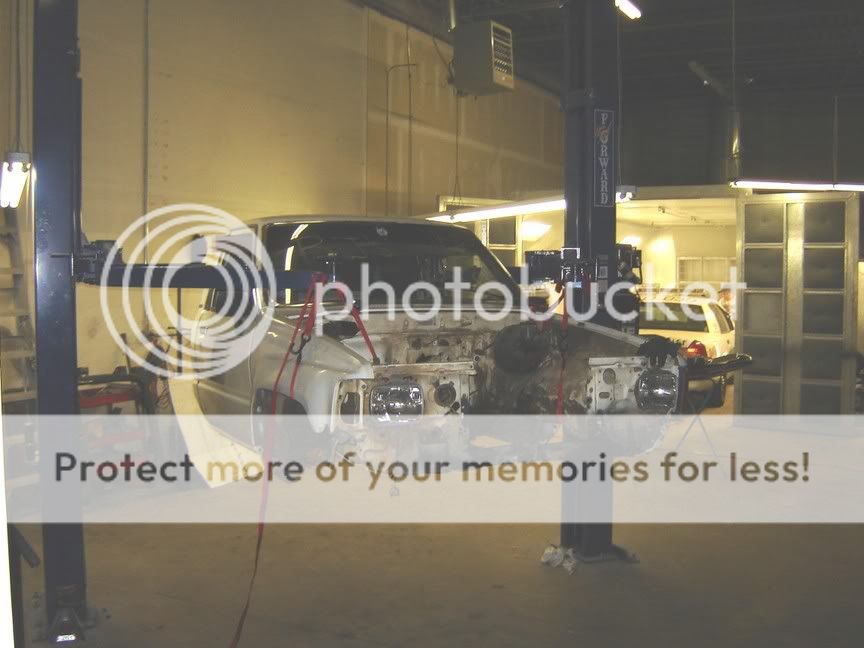
Pic's of the Toyota.
It is a 1987 Toyota. Prod. date 4/87. I am cutting off the front frame rails and getting rid of the IFS. I will build my own front frame rails.
10/15/05
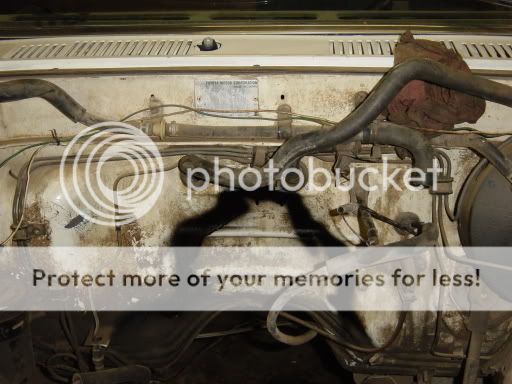
I test fit the engine in the engine compartment and the I-6 is very long for
this Toyota. It is going to take some work to get it to fit. The painted
outline may end up being a cut line for the firewall to gain clearance.
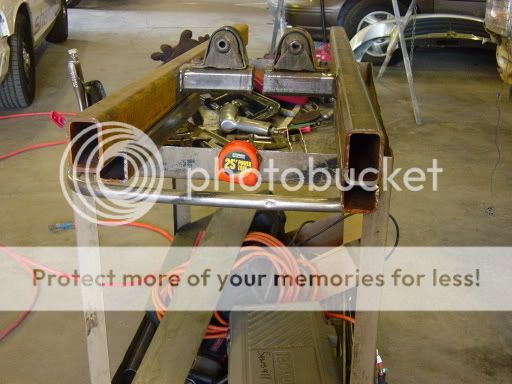
Started building the front frame rails. The rails are 1/4" wall 2X3.
10/18/05
Cab is now off and I've started mocking up the Lt. Rail.
10/21/05
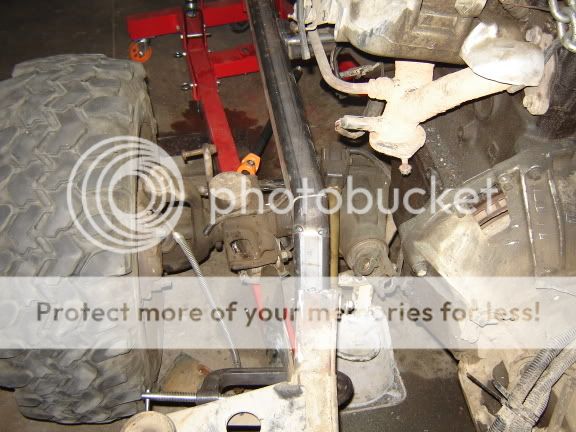
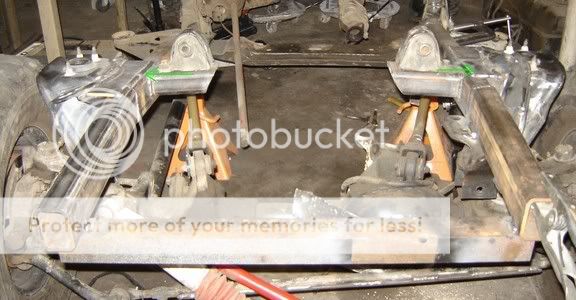
Setting up the position of the lower c/arm brackets was pretty easy.
Once I knew how far back the engine would be in the frame by test installing
with the cab on, I made some temporary brackets and mounted the
trans. x-member in place at the same height as in the XJ. Then I set the
engine at the same motor mount height as the XJ. Then I measured forward
from the trans. x-member the same distance as the XJ had, and mounted some
more temporary brackets for the lower c/arms to bolt to.
This way I know the front diff. is the same distance away from the transfer case
as it was in the XJ and I'll have the same oil pan clearance. Then when I put the
upper c/arms at the same height as the XJ, I'll have the same drive line angles.
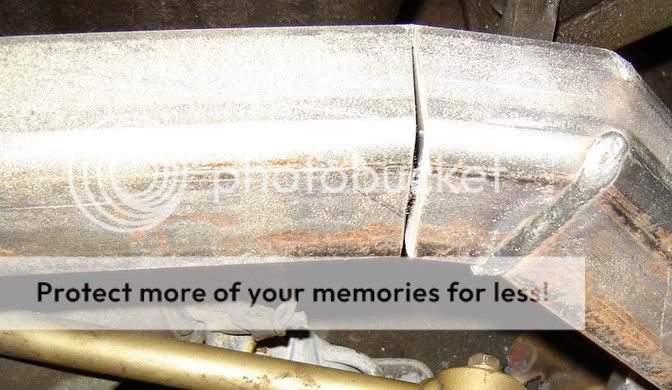
Then I figured out the angle that needed to be put in the front rail and notched
and welded the rail and mocked it into place. There will be plating at the connection between old and new frame.
The drawing below shows all the measurements taken off of the XJ before teardown
and a basic drawing of how the Toyota will look.

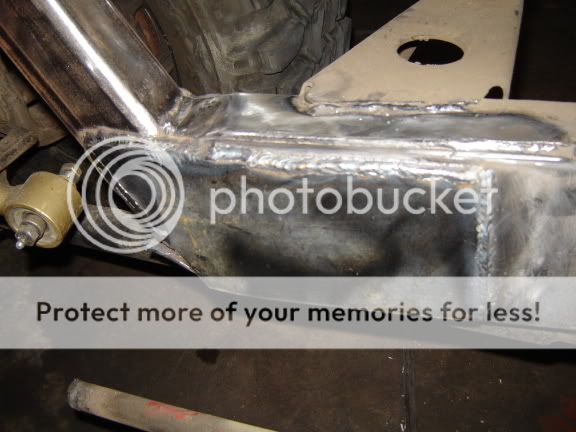
The rails have some interesting bends to fab.
I will bevel the edges and then weld up this second notch.
Page Break
I have the rails built and positioned where I want them.
10/22/05

Welded them to the Toyota frame. My vertical welds from the new rails to the old are not coming out to good.
Looks like I'll have to grind it off and put the frame on it's side for many
of the welds.

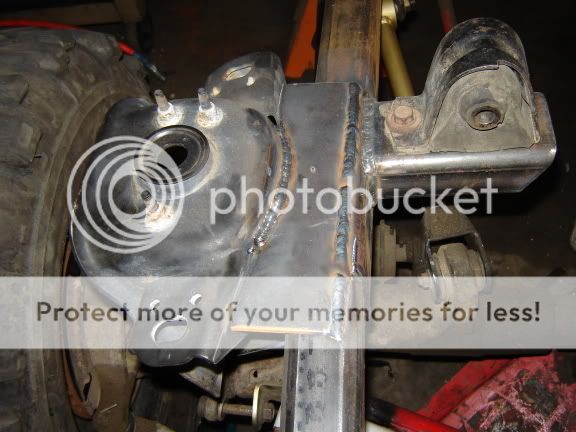
Made some plates to reinforce the connection and welded one of them on
I have my spring seats and track bar mount bracket in place now. I got the spring seats off of a bent 05 Explorer frame that we had replaced.
10/25/05
Now with the springs in and no weight on the front it would be a good
time to bolt on the front shocks and extend them all the way out and position
the upper shock mount.
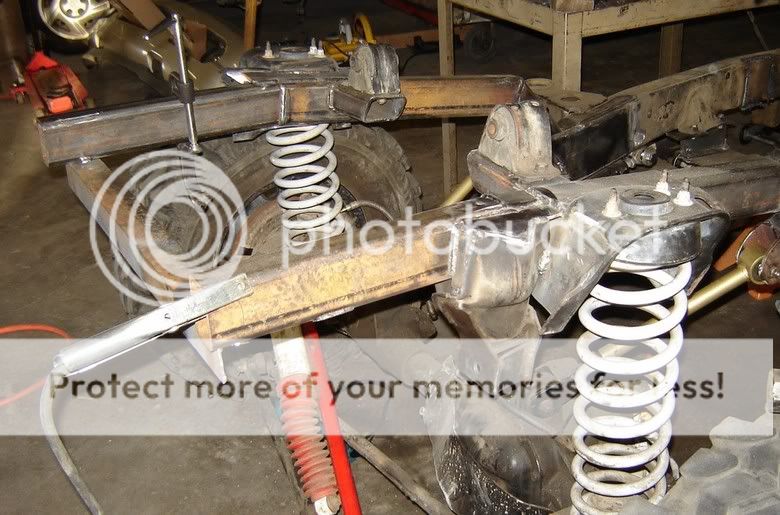
I didn't realize until just now how tall the shock bracket will need to be.
I'll set the shock bracket so that the down travel will allow the spring to come out of it's seat by about 1 1/2". I will install some sort of limiter so that the shocks are not used as travel limiters.

Shock mounts are in place. Just need to add some gusseting.
10/27/05
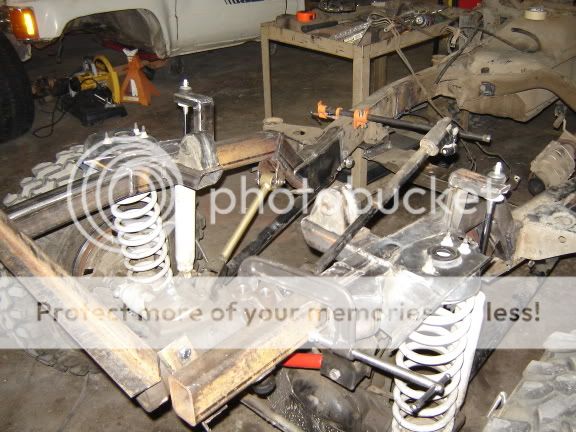
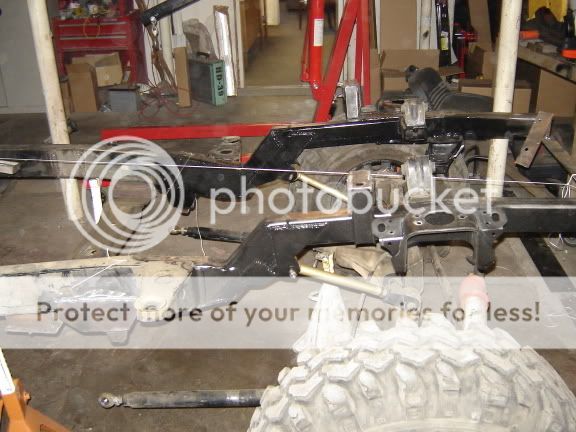
Finally, the front frame mock up is done. Just need to get the frame off the diff's and add some more gussets and do some more welding and some trimming. Then I'll clean and spray paint frame.

As you can see I just have the rear diff. bolted up to some temporary brackets. I will wait to do the rear diff. fabrication until I have all the weight back on the frame. But I think I will swap the springs side to side and put the long side in the front to get a longer wheel base.
Underside of the frame is done and painted.
10/31/05

I am now able to bolt up the front differential. Since all 4 control arms are adjustable, I want to make sure it is centered and that the wheel base is even side to side.
Here is what I did;
1: First I leveled the frame
2: Then I found two holes near the rear of the frame that were in the same location on both rails. I tied a string that went from hole to hole and then I measured and marked center.
3: Then I did the same up near the center of the frame
4: Then I ran a string that intersected both those center points and tied it off on the temporary angle iron that is across the very front of the frame.

5: Then I tied a string across from each of the upper ball joint grease
zerks, then measured and marked the center.
6: Then I used a plumb bob hanging down from the center string and aligned the axle center with the plumb bob and then measured back from each ball joint zerk to a point on the frame that is equal on each side of the frame (I used the cab rear mount hole). Keeping the axle centered I used each adjustable upper control arm to set the distance equal on each side.
This should give me a front differential that has the same wheel base side to side and be centered with the frame. I'll use the lower control arm adjustments to set the pinion angle.
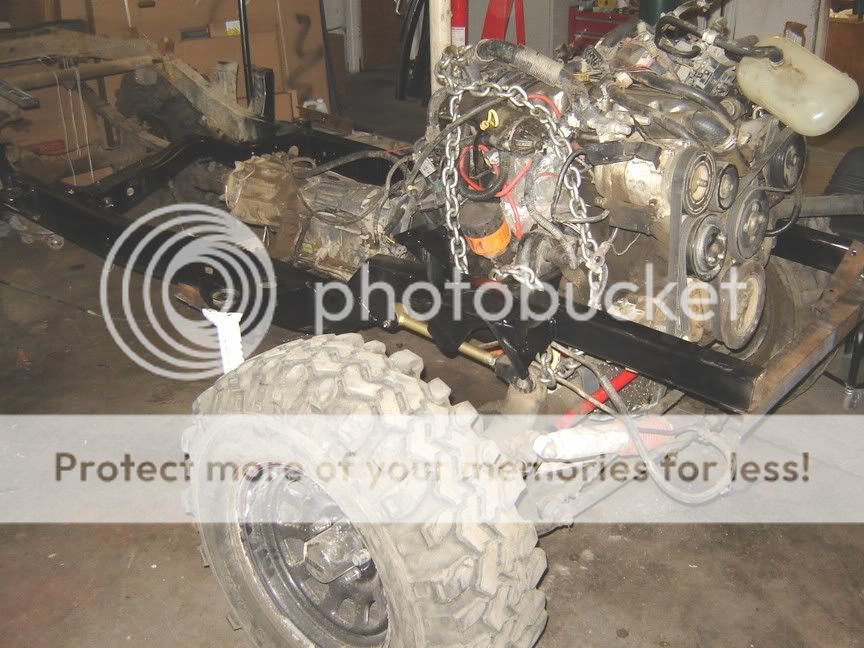
Woo Hoo!
Engine is installed (hopefully for the last time) and frame work is all painted. Just need to do a little work on the spring seats (weld in some center tubes) and I'll put all the front suspension back together. Then I need to build a better transmission crossmember. And then... and then... and then...........
11/1/05


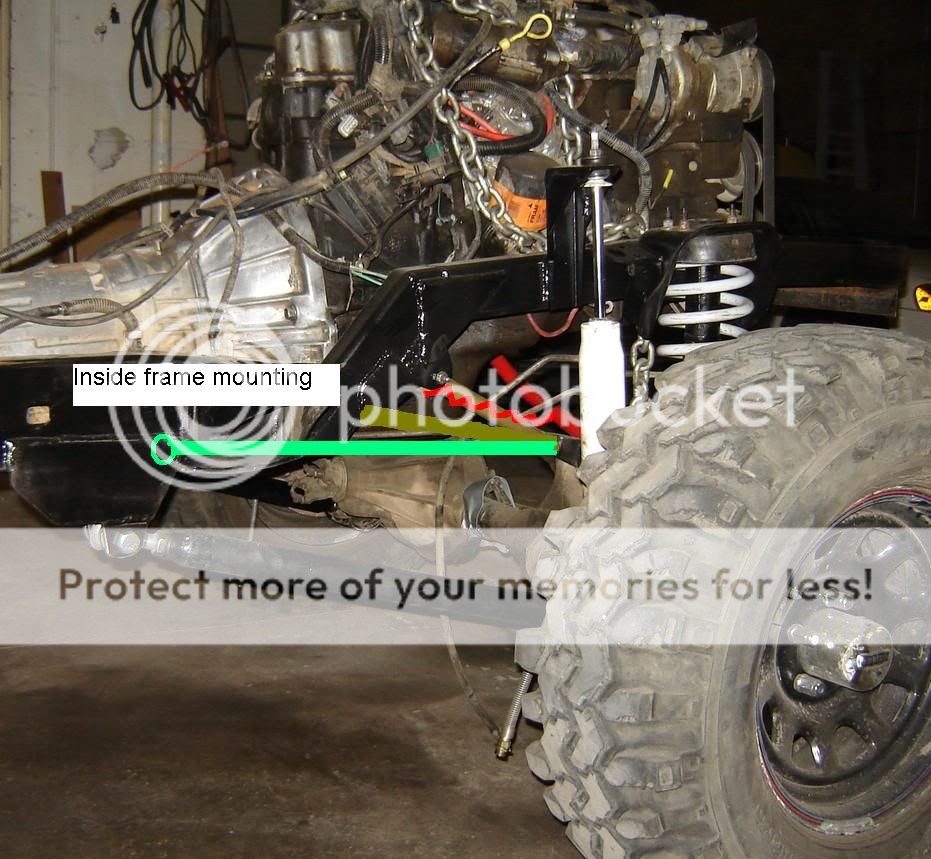
Suspension is all together except for mounting the steering gear.
When I was putting this frame together I basically just put everything in the same position as it was in the XJ and the XJ handled good. But after seeing the angle on those UCA's it was obvious that they need to be longer and repositioned like you see in the drawing. I'll do that later and post.
11/3/05
Cab is ready to set back on frame. I need to have cab in place to set up steering gear box and column and to run fuel & brake lines.
But it will come back off again later for painting etc...
11/4/05
Cab is set on frame. It will look alot better with some bigger tires.
11/5/05

I still have some work to do for clearance near the throttle pedal. I'd like to get about a 1/2" so I can put some heat shielding in.
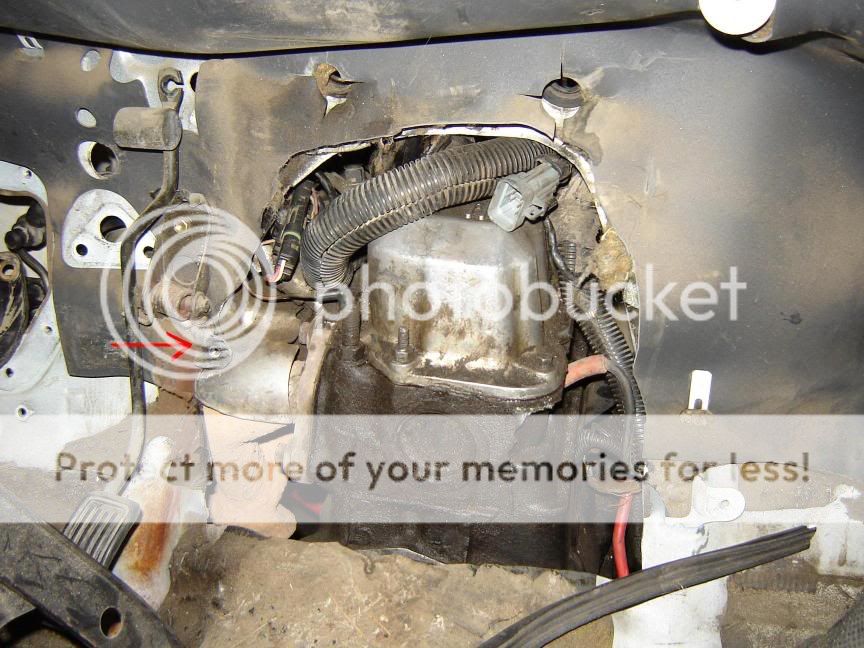
I couldn't really put the engine any further forward.

Yes it runs!!!! Just started it for a few seconds as there is no radiator in place yet. I hooked up the wiring to computer,
relays, engine, grounds, etc.. I just routed the looms over the fender thru the window into the cab and plugged in the column.
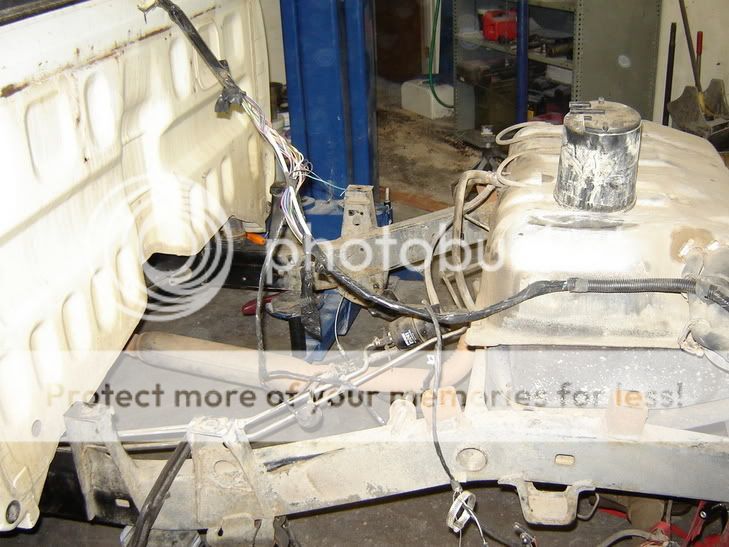
I set the fuel tank on the back & hooked up the wiring and hoses and ran a ground. I wanted to make sure it would run again and
that I didn't have any new problems I would need to figure out.
It started easily and fuel pump runs. Now i'll start running the looms where they need to go.
11/09/05


This will probably make both Jeep guys and Toyota guys cringe. But, I
rolled my XJ and I have some bucks into the Detroit locker and true trac & 4.56 gears
in the differentials, and since the motor and trans. run real good. I
decided to do this project. I could of picked up another XJ body cheap
but it is hard to get big tires on an XJ and I find myself needing a truck
for hauling often.
I also didn't want to just chop the roof as I want it for cold weather driving.
So my solution is to buy a Toyota cab and frame (found one for $150.00)and use all the XJ
drivetrain and electrical.
Crazy? maybe. Cheap? hopefully.
I'll start with the XJ teardown.
Before the roll
The XJ was rolled on "Widow maker hill" above Boulder Carnage.
10/2/05
Used a sawzall to cut off the roof. I'll need to remove most of the dash to
get out the complete wiring loom and computer. The way the roof was crushed
in it would have been difficult. I will also probably use the console, front
seats, shifters, and who knows what else.
Engine is ready to come out.
10/11/05
Pic's of the Toyota.
It is a 1987 Toyota. Prod. date 4/87. I am cutting off the front frame rails and getting rid of the IFS. I will build my own front frame rails.
10/15/05
I test fit the engine in the engine compartment and the I-6 is very long for
this Toyota. It is going to take some work to get it to fit. The painted
outline may end up being a cut line for the firewall to gain clearance.
Started building the front frame rails. The rails are 1/4" wall 2X3.
10/18/05
Cab is now off and I've started mocking up the Lt. Rail.
10/21/05
Setting up the position of the lower c/arm brackets was pretty easy.
Once I knew how far back the engine would be in the frame by test installing
with the cab on, I made some temporary brackets and mounted the
trans. x-member in place at the same height as in the XJ. Then I set the
engine at the same motor mount height as the XJ. Then I measured forward
from the trans. x-member the same distance as the XJ had, and mounted some
more temporary brackets for the lower c/arms to bolt to.
This way I know the front diff. is the same distance away from the transfer case
as it was in the XJ and I'll have the same oil pan clearance. Then when I put the
upper c/arms at the same height as the XJ, I'll have the same drive line angles.
Then I figured out the angle that needed to be put in the front rail and notched
and welded the rail and mocked it into place. There will be plating at the connection between old and new frame.
The drawing below shows all the measurements taken off of the XJ before teardown
and a basic drawing of how the Toyota will look.
The rails have some interesting bends to fab.
I will bevel the edges and then weld up this second notch.
Page Break
I have the rails built and positioned where I want them.
10/22/05
Welded them to the Toyota frame. My vertical welds from the new rails to the old are not coming out to good.
Looks like I'll have to grind it off and put the frame on it's side for many
of the welds.
Made some plates to reinforce the connection and welded one of them on
I have my spring seats and track bar mount bracket in place now. I got the spring seats off of a bent 05 Explorer frame that we had replaced.
10/25/05
Now with the springs in and no weight on the front it would be a good
time to bolt on the front shocks and extend them all the way out and position
the upper shock mount.
I didn't realize until just now how tall the shock bracket will need to be.
I'll set the shock bracket so that the down travel will allow the spring to come out of it's seat by about 1 1/2". I will install some sort of limiter so that the shocks are not used as travel limiters.
Shock mounts are in place. Just need to add some gusseting.
10/27/05
Finally, the front frame mock up is done. Just need to get the frame off the diff's and add some more gussets and do some more welding and some trimming. Then I'll clean and spray paint frame.
As you can see I just have the rear diff. bolted up to some temporary brackets. I will wait to do the rear diff. fabrication until I have all the weight back on the frame. But I think I will swap the springs side to side and put the long side in the front to get a longer wheel base.
Underside of the frame is done and painted.
10/31/05
I am now able to bolt up the front differential. Since all 4 control arms are adjustable, I want to make sure it is centered and that the wheel base is even side to side.
Here is what I did;
1: First I leveled the frame
2: Then I found two holes near the rear of the frame that were in the same location on both rails. I tied a string that went from hole to hole and then I measured and marked center.
3: Then I did the same up near the center of the frame
4: Then I ran a string that intersected both those center points and tied it off on the temporary angle iron that is across the very front of the frame.
5: Then I tied a string across from each of the upper ball joint grease
zerks, then measured and marked the center.
6: Then I used a plumb bob hanging down from the center string and aligned the axle center with the plumb bob and then measured back from each ball joint zerk to a point on the frame that is equal on each side of the frame (I used the cab rear mount hole). Keeping the axle centered I used each adjustable upper control arm to set the distance equal on each side.
This should give me a front differential that has the same wheel base side to side and be centered with the frame. I'll use the lower control arm adjustments to set the pinion angle.
Woo Hoo!
Engine is installed (hopefully for the last time) and frame work is all painted. Just need to do a little work on the spring seats (weld in some center tubes) and I'll put all the front suspension back together. Then I need to build a better transmission crossmember. And then... and then... and then...........
11/1/05
Suspension is all together except for mounting the steering gear.
When I was putting this frame together I basically just put everything in the same position as it was in the XJ and the XJ handled good. But after seeing the angle on those UCA's it was obvious that they need to be longer and repositioned like you see in the drawing. I'll do that later and post.
11/3/05
Cab is ready to set back on frame. I need to have cab in place to set up steering gear box and column and to run fuel & brake lines.
But it will come back off again later for painting etc...
11/4/05
Cab is set on frame. It will look alot better with some bigger tires.
11/5/05
I still have some work to do for clearance near the throttle pedal. I'd like to get about a 1/2" so I can put some heat shielding in.
I couldn't really put the engine any further forward.
Yes it runs!!!! Just started it for a few seconds as there is no radiator in place yet. I hooked up the wiring to computer,
relays, engine, grounds, etc.. I just routed the looms over the fender thru the window into the cab and plugged in the column.
I set the fuel tank on the back & hooked up the wiring and hoses and ran a ground. I wanted to make sure it would run again and
that I didn't have any new problems I would need to figure out.
It started easily and fuel pump runs. Now i'll start running the looms where they need to go.
11/09/05
