• Welcome to the new NAXJA Forum! If your password does not work, please use "Forgot your password?" link on the log-in page. Please feel free to reach out to [email protected] if we can provide any assistance.

Thought i'd share the new rig..

Getting there.. however my trip to Utah has been cancelled. Had some unexpected bills come up, daughters medical after an accident, my rear axle and other parts.. and the Mrs WJ. Didn't want to do the trip on a very tight budget so i'll try again another time.

Got my Cobra 75wxst that I had wanted for awhile, and installed a hood mount and Firering coax from Firestik.

zjCBinstall003_zps508769f8.jpg


cbant004_zpsd39a9c2d.jpg


I mentioned the issue with my XJ44, ordered up a new install kit and R&P. Ran up to see Joe at Endless Mountain Fab for the install Saturday am. He did a great job as always..

xj44gearing008_zpsda9c2f33.jpg


xj44gearing009_zps61d5c3c7.jpg


Think i'v decided to place my power invertor beneath the pass side seat, I need to pick up some heavier wiring for this and a 136 amp. Think 5-90 will get the nod for the alt kit.

zjCBinstall004_zps8852e194.jpg
 
Last edited:
Got some time to work on the rig this past weekend, new intake and TB are in.

intakeswap003_zpsfa5a487e.jpg


Anyone remember the write up here @ NAXJA where someone wired in a newer style alternator to a later rig? Cant seem to find it, like to swap my Durango alt in this week. Hopefully transfer case goes in this coming weekend.

Durango136amp002_zps8862f2c0.jpg
 
The two small screw terminals on the wonky shaped alternator connector (the ones that go to the impossibly tiny studs that always twist off if it's a salt belt vehicle) go to the two pins in the plastic connector. Doesn't really matter which goes where, it's the field coil and energizing it either way works since it's an alternator not a generator. The B+ terminal goes the same place it did on the old alternator, the others are all grounds and can be bolted to that stud in the 6 oclock position in your picture or probably even to the two alternator mounting bolts or the engine block. IIRC they can be ignored (pretty sure the other end is bolted to the engine block anyways) but I'm not 100% on that and don't want to accidentally mislead you into disconnecting one of your engine/alternator to battery or chassis grounds.
 
Thanks again Ken.. did some searching and it appears I can probably swap the end cap and install the earlier connections of the alt myself. Never been in one, try it if I can find a donor alt for the parts.

Transfer case is in, driveline is too short... i'll need to have it extended. Think I should install the 44 so I can get it right.

Noticed a few things about the rear axle bracket kit I purchased. Looks like the coil mounts are set center over the tube whereas the OEM setup has it favoring the front side. I'll also get some more lift.. maybe 1.5" or so. Probably end up needing shorter rear coils.

242in-drivelineshort001_zps3c996310.jpg


242in-drivelineshort002_zps4df00431.jpg
 
Anyone remember the write up here @ NAXJA where someone wired in a newer style alternator to a later rig? Cant seem to find it, like to swap my Durango alt in this week. Hopefully transfer case goes in this coming weekend.

Think that might've been me. No write up, I just shared my experience.

scaled.php


Didn't get a picture of the rubber block modification, but I had an extra I was able to dissect.

iz2m.jpg


The terminal circled is only a mounting support. Doesn't have a wire connected to it. The ground goes straight through the block & grounds the alternator case to, like kastein said, to the engine block.

The "L" shape of the block wouldn't allow me to mount the "support" terminal or the ground, with the field terminals connected, so I chopped off enough to have the field terminals connected & dissected out the ground (which is molded into the block with the insulation) & hooked it up to its original location.
 
You're right. The two I bent on a dd Zj used Offroad only for camping were nothing like the rest. Only people who like em are too stubborn to accept that they dumped all kinds of money in a toilet bowl axle.

For the record

44a still going strong locked on 35s with a v8

And I just broke ANOTHER hp dana 30 pinion

Damn that toilet bowl axle
 
My speedo is inoperative.

I installed the speedo sensor that was in the Jeep originally and worked. Swapped in a 39 tooth gear and clocked it where the 39-45 on housing lined up with the raised dot and fork fit into slots. No speedo..

Do I simply rotate clockwise to engage on drive gear better and disregard having the fork fit inside the slots?

Yes.
 
Glad it's working out for ya Scott..

You built another ZJ? What happened to the Platinum Niner?
It was just time.. the 5.9 was "well used" From a tweaked B piller causing moisture issues, Not a straight panel, Cracked frame around the steering box, and then I cracked a head.. I cut everything off, sold some stuff (The Bushwackers) and Horded the parts, Picked up a 97 Limited for $600 a month before the Naxja Moab event, and tossed it all together..

These rigs are quite disposable, Just like an XJ.. I plan to do rocker replacements in 2 weeks


After blowing yet another 4.56 Pinion in the HP30:smsoap:...My winter project is 60s and 37s..
 
Last edited:
Nice Scott.. good looking rig.

D35 is out and stripped. Decided to use the ZJ discs and sell off the TSM discs I had used on this axle before..be nice to have a parking brake. Ordered the Teraflex spacers for spacing the XJ retainers and ordering up RE 3.5" coils to lower the rear a bit.

ZJ35out001_zps34509751.jpg
 
Spacers for the disc swap and the new RE coil springs arrived..

Got the ZJ caliper brackets mounted, just need to finish enlarging the center hole to slip the Teraflex spacer through.. seems like it'll take awhile.

zjdiscswap001_zpsc737f9bd.jpg


zjdiscswap007_zps1da284bb.jpg


zjdiscswap010_zpsccc8d9ab.jpg
 
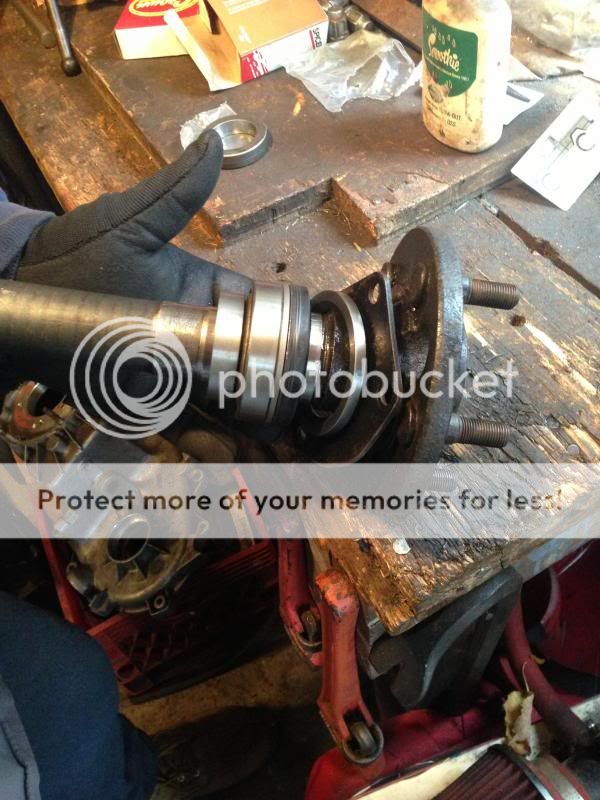
Couple things I didn't see in any ZJ to XJ44 threads.. the retainer plate needs trimming and the bottom rivet on backing plate needs ground down/off to allow the retainer to sit flush and put proper preload on the bearings/seal and spacer.

discswap3_zps2e3b1c85.jpg


Triple check the orientation and order of the bearings/seals prior to pressing them on, or it'll cost you another $100. Tust me on this.. ;)
Used my new to me shop press, the last one I bought was too short for axleshafts, it'll be mod'd to be a press brake eventually.

brngpress2_zps0829e0c3.jpg


brngpress1_zps90cb254e.jpg


brngpress3_zps58dc45b8.jpg


Install your shafts. It appears I need to take just a small amount of material from the center hole on the ZJ rotors also, they don't want to seat just right. I'll do this tomorrow and start on the brake components.

discswap4_zpsb1f70c01.jpg
 
Back
Top