• Welcome to the new NAXJA Forum! If your password does not work, please use "Forgot your password?" link on the log-in page. Please feel free to reach out to [email protected] if we can provide any assistance.

The front leaf spring thread. who's doing it now? what have you learned?

I got my front axle on the new jeep last night...still need to hook up the steering and brake lines, really need to do some trimming also, here are some pics, used a c-rok bumper mount kit/some .25in to make the crossmemeber


142830.jpg


142840.jpg


Kevin
 
I finally got this done. I am pretty happy with it so far. On to the details, and LOTS of pics... To help the dial-upers they are all thumbnailed - click for the larger image obviously.

Also, I am a rookie fabber (hence doing the leafs) so feel free to make fun of my fabwork.


Out with the old:


Beginning the mockup for the front crossmember attachments:


For the passenger side, I drilled and welded in some tubing to keep from crushing the rail. I felt it wasn't necessary to use 3 bolts or to match the bolt locations of the driver side.


I basically stole the patented BrettM design by using 4x4x1/4 angle. The side and bottom peices are 1/4" plate. A little heat from the torch and the bottom peice bent like butter to properly catch the factory sway bar holes.


I pulled it off, welded it, and ground a radius between the side and bottom plates to make it look clean. I did kinda screw up here, notice that I left the 4x4 angle about a 1/4" wider than the side plates. I thought I needed this extra width for the front shackle mounts. As it turns out, I didn't. Had I flushed it all up, it would have looked a heck of a lot nicer.


This was the first mockup attempt. Note, those are Rubicon Express 2.5" Extreme Duty (RE1432) mil-wrapped springs. Also, the original plan was to just use the factory LCA mount. However, notice that I whacked those off and made my own. At this point though, I was cursing myself because my mounts are basically in the stock LCA location. Nevertheless, I found that in this location, the axle was too far forward.


After several additional mockup attempts, this is where the rear mount ended up. My mounts were made out of 3.5" by 1/4" wall square tubing. Also, before I started on the front end I plated the frame rails with angle iron, I feel this proved key to making sure my rear mounts were solid. To add additional strength to the rear mount, I cut up some of that 4x4 angle, tied it to the frame rail angle and wrapped it around the mount.


To further strengthen the rear mount, I wanted to gusset it out. This also gave the mount a bit of a ramp to hopefully avoid getting hung up. The guesset is made out of 1/4" plate and was tied into the mount made out of box. After welding, it was ground and now looks as if it was all one peice.


With the rear mounts done, I moved on to finalizing the shackle mounts to hang off the front x-member.


Rear mounts painted up:


Front mounts and x-member painted up. I used stock length (4" i think) YJ shackles from RE.


With the springs in place, I moved to the axle. Of course, cutting and turning the knuckles. It really wasnt that hard. What worked quite well for me was a combination between a grinding wheel and a cut-off wheel. They were re-welded at about 4 degrees,


I wont go into detail about the spring perches, its easy enough. I got mopar d44 perches. For the driver side, I set the perch on the tube next to the cast ridge, drew a line and torched them out (if that makes sense). That way both of the perches sit at the same height. Of course, proper pre and post heat is absolutely key to making it stick on the cast side. Here is everything bolted up. A very small amount of grinding was done to fit the ubolt on that one side. Also, at this point the front x-member is completely bolted off with grade 8 and metric 8.8 hardware. 17 bolts total hold the front x-member onto the jeep.


Its past my bedtime, so I will discuss steering and what I had to do about shocks later. But, this is how it came out. It sits level with rubicon 4.5" springs + 1.75" shackle in the back.


-justin
 
I got a PM a few weeks ago asking about how i did my steering. So, I figured I would show how I dealt with it. For those not paying attention, this is for the black jeep above :dunce:

And before I get started, I would like to give props to WFO Concepts for making my steering happen with ease. While they are local to me, I highly recommend them for those of you who may have to order stuff online.

On to the details... I picked up a pair of flattop knuckles off a J-10 (or 20, i dont remember) at the local pick n' pull. $15 bucks, thank you very much :D. I had WFO machine them for me, I beleive it was $65 a side if I remember correctly. And actually, they just swapped me for a pair they already had machined, I just walked in and out in 5 minutes. The high steer arms are Parts Mike super arms.
steering21ua.jpg


The tie rod and drag link are 1 1/4" x .219 DOM. From the time I called to place order Trevor @ WFO had them cut, machined, drilled, tapped, and ready to pick up in less than 2 hours. They are designed to accept chevy 7/8" rod ends. If your not familiar with this setup, the drag link intersects and connects the tie rod's TRE in a hole that was originally designed to be used as a steering stabalizer mount on chevy's. Of course, this hole is reamed out to the appropriate size to accept the TRE off the draglink. Click HERE for a better picture of the TRE setup. To use these chevy TRE's, your pitman arm needs to be reamed out to the appropriate size. When I picked up my Tie Rod and Drag Link, Trevor once again made my life easy and reamed out my pitman arm in a matter of minutes at NO charge. I was worried about whether or not I would get full steer out of my stock pitman arm - and I do, everything works great.
steering36un.jpg


And the finished goods. With everything this high up, hopefully I won't have any problems bending Tie Rods.
steering15mj.jpg


After I got my steering put together, I needed a steering stabalizer. And since I had everything installed and painted, i didn't really feel like going and welding tabs on my new tie rod. Luckily, I managed to peice something together that was SUPER simple, quick, and nearly free (minus the new $34 stabalizer of course). When I got my axle, it cam with the old steering stabalizer mounts. I took the two mounts and hacked em up to make it all work. For this end, I just trimmed off on side of the mount, enlarged the 4 holes, and procured some Dana60 sized u-joint straps. Bingo, it all bolts together perfect.
steering43ey.jpg


For the opposite end, I once again used the stock mount. For this one, I simply had to enlarge two of the three holes and bolt it all down.
steering55mx.jpg


And in under an hour, you have a slick stabalizer mount that is tucked up behind the Tie Rod.
steering69tv.jpg


-Justin
 
xjj33p3r said:
Did the stabilizer really help at all?

It helped a lot. Although, I did a shade tree alignment and I believe its still toe'd out a little. Thus causing the rig to want to follow every bump in the road. So the stabalizer helped quite a bit in this sense.

We will see how she handles when its toe'd in just slightly, perhaps (and my hope is) that the steering stabalizer will become a moot point.

BrettM said:
I have full steering on flat ground, but stuff the right tire and you loose left steer, stuff the left tire and you loose right steer. JC Whitney has a Ford/Waggy drop pitman for $55 that should do the trick if you later choose.

I will keep on eye on this the next time I am out.
 
Brett, Any updates on the rig, or the 4link rear?
I think my XJ will be your MJs twin.
Doing alot of research into the leafed front, linked rear.

I look at myself crazy for switching the suspension 180 degrees
 
I did a wishbone 3 link in the rear. I'm very happy with it. I still like the leafs in front. Once again, I've never claimed them to be ideal, but the stability and simplicity are great, and the little bit of axle-wrap preventing shock loading may have helped my Spicer shafts survive in JV.

there's some pictures in the link in my sig, and here:http://www.naxja.org/forum/showthread.php?t=57450

don't look at it as switching the suspension 180 degrees; look at your Jeep as a blank canvas and go from there.
 
I hate to dig up old threads, but more so I know better than to ask without searching. I've read this thread many time in the past and I figure I ought to post my question here for those that have done the conversion and maybe as help to those who will do it in the future.

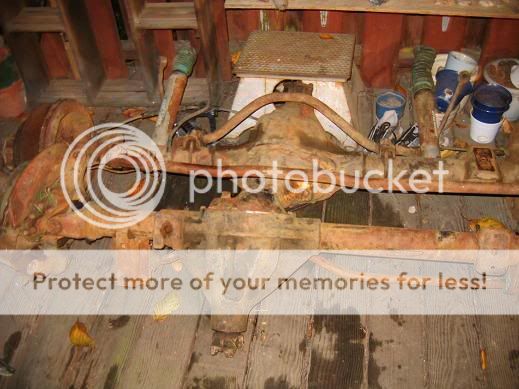
Got a little motivation sitting on my patio that I need to get under my jeep. First I need to figure out my leaf springs. HP44 out of an F250 and a FFD60 out of the same rig.
11-21-06axles.jpg


I'm stuck on what springs to use. I have a set of stock XJ, a set of 2" OME XJ, one set of 4.5" RE XJ, one set of stock waggy and I have access to a couple toyota front and rear leaf packs. Picking up some YJ wouldn't be hard either.
I'm looking for right around 5" of lift. I'll be running a 37 or 38" tire. Waggy springs sound like they will put me a bit too high. Maybe pulling a leaf would get me where I want to be. I obviously have a bundle of leafs I can pull apart and package something up, but I'm looking to keep it flexy, stable(XJ mains look to be out of the question without a trackbar) and low.
Waggy, Toy or YJ mains?

I see alot of the shackles being mounted at somewhat steep angle and preventing a bit of approach angle. I slopped together a couple second sketch of what I was thinking of doing. I'd like to hear a little feedback.

frontsuspension.jpg


The shackle would be mounted to a crossmember on the backside of the jeep. I know the framerails are going to block some space, but inboarding them slightly inside the framerails wouldn't be too bad, or I could mount the shackle right under the frame or just sleeve(in addition to the plating) the frame and put the shackle there.
I figure this will give me the down travel I want and a bit of up travel as well. I'm looking at keeping this low so I'm thinking a max of 3-4" of up travel.
It would also allow me to keep a decent approach angle.
Please keep in mind this is just a rought sketch, nothing was measured, I'm just brinstorming a looking for a few suggestions. Thanks.

-Kevin
 
I hadn't planned on it. I also hadn't really planned on building a cross member for the rear attachment points. Which I supposed would mean that I would have to mount my leaves directly under my frame rails. It looks like you mounted yours under the frame rails. Of course I could catch a rock that way, but I'm really not too concerned, my last setup had rock anchors on it.

I'm a little bit weary as far as the shackle angle goes. I want down travel, and not quite so much up(mostly just to keep it low) and it seems with the shackle angle I sketch climping is going to try to decompress the suspension more than a shackle with a more verticle angle.

On the waggy, YJ and Toy springs, you are reffering to the front springs out of each of those vehicles correct?

-Kevin
 
I used 2.5" yj springs on the front of mine with 36" swampers...no bumpstops and the tires could hit hard enough in the wheel well to stop me...I wouldnt worry so much about the front shackles. I can only think of a couple times in 2 years that mine hit something first. 4" yj springs left plenty of clearance but still flexed enough to hit the cut front fenders.


how about a slider up front instead of a shackle? seen that before? looks like more maintenence than a shackle
 
yellowxj said:
I used 2.5" yj springs on the front of mine with 36" swampers...no bumpstops and the tires could hit hard enough in the wheel well to stop me...I wouldnt worry so much about the front shackles. I can only think of a couple times in 2 years that mine hit something first. 4" yj springs left plenty of clearance but still flexed enough to hit the cut front fenders.


how about a slider up front instead of a shackle? seen that before? looks like more maintenence than a shackle

I want to keep it low. Using a 3.5" YJ spring as Brett said would likely net around 7-8" of lift. Thats 2-3" too high. I have a 2dr that I will be removing a bit of sheet metal from, possibly even retubbing the inside. My last rig has 7" of lift and full widths and while stable, I wished it were lower in many situations.

My problem with the shackle was just that when you get to those times when you have to bump your front end over things, I'd like to hit either my bumper of my tires and not so much the shackle or the srpings, which is why I drew it tucked up behind the bumper.
I suppose with the shackle being where it is a 3.5" leaf on my setup probably wont produce the same lift as on something similar to what others are running.

-Kevin
 
Is your drawing above meant to represent full compression or ride height?

Maybe im just a simpleton, but if your drawing represents ride height, then I dont think your shackle idea will work.

My reasoning:
As a leaf spring compresses the physical eye to eye length of the spring gets longer. Hence the need for a shackle in the first place - it allows the physical length of the spring to vary. Of course the opposite is true under a droop condition.

Based on your drawing above, your shackle will not allow your leaf spring to compress because it cant get any "longer". You will only have droop.

Shackles were designed to be mounted at a steep angle, it's just that simple.

If your that hard up to limit the loss of approach angle then you may consider a shackle reversal. Although this may not solve your problem if you have to build a drop hanger... yada yada....

-jm
 
I see your point as far as the angle being too extreme. I hadn't thought too deeply about that part either. Thanks for catching my error. I could however, easily change that and create an angle that allows the spring to compress.

TNT U bolt Eliminators... Any downsides to using them on my front axle? I'll be ordering a set for the rear and could easily pic one up for the front at the same time. I can't see any downsides to it, but then again I'm not always a clear thinker.

-Kevin
 
wrecked said:
TNT U bolt Eliminators... Any downsides to using them on my front axle? I'll be ordering a set for the rear and could easily pic one up for the front at the same time. I can't see any downsides to it, but then again I'm not always a clear thinker.

For me personally, I would see two downsides:
1. cost - more expensive than perches, u-bolts, and spring plates
2. Peace of mind... If the welds on my spring perches let loose I still have 5/8" u-bolts keeping things from going to hell (at least short term).

-jm
 
wrecked said:
I hadn't planned on it. I also hadn't really planned on building a cross member for the rear attachment points. Which I supposed would mean that I would have to mount my leaves directly under my frame rails. It looks like you mounted yours under the frame rails. Of course I could catch a rock that way, but I'm really not too concerned, my last setup had rock anchors on it.

I'm a little bit weary as far as the shackle angle goes. I want down travel, and not quite so much up(mostly just to keep it low) and it seems with the shackle angle I sketch climping is going to try to decompress the suspension more than a shackle with a more verticle angle.

On the waggy, YJ and Toy springs, you are reffering to the front springs out of each of those vehicles correct?

-Kevin

I broke alot of main leafs, and now I dont run font leaf springs.. If I did leaf springs again Id try for shackle in back, with a short shackle, its more reliable from my experience, then shackle in front. you will get mroe brake dive and need a longer slip drive shaft with shackle in back but it will be more reliable.

When doing my front links I notched the frame for my upper links, you could do that but make it the hanger for the rear shackle. you would need to run an axle shim but I think it would work great. I havent seen anyone try it yet..

t_000_0002_108.jpg


t_000_0003_610.jpg


t_000_0003_186.jpg
 
Thats actually quite interesting. How is the shackle in the rear more reliable? You mentioned that it would have more brake dive and would require a long slip shaft on my front drive shaft, I'm not quite understanding how the shackle in the rear is more reliable?

I can see the front suspension compressing when trying to climb an obstacle(like a wall) with a rear shackle. Where as a front would try to decompress.
Little bit confused which way to go.

-Kevin
 
Back
Top