2xtreme
NAXJA Forum User
- Location
- Kayak Pt, WA
Over the last couple of years I had been considering building a cage and had several conversations with others here on  as well as friends and family who have significantly more cage design and build experience than I do. After lots of discussions and reviewing other's designs I came to the conclusion that for my priorities in a cage, building a hybrid inner/outer cage would really be the best design for me. I know that according to several friends of mine who have much more experience this is NOT a proper cage and will not provide near as much protection as a more "proper" internal cage would, but it fits my needs and priorities well and I am willing to live with the compromise.
My priorities:
1. Seat 5 (two adults and 3 kids) comfortably and safely with no tubes too close to anyone. As well as easy access in and out of the vehicle.
2. Stiffen the unibody and provide some reasonable added strength with limited gain in weight.
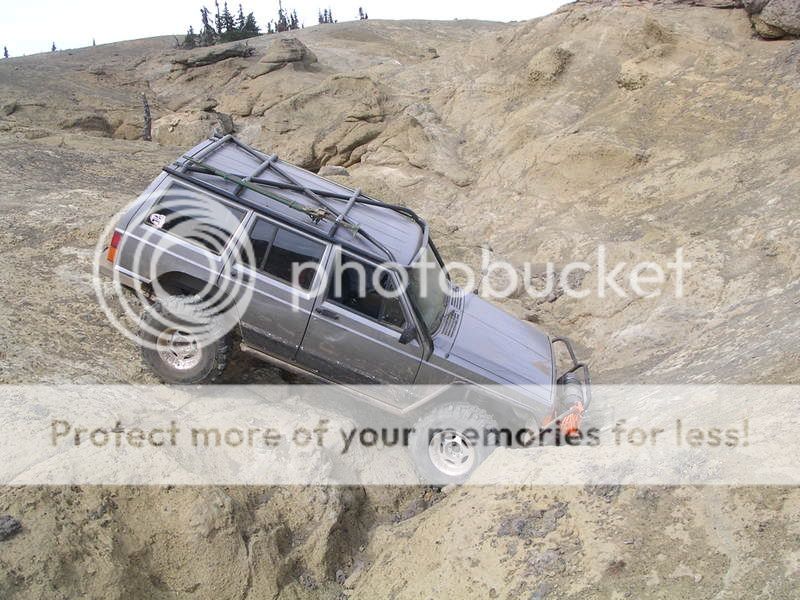
3. Roof sliders. Protection for the rain gutter from tree's and rocks.
4. gain experience building a cage for future vehicles.
After pairing up with Jeremy (Megawatt) for the TTC event it turned out he had been thinking about doing something very similar and also had very similar priorities for his vehicle. Only he has a two door that made our two designs more different than one might expect.
One thing led to another and the two of us with the help of Han's (XJourney) and Ryan (Blkxjkrawler) built two complete hybrid cages with similar basic designs for both my 4 door and his 2 door.
Basic design:
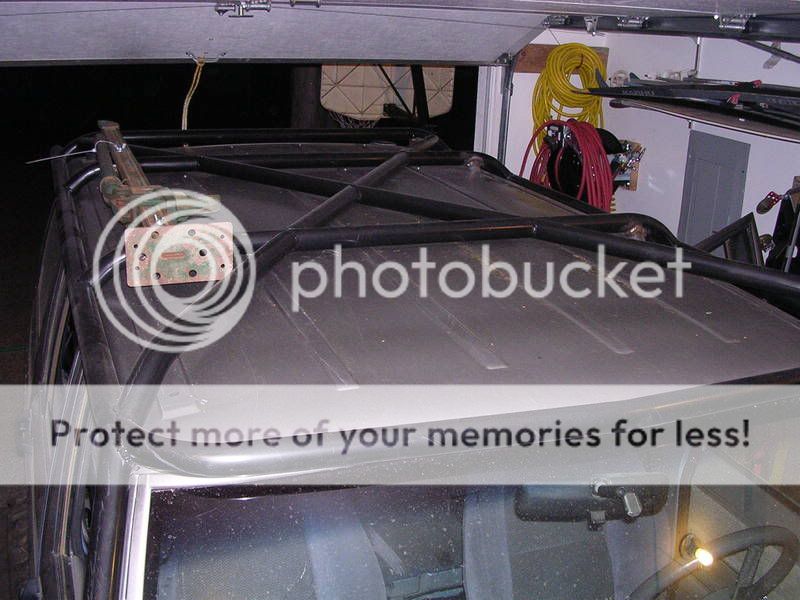
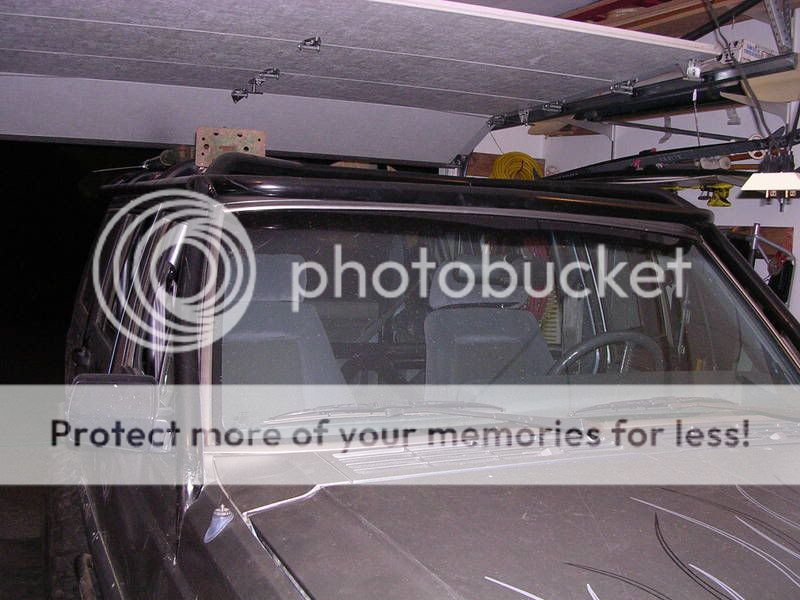
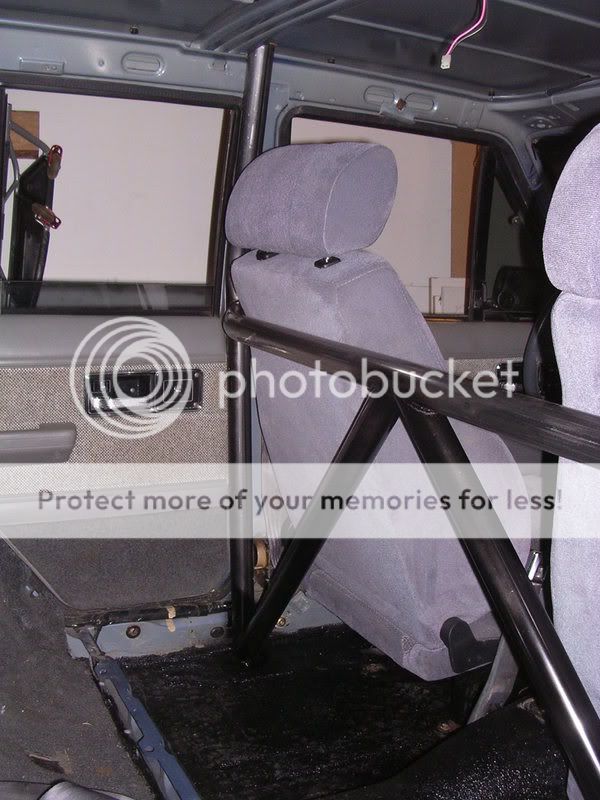
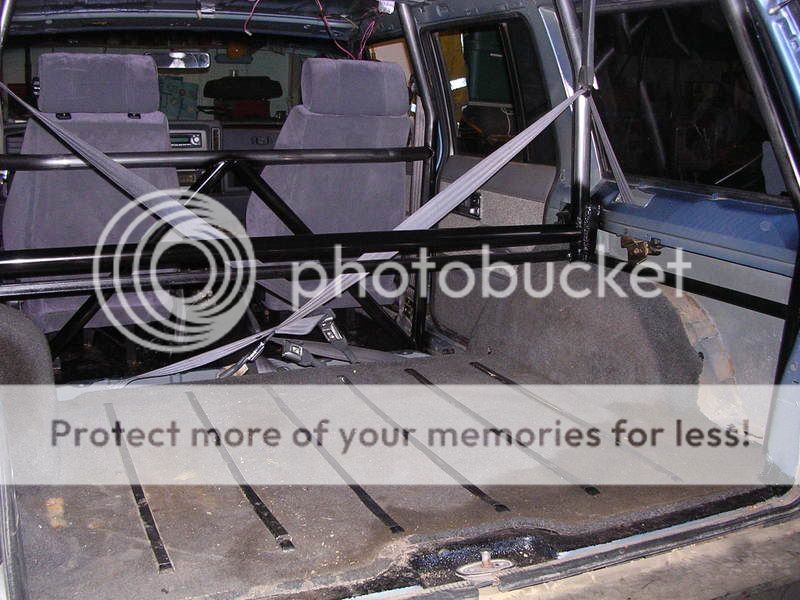
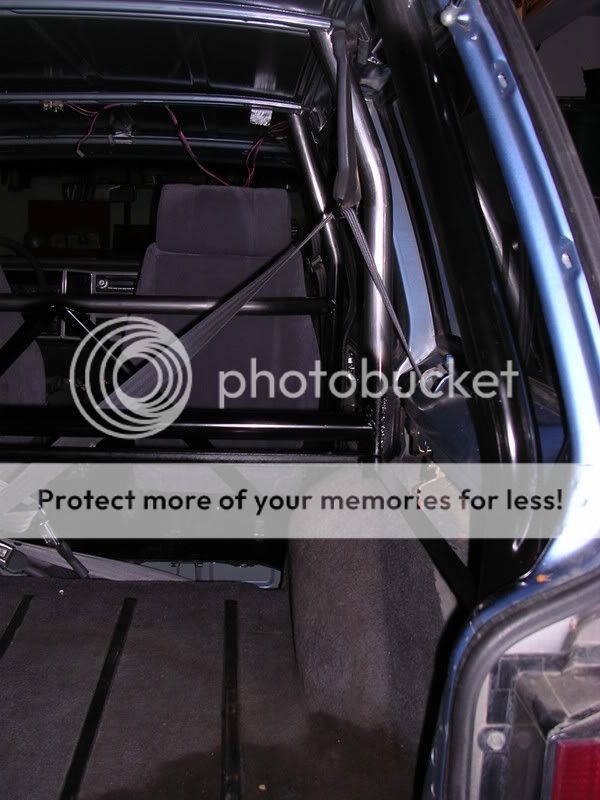
1. Full roof halo and cross bars act as gutter sliders and flat roof rack.
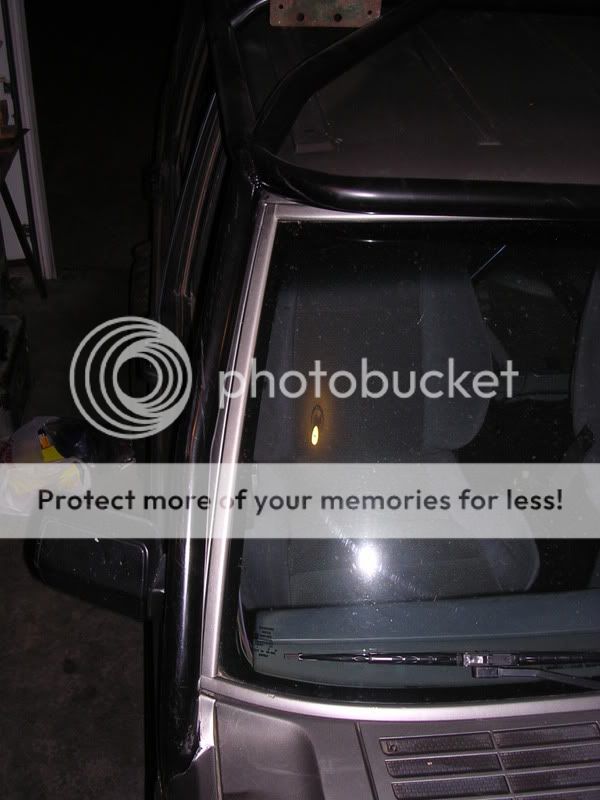
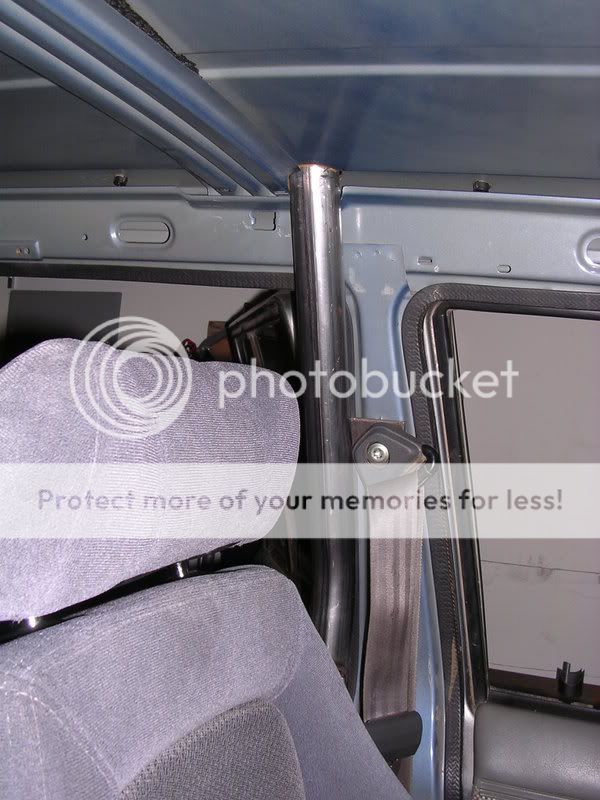
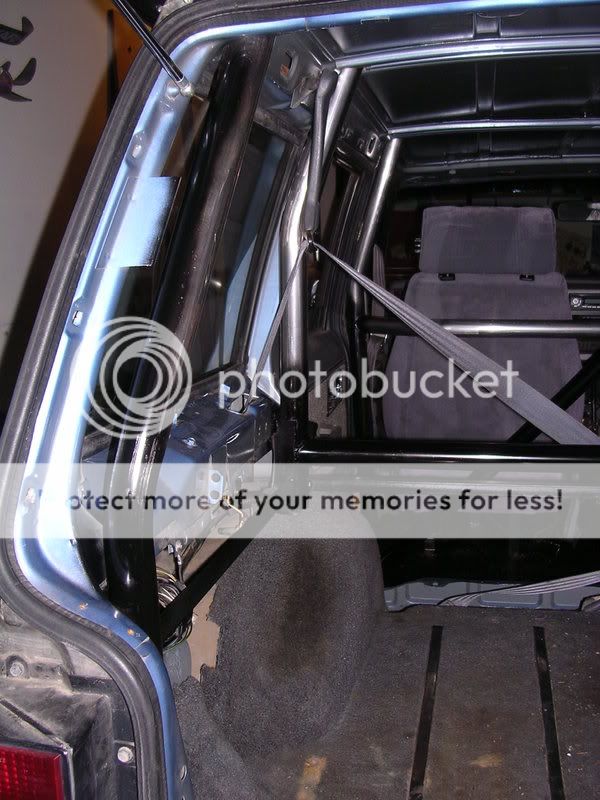
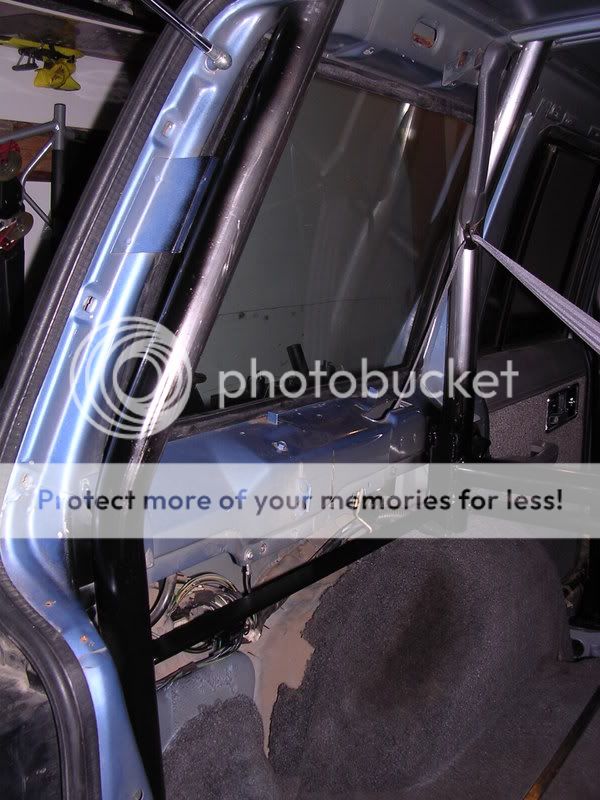
2. "A" pillars protect the windshield and mount on both sides of firewall (from top to bottom)
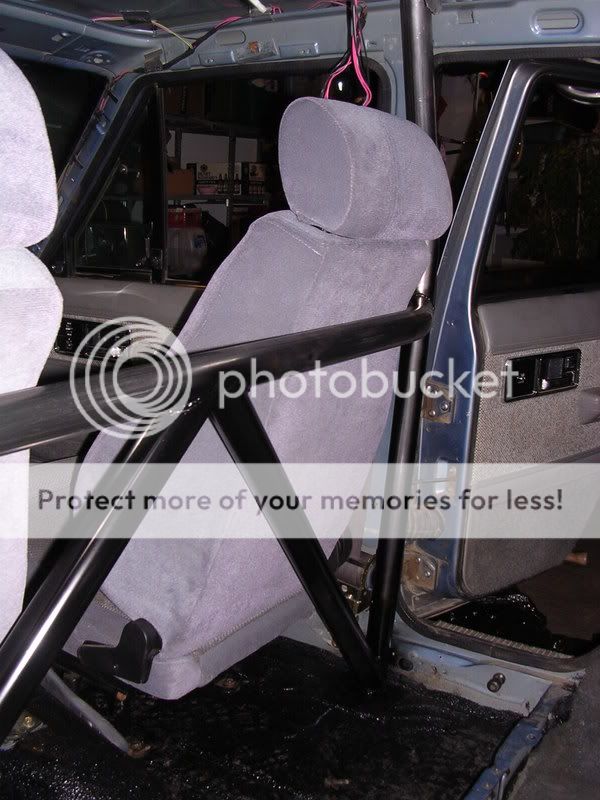
3. "B" pillars are out of the way of passengers and provide as much lateral support and structure to the cage as possible without getting too much in way. They also provide a location for front harnesses. "B" pillars are tied into the front shoulder belt. Jeremy’s “B” pillars needed to allow as easy access as possible to the rear seat.
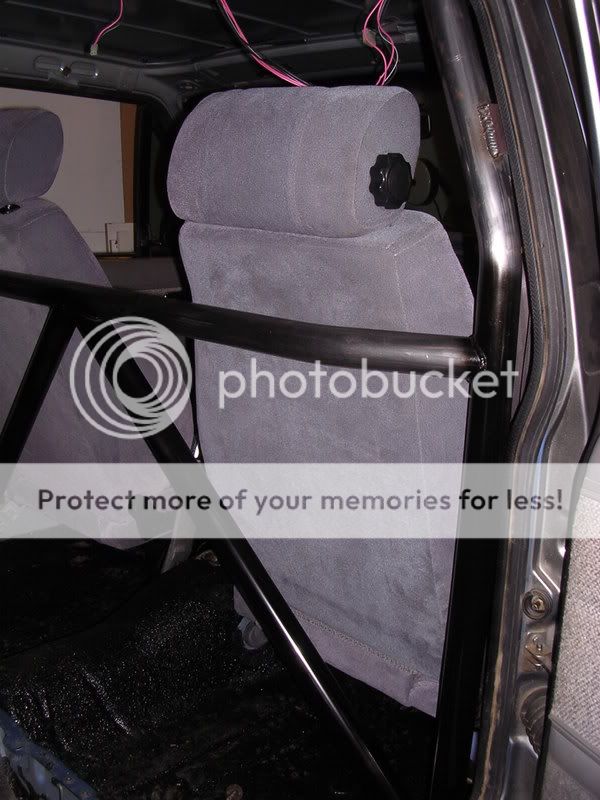
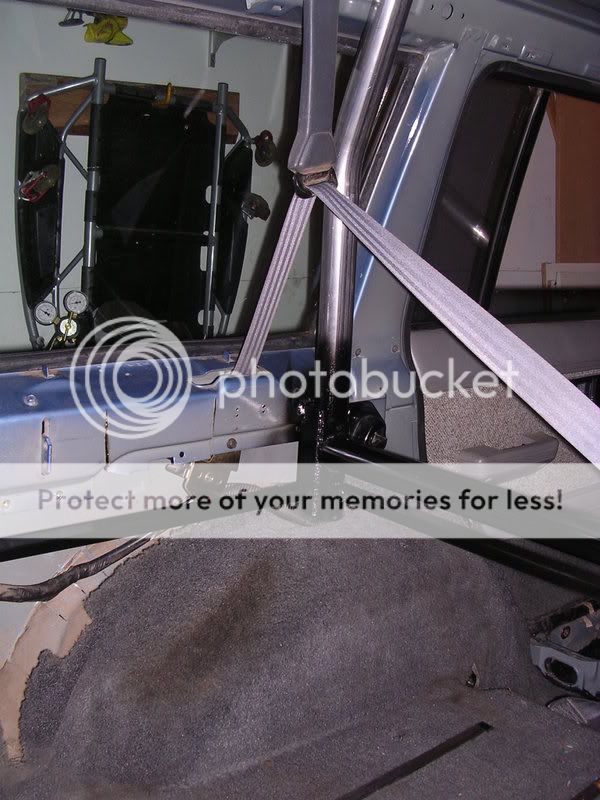
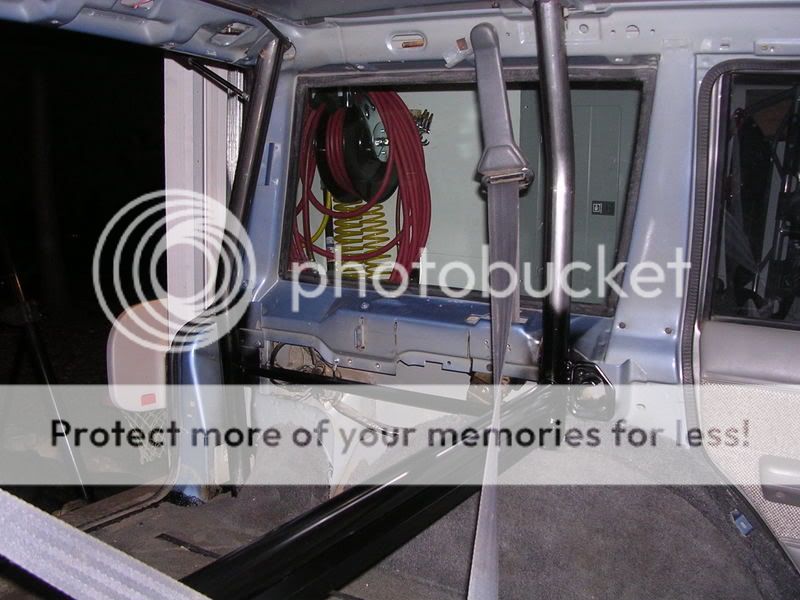
4. "C" pillars are out of the way of passengers and provide additional structure to the cage and provide a location for rear harnesses.
5. "D" pillars are out of the way of cargo area and provide additional support to the outer halo. Jeremy’s “D” pillars do a much better job of providing a “rear 45 deg support to match the front “A” pillar, there just isn’t much room to provide this support with the 4 door.
Again these cages were derived from our own priorities for the cage and took several others past experience and designs for our cage. These are by no means the "best" or "strongest" way of building a cage.
Pictures to follow.
Michael
as well as friends and family who have significantly more cage design and build experience than I do. After lots of discussions and reviewing other's designs I came to the conclusion that for my priorities in a cage, building a hybrid inner/outer cage would really be the best design for me. I know that according to several friends of mine who have much more experience this is NOT a proper cage and will not provide near as much protection as a more "proper" internal cage would, but it fits my needs and priorities well and I am willing to live with the compromise.My priorities:
1. Seat 5 (two adults and 3 kids) comfortably and safely with no tubes too close to anyone. As well as easy access in and out of the vehicle.
2. Stiffen the unibody and provide some reasonable added strength with limited gain in weight.
3. Roof sliders. Protection for the rain gutter from tree's and rocks.
4. gain experience building a cage for future vehicles.
After pairing up with Jeremy (Megawatt) for the TTC event it turned out he had been thinking about doing something very similar and also had very similar priorities for his vehicle. Only he has a two door that made our two designs more different than one might expect.
One thing led to another and the two of us with the help of Han's (XJourney) and Ryan (Blkxjkrawler) built two complete hybrid cages with similar basic designs for both my 4 door and his 2 door.
Basic design:
1. Full roof halo and cross bars act as gutter sliders and flat roof rack.
2. "A" pillars protect the windshield and mount on both sides of firewall (from top to bottom)
3. "B" pillars are out of the way of passengers and provide as much lateral support and structure to the cage as possible without getting too much in way. They also provide a location for front harnesses. "B" pillars are tied into the front shoulder belt. Jeremy’s “B” pillars needed to allow as easy access as possible to the rear seat.
4. "C" pillars are out of the way of passengers and provide additional structure to the cage and provide a location for rear harnesses.
5. "D" pillars are out of the way of cargo area and provide additional support to the outer halo. Jeremy’s “D” pillars do a much better job of providing a “rear 45 deg support to match the front “A” pillar, there just isn’t much room to provide this support with the 4 door.
Again these cages were derived from our own priorities for the cage and took several others past experience and designs for our cage. These are by no means the "best" or "strongest" way of building a cage.
Pictures to follow.
Michael


") . I just used seam sealer both on top and bottom.
. I just used seam sealer both on top and bottom.


