lost honda pro
NAXJA Forum User
- Location
- Gainesville, FL
Alright, I've done a bunch of research on this, and I've yet to come across a writeup for a USDM 97+ XJ, so I'm gonna do one. Let me add that I didn't have any problems with my cooling system, it worked flawlessly, I just wanted to be able to control more cooling at/near idle, without running the A/C. Here's how this thread's going to look:
Part 1: Mechanical Fan removal & Belt re-routing
Part 2: Picking a Fan
Part 3: Installing Electric Fan
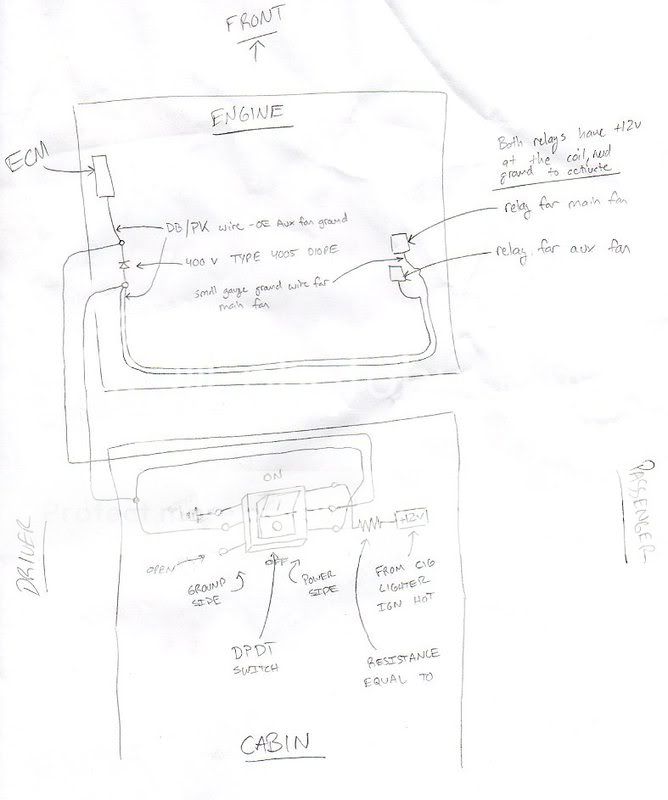
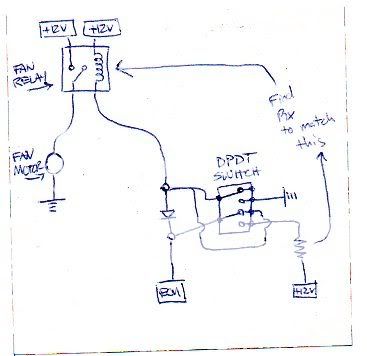
Part 4: Wiring
Part 5: Cost Breakdown
***** Part 1: Mechanical Fan Removal & Belt re-routing *****
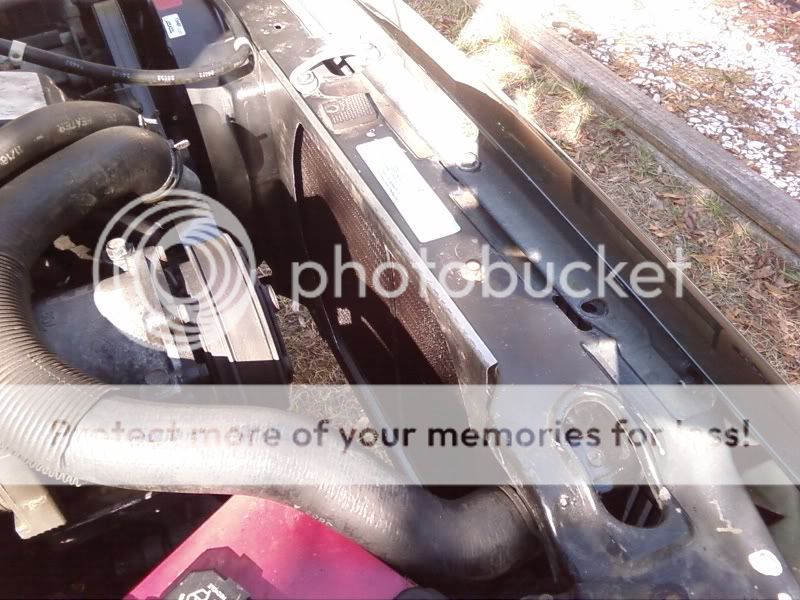
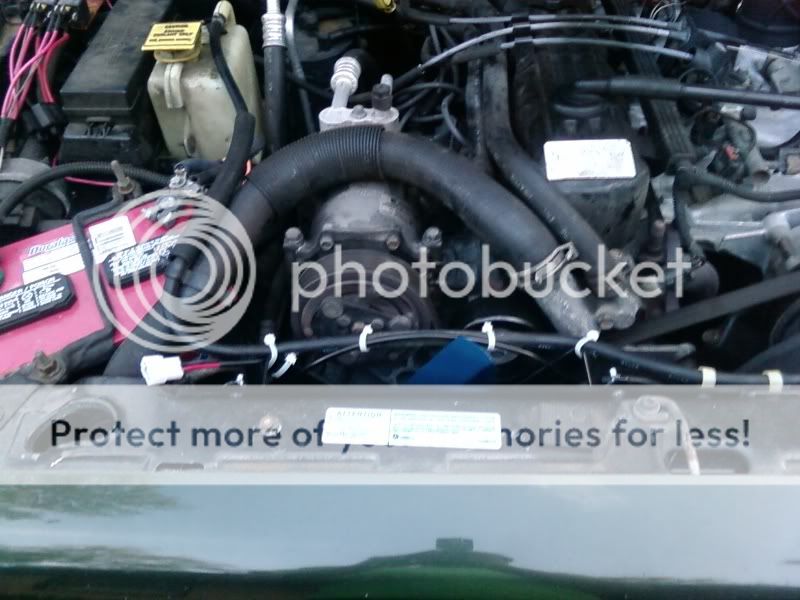
This is VERY straightforward. There are two small bolts at the top of the fan shroud, and four nuts on the fan clutch. Remove all six, and the fan/shroud with come out the top easily.
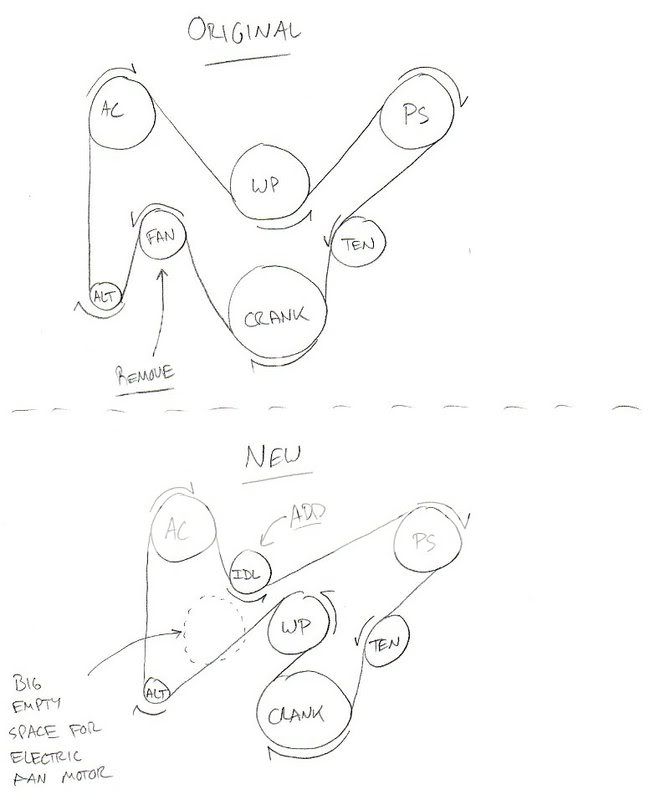
Once it's out, you can see that there's only like 2.75" to mount a fan/shroud. It can be done, but the options are slim, especially when trying to get 2000+ CFM. So, the best bet is to remove that fan pulley entirely, since it's now useless. I looked at several other fan installs, and noticed that the pre-97 XJs had an idler pulley next to the thermostat housing. I realized I could use this pulley (mounted on the A/C compressor bracket) to re-route the serpentine belt, eliminating the now useless fan pulley. This is how the belt will look:
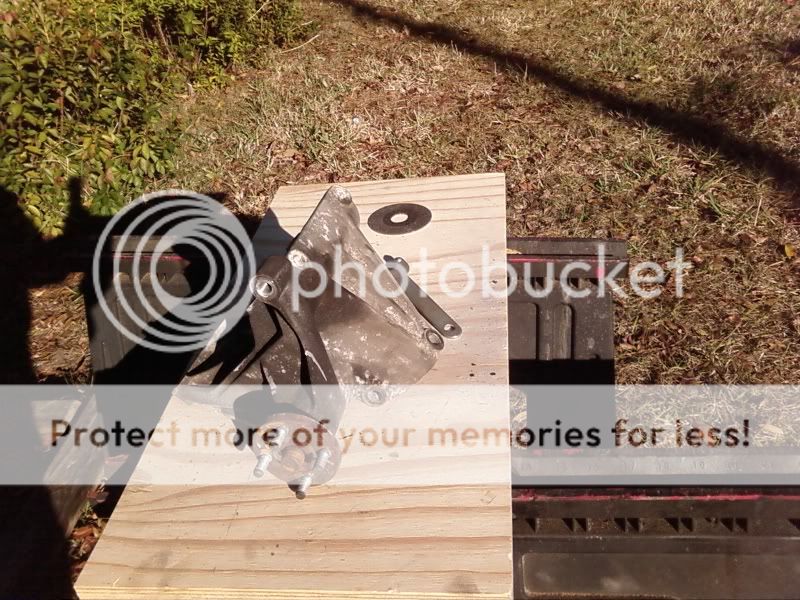
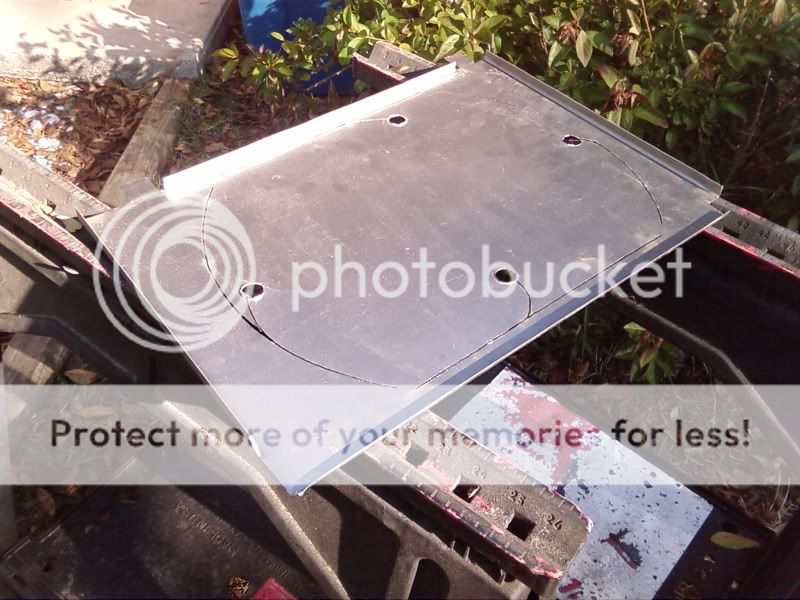
Went to the junkyard, and grabbed up this A/C bracket off a '91 for $14:

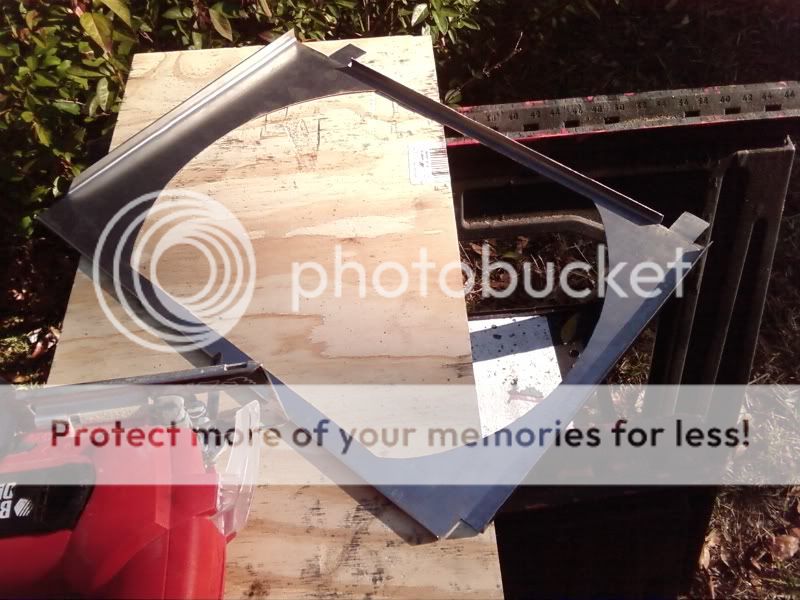
Using a 4.5" angle grinder, I chopped off the shaft and support for the fan pulley (all this so I had the option to go back to stock, I wasn't sure it was gonna work out right...)
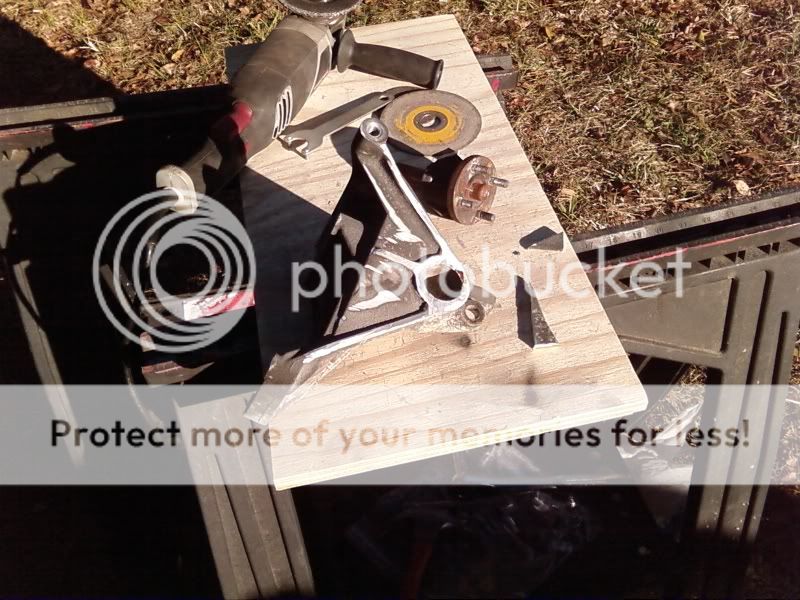
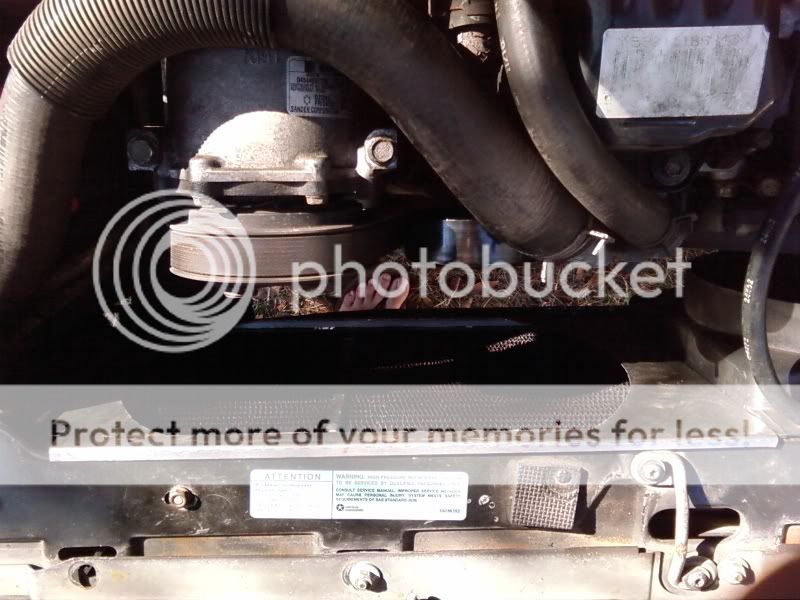
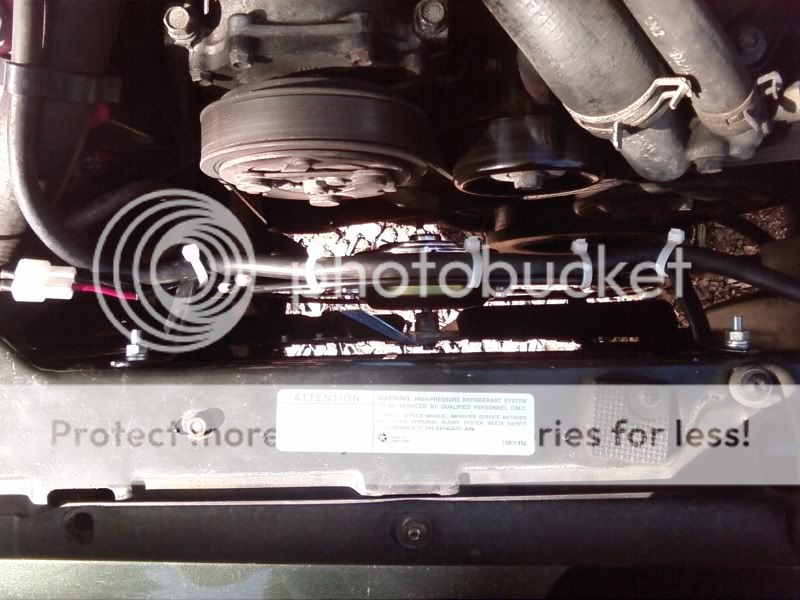
This is how it looks with the modified A/C bracket, and the belt routed (temporarily):

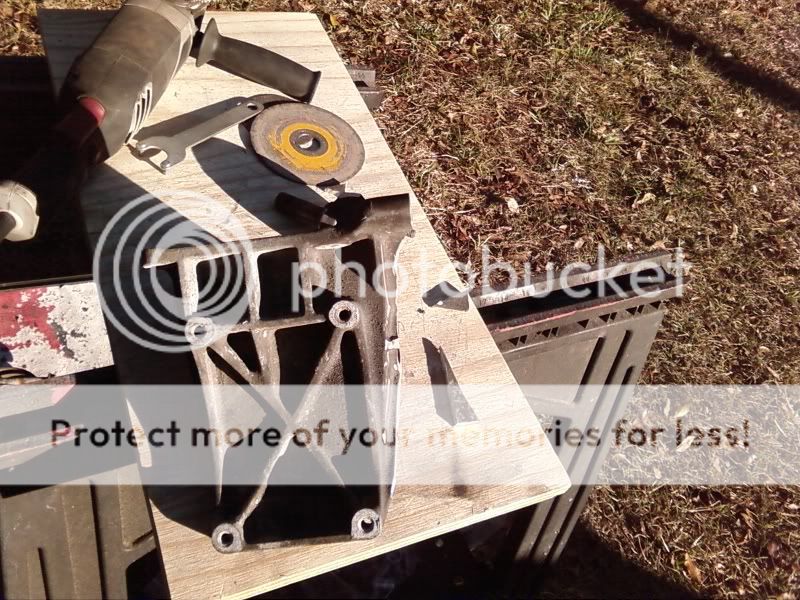
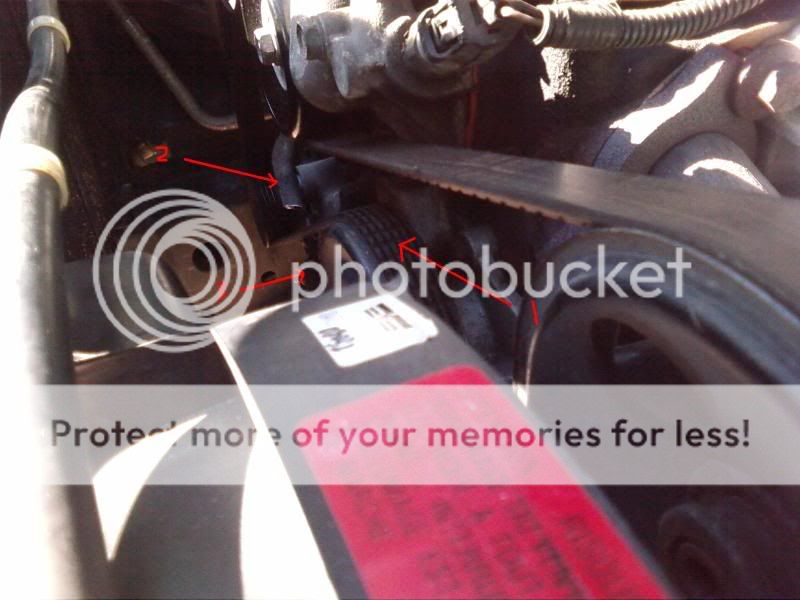
I also bought a spare front alternator bracket, as the new belt would have gone through it, as seen here:
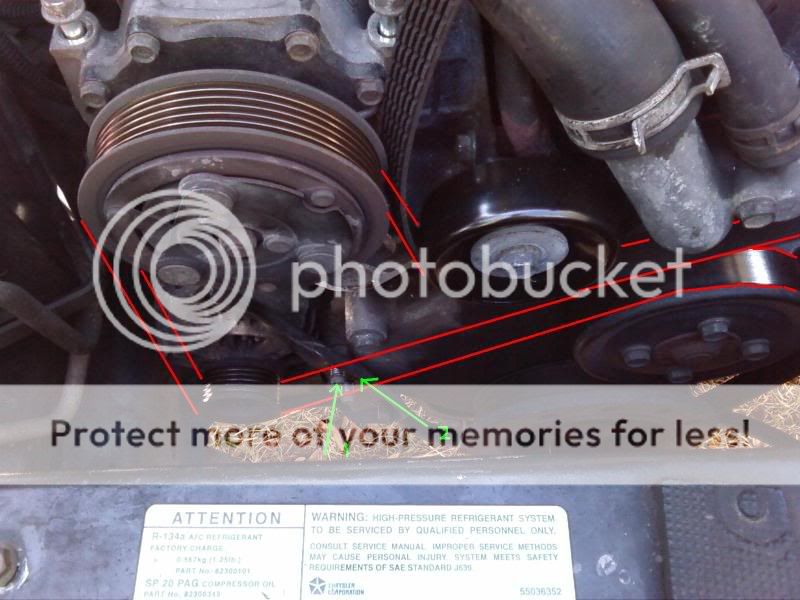
The red lines are the belt outlines, and 1) is the timing cover stud that had to be ground smooth, 2) is the alternator bracket that was modified. It was modified like this:

So that it woulf fit between the top bolt of the alternator bracket and the bolt/nut combo that goes through the bottom of the A/C bracket. Using some lock washers as spacers, it came together perfectly. The A/C bracket bolt hole had to be opened up a bit, but it fits like this:


Part 1: Mechanical Fan removal & Belt re-routing
Part 2: Picking a Fan
Part 3: Installing Electric Fan
Part 4: Wiring
Part 5: Cost Breakdown
***** Part 1: Mechanical Fan Removal & Belt re-routing *****
This is VERY straightforward. There are two small bolts at the top of the fan shroud, and four nuts on the fan clutch. Remove all six, and the fan/shroud with come out the top easily.
Once it's out, you can see that there's only like 2.75" to mount a fan/shroud. It can be done, but the options are slim, especially when trying to get 2000+ CFM. So, the best bet is to remove that fan pulley entirely, since it's now useless. I looked at several other fan installs, and noticed that the pre-97 XJs had an idler pulley next to the thermostat housing. I realized I could use this pulley (mounted on the A/C compressor bracket) to re-route the serpentine belt, eliminating the now useless fan pulley. This is how the belt will look:
Went to the junkyard, and grabbed up this A/C bracket off a '91 for $14:
Using a 4.5" angle grinder, I chopped off the shaft and support for the fan pulley (all this so I had the option to go back to stock, I wasn't sure it was gonna work out right...)
This is how it looks with the modified A/C bracket, and the belt routed (temporarily):
I also bought a spare front alternator bracket, as the new belt would have gone through it, as seen here:
The red lines are the belt outlines, and 1) is the timing cover stud that had to be ground smooth, 2) is the alternator bracket that was modified. It was modified like this:
So that it woulf fit between the top bolt of the alternator bracket and the bolt/nut combo that goes through the bottom of the A/C bracket. Using some lock washers as spacers, it came together perfectly. The A/C bracket bolt hole had to be opened up a bit, but it fits like this:
Last edited:


 ) - 4500 CFM - Taurus Fan -


")