lost honda pro
NAXJA Forum User
- Location
- Gainesville, FL
Alright, so I've had my '97 XJ Country for almost two weeks, and while I am the usual broke college student, I still want to change stuff, and articulation is always a good thing to have, so I started doing some reasearch...
These sites had some great info, so I'm not pretending I thought this up myself, but I did manage to make a little combo of everything that I think turned out pretty good.
http://www.4x4xplor.com/homediscos.html
http://www.capitaljeeps.com/xjtech/discos/swaybardisco.shtml
http://www.jeepforum.com/forum/showthread.php?t=345039&highlight=swaybar+disconnects
http://jeep.off-road.com/jeep/article/articleDetail.jsp?id=257851
Alright, now to the write up (pics for each step follow the description):
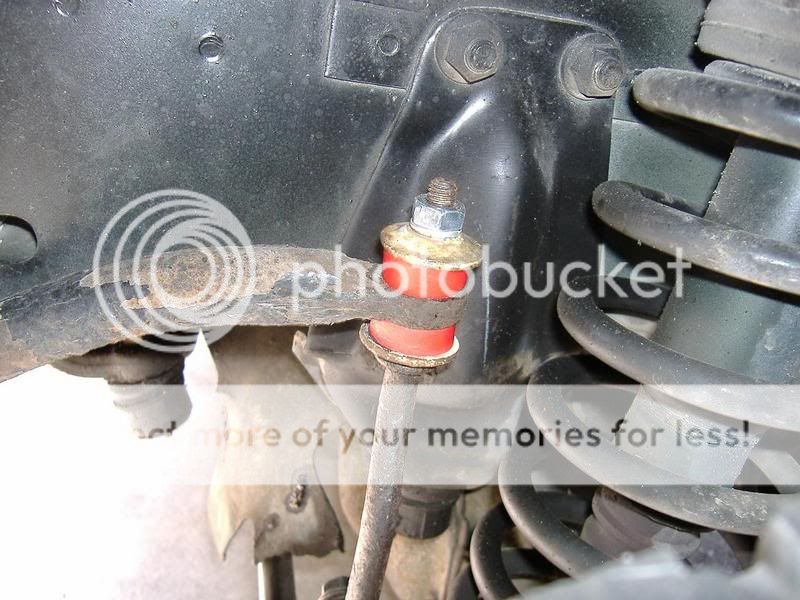
1) First thing is to pull of the old rusty hardware... Mine was a 17mm on the top of the end links, and 18mm on the bottom... This is what the hardware looks like, less the end link bushings, as I re-used them and they are on the vehicle. The red line is hardware from the top, blue line is bottom hardware.

2) I also wanted to get an extra set of the OE size hardware, in case push came to shove and I needed to replace everything, so I went to Ace Hardware and got new washers, lock washers, and nuts (the top nut is M10 x 1.5, bottom is M12 x 1.75)

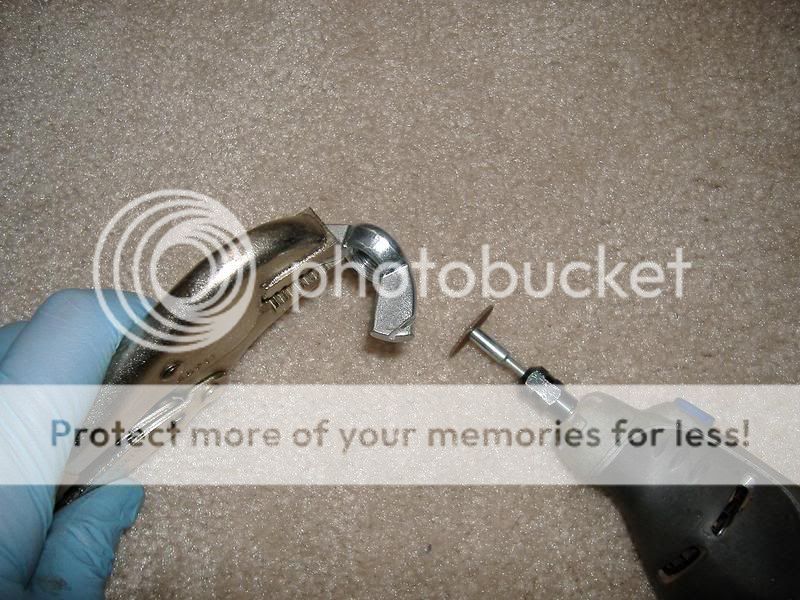
3) Next, I test fitted the wing nuts on the top and bottom. They were matching M10 x 1.5 up top, and M12 x 1.75 below. Turns out the axle side of the steering stabilizer bracket was too close to the end link bolt, so I had to trim the (passenger side only) wing nut with a Dremel. (Below is trimming the wing nut, and how it fit afterword)
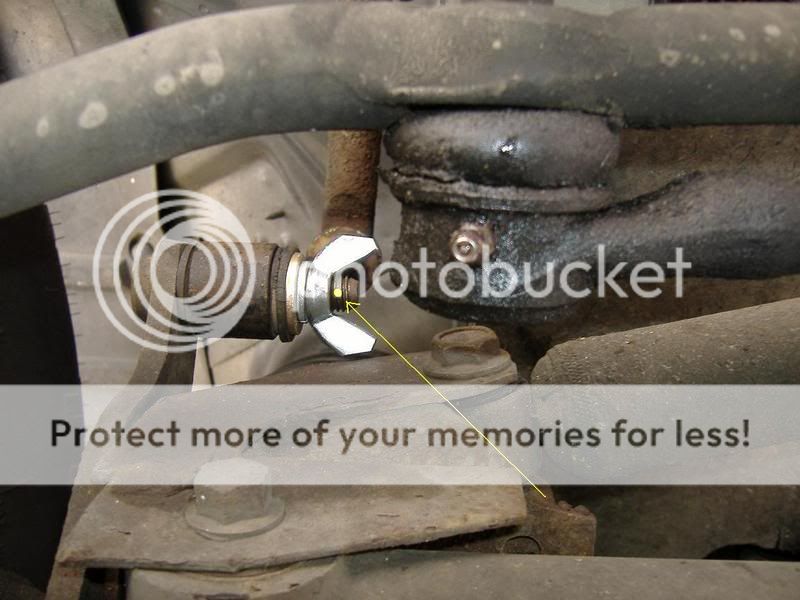
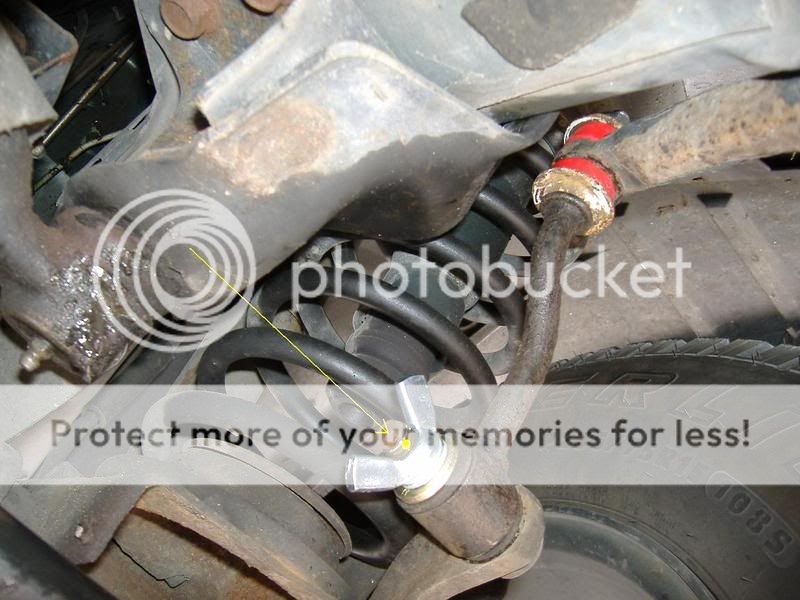
4) Now I put on the wing nuts with the end links in place to mock up where the ideal hitch pin holes would be. Yellow dots/lines indicate where I decided to put em. I used a Ace brand bit for hardened steel, and it went through like a hot knife... I decided to use a 3/32" so there would be plenty of bolt still there.
5) I was going to use a lock washer on the top of the end link, but when I tried unscrewing it, the split dug into the other washer, and the wing nut, so that idea was out...
6) Drilled the hole in the lower bolt using the 3/32" bit referenced above. Hardest part is starting it, then just make sure it goes in straight and centered....

7) Then the top of the end link... Used the same bit and tried to stay true ( a press would have been nice )
8) Then I took my wire brush attachment on the Dremel, cleaned up the loose bits of metal, then ran the new hardware over the drilled area, to make sure nothing would snag... It was a little tight the first time, but spun freely afterwards.
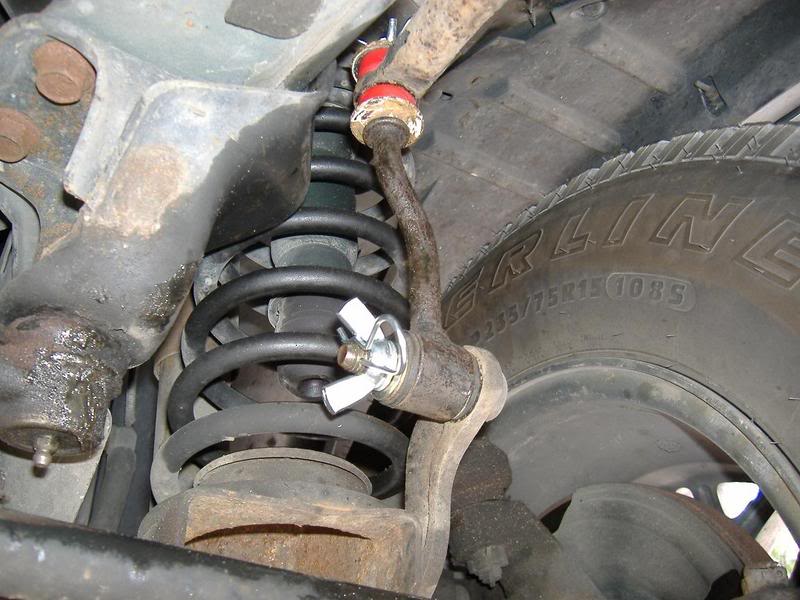
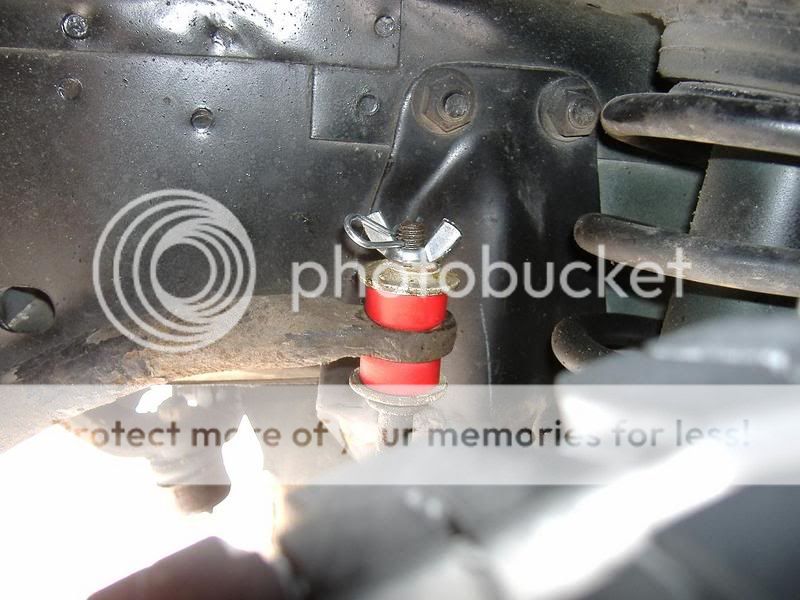
9) Then just mount 'em up! Mine fit a little tight on top, so I suggest you give a little extra space if possible.
10) Price breakdown:
(2) OE replacement M10 x 1.50 nuts - $0.60
(2) M10 lock/split washers - $0.26
(2) OE replacement M12 x 1.75 nuts - $1.40
(2) M12 washers - $0.24
(2) M12 lock/split washers - $0.30
(2) M10 x 1.50 wing nuts - $1.30
(2) M12 x 1.75 wing nuts - $2.68
(4) 3/32" x 1 5/8" hitch pins (two spares) - $0.80
(4) 3/32" x 2 5/16" hitch pins (two spares) - $0.68
(1) 3/32" carbite (for hardened steel) bit - $2.99
I also chose to replace the bushings with some Prothane replacements:
(1) set of 8 bushings (for F & R) - $11.99
11) Drove it around the block, went over some speed bumps, my driveway is pretty rough, and it felt 100% stock, so I don't have any concerns for the time being. I will be carrying the spare hardware with me, however, along with some pliers for the hitch pins. You might also want some WD-40 to spray off the threads after some mud/trail running. I was thinking about using the clevis pins, but I didn't like the idea of it flapping around, so utilizing the stock bolts ended up working out.
Please let me know if you have any revisions/typos/websites to include. Hope it was helpful to some broke stocker Jeepers like me...
Disclaimer: The information here is presented to the best of my knowledge. All information given is as accurate as possible, but may not apply to your specific vehicle. I am not liable for any damage or injury resulting from use of information or procedures on this page. Please use all proper safety equipment and practices when working on your vehicle.
These sites had some great info, so I'm not pretending I thought this up myself, but I did manage to make a little combo of everything that I think turned out pretty good.
http://www.4x4xplor.com/homediscos.html
http://www.capitaljeeps.com/xjtech/discos/swaybardisco.shtml
http://www.jeepforum.com/forum/showthread.php?t=345039&highlight=swaybar+disconnects
http://jeep.off-road.com/jeep/article/articleDetail.jsp?id=257851
Alright, now to the write up (pics for each step follow the description):
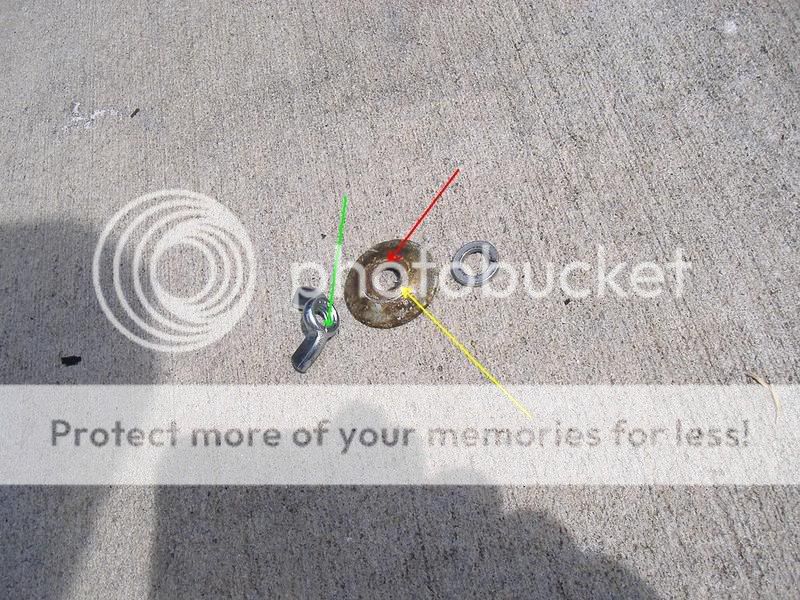
1) First thing is to pull of the old rusty hardware... Mine was a 17mm on the top of the end links, and 18mm on the bottom... This is what the hardware looks like, less the end link bushings, as I re-used them and they are on the vehicle. The red line is hardware from the top, blue line is bottom hardware.
2) I also wanted to get an extra set of the OE size hardware, in case push came to shove and I needed to replace everything, so I went to Ace Hardware and got new washers, lock washers, and nuts (the top nut is M10 x 1.5, bottom is M12 x 1.75)
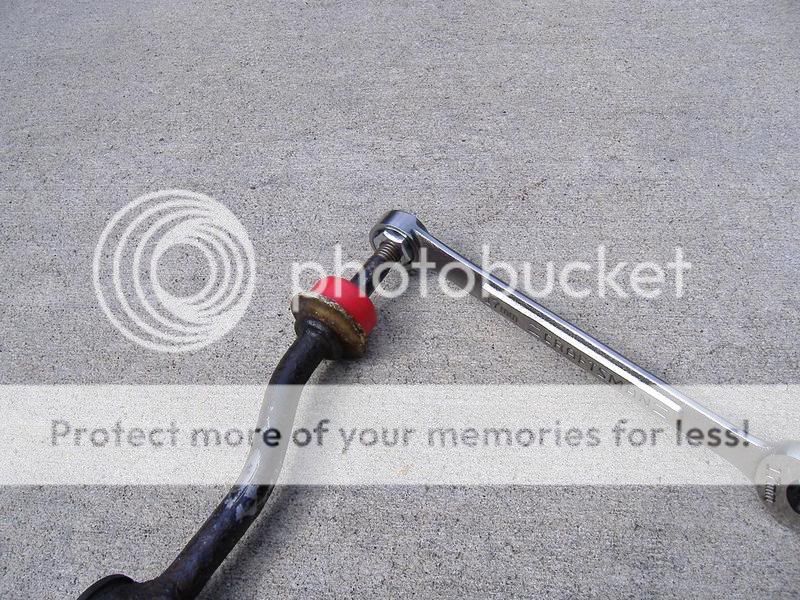
3) Next, I test fitted the wing nuts on the top and bottom. They were matching M10 x 1.5 up top, and M12 x 1.75 below. Turns out the axle side of the steering stabilizer bracket was too close to the end link bolt, so I had to trim the (passenger side only) wing nut with a Dremel. (Below is trimming the wing nut, and how it fit afterword)
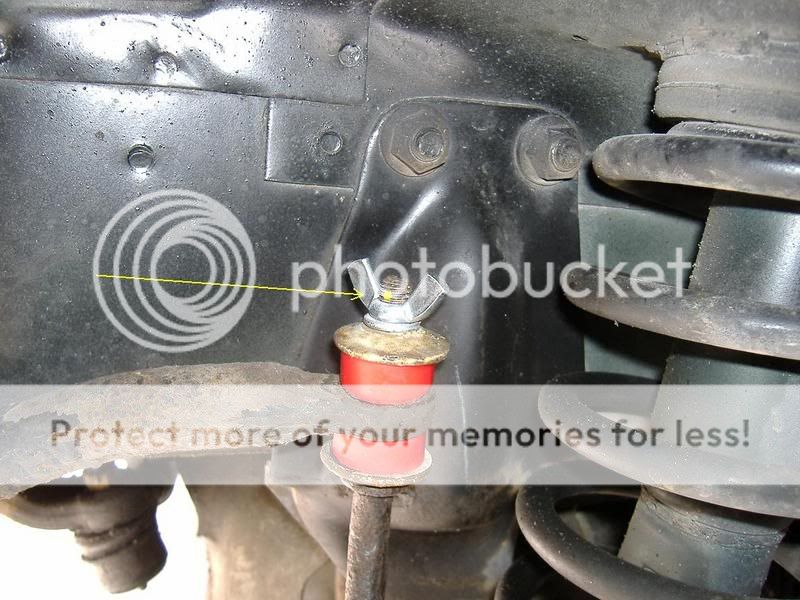
4) Now I put on the wing nuts with the end links in place to mock up where the ideal hitch pin holes would be. Yellow dots/lines indicate where I decided to put em. I used a Ace brand bit for hardened steel, and it went through like a hot knife... I decided to use a 3/32" so there would be plenty of bolt still there.
5) I was going to use a lock washer on the top of the end link, but when I tried unscrewing it, the split dug into the other washer, and the wing nut, so that idea was out...
6) Drilled the hole in the lower bolt using the 3/32" bit referenced above. Hardest part is starting it, then just make sure it goes in straight and centered....
7) Then the top of the end link... Used the same bit and tried to stay true ( a press would have been nice )
8) Then I took my wire brush attachment on the Dremel, cleaned up the loose bits of metal, then ran the new hardware over the drilled area, to make sure nothing would snag... It was a little tight the first time, but spun freely afterwards.
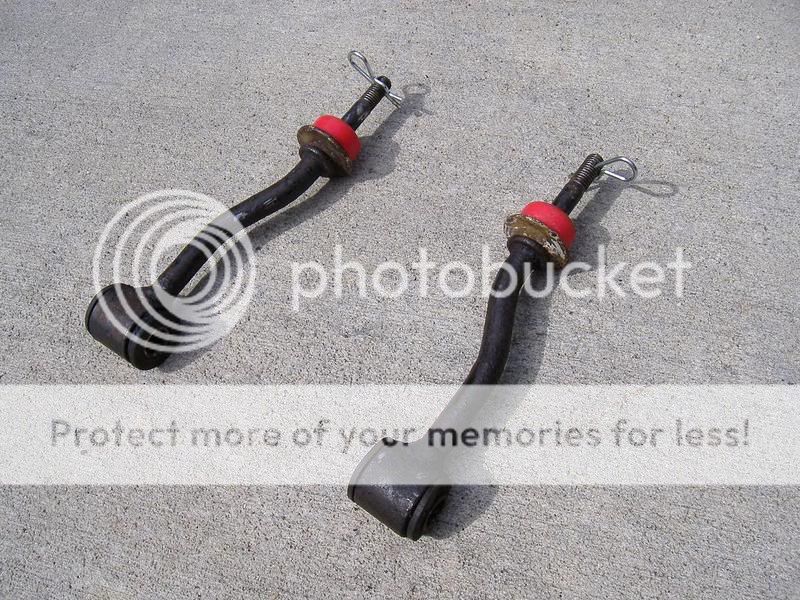
9) Then just mount 'em up! Mine fit a little tight on top, so I suggest you give a little extra space if possible.
10) Price breakdown:
(2) OE replacement M10 x 1.50 nuts - $0.60
(2) M10 lock/split washers - $0.26
(2) OE replacement M12 x 1.75 nuts - $1.40
(2) M12 washers - $0.24
(2) M12 lock/split washers - $0.30
(2) M10 x 1.50 wing nuts - $1.30
(2) M12 x 1.75 wing nuts - $2.68
(4) 3/32" x 1 5/8" hitch pins (two spares) - $0.80
(4) 3/32" x 2 5/16" hitch pins (two spares) - $0.68
(1) 3/32" carbite (for hardened steel) bit - $2.99
I also chose to replace the bushings with some Prothane replacements:
(1) set of 8 bushings (for F & R) - $11.99
11) Drove it around the block, went over some speed bumps, my driveway is pretty rough, and it felt 100% stock, so I don't have any concerns for the time being. I will be carrying the spare hardware with me, however, along with some pliers for the hitch pins. You might also want some WD-40 to spray off the threads after some mud/trail running. I was thinking about using the clevis pins, but I didn't like the idea of it flapping around, so utilizing the stock bolts ended up working out.
Please let me know if you have any revisions/typos/websites to include. Hope it was helpful to some broke stocker Jeepers like me...
Disclaimer: The information here is presented to the best of my knowledge. All information given is as accurate as possible, but may not apply to your specific vehicle. I am not liable for any damage or injury resulting from use of information or procedures on this page. Please use all proper safety equipment and practices when working on your vehicle.
