I am so excited about how this project is going that I decided to post some of it before it is completely done.
Some of you have asked about some of the fiberglass work I do for myself and friends, so I decided to do a how to write up on something that I have never done before to show how the process works for me.
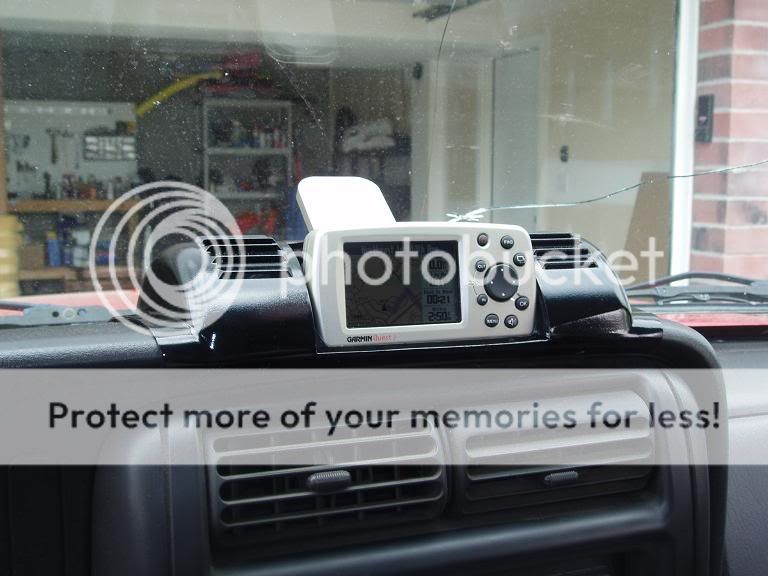
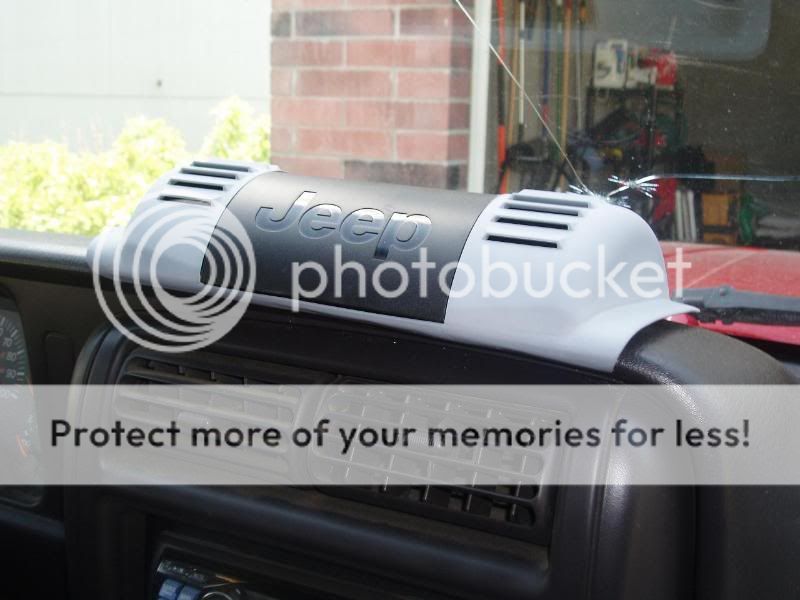
First off, I wanted a GPS unit in my Jeep, and I was really jealous of the TJ Trailguide setup. It was exactly what I wanted. It is small, handheld capability, motor cycle capable (if I ever get one, and Jeep mounts available. The problem is that the mounts were only available for TJ’s and JK’s. I choose the Garmin Quest II GPS unit cause the price had dropped and made it easier to afford.
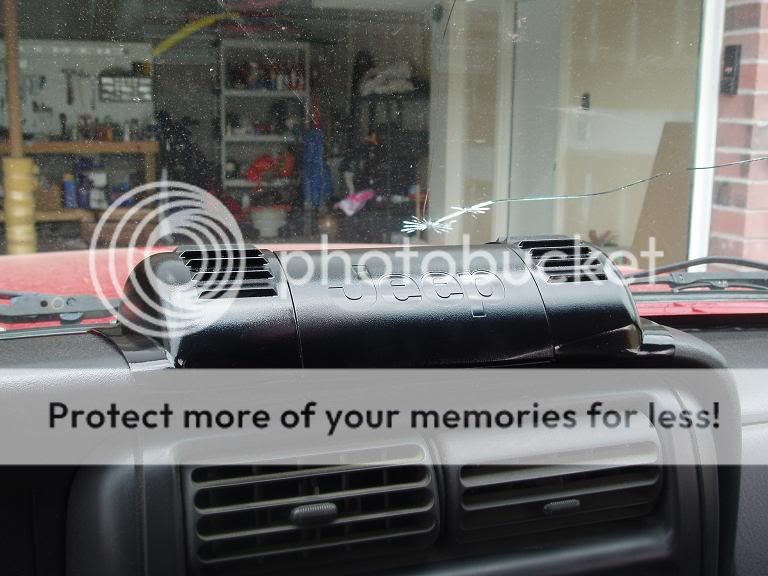
The mount for the GPS would not have looked good if I just cut the dash or installed it on top. It would have either looked like crap or been too high off the dash. The dash needs to be cut, but the contours of the mount would make it impossible to get a tight good looking fit. So, I decided to make a fiberglass form of the dash to attach to the mount and hide the dash cuts. This is a fiberglass how to on making a mold of an existing piece.
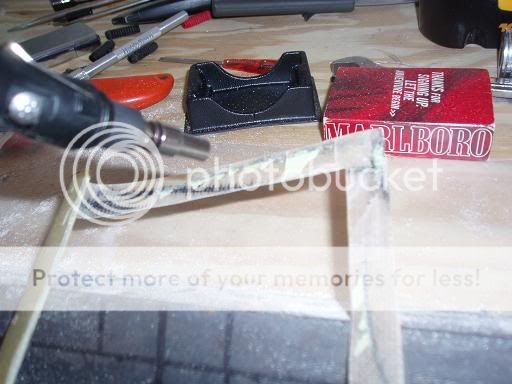
First thing is to decide where to mount the piece. I centered it with the center dash console and taped up the dash area that I would be making a mold of. Make generous overlaps with the tape, because you DO NOT want resin to leak into unwanted areas.
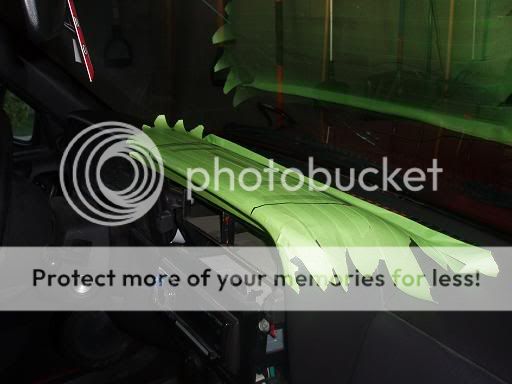
I marked the taped area where the mount would go to give me an idea of coverage needed. Using a double sided tape I stuck the fiberglass cloth to the area I wanted a mold of. Around the more extreme curved areas, I used more tape to make sure the contour would be correct. I then layed the cloth over the tape and made sure there was no wrinkles and that it curved with the dash (no bubble areas). In some cases you would want to use a releasing agent, like carnuba wax, on the taped off surface to make sure the mold comes off without too much trouble. I used a little on the top of that dash between the double sided tape areas. I applied a thin coat of resin.

I waited for it to cure. I then made an anxious mistake and removed the piece before adding another layer (more on this later). I quickly put it back into place. I added two more layers with the second layers weave turned 45* to make a cross pattern of weaves between layers. Hoping to add strength and limit total layers needed. I then removed it from the dash. Strong and only 1/16 of an inch thick.
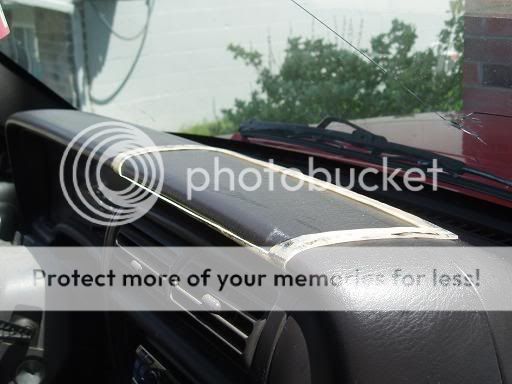
Next step was to place it back on the dash and mark the centerline. I then took the mount and placed it on top of the dash piece to mark out inner and outer cut lines. I used a dremel to make the cuts. The cut on the front edge of the dash was leveled to make sure the mount would sit level in the piece.
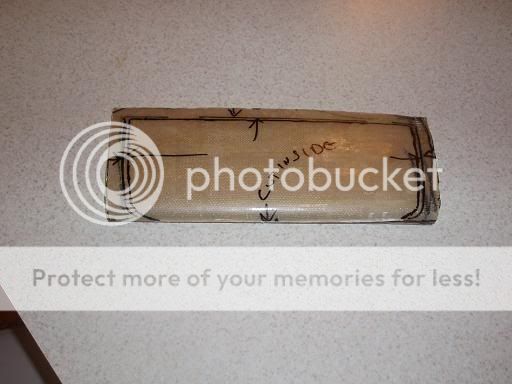
Once cut I placed it on the dash to see how it fit. I had F’ed it up when I took it off to early. I tried a trick I have used before and it worked. I heated up the underside of the piece in the areas that needed to have more curve and pressed it into shape. The resin tightens on the bottom side more and helps curve it on its own. Do it from the top, and it will cure tighter the wrong way. Once fixed, I marked the dash along the inside cut area with a grease pencil where I would cut it later.
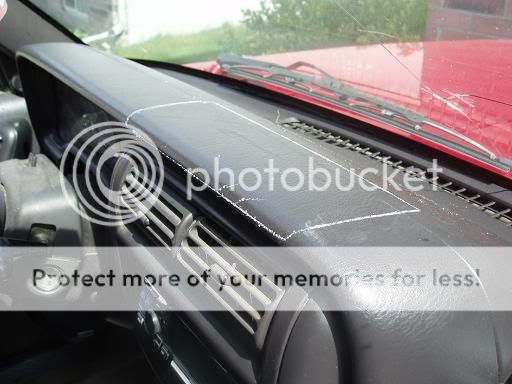
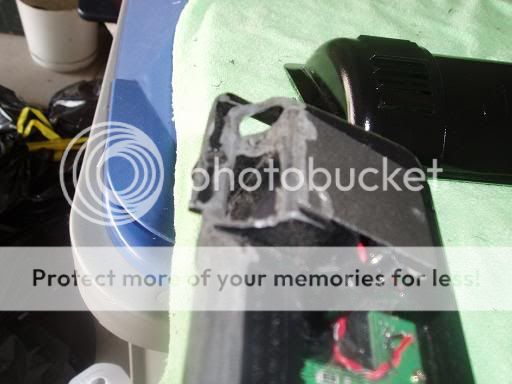
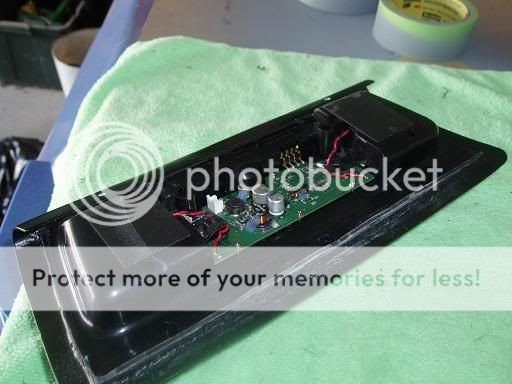
Now the hard part! Slowly cutting and sanding to make the mount fit inside the dash piece just right without ruining the pieces. Once it was sitting straight, I used some super glues that R/C modelers use to tac it into place. These glues come in different thicknesses to help with gap filling.
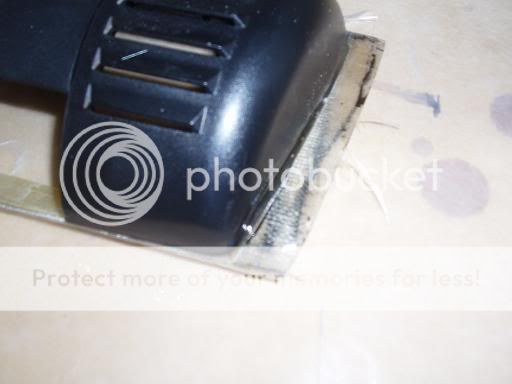
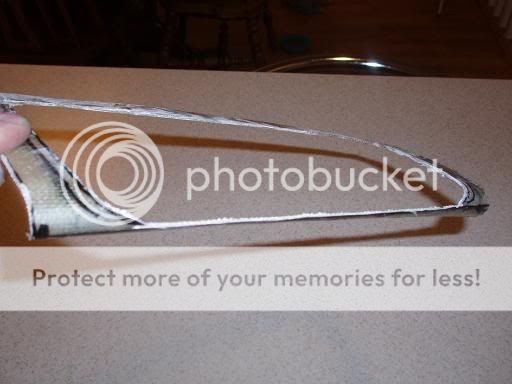
Cut and in place it needed to have a fiber glass joint that would make it stronger. From the back side I took small pieces of the cloth and resin to make a joint between the pieces. I drilled holes prior to this to help the resin seep into the mount to make a strong joint.
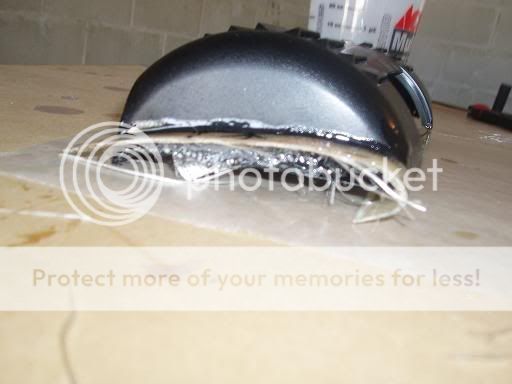

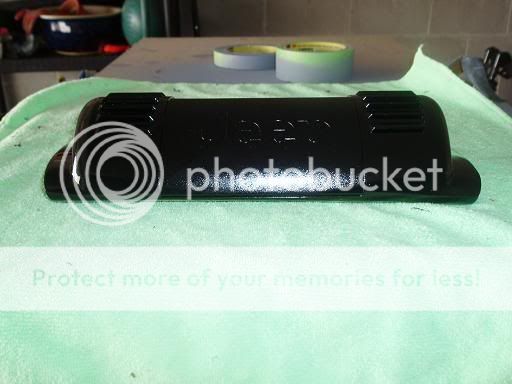
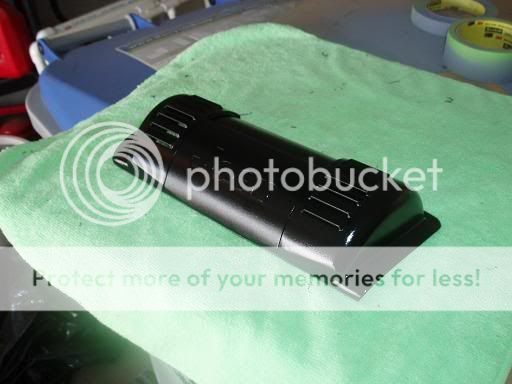
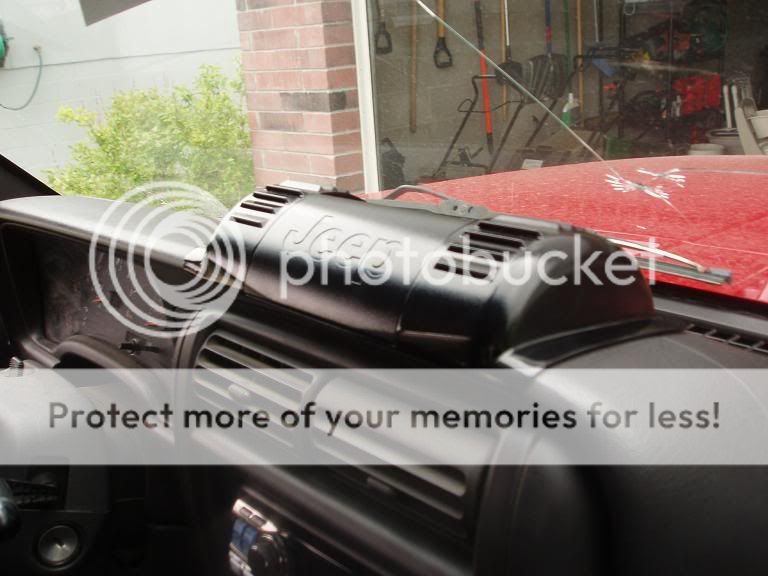
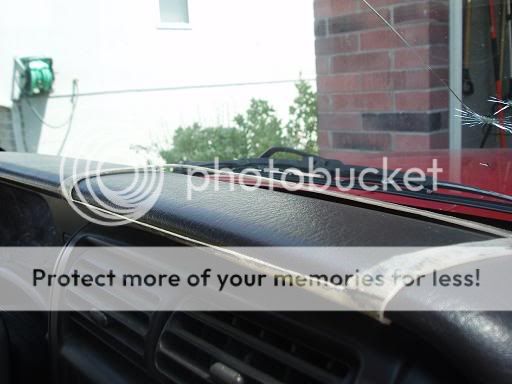
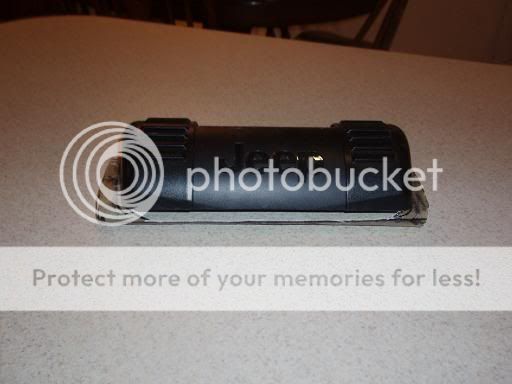
Fiberglass done and strong! Now time to bondo and shape. Take your time. Lots of sanding and shaping got it to this!!!! A shot of primer is on to get ready for paint. Just sitting on top of dash for now...
Some of you have asked about some of the fiberglass work I do for myself and friends, so I decided to do a how to write up on something that I have never done before to show how the process works for me.
First off, I wanted a GPS unit in my Jeep, and I was really jealous of the TJ Trailguide setup. It was exactly what I wanted. It is small, handheld capability, motor cycle capable (if I ever get one, and Jeep mounts available. The problem is that the mounts were only available for TJ’s and JK’s. I choose the Garmin Quest II GPS unit cause the price had dropped and made it easier to afford.
The mount for the GPS would not have looked good if I just cut the dash or installed it on top. It would have either looked like crap or been too high off the dash. The dash needs to be cut, but the contours of the mount would make it impossible to get a tight good looking fit. So, I decided to make a fiberglass form of the dash to attach to the mount and hide the dash cuts. This is a fiberglass how to on making a mold of an existing piece.
First thing is to decide where to mount the piece. I centered it with the center dash console and taped up the dash area that I would be making a mold of. Make generous overlaps with the tape, because you DO NOT want resin to leak into unwanted areas.
I marked the taped area where the mount would go to give me an idea of coverage needed. Using a double sided tape I stuck the fiberglass cloth to the area I wanted a mold of. Around the more extreme curved areas, I used more tape to make sure the contour would be correct. I then layed the cloth over the tape and made sure there was no wrinkles and that it curved with the dash (no bubble areas). In some cases you would want to use a releasing agent, like carnuba wax, on the taped off surface to make sure the mold comes off without too much trouble. I used a little on the top of that dash between the double sided tape areas. I applied a thin coat of resin.
I waited for it to cure. I then made an anxious mistake and removed the piece before adding another layer (more on this later). I quickly put it back into place. I added two more layers with the second layers weave turned 45* to make a cross pattern of weaves between layers. Hoping to add strength and limit total layers needed. I then removed it from the dash. Strong and only 1/16 of an inch thick.
Next step was to place it back on the dash and mark the centerline. I then took the mount and placed it on top of the dash piece to mark out inner and outer cut lines. I used a dremel to make the cuts. The cut on the front edge of the dash was leveled to make sure the mount would sit level in the piece.
Once cut I placed it on the dash to see how it fit. I had F’ed it up when I took it off to early. I tried a trick I have used before and it worked. I heated up the underside of the piece in the areas that needed to have more curve and pressed it into shape. The resin tightens on the bottom side more and helps curve it on its own. Do it from the top, and it will cure tighter the wrong way. Once fixed, I marked the dash along the inside cut area with a grease pencil where I would cut it later.
Now the hard part! Slowly cutting and sanding to make the mount fit inside the dash piece just right without ruining the pieces. Once it was sitting straight, I used some super glues that R/C modelers use to tac it into place. These glues come in different thicknesses to help with gap filling.
Cut and in place it needed to have a fiber glass joint that would make it stronger. From the back side I took small pieces of the cloth and resin to make a joint between the pieces. I drilled holes prior to this to help the resin seep into the mount to make a strong joint.
Fiberglass done and strong! Now time to bondo and shape. Take your time. Lots of sanding and shaping got it to this!!!! A shot of primer is on to get ready for paint. Just sitting on top of dash for now...