I might shy away from the iroks. They have a great price point and always thought they were a nice looking tire, but most people I've talked to that ran them over the years didn't really like them all that much. I've been a diehard Kevlar mtr guy since I first got them, any other tire would have lost sidewalls a long time ago for what I've put mine thru.
-
Welcome to the new NAXJA Forum! If your password does not work, please use "Forgot your password?" link on the log-in page. Please feel free to reach out to [email protected] if we can provide any assistance.
You are using an out of date browser. It may not display this or other websites correctly.
You should upgrade or use an alternative browser.
You should upgrade or use an alternative browser.
beater!
- Thread starter ehall
- Start date
Outlander560
NAXJA Forum User
- Location
- New York
X2 with Rich. I have had 33s 35s and now 37s one of my top tire choices
- Location
- Southern Maryland
Yeah they are top of my list too. I've heard some common complaints though, that the single AT tread fills with mud and won't unload, and that they wear uneven and become increasingly difficult to balance.
RoyalXJ
NAXJA Forum User
- Location
- West Deptford, NJ
I havent noticed any issues with the 2 sets of kevlars that ive run. Mine wore great. Just keep them rotated and good alignment. Never had balancing issues because mine are always internally balanced. As for tread not cleaning. Ive never noticed. I was able to go from mud right to gripping the rocks with no problems. Hands down best road worthy MT ive owned.
- Location
- Southern Maryland
Mostly finished my D44 swaps.
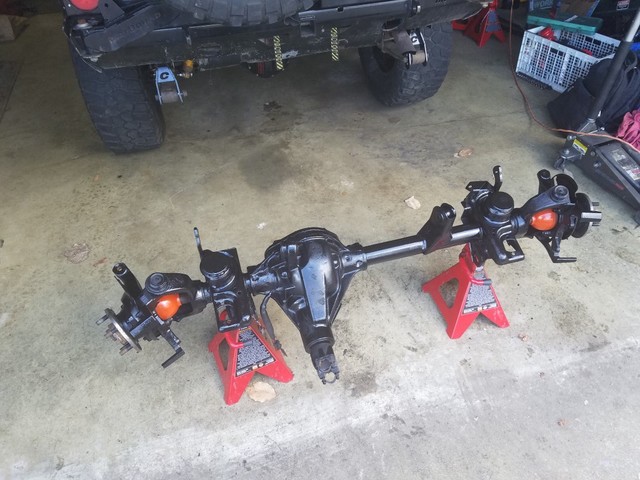
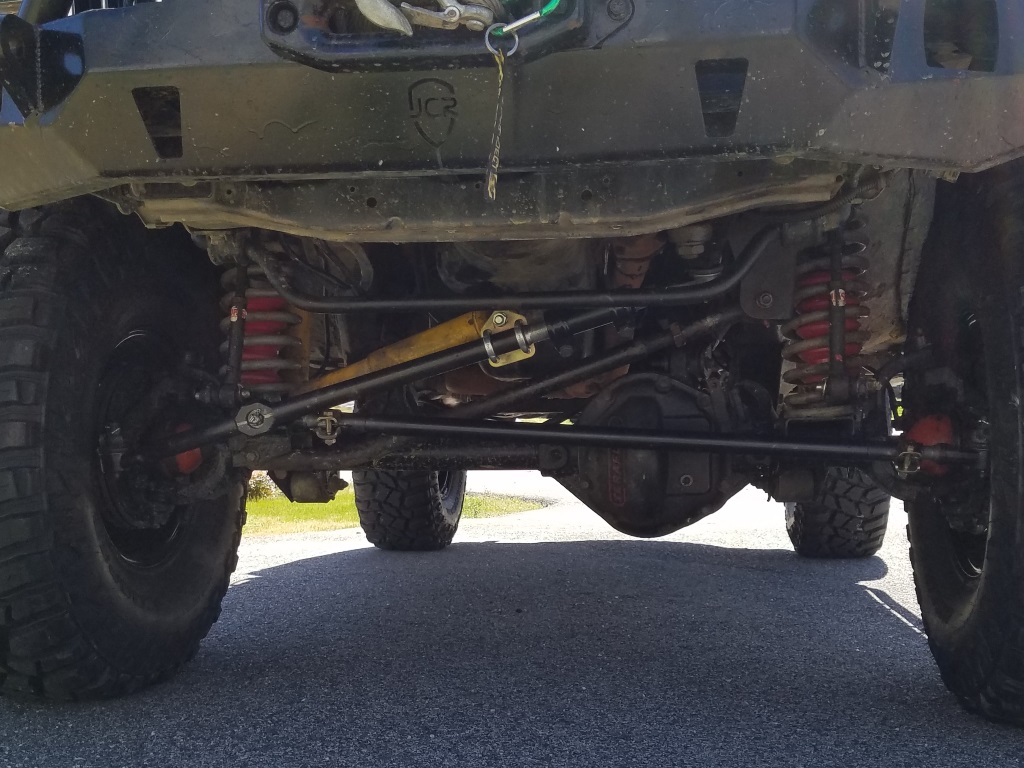
Last year I ran on 32s with RE 3.5 springs and open diffs. I was able to run almost all of the trails that I wanted, but I had to spend a lot of time picking a line where all the tires would stay on the ground, and there were a few trails that I couldn't run because there was no such line available. For this year I wanted to upgrade to 35s and lockers so that I could run the harder stuff, stay on top of bigger rocks, don't care if I put a wheel in the air, and generally beef up the capability and strength. Andy found a pair of TJ Rubicon D44s up in CT that fit the bill so I made a road trip and bought them.
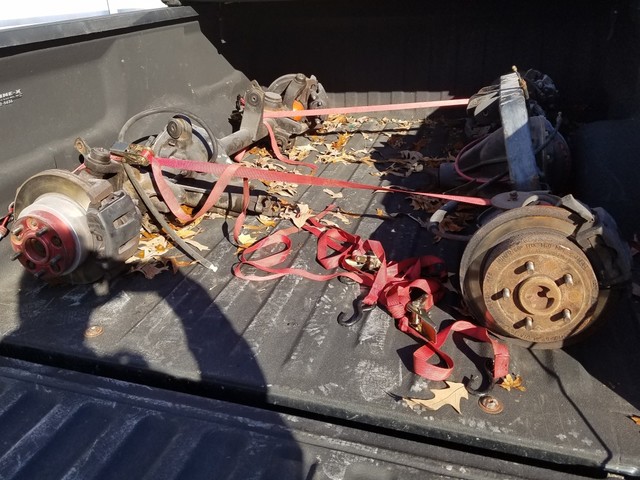
Rear TJ Rubicon D44s have a hybrid worm-drive LSD and air locker with disk brakes. The front also has an air locker. The downfall is low-pinion D44 with D30 outers (boo), however the seller had already upgraded to RCV shafts (yay) so axle strength wasn't an issue--overall much stronger than a D30 with u-joint shafts. The seller had also already upgraded the gear ratio to 5.13, added Teraflex covers, new hubs and brakes, and a few other small upgrades. Overall very solid axles, and very good match for use with a winter Jeep--Full-Time with gear-driven LSD and RCVs should be very nice in the snow.
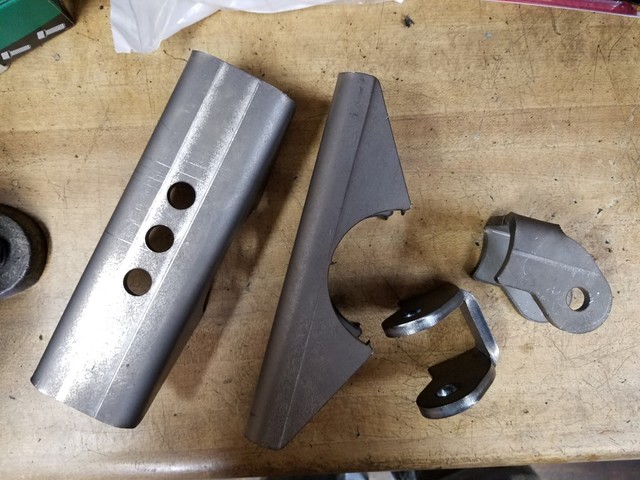
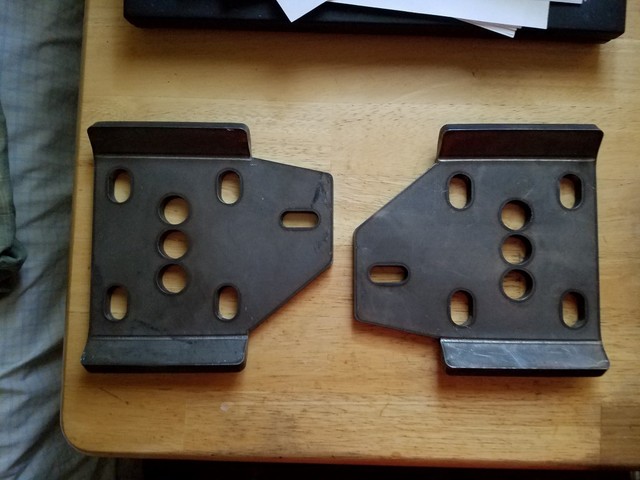
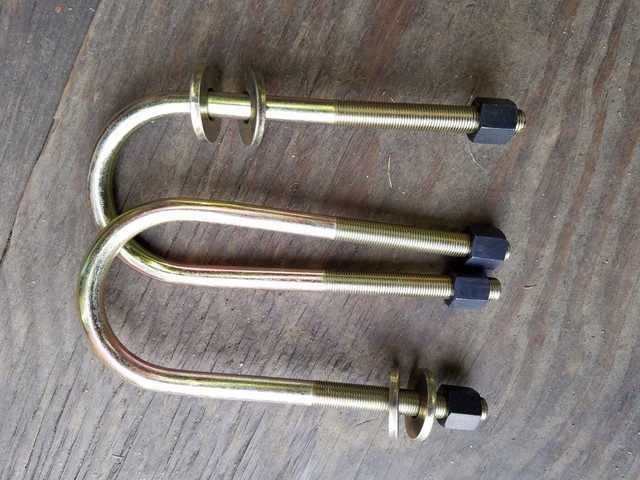
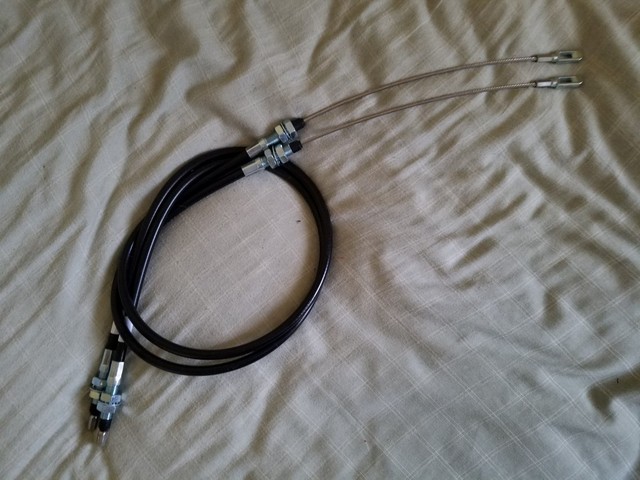
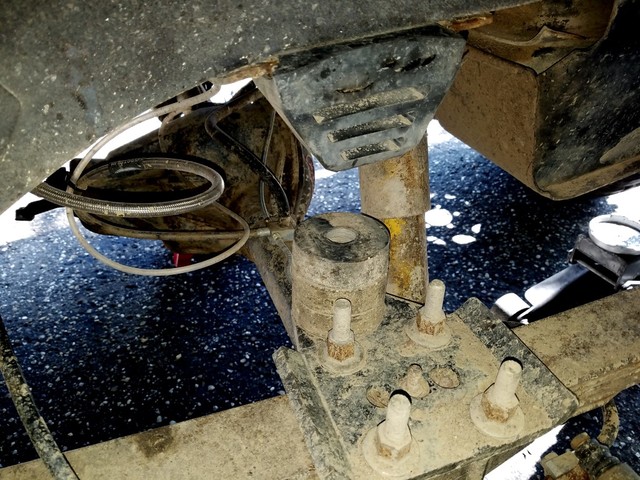
Once I got the axles I started buying install parts. First the leaf setup bits for the rear D44, starting with Ruff Stuff extended leaf perches and low-profile shock tabs, Dirtbound Offroad upper plates with bumpstop pads (note that the uppers and lowers have adjustment holes so I can move the axle back and forth 1" if needed), Curry u-bolts, and MORE parking brake cables for their 8.8 swap kit which also work with KJ/ZJ/TJ disc brakes.
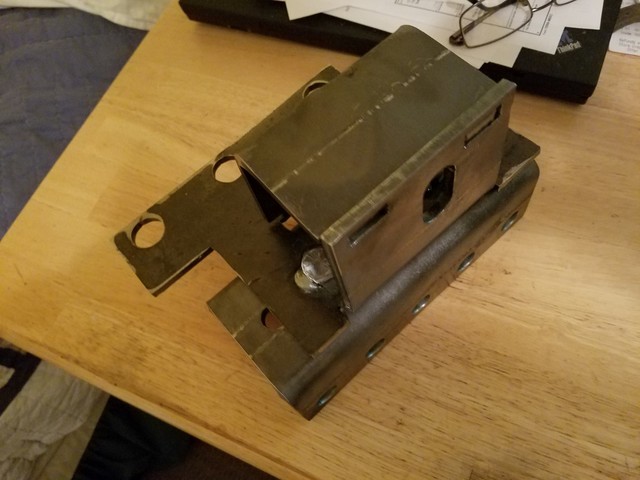
I also planned to add more lift for the tires, so I bought a set of HD Offroad Engineering shackle relocation boxes and Clayton adjustable lift shackles
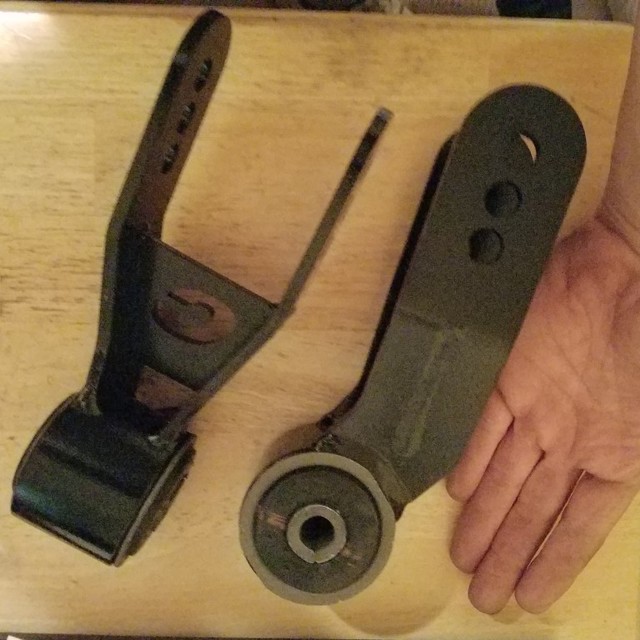
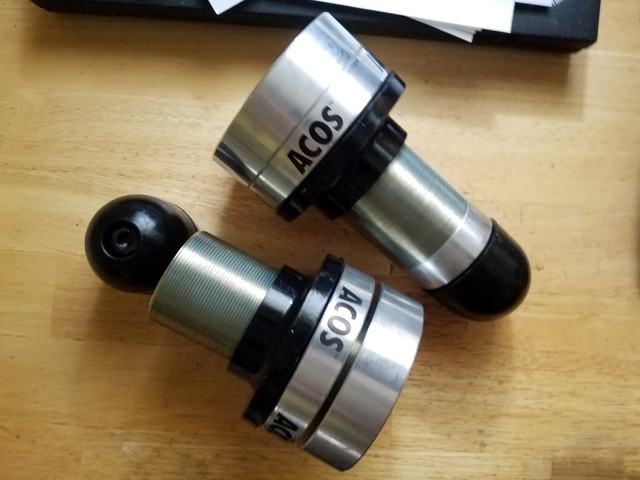
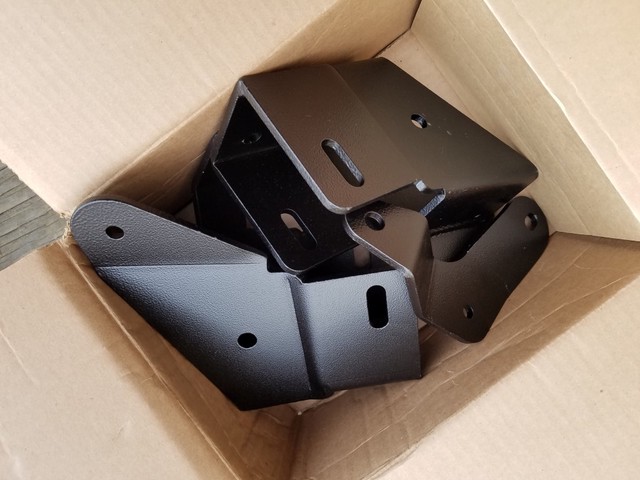
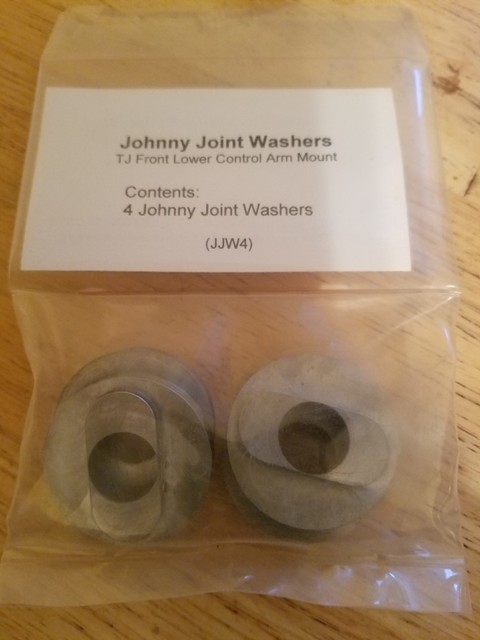
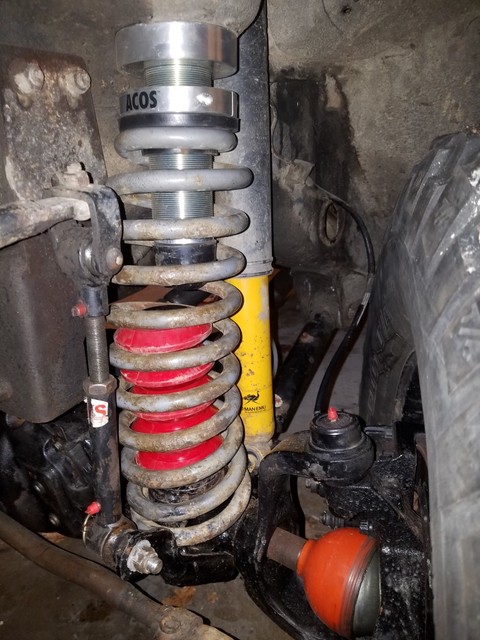
For the front I bought a set of JKS ACOS adjustable spacers, Rubicon Express control arm drop brackets, Black Magic machined washers for the TJ cam bolt slots, and Prothane coil inserts to use as bumpstops.
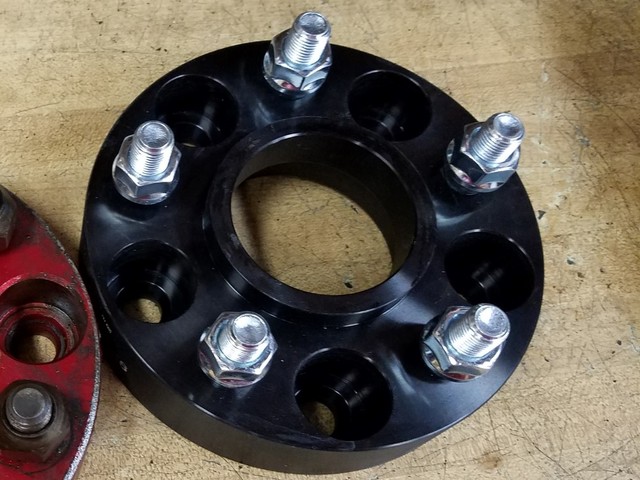
Finally I found a set of used 35/12.5R17s locally for a good price, and bought some new G2 1.25" spacers that gave me 3.25" backspacing with my 4.5" wheels
Last year I ran on 32s with RE 3.5 springs and open diffs. I was able to run almost all of the trails that I wanted, but I had to spend a lot of time picking a line where all the tires would stay on the ground, and there were a few trails that I couldn't run because there was no such line available. For this year I wanted to upgrade to 35s and lockers so that I could run the harder stuff, stay on top of bigger rocks, don't care if I put a wheel in the air, and generally beef up the capability and strength. Andy found a pair of TJ Rubicon D44s up in CT that fit the bill so I made a road trip and bought them.
Rear TJ Rubicon D44s have a hybrid worm-drive LSD and air locker with disk brakes. The front also has an air locker. The downfall is low-pinion D44 with D30 outers (boo), however the seller had already upgraded to RCV shafts (yay) so axle strength wasn't an issue--overall much stronger than a D30 with u-joint shafts. The seller had also already upgraded the gear ratio to 5.13, added Teraflex covers, new hubs and brakes, and a few other small upgrades. Overall very solid axles, and very good match for use with a winter Jeep--Full-Time with gear-driven LSD and RCVs should be very nice in the snow.
Once I got the axles I started buying install parts. First the leaf setup bits for the rear D44, starting with Ruff Stuff extended leaf perches and low-profile shock tabs, Dirtbound Offroad upper plates with bumpstop pads (note that the uppers and lowers have adjustment holes so I can move the axle back and forth 1" if needed), Curry u-bolts, and MORE parking brake cables for their 8.8 swap kit which also work with KJ/ZJ/TJ disc brakes.
I also planned to add more lift for the tires, so I bought a set of HD Offroad Engineering shackle relocation boxes and Clayton adjustable lift shackles
For the front I bought a set of JKS ACOS adjustable spacers, Rubicon Express control arm drop brackets, Black Magic machined washers for the TJ cam bolt slots, and Prothane coil inserts to use as bumpstops.
Finally I found a set of used 35/12.5R17s locally for a good price, and bought some new G2 1.25" spacers that gave me 3.25" backspacing with my 4.5" wheels
- Location
- Southern Maryland
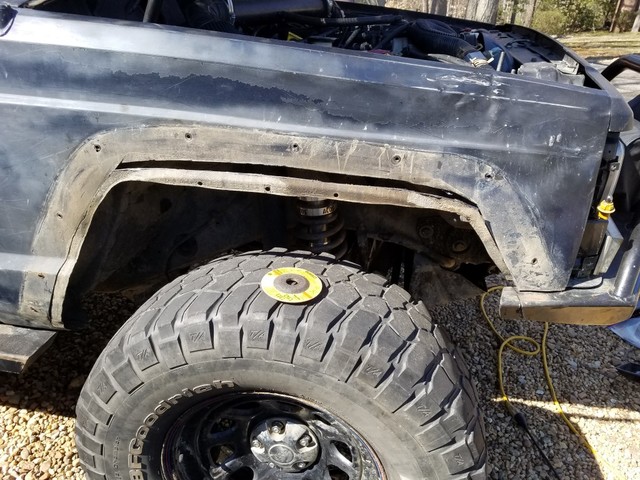
On to the install... First thing I wanted to do was install the lift and tires before installing the axles. I knew the upper shackle bolts would be bad (have never been out), and I knew the RE leaf bushings were shot, so I wanted to deal with all that junk first.
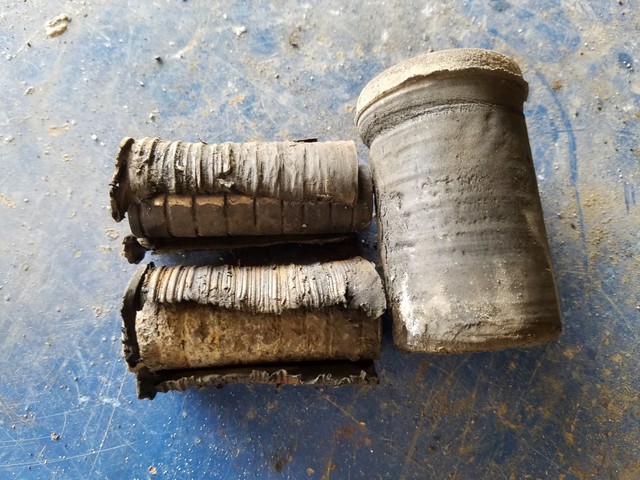
RE leaf bushings completely destroyed, replaced with Stengel Bros rubber counterparts as recommended here on . Pretty easy swap, considering. The basic approach was to push the rubber out, and then slice the outer metal with a sawzall to break the seal, then press in the new bushings with anti-sieze. Pretty straightforward

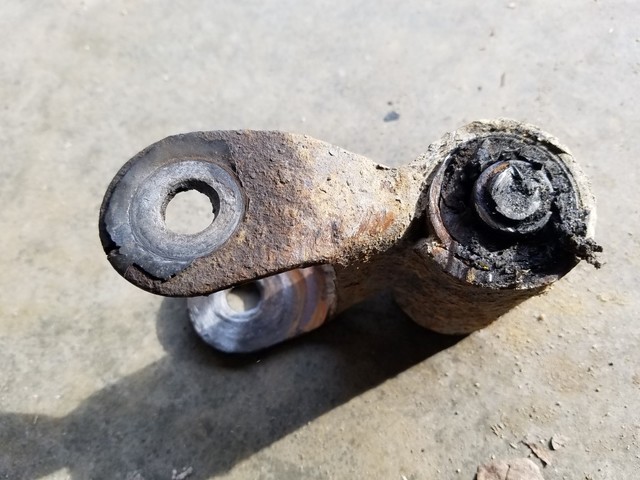
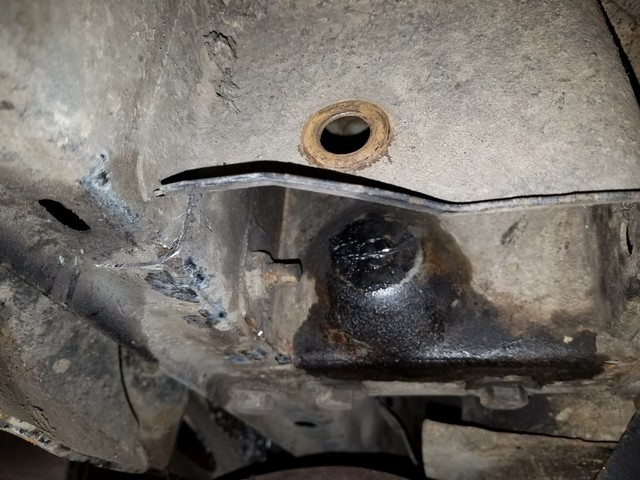
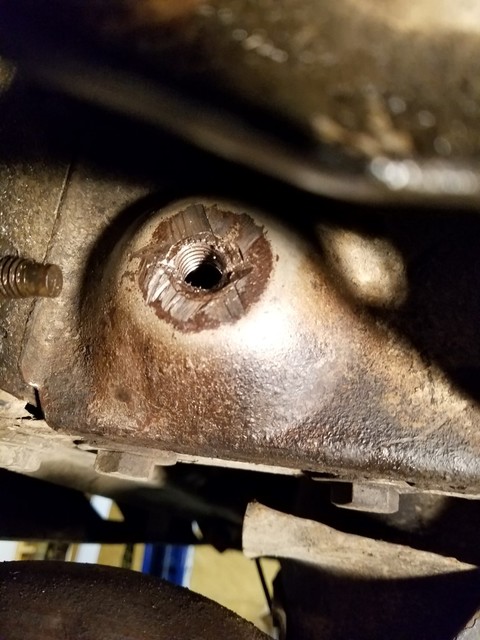
The upper shackle bolts were much more difficult. For those we had to cut the bolts flush with the body, then deal with the leftover nub. In both cases we ended up having to drill through the old 14mm bolt enough to tap for a 1/2" bolt for the relocation brackets. If I ever want to use these for 14mm again, I will have to drill more and tap again (should be able to).
The next day I got the shackles and relocation boxes installed. The front was easy enough, just drop the axle, pull the springs, and replace the stock isolators with the ACOS to get the jeep level.

The PO was in the process of converting the rear to a triangulated 4-link when he sold it, so before I could go any further I had to get the brackets and truss chopped

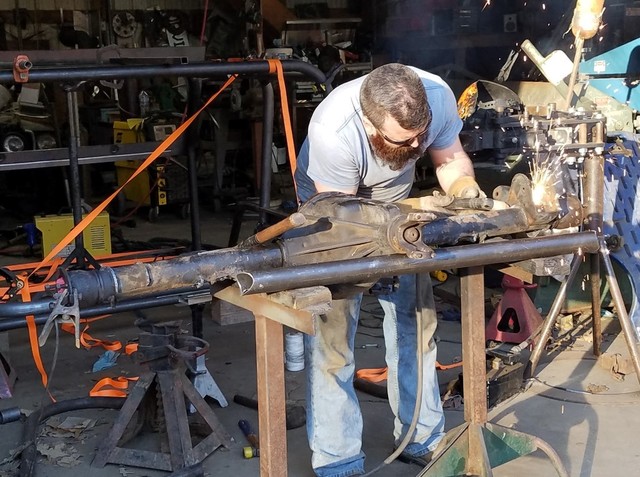

One thing I found was the tube was warbled from where the PO had welded the 4-link truss, so it was very difficult to get a level reference. I ended up using three jack-stands (one for each end and another for the yoke) and leveling the three points as a triangle, setting the yoke face to zero degrees, and then setting the perch angles relative to the yoke. This got me to almost exactly where I wanted, but I am off by about +1 degree at current height (dropping the rear should lower it back to the desired angle). No pics of the setup or welds, sorry
For the front I didn't have to do much, just tap for the coil retainer bolts and tap in the slotted washers.
I also tried to install the RE drop brackets, but I was not able to make my JKS LCAs short enough to fit between the LCA and drop bracket holes. Instead I stretched the front a little further out (about 17" on the LCAs and 16.75" on the UCAs) to help center the wheel, and also cut another 1" from the fenders to give more room.
RE leaf bushings completely destroyed, replaced with Stengel Bros rubber counterparts as recommended here on
. Pretty easy swap, considering. The basic approach was to push the rubber out, and then slice the outer metal with a sawzall to break the seal, then press in the new bushings with anti-sieze. Pretty straightforward
The upper shackle bolts were much more difficult. For those we had to cut the bolts flush with the body, then deal with the leftover nub. In both cases we ended up having to drill through the old 14mm bolt enough to tap for a 1/2" bolt for the relocation brackets. If I ever want to use these for 14mm again, I will have to drill more and tap again (should be able to).
The next day I got the shackles and relocation boxes installed. The front was easy enough, just drop the axle, pull the springs, and replace the stock isolators with the ACOS to get the jeep level.
The PO was in the process of converting the rear to a triangulated 4-link when he sold it, so before I could go any further I had to get the brackets and truss chopped
One thing I found was the tube was warbled from where the PO had welded the 4-link truss, so it was very difficult to get a level reference. I ended up using three jack-stands (one for each end and another for the yoke) and leveling the three points as a triangle, setting the yoke face to zero degrees, and then setting the perch angles relative to the yoke. This got me to almost exactly where I wanted, but I am off by about +1 degree at current height (dropping the rear should lower it back to the desired angle). No pics of the setup or welds, sorry
For the front I didn't have to do much, just tap for the coil retainer bolts and tap in the slotted washers.
I also tried to install the RE drop brackets, but I was not able to make my JKS LCAs short enough to fit between the LCA and drop bracket holes. Instead I stretched the front a little further out (about 17" on the LCAs and 16.75" on the UCAs) to help center the wheel, and also cut another 1" from the fenders to give more room.
- Location
- Southern Maryland
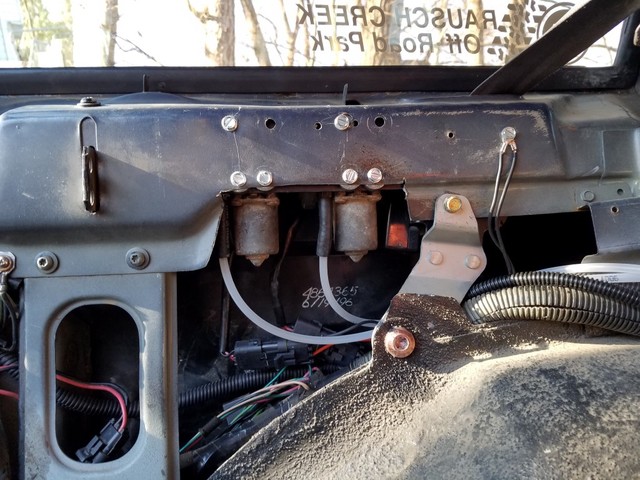
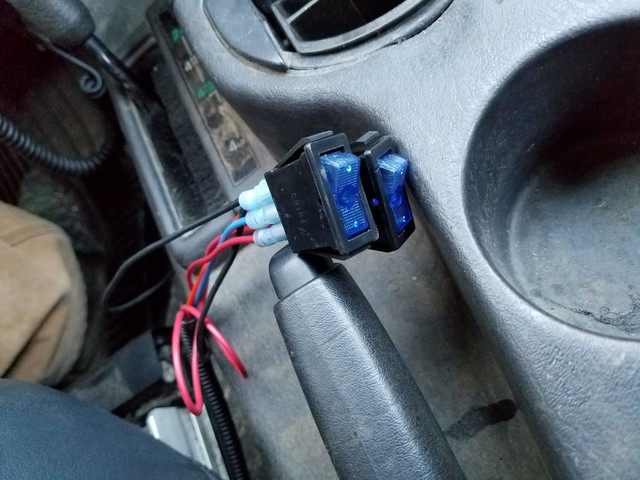
After the axles were in I started working on the Rubicon air compressors. These have built-in pressure switches that try to maintain about 5-7 PSI when energized (starts running until pressure reaches ~6 PSI), and vent to atmosphere when voltage is removed. Since they only run when activated, I installed them in the cabin (protected from dust and mud) and fed hard nylon tubing down to the housings. Switches are temporary until I get the secondary battery and cabin power grid installed
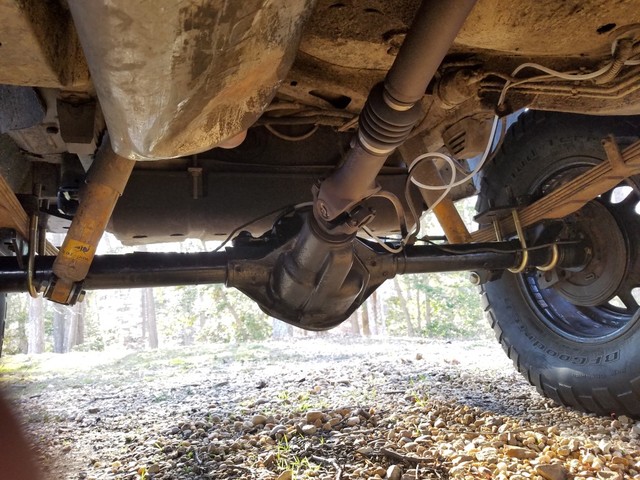
Next was driveshafts. The rear D44 pinion is almost the same as the C8.25, and the existing 32" WJ front driveshaft still works fine after a 1310-1330 conversion u-joint. However the front D44 pinion is about 2-3" longer than the D30, so the WJ driveshaft would no longer work. The FAQ here said that any 4.0 with a manual transmission would have a front driveshaft 29.25" long, so I found one at a junkyard and rebuilt it with a 1330 conversion u-joint on the end.

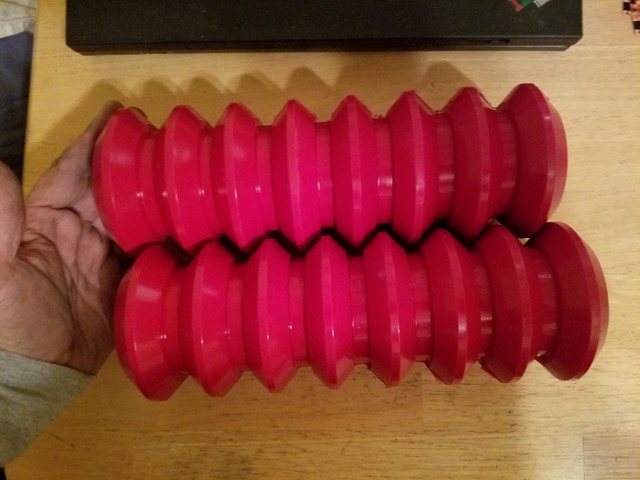
Lastly I measured and installed the bumpstops to keep the tires out of the sheet metal. For the fronts I measured about 8" of gap, so I cut the Prothanes down to 6" and fabricated end-caps from 1/8" bar stock and pipe nipples. For the rear I stacked 3 hockey pucks onto the Dirtbound Offroad spring plate (the upper jounce is soft and hollow and should compress).
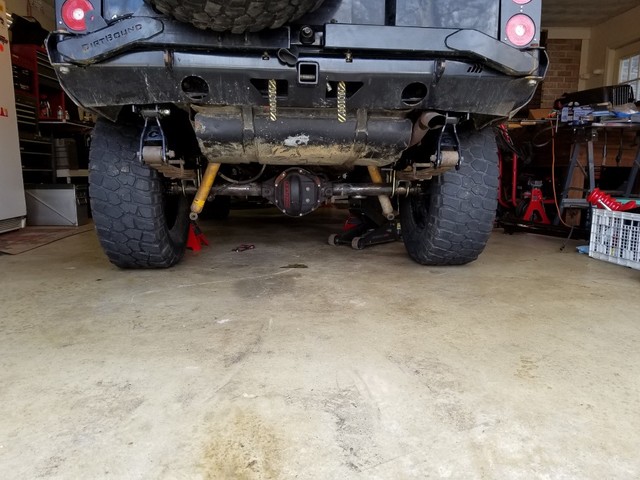
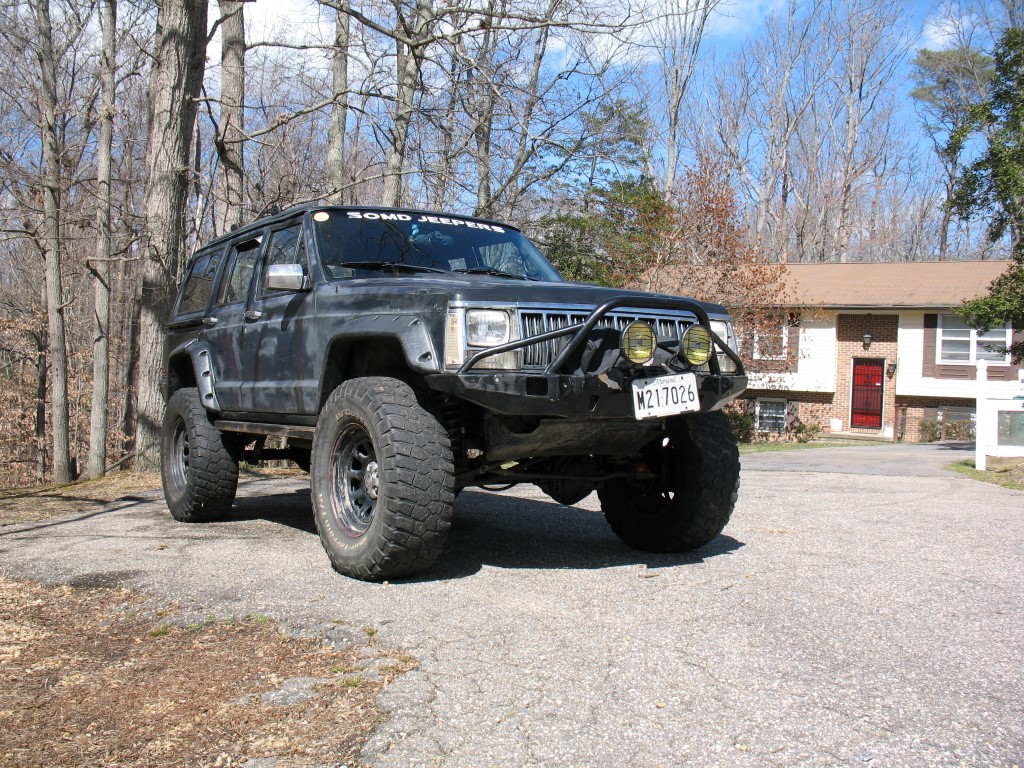
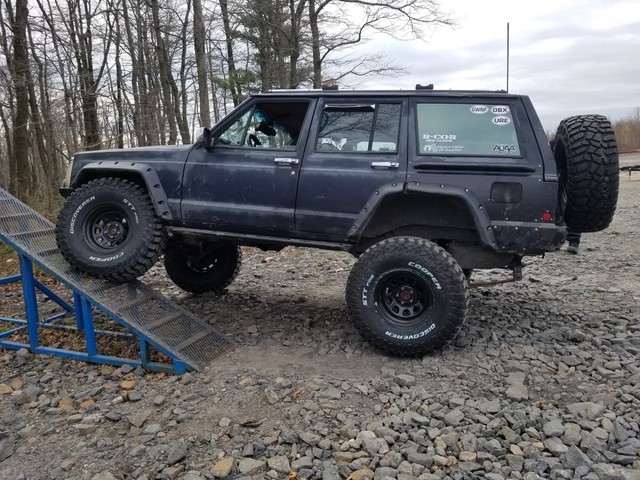
Final stance is about 5.75" of lift, and a wider posture (rear tires flush with Napier flares).
Ride quality is ... okay. Its a little "active" in tight corners, and gets death wobble on irregular road surfaces at highway speeds. Some of this can be fixed by improving caster angles, some of it is due to wheel imbalance problems. I plan to lower the rear a little by replacing the bolt-in shackle boxes with no-lift boxes; if that goes too low then I will get taller leaf springs to bring it back up. Meanwhile I am saving up money for new wheels and tires and looking at balance options.
I also lost a couple of upgrades in the conversion, namely the raised swaybar links and the OTK steering, which I will need to redo at some point, but I am planning a lot of upgrades for the front axle (truss, gussets, sleeve, etc) and will work those into the plan. I also plan to do the Reid knuckle conversion at some point, which will give me crossover steering, lockout hubs, bigger bolt pattern and bigger brakes, and need to do more research on all that too.
Overall however I am very pleased with where I am at--D44s, 5.13 gears, gear-driven LSD in the rear, selectable lockers on both axles, RCVs up front, and discs all around, on 35 MTs. Big upgrades for my little POS
Next was driveshafts. The rear D44 pinion is almost the same as the C8.25, and the existing 32" WJ front driveshaft still works fine after a 1310-1330 conversion u-joint. However the front D44 pinion is about 2-3" longer than the D30, so the WJ driveshaft would no longer work. The FAQ here said that any 4.0 with a manual transmission would have a front driveshaft 29.25" long, so I found one at a junkyard and rebuilt it with a 1330 conversion u-joint on the end.
Lastly I measured and installed the bumpstops to keep the tires out of the sheet metal. For the fronts I measured about 8" of gap, so I cut the Prothanes down to 6" and fabricated end-caps from 1/8" bar stock and pipe nipples. For the rear I stacked 3 hockey pucks onto the Dirtbound Offroad spring plate (the upper jounce is soft and hollow and should compress).
Final stance is about 5.75" of lift, and a wider posture (rear tires flush with Napier flares).
Ride quality is ... okay. Its a little "active" in tight corners, and gets death wobble on irregular road surfaces at highway speeds. Some of this can be fixed by improving caster angles, some of it is due to wheel imbalance problems. I plan to lower the rear a little by replacing the bolt-in shackle boxes with no-lift boxes; if that goes too low then I will get taller leaf springs to bring it back up. Meanwhile I am saving up money for new wheels and tires and looking at balance options.
I also lost a couple of upgrades in the conversion, namely the raised swaybar links and the OTK steering, which I will need to redo at some point, but I am planning a lot of upgrades for the front axle (truss, gussets, sleeve, etc) and will work those into the plan. I also plan to do the Reid knuckle conversion at some point, which will give me crossover steering, lockout hubs, bigger bolt pattern and bigger brakes, and need to do more research on all that too.
Overall however I am very pleased with where I am at--D44s, 5.13 gears, gear-driven LSD in the rear, selectable lockers on both axles, RCVs up front, and discs all around, on 35 MTs. Big upgrades for my little POS
- Location
- Salem, OR
If you're planing on selling the shackle relocators, I would be interested lol
Sent from my iPhone using Tapatalk
Sent from my iPhone using Tapatalk
- Location
- Southern Maryland
Yeah those and the drop brackets probably
js_customs
NAXJA Forum User
- Location
- southeast PA
Looks good. Selectable lockers front and rear definitely makes things a lot more fun on the trail. I also had death wobble issues when I swapped a set of used 35's on. Balancing and rotating them helped a little, but I still ended up needing new tires.
- Location
- Southern Maryland
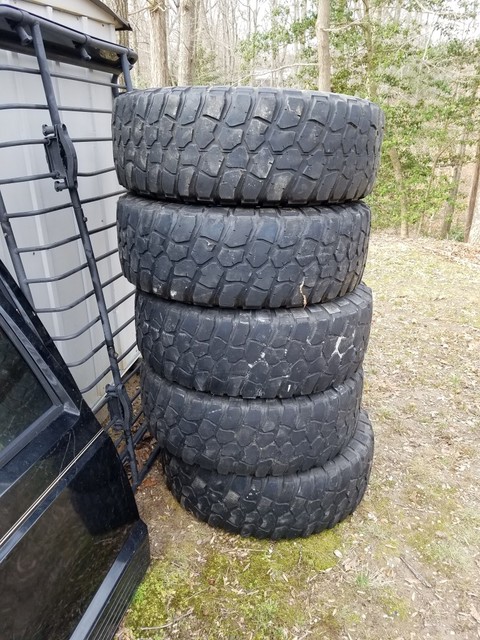
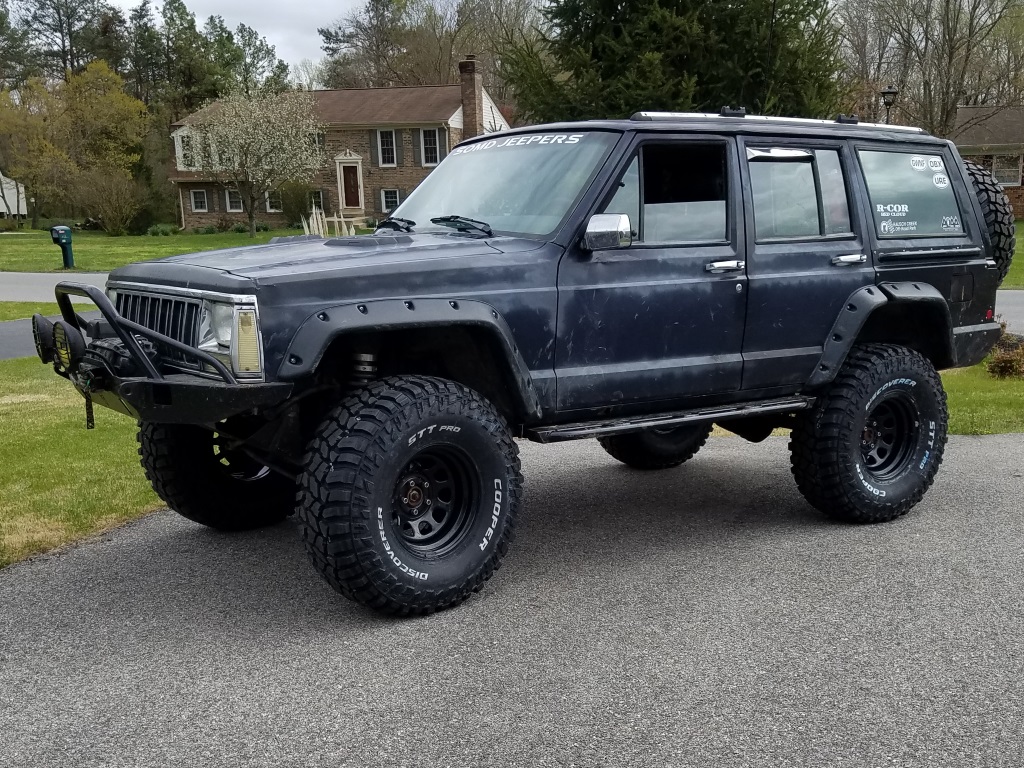
Bought a set of 35X12.50R17 Cooper STT PROs and Pro Comp steelies with 3.75 backspacing. Ride quality went way up, and the death wobble stopped.
Also found out the ZJ tie rod end at the drag link was shot, and I decided to upgrade to Currie Currectlync rather than rebuild.
One thing about tight steering I can feel the problems really well now--caster is bad, and there is a front driveshaft vibe at 45 MPH. I really need to bring the height down a little bit, but I want to do some wheeling first so I know how things are setting now. I bought the no-lift shackle relocators and will probably buy RE 4.5" leaf pack, hopefully end up around 5.5" in the rear, will dial out the ACOS to match and thinking about some other coil spring options (dual-rate?). Probably going to pocket the Napier flares to get more uptravel
- Location
- Southern Maryland
Typo there, they are 15s not 17s. Just got rid of the 17s, guess I had it on the brain
Also forgot to show off my rocker rail extensions. Protects the door a little better and makes it easier to climb in and out
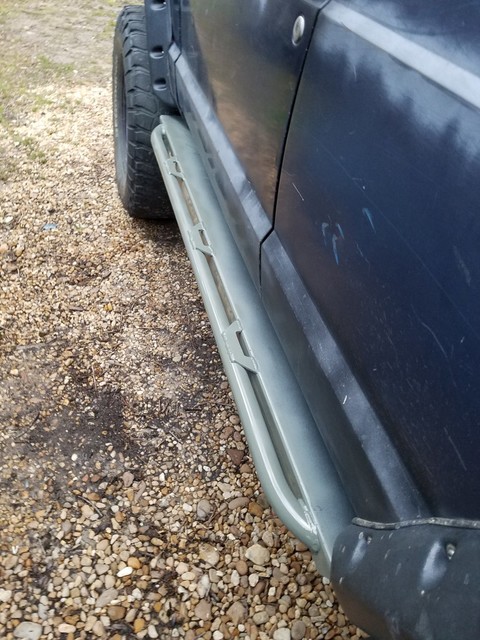
Also forgot to show off my rocker rail extensions. Protects the door a little better and makes it easier to climb in and out
Last edited:
- Location
- Southern Maryland
Wanted to document some shock travel notes for reference so I can delete my local notes
Front Travel (compressed x extended)
no shocks RTI ramp 17" x 25.5"
RE 3.5 specs 16" x 26"
JK w/ BPE 15.5" x 23.75" (not enough up or downtravel, severely limited on downtravel)
OME 60052L 15.4" x 26.7" (I measured 16" x 27.25")
Rear Travel
no shocks RTI ramp 17" x 21.75"
RE 3.5 specs 15" x 24"
JK w/ BPE 15.75" x 24.25" (good enough)
OME 60053L 14.4" x 24.5" (I measured 15" x 25")
Measured on the RTI at Rausch Creek yesterday

Front 20" x 26" -- bumpstopping and ACOS restrict uptravel, control arms are the hard limit on downtravel. Plan is to get long arms, coils and shocks for the next round of upgrades.
Rear 17.5" x 22.5" -- uptravel about the same as before, little more downtravel from the shackle setup. I plan to raise the shackle box so I will lose the extra inch soon. Think I'm going to get taller leafs and move the axle back 1" on the perch.
- Location
- Southern Maryland
- Location
- Southern Maryland
Measured on the RTI at Rausch Creek yesterday
Front 20" x 26" -- bumpstopping and ACOS restrict uptravel, control arms are the hard limit on downtravel. Plan is to get long arms, coils and shocks for the next round of upgrades.
Rear 17.5" x 22.5" -- uptravel about the same as before, little more downtravel from the shackle setup. I plan to raise the shackle box so I will lose the extra inch soon. Think I'm going to get taller leafs and move the axle back 1" on the perch.
I forgot that I raised the lower shock mount a couple of inches, so that's about 3" of additional down travel relative to the prior setup
- Location
- Southern Maryland
STT Pros and front locker engaged walked right through a good sized mud puddle at RC (not interested in the pond puddles). Pretty happy with how this is coming together
Last edited:
Andy in Pa.
NAXJA Member #180
- Location
- Downingtown, Pa.
Jeep looks great Eric. I like the look of those tires too, and will be following along to see how they do for you. They look very similar to the BFG KM2's, with possibly better on road siping and larger lugs for better mud clean out.
Outlander560
NAXJA Forum User
- Location
- New York
Jeep looks great Eric. I like the look of those tires too, and will be following along to see how they do for you. They look very similar to the BFG KM2's, with possibly better on road siping and larger lugs for better mud clean out.
and they are so much lighter and measure true to size
Andy in Pa.
NAXJA Member #180
- Location
- Downingtown, Pa.
and they are so much lighter and measure true to size
Don't know much about them... decent sidewalls?
RoyalXJ
NAXJA Forum User
- Location
- West Deptford, NJ
Don't know much about them... decent sidewalls?
Hopefully the new ones are better than the old ones.