-
Welcome to the new NAXJA Forum! If your password does not work, please use "Forgot your password?" link on the log-in page. Please feel free to reach out to [email protected] if we can provide any assistance.
- Home
- Forums
- NAXJA Unibody Jeep Technical Forums
- Jeep Cherokee XJ (1984 - 2001)
- Modified Tech Discussion
You are using an out of date browser. It may not display this or other websites correctly.
You should upgrade or use an alternative browser.
You should upgrade or use an alternative browser.
4.3L XJ Buildup
- Thread starter 4.3LXJ
- Start date
95' heep
NAXJA Forum User
- Location
- Chicago Land
where you got that info on that the 99-00 heads' better than 96-98 and 01+?
the 96 to 02 use stamped rocker arms and the 02 and up uses pivot roller rocker arms (like a full roller rocker but not have a roller at the tip) which help a bit.
the 96 to 02 use stamped rocker arms and the 02 and up uses pivot roller rocker arms (like a full roller rocker but not have a roller at the tip) which help a bit.
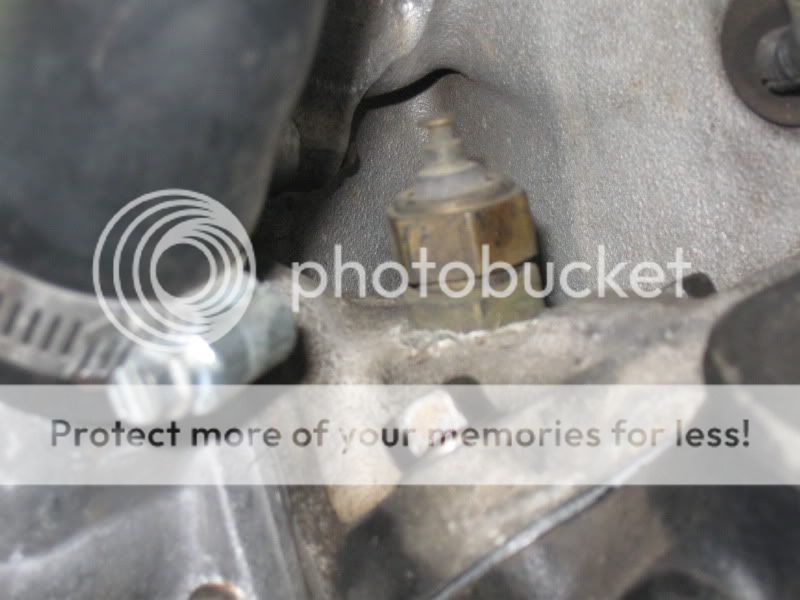
Before installing the engine and tranny, there has to be some prep work done so it will all work right. The first thing was that I needed to make the mechanical gauges work and be compatible with the electronic controls the engine has. This means adding sensors to the engine.
The first was the stock oil pressure sensor to the electronic sensor. I just did a little plumbing and added a Tee.

Next is the water temp. The Chevy engine functions and gauges are run off one sensor. But the Jeep gauge needs its own sensor. It is added to the intake manifold near the t stat housing.
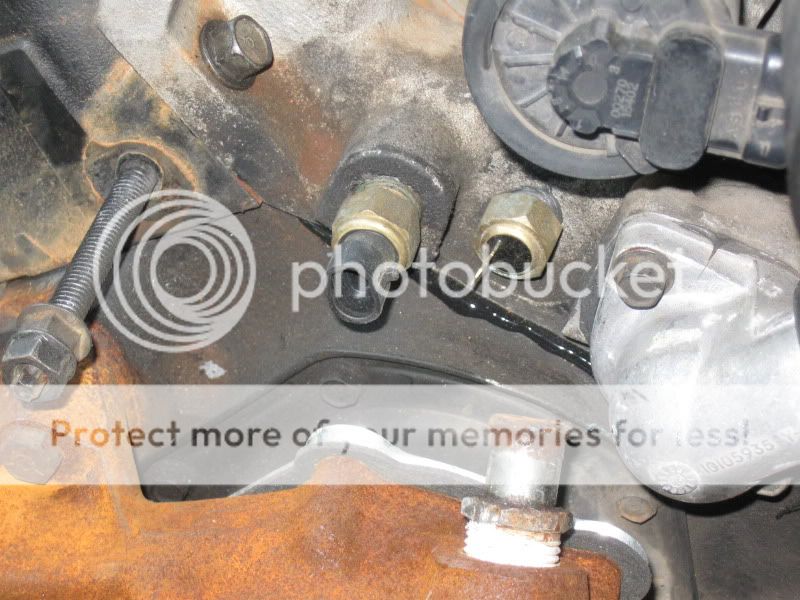
Next, I am going to run dual electric fans on the radiator. I wanted a built in sensor to turn them on and off. I used this sensor on the right from Painless Wiring. It turns the fans on at 200 degrees and off at 190 degrees. It is the one on the right. The one on the left is the coolant temp sensor for the ECM.
Next I made a custom wiring loom and spark plug wire set since the stock looms are long gone and not available from GM
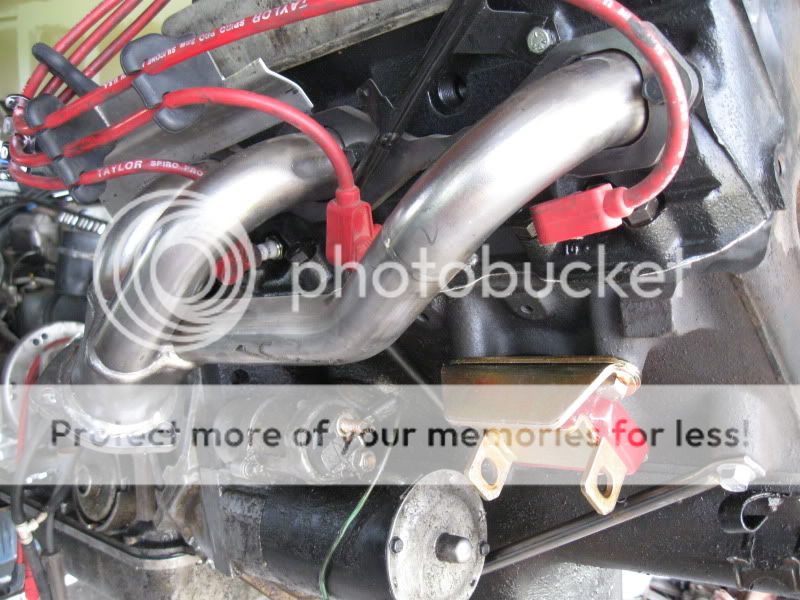
Also used poly engine mounts since this engine will see some hard running.
The first was the stock oil pressure sensor to the electronic sensor. I just did a little plumbing and added a Tee.
Next is the water temp. The Chevy engine functions and gauges are run off one sensor. But the Jeep gauge needs its own sensor. It is added to the intake manifold near the t stat housing.
Next, I am going to run dual electric fans on the radiator. I wanted a built in sensor to turn them on and off. I used this sensor on the right from Painless Wiring. It turns the fans on at 200 degrees and off at 190 degrees. It is the one on the right. The one on the left is the coolant temp sensor for the ECM.
Next I made a custom wiring loom and spark plug wire set since the stock looms are long gone and not available from GM
Also used poly engine mounts since this engine will see some hard running.
- Location
- Houston, Tx
Good engine, ran one in my 95 S10 for years.
The Ca smog stuff is annoying, but these swaps are fairly easy with a ref's help. We had to do that for a buddy's Honda CRX swap, but he ended up with one of the few smog legal ones in Ca.
The Ca smog stuff is annoying, but these swaps are fairly easy with a ref's help. We had to do that for a buddy's Honda CRX swap, but he ended up with one of the few smog legal ones in Ca.
Next the Advance Adapters engine brackets were installed. They had to be modified to allow the headers to fit. I had to move the engine over 3/4". So I cut one side off and redrilled and welded the cut off part to the other side.

This XJ started out with a 2.8L V6. So I had to add this radiator support to the front cross member.
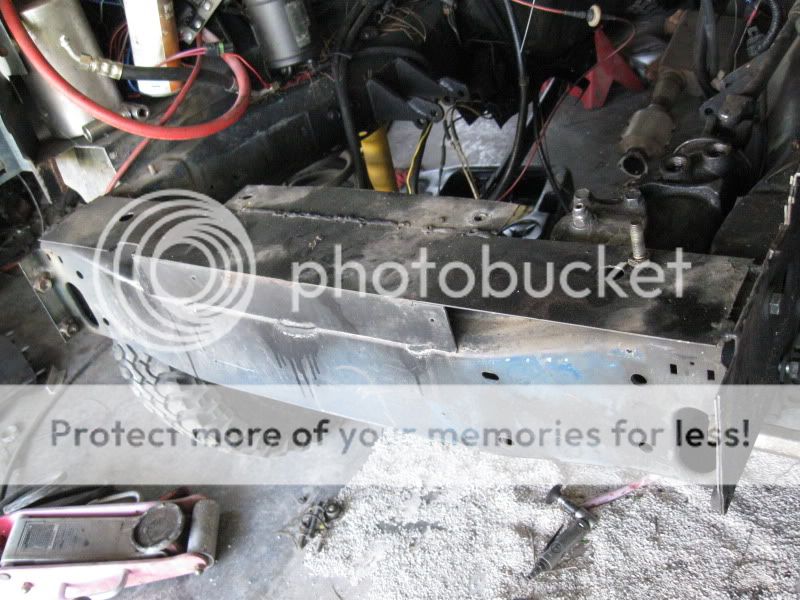
This XJ started out with a 2.8L V6. So I had to add this radiator support to the front cross member.
The next issue that needed addressing was cooling. Our XJs are notorious for running hot due to air flow issues and I suspect the shape of the radiator. Since I plan on running more than stock horsepower, eventually hitting 300 hp, and because this engine needs an oil cooler to be cooled properly, I started planning ahead. The stock S10 radiator has tranny oil and engine oil coolers both in the tanks. I will put a custom radiator in, but did not want to compromise the water temp. so I decided to run an auxiliary cooler for the engine oil and tranny oil.
This is the coolers I will run.
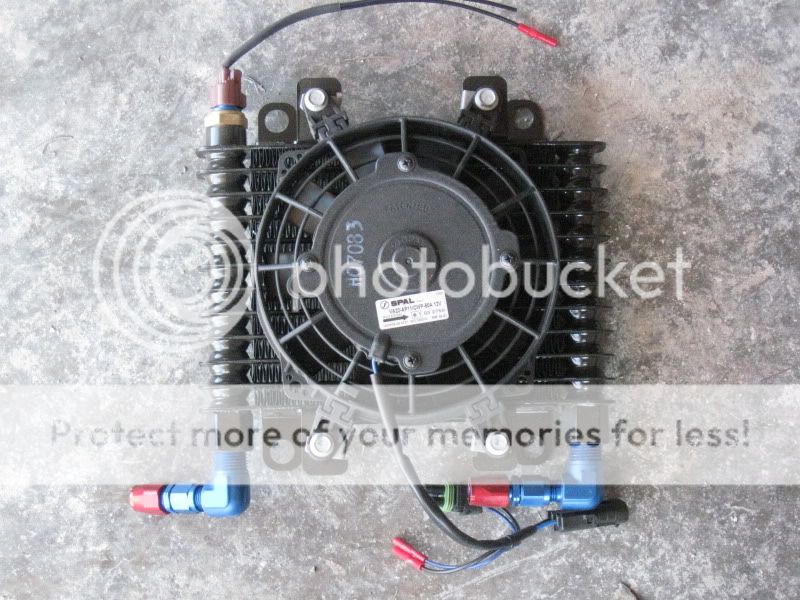
These are thermostatically controlled B&M coolers that I will mount in the hood. The fan comes on and off at 160 degrees. This will prevent over cooling in winter. To do this, I needed to do some plumbing to accommodate this upgrade.
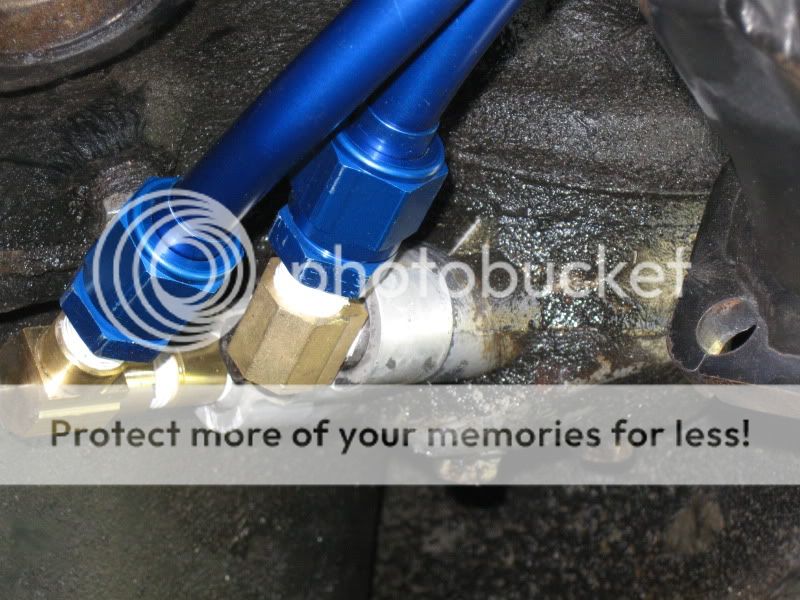
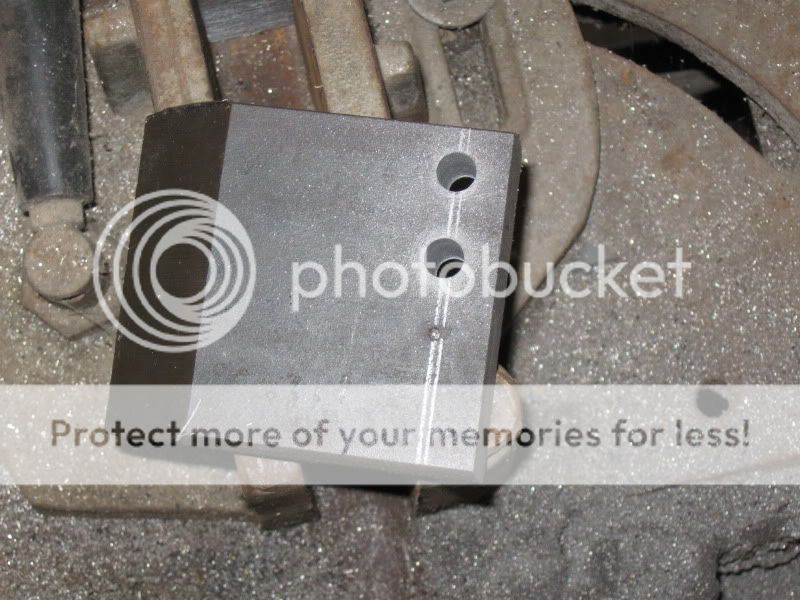
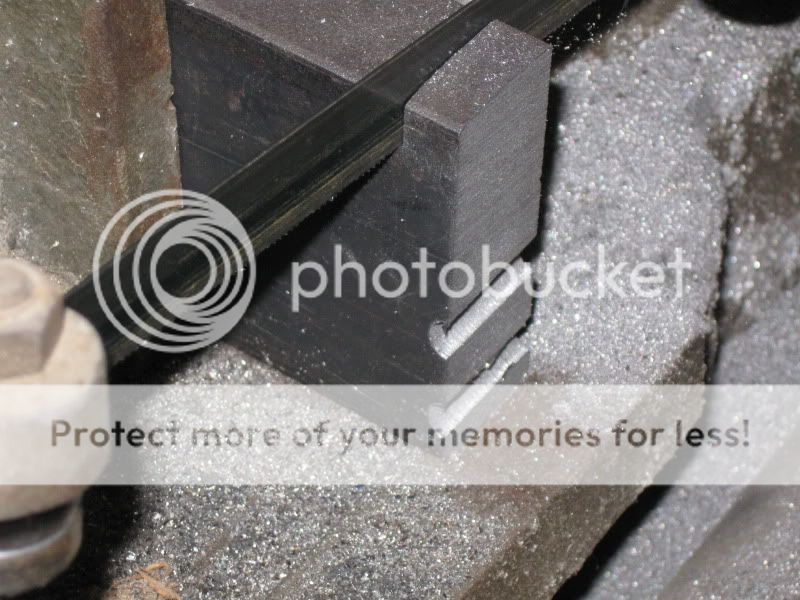
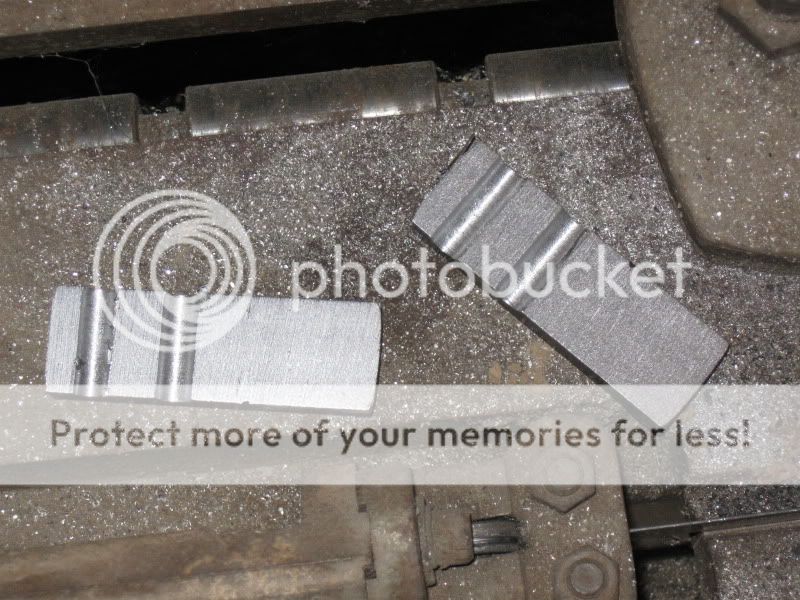
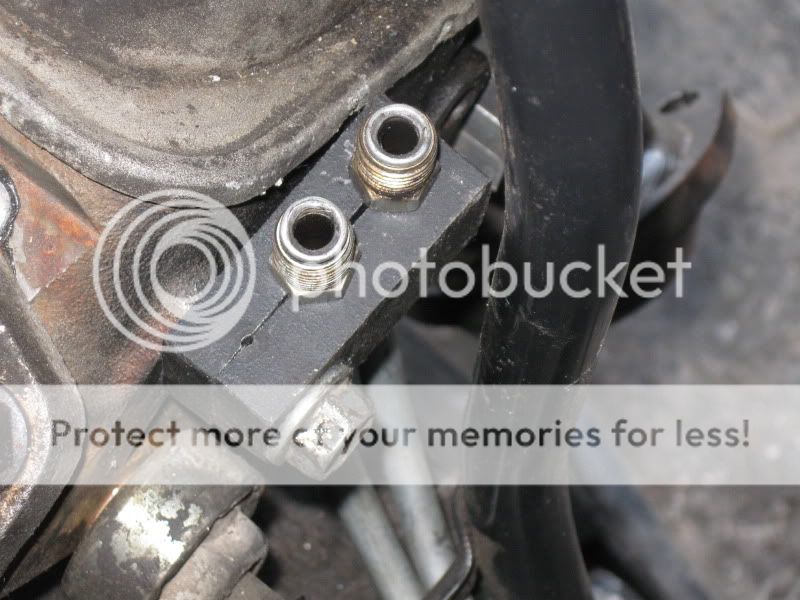
The stock remote oil filter adapter was used. The hard lines were cut off and the holes tapped and 8AN fittings used with solid aluminum running up the back. This necessitated the fabrication of clamps to hold the lines solidly against the back of the engine. I started with a 6 X 1 1/2 inch block of steel.
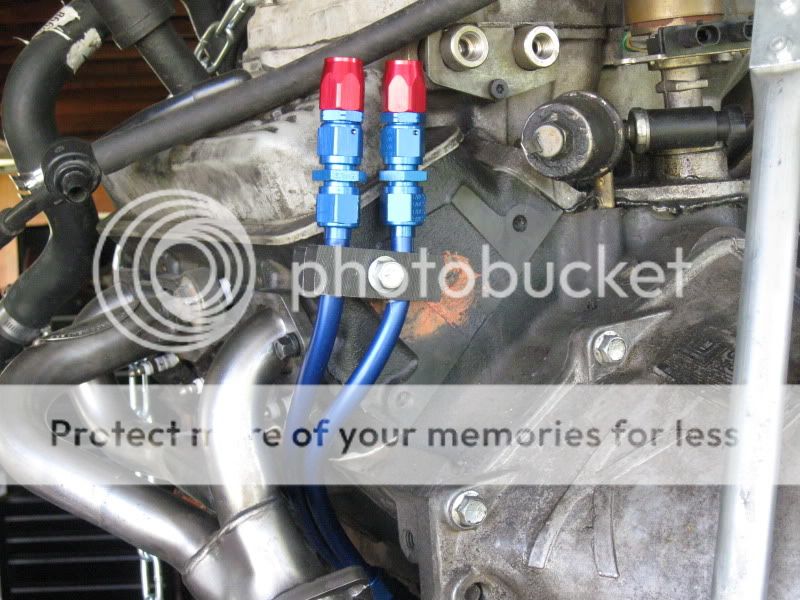
Shown here is the engine oil cooler with 8AN fittings on the end waiting for 1/2" braided stainless hose to go to the cooler.
The process was repeated with 3/8" steel line for the tranny cooler
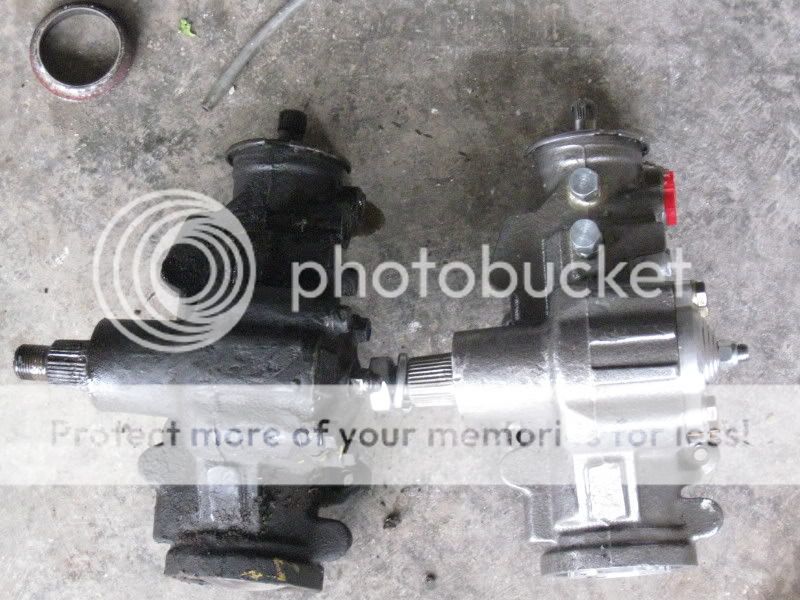
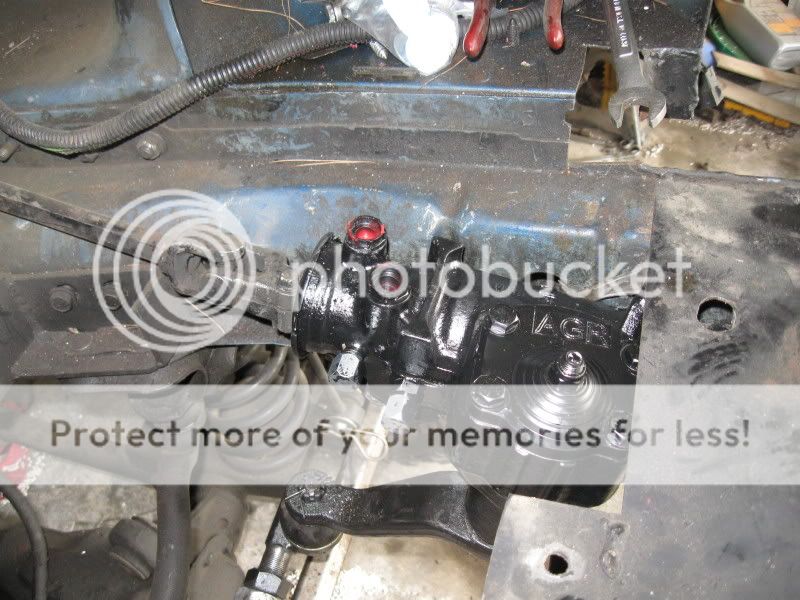
One other thing that was needed was the steering box needed fixing. I was tired of replacing boxes with wrecking yard boxes and having them leak. So I bought a new AGR box set up for ram assist. Bet you can't guess what is in my future.
This is the coolers I will run.
These are thermostatically controlled B&M coolers that I will mount in the hood. The fan comes on and off at 160 degrees. This will prevent over cooling in winter. To do this, I needed to do some plumbing to accommodate this upgrade.
The stock remote oil filter adapter was used. The hard lines were cut off and the holes tapped and 8AN fittings used with solid aluminum running up the back. This necessitated the fabrication of clamps to hold the lines solidly against the back of the engine. I started with a 6 X 1 1/2 inch block of steel.
Shown here is the engine oil cooler with 8AN fittings on the end waiting for 1/2" braided stainless hose to go to the cooler.
The process was repeated with 3/8" steel line for the tranny cooler
One other thing that was needed was the steering box needed fixing. I was tired of replacing boxes with wrecking yard boxes and having them leak. So I bought a new AGR box set up for ram assist. Bet you can't guess what is in my future.
insanity
NAXJA Forum User
- Location
- Fort Drum NY
Looks very clean, subscribing to keep an eye on this!
I got the engine and tranny bolted in. While I was at it, I needed on board air to power my ARBs that I will install in updated axles later. I tried running a 1 hp portable off my 1750 watt inverter and found it would not start it. When I went to hook up the AC, since I live in hot weather and am a wuss, I was told at a local AC shop that the GM compressors were one step up from junk. I talked to them a little more and they said they could sell me a kit to install the stock Sanden compressor in place of the GM compressor. Then when I got it installed, I just didn't like the look of it. Then I got to thinking about the need for OBA and then decided it was time to convert the MIG over to weld aluminum and get to work. I bought two new Sanden compressors for $220 each and went to work. I built a bracket and installed both compressors side by side.
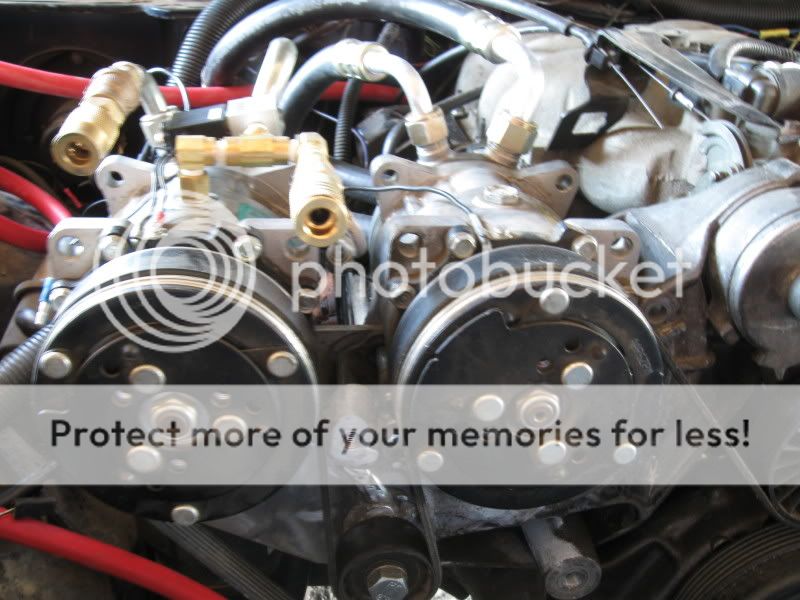
Both compressors are shown here. The only thing I ended up using out of the kit was the idler pulley that came with it. I am currently running a 120" belt to power it. The AC compressor is on the right with custom hoses. The OBA compressor is on the left. Quick connects are used so I can take it apart later easily since the air horn to the filter will run through here and will need to be removed to change plugs etc. There are two hoses with disconnects because one vents the crank case of the compressor.
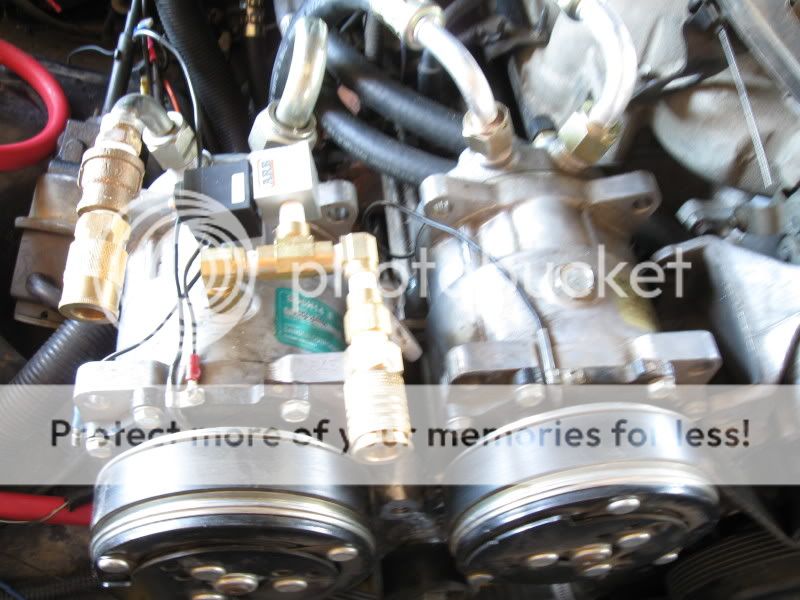
Here is a top view. I am running oil in this crankcase. Sanden compressors have horizontal pistons without oil rings in the pistons. So oil leaks out the bottom pistons into the manifold and into the system. This is great for AC systems that use oil dissolved in refrigerant to lubricate the pistons, but not for air systems that do not recycle the air. I have been setting this all up so that my wife can drive it with no issues, so it has to operate as a no brainer. So I designed a system to recycle the oil back into the crankcase. Seen here on top of the crankcase is some plumbing with a ARB air valve. These valves are like normal valves except one side is vented when shut to relieve pressure. This valve will remain open at all times when the compressor is running relieving crankcase pressure so oil will not be forced into the air system by pressure buildup when in operation. It will close when the system is shut off and oil is returned to the crankcase under pressure.
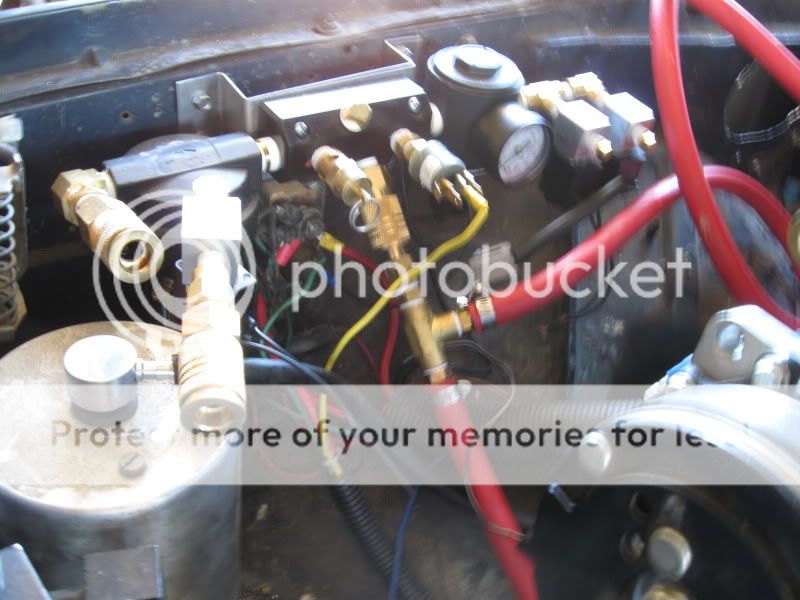
Seen here is the manifold set up. There is in order of entrance on the far left, quick disconnect, check valve (looks like another brass fitting), oil separator, manifold with pressure relief valve, air out to front and rear tank, pressure switch set at 140# regulator and two ARB air switches for future lockers. A line out of the bottom of the oil separator has another ARB switch that remains closed at all times except when the compressor shuts off. It then opens for ten seconds while the other air switch closes on the compressor shuts and forces any oil in the bottom of the separator back into the crankcase. Relays and timer are not shown here, but will be added later. The loose air hose goes to the back to the 2 gal air tank.
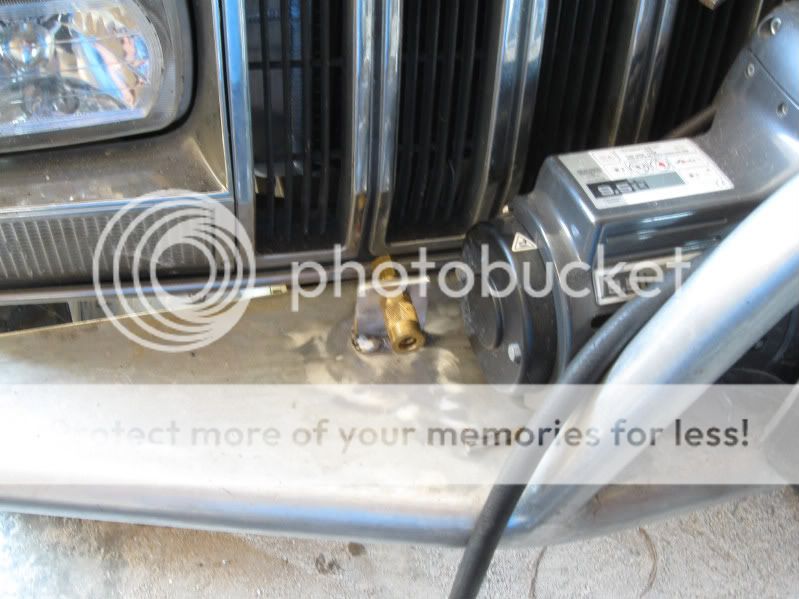
Last is the air chuck on the front bumper so my wife does not have to open the hood to operate it. Completely plug and play.
Both compressors are shown here. The only thing I ended up using out of the kit was the idler pulley that came with it. I am currently running a 120" belt to power it. The AC compressor is on the right with custom hoses. The OBA compressor is on the left. Quick connects are used so I can take it apart later easily since the air horn to the filter will run through here and will need to be removed to change plugs etc. There are two hoses with disconnects because one vents the crank case of the compressor.
Here is a top view. I am running oil in this crankcase. Sanden compressors have horizontal pistons without oil rings in the pistons. So oil leaks out the bottom pistons into the manifold and into the system. This is great for AC systems that use oil dissolved in refrigerant to lubricate the pistons, but not for air systems that do not recycle the air. I have been setting this all up so that my wife can drive it with no issues, so it has to operate as a no brainer. So I designed a system to recycle the oil back into the crankcase. Seen here on top of the crankcase is some plumbing with a ARB air valve. These valves are like normal valves except one side is vented when shut to relieve pressure. This valve will remain open at all times when the compressor is running relieving crankcase pressure so oil will not be forced into the air system by pressure buildup when in operation. It will close when the system is shut off and oil is returned to the crankcase under pressure.
Seen here is the manifold set up. There is in order of entrance on the far left, quick disconnect, check valve (looks like another brass fitting), oil separator, manifold with pressure relief valve, air out to front and rear tank, pressure switch set at 140# regulator and two ARB air switches for future lockers. A line out of the bottom of the oil separator has another ARB switch that remains closed at all times except when the compressor shuts off. It then opens for ten seconds while the other air switch closes on the compressor shuts and forces any oil in the bottom of the separator back into the crankcase. Relays and timer are not shown here, but will be added later. The loose air hose goes to the back to the 2 gal air tank.
Last is the air chuck on the front bumper so my wife does not have to open the hood to operate it. Completely plug and play.
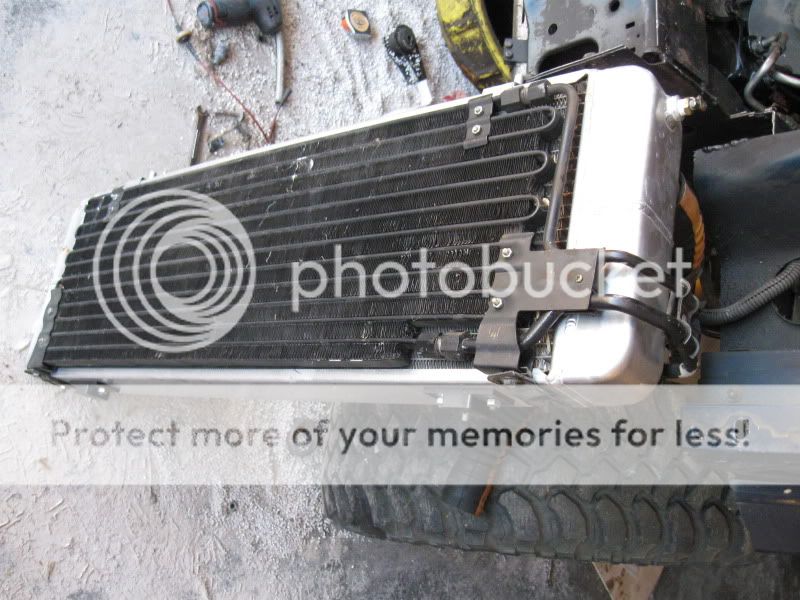
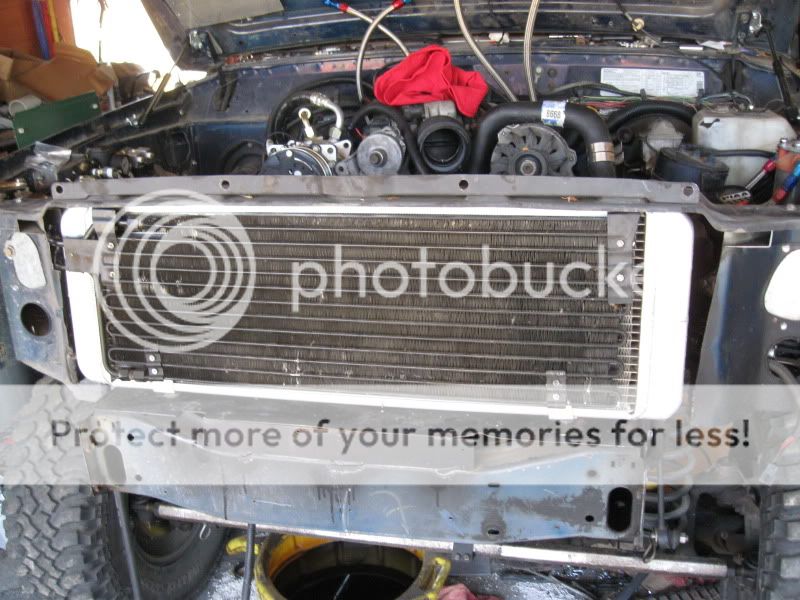
After the OBA was in place, it was time to address the cooling system. XJs are notorious for cooling issues. Personally I think some of it is due to the shape of the radiator. But I was prepared to use the stock 4.0 configuration. I purchased a new Griffin radiator set up for a Chevy.

The people at Griffin set this up to handle 600 hp. Also, since I don't like hot weather, I bought a new AC condenser. It was really designed for a thinner radiator, but with a little bending of lines and tweaking of brackets, it fits.
I was able to use a nearly stock S10 radiator upper hose. There is not much room for it to exit in the normal manner.
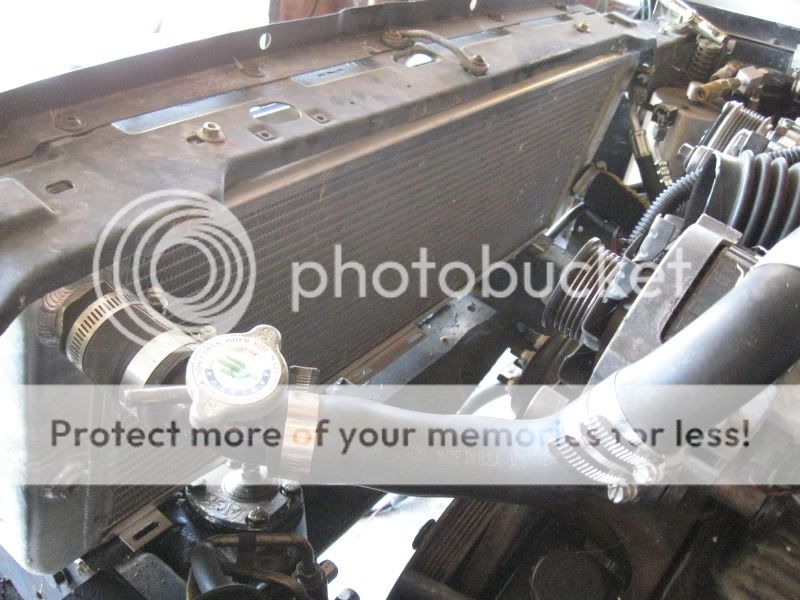
Here is the radiator and condenser from the front.
Next it was time to address the cooling fans. I built an aluminum shroud out of angle and sheet, ground the welds and added two Derale 11" electric fans capable of pulling 2000 cfm each.
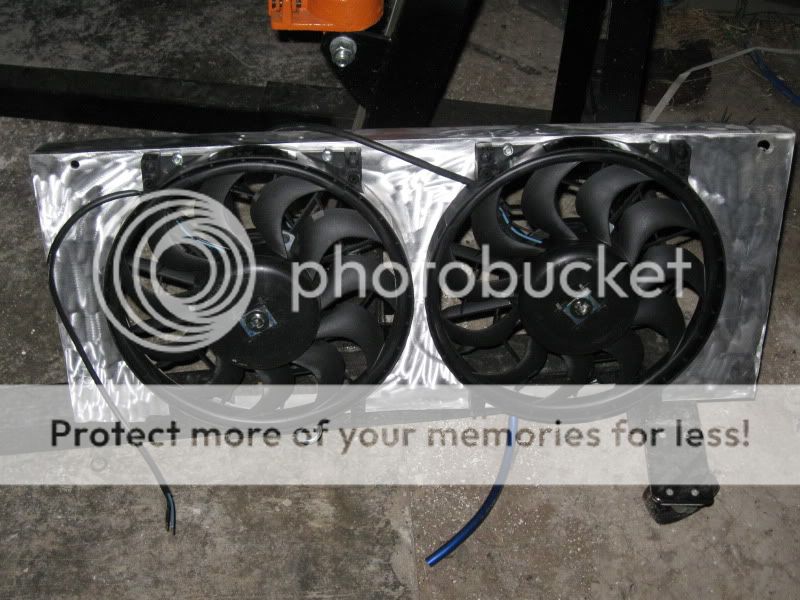
Here they are installed
The people at Griffin set this up to handle 600 hp. Also, since I don't like hot weather, I bought a new AC condenser. It was really designed for a thinner radiator, but with a little bending of lines and tweaking of brackets, it fits.
I was able to use a nearly stock S10 radiator upper hose. There is not much room for it to exit in the normal manner.
Here is the radiator and condenser from the front.
Next it was time to address the cooling fans. I built an aluminum shroud out of angle and sheet, ground the welds and added two Derale 11" electric fans capable of pulling 2000 cfm each.
Here they are installed
tbburg
NAXJA Forum User
- Location
- Scottsdale AZ
Nice looking build so far. Like the way it's looking.
A little advice:
Other then that, looking sweet!
A little advice:
If this is the final assembly, you might want to go back in and put some insulation around the oil lines, or heat off the header is going to heat the oil both going to, and returning from the oil cooler.
If that's a brass "T", you might consider changing it for a steel "T" before you get it all together. 'Buddy of mine stuck a 400SBC in a CJ. 'Had a brass "T" on the oil sender just like that, which cracked. About a month after he replaced it, the new one cracked in the same place. His was a bear to get to in a CJ. It might be impossible to get to on a 4.3 in an XJ engine bay.
Other then that, looking sweet!
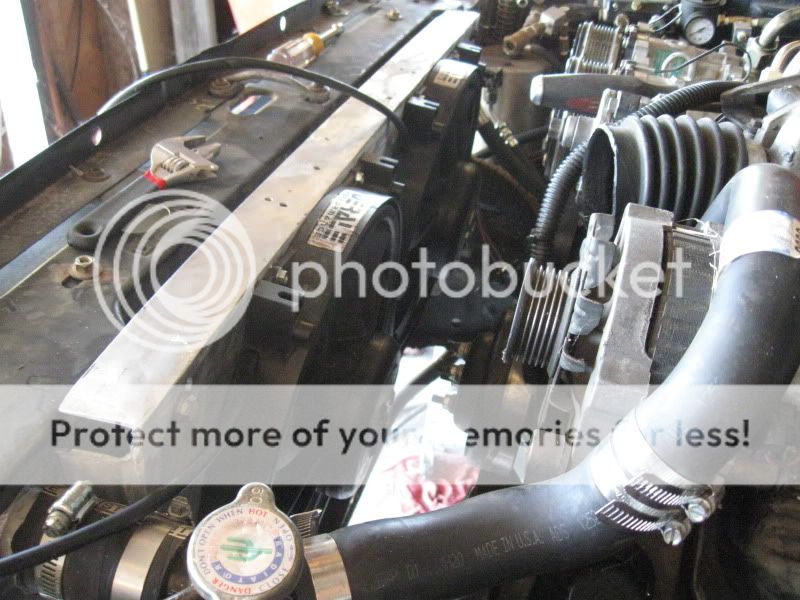
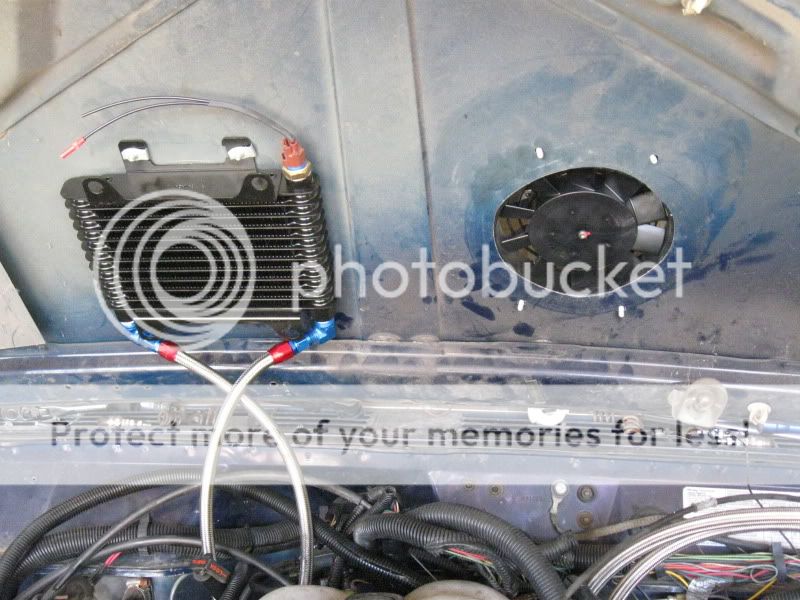
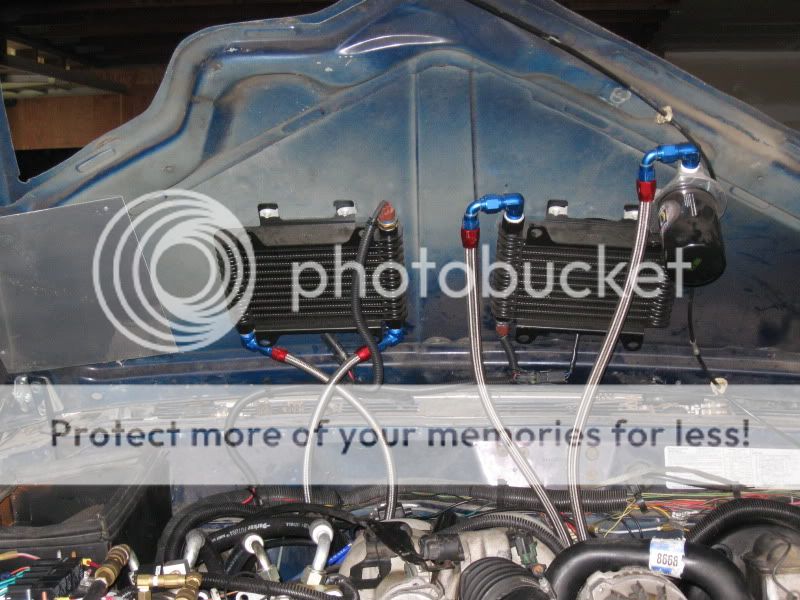
With the water cooling done, it was time to take care of the oil. Many of the Chevy engines require engine oil cooling to be cooled properly. I already ran the plumbing up the back for this purpose. I decided to use two B&M coolers with thermostatically controlled fans.
These fans turn on and off at 160 degrees.
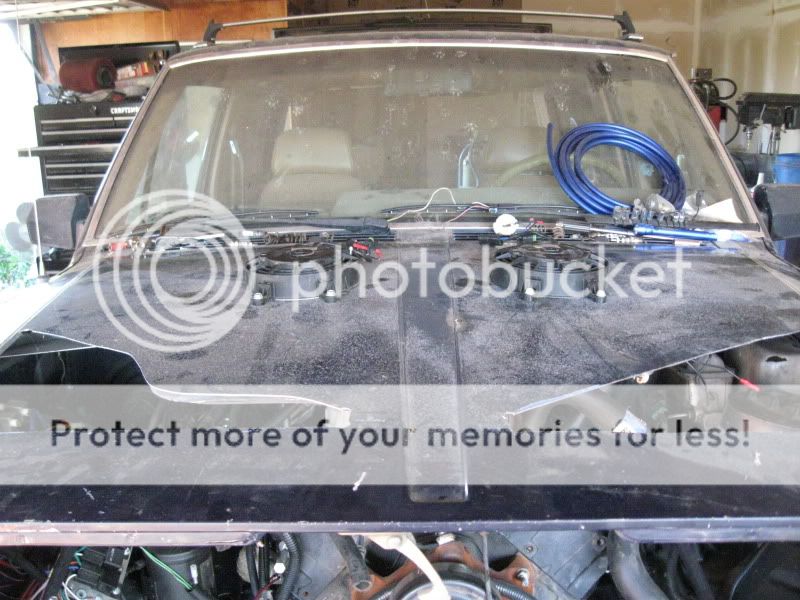
XJs are notorious for not breathing properly. It was time to cut the hood. Needs paint badly anyway.
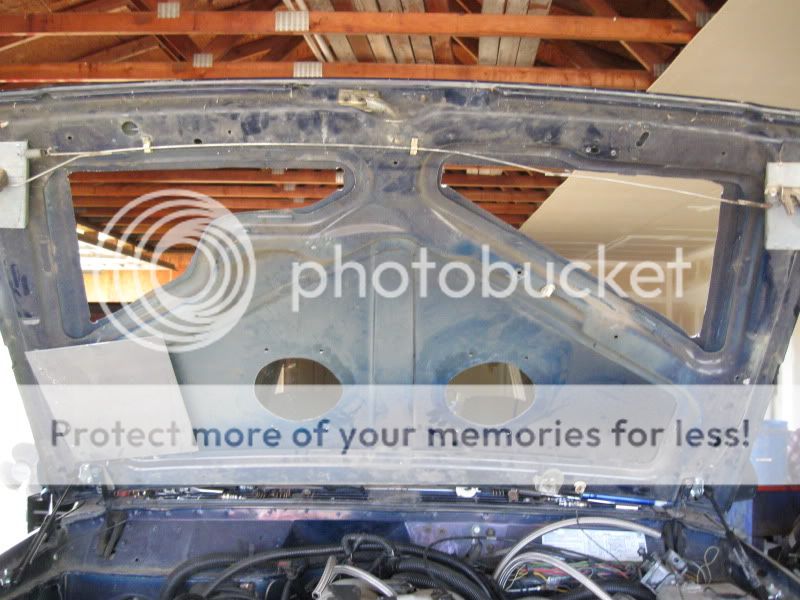
I decided to cut as much as possible out of the hood near the radiator fans to help it breath easier. Also needed holes for the fans to blow air through. The idea is to circulate air down the fire wall to help reduce cab temperatures and draw warm air out through the venting in the front of the hood.
The stock Chevy remote oil cooler also incorporates the oil filter. Since I am not using the stock one, I needed to relocate the oil filter also. I incorporated it with the cooler.
These fans turn on and off at 160 degrees.
XJs are notorious for not breathing properly. It was time to cut the hood. Needs paint badly anyway.
I decided to cut as much as possible out of the hood near the radiator fans to help it breath easier. Also needed holes for the fans to blow air through. The idea is to circulate air down the fire wall to help reduce cab temperatures and draw warm air out through the venting in the front of the hood.
The stock Chevy remote oil cooler also incorporates the oil filter. Since I am not using the stock one, I needed to relocate the oil filter also. I incorporated it with the cooler.
tbburg
NAXJA Forum User
- Location
- Scottsdale AZ
What's the black box on the passenger side, looks like it seals to the aluminum panel mounted to the hood? Is that part of the heat/air system on the 86-down model?
Are you planning a cover for the hood penetrations?
Figured a way to keep the cat off the windshield yet?
Are you planning a cover for the hood penetrations?
Figured a way to keep the cat off the windshield yet?
What's the black box on the passenger side, looks like it seals to the aluminum panel mounted to the hood? Is that part of the heat/air system on the 86-down model?
Are you planning a cover for the hood penetrations?
Figured a way to keep the cat off the windshield yet?
Patience. Black box is the air intake. I will have pics of that later. I need to change it a little. You can not keep the cat off it. It is his shop and his Jeep.:laugh:
I haven't decided about the openings yet. I have several options.
Next was the Atlas 4 speed tcase. You generally cannot install one on an XJ without major floor board modification. However with a Chevy conversion, the transmission is moved forward 4" which give just enough room to do it. Had to have a little help on this. The box weighs 175# and is awkward.
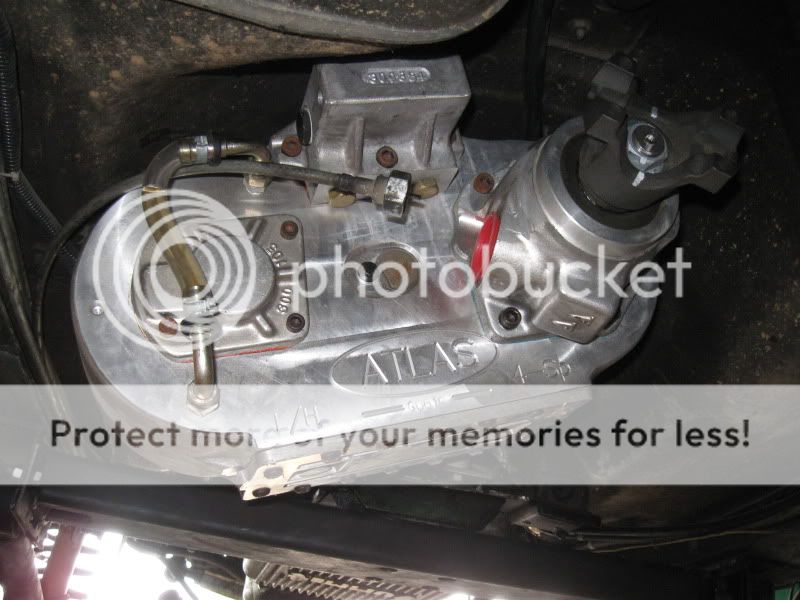
I only had to hammer the floor board a little under the driver seat. No problem. It won't show at all or affect the driver seat.
The real trick with these boxes is what you are going to do for linkage. You have to ask yourself what kind of hack job you want or even if you are going to run a console at all. The linkage supplied by Advance Adapters works well, but is definitely not console friendly. There were several ideas I played with but was not satisfied since I wanted a clean interior and to retain my console intact. So I took the parts that were supplied and modified them. I started with the main box.
This is what I made for it. I used a piece of 2X4" 3/16 wall tubing left over from when I made my cross member. Drilled it, bought a long shouldered bolt that just happened to fit it just right. Added some nylone washers and added new rods to the shift levers so they were shorter an straight. Then it was welded to the stock shift linkage ring that bolts to the floor boards. A little adjusting on the levers and then it fit right in the same spot that stock linkage was.
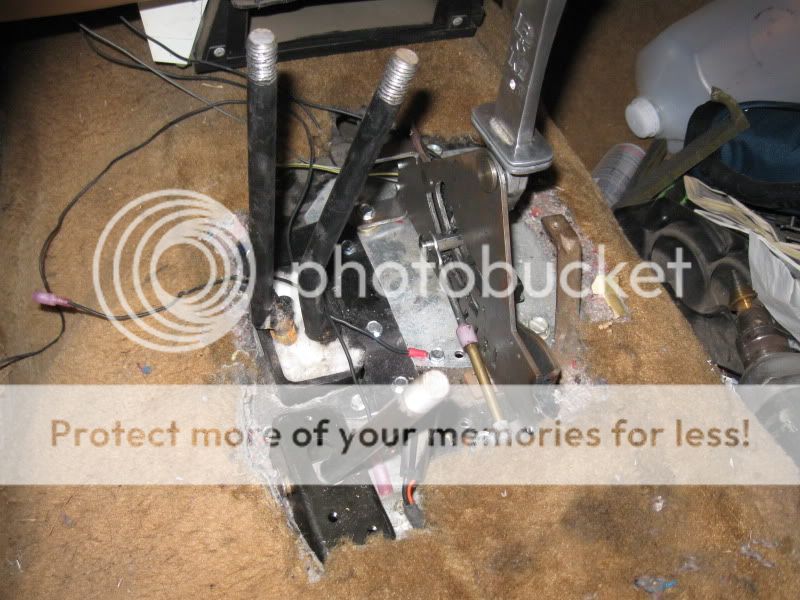
I repeated the ring procedure with the Advance Adapters cable shifter for the planetary gears supplied with the kit. It is shown bolted in behind the main box levers.

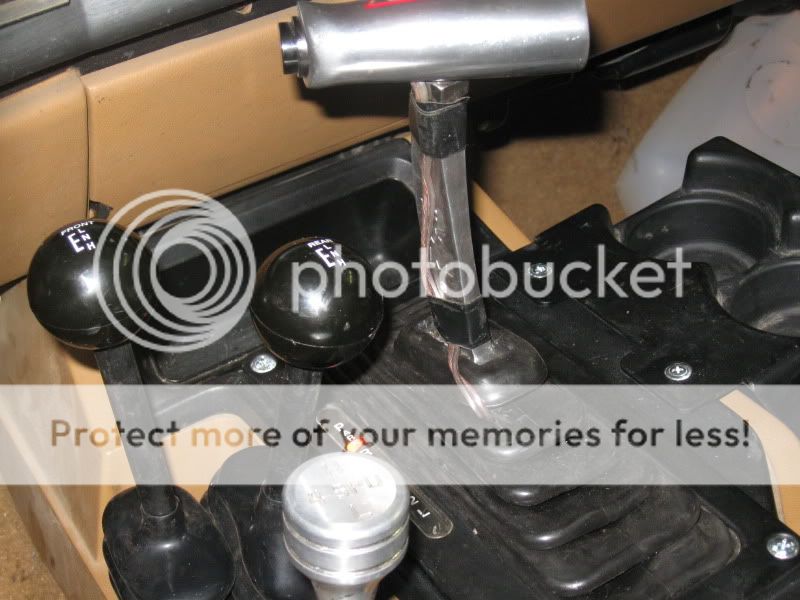
Also shown is the Hurst gate shifter with the transmission lockup wired to the t handle
I only had to hammer the floor board a little under the driver seat. No problem. It won't show at all or affect the driver seat.
The real trick with these boxes is what you are going to do for linkage. You have to ask yourself what kind of hack job you want or even if you are going to run a console at all. The linkage supplied by Advance Adapters works well, but is definitely not console friendly. There were several ideas I played with but was not satisfied since I wanted a clean interior and to retain my console intact. So I took the parts that were supplied and modified them. I started with the main box.
This is what I made for it. I used a piece of 2X4" 3/16 wall tubing left over from when I made my cross member. Drilled it, bought a long shouldered bolt that just happened to fit it just right. Added some nylone washers and added new rods to the shift levers so they were shorter an straight. Then it was welded to the stock shift linkage ring that bolts to the floor boards. A little adjusting on the levers and then it fit right in the same spot that stock linkage was.
I repeated the ring procedure with the Advance Adapters cable shifter for the planetary gears supplied with the kit. It is shown bolted in behind the main box levers.
Also shown is the Hurst gate shifter with the transmission lockup wired to the t handle
fosforito_one
NAXJA Forum User
- Location
- Orem, UT
If I ever had the time or money this would be a freaking sweet mod! Keep the updates commig!
tbburg
NAXJA Forum User
- Location
- Scottsdale AZ
Have you tried paint ball?You can not keep the cat off it. It is his shop and his Jeep.:laugh:
Nice looking build. Interesting solution, putting the oil coolers on the hood.
Thanks one and all
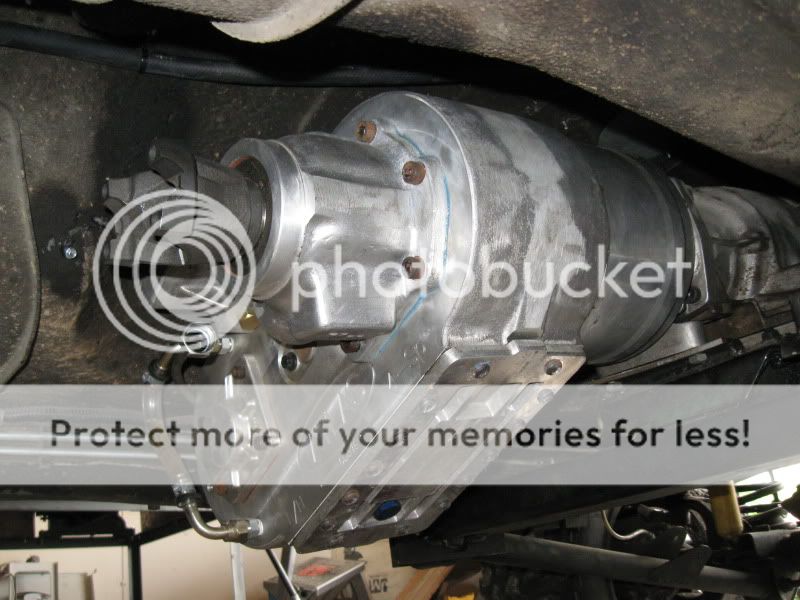
The next mod concerns the parking brake. I realize most of you probably don't care about them. However I want this to be 100% legal and besides, my wife needs to drive this also and she likes parking brakes. The problem with parking brakes is that I am going to trash the D35 and adapting to other rear discs is a pain. Also if you have a lot of articulation, those cables start getting in the way. So I got a kit for the Atlas from a couple of old guys like me that have a small shop not far from where I live. These guys are lots of fun and wheel what they make.
Here is the kit from Parts Mike. If you haven't heard of them, they are in tight with Advance Adapters and Tom Woods
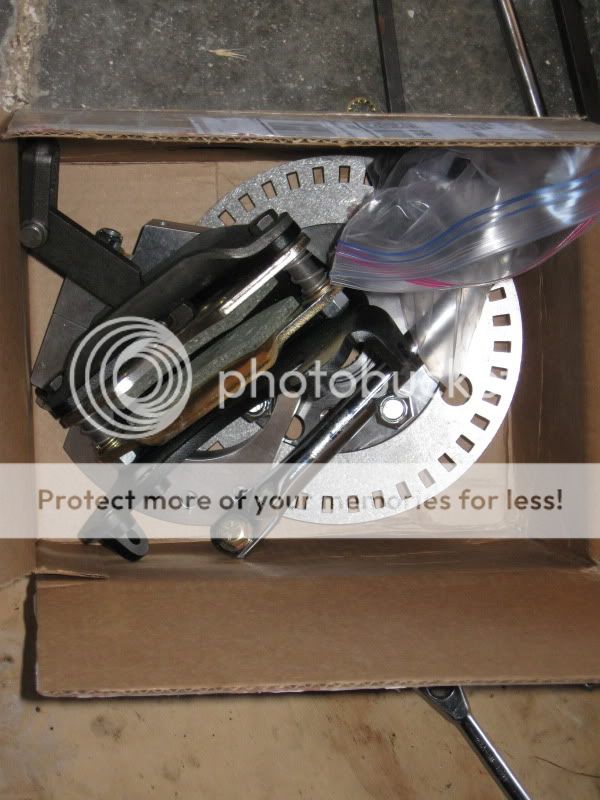
They make their kit specifically for the Atlas or even a 231 if you want.
Here it is installed. It fits neatly in the XJ tunnel.
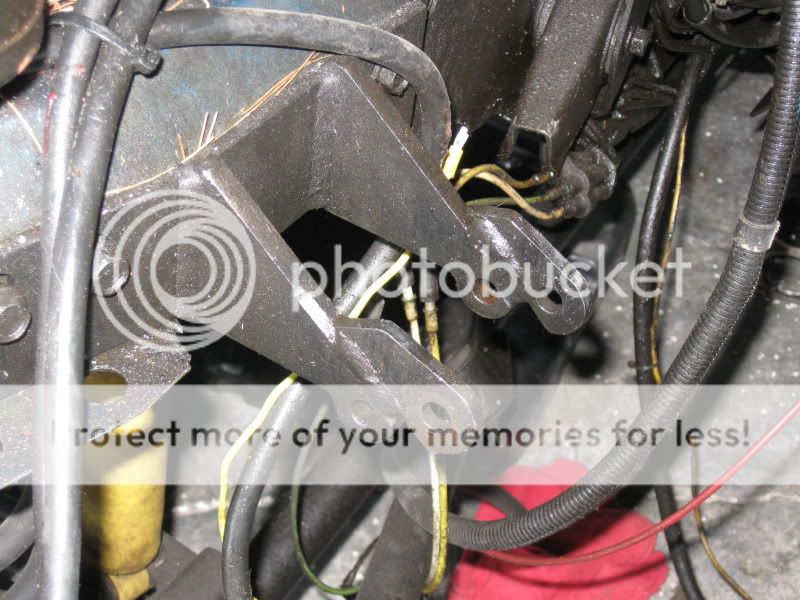
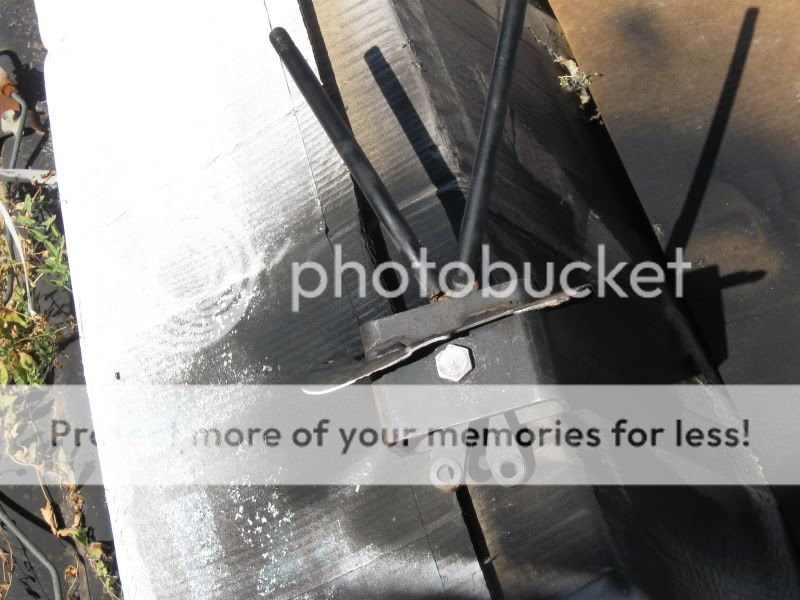
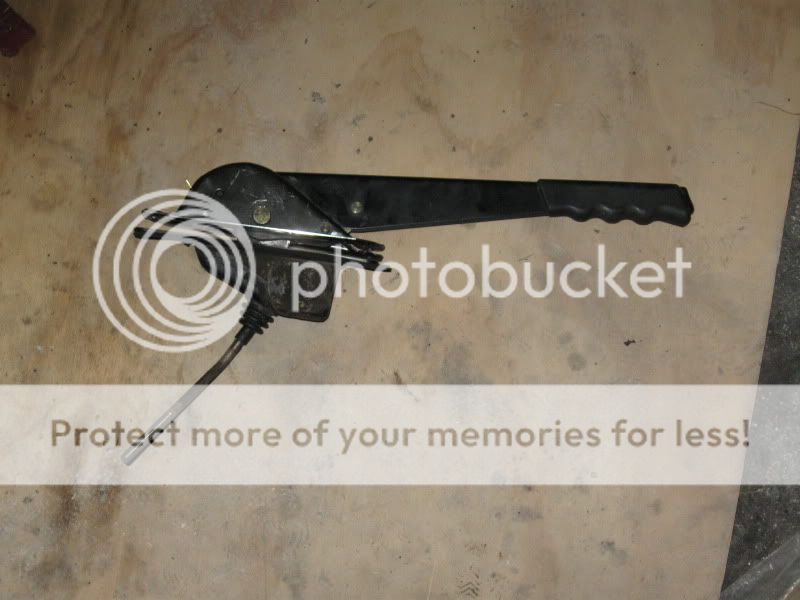
But next, how to make it work. I dislike hack jobs and wanted something neat. It just happens the brake is jsut under the stock brake handle. Here is the mechanism.

The rod comes out the back. but I welded a couple of ears on the front and put the stock rod out of the bottom, shortened it and chased new threads to fit the new clevis.
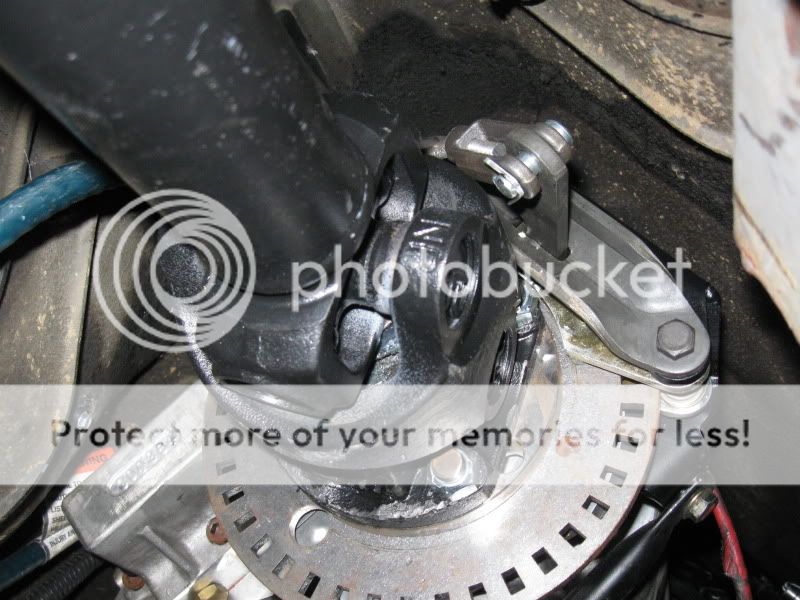
Here is the new clevis installed and new Tom Woods drive shaft with 1350 CV joint. I didn't bother taking a pic of the handle because it looks completely stock and works like stock with an easier pull. also works going backwards as well as it does going forward. Put a Tom Woods drive line on the front too with the same specs.
The next mod concerns the parking brake. I realize most of you probably don't care about them. However I want this to be 100% legal and besides, my wife needs to drive this also and she likes parking brakes. The problem with parking brakes is that I am going to trash the D35 and adapting to other rear discs is a pain. Also if you have a lot of articulation, those cables start getting in the way. So I got a kit for the Atlas from a couple of old guys like me that have a small shop not far from where I live. These guys are lots of fun and wheel what they make.
Here is the kit from Parts Mike. If you haven't heard of them, they are in tight with Advance Adapters and Tom Woods
They make their kit specifically for the Atlas or even a 231 if you want.
Here it is installed. It fits neatly in the XJ tunnel.
But next, how to make it work. I dislike hack jobs and wanted something neat. It just happens the brake is jsut under the stock brake handle. Here is the mechanism.
The rod comes out the back. but I welded a couple of ears on the front and put the stock rod out of the bottom, shortened it and chased new threads to fit the new clevis.
Here is the new clevis installed and new Tom Woods drive shaft with 1350 CV joint. I didn't bother taking a pic of the handle because it looks completely stock and works like stock with an easier pull. also works going backwards as well as it does going forward. Put a Tom Woods drive line on the front too with the same specs.
insanity
NAXJA Forum User
- Location
- Fort Drum NY
Great one more thing I want on my XJ.
Similar threads
- Replies
- 0
- Views
- 68
- Replies
- 11
- Views
- 171