- Location
- Southern Maryland
I read BIGSLVRXJ's console swap write-up a long time back, and I've been gathering up the parts to do this mod for a while too. Today I finally got all of the stuff together to finish it up, so here is my write-up from beginning to end and everything that was used.
Note that this is much easier to do when the carpet is out, but the carpet has to be in for the complete fit and finish, and some parts of it are easier when the carpet is in place (drilling holes through floorboard and carpet together, for example). IOW, it's simpler to do without carpet if you don't plan to put carpet back in, but if you have carpet or plan to have carpet then it should probably be done with the carpet installed.
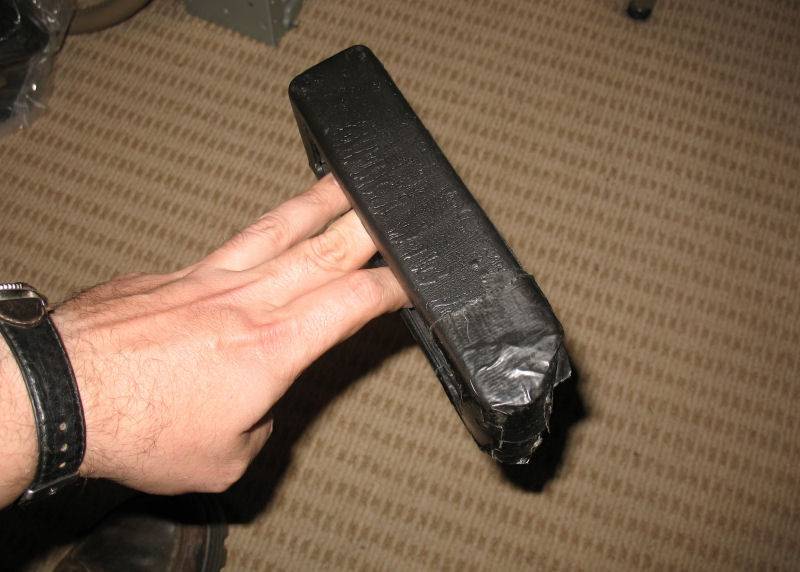
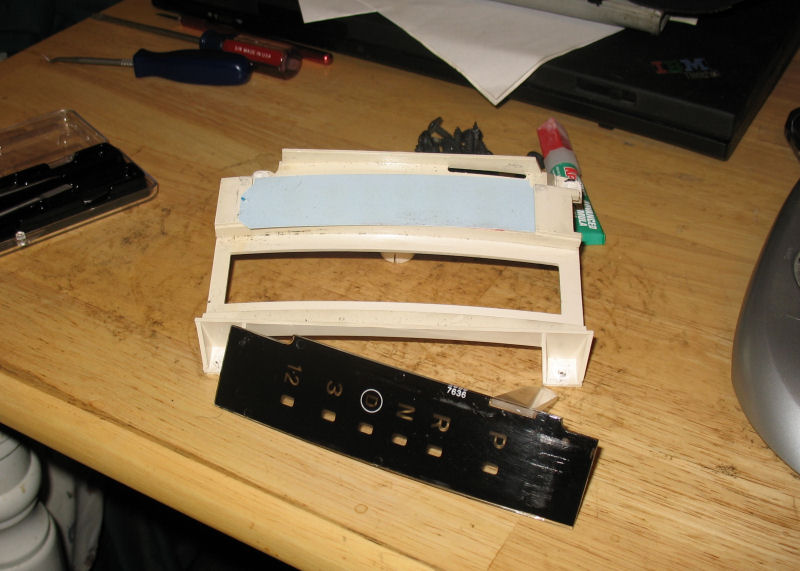
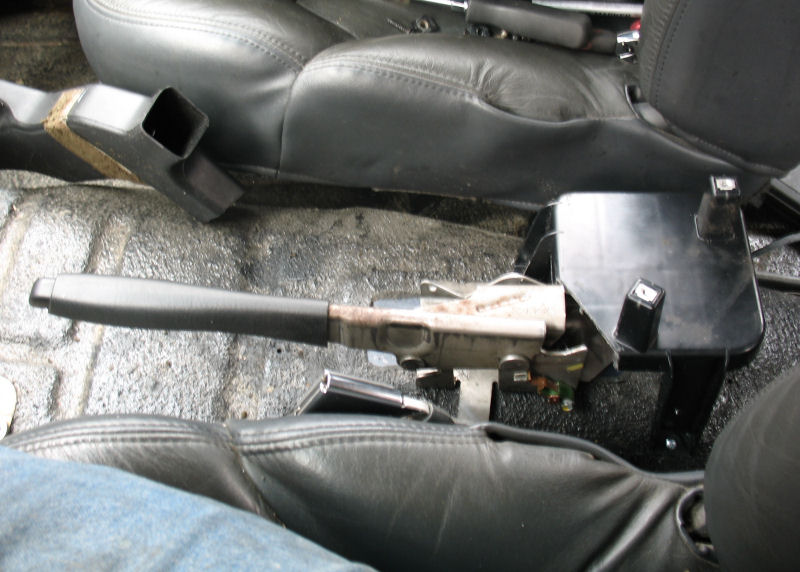
First thing you have to do is swap the transmission shifter with a late-model unit. This is pretty simple, and just requires removing some bolts and popping the shifter cables loose. However I did run into two problems here. For one, the bushing post on the steering column release cable is slightly different and I had to enlarge the bushing to get it on the post--just rough it out with sandpaper around a drill bit and slather it in silicon dielectric grease to make the bushing easier to press onto the post. Second is that I had replaced the shifter handle with a ZJ handle, which has a slightly different thumb button design that was too short to engage the late-model XJ rod--I fixed that by cutting 1/4" off the ZJ rod and supergluing it to the XJ rod, which made it just long enough to reach. Here is a pic of the shifter and rod, and you can see the dark line where the rod pieces were glued together:
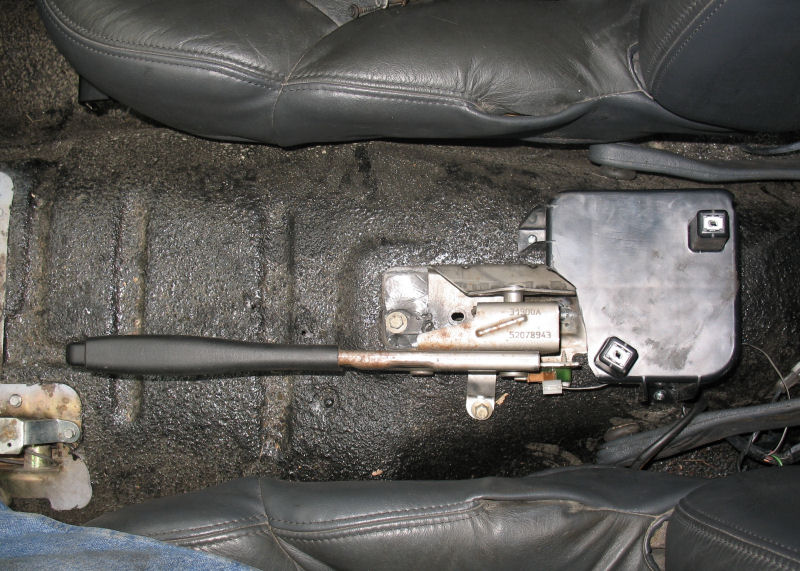
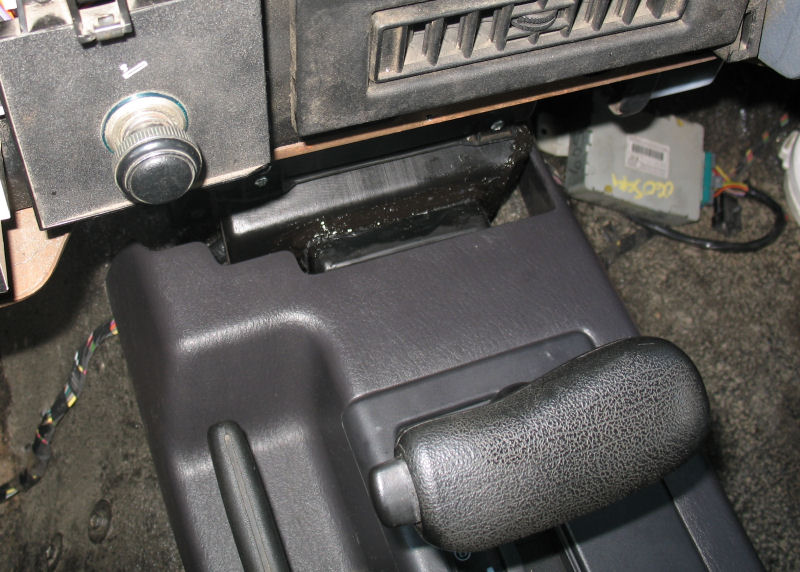
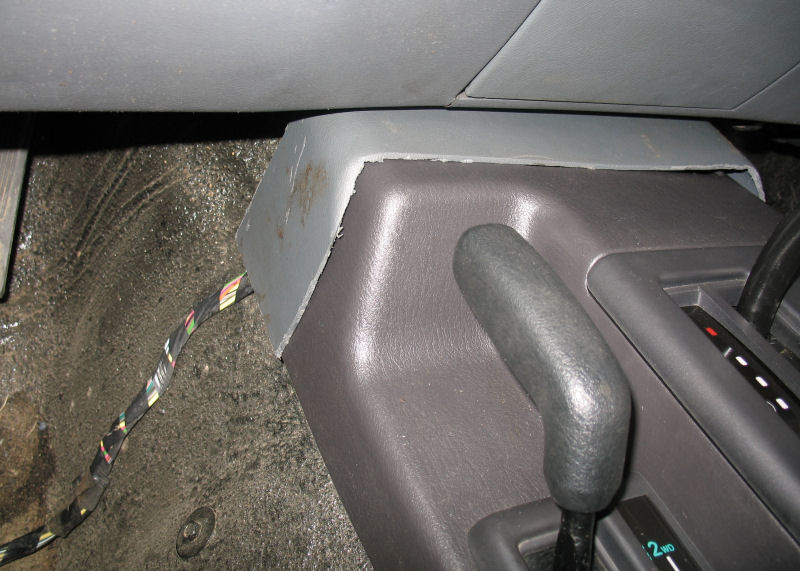
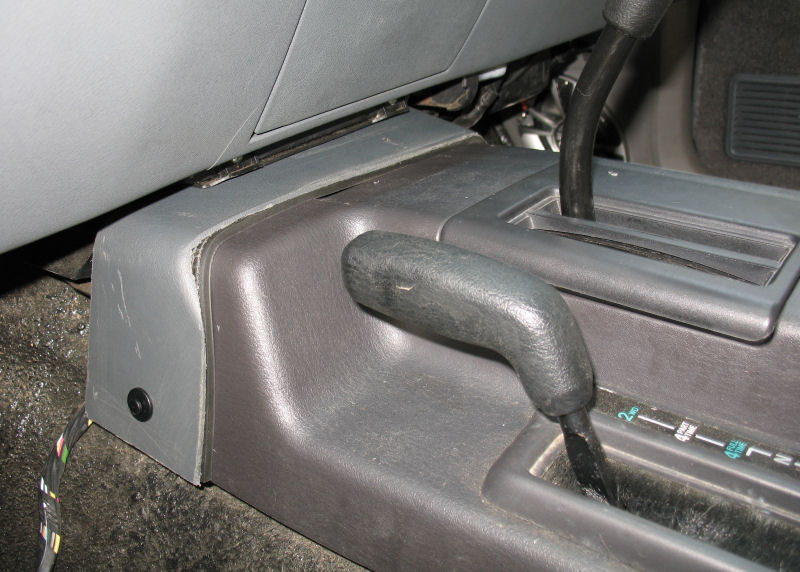
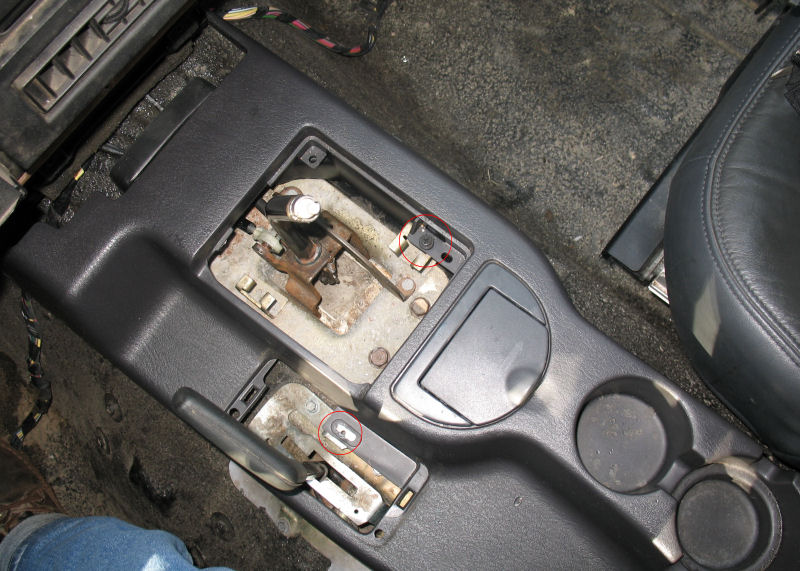
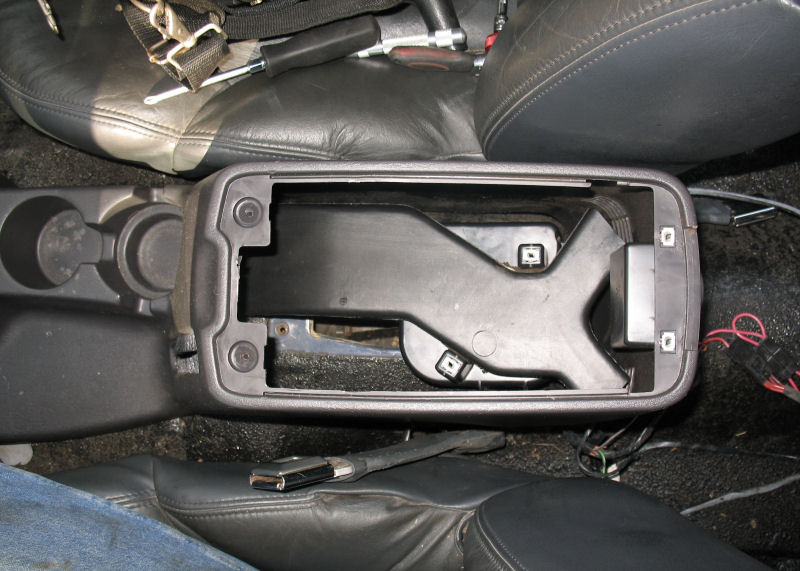
Next I had to fit the console to the floor in order to determine placement for the heater tubing, the rear support bracket, and the parking brake handle. I found that this was easiest to do by screwing the front of the console to the shifter brackets (this forced the HVAC tubing into place and prevented the rear from sliding around too much), then lining up the rear parts accordingly through the open console bucket in the rear. These pictures show the determined placement, with the screw holes highlighted in the first pic, and the rear pieces positioned in the second:
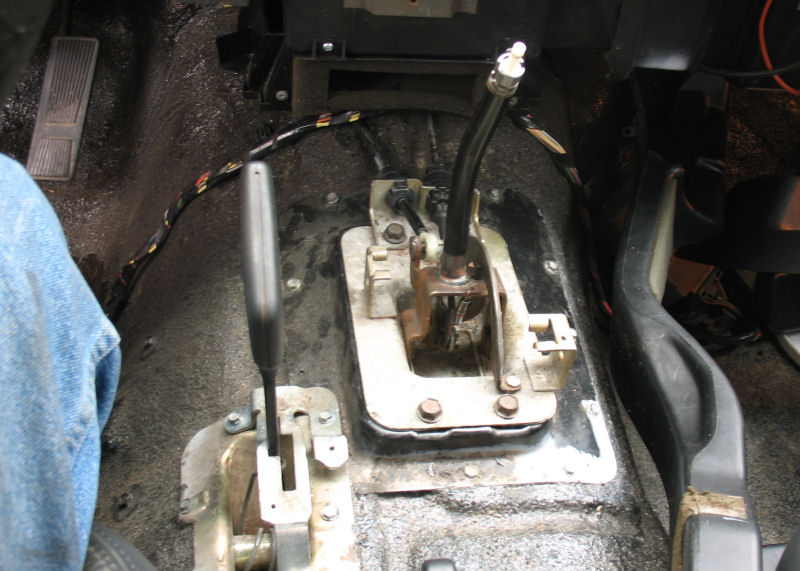
Everything more or less depends on the placement of the support bracket, so that is where you have to start mounting. I found it easiest to use a silver paint pen to mark the holes in the rear support bracket and then drill them out separately. At first I used some small #8 sheet metal screws to hold the bracket to the floor but that put too much pressure on it and the plastic cracked. For the second attempt I used some rubber well nuts that were pushed through the floor, with #8 machine screws holding the bracket down. This makes the bracket a bit less rigid, but it seems to work just fine and I am less worried about breaking the bracket.
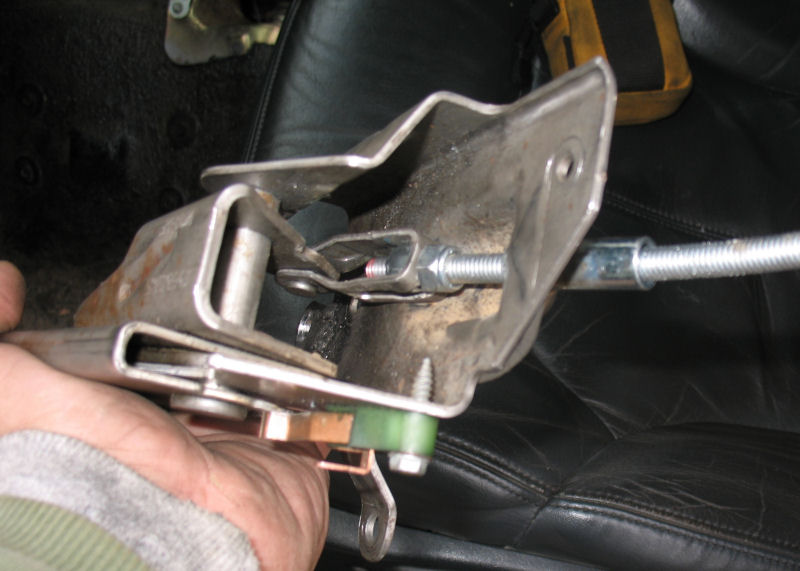
Once the bracket position was determined, I fitted the parking brake handle in the holes to see what would work best, and found that the front parking brake mounting hole had the handle too far forward (part of the handle metal was exposed through the console), so I had to use the rear hole, which required some clearance trims of the bracket. Here is a picture of the first bracket and parking brake handle fitted, although later pics show how it was clearanced again after the first one broke:
Note that this is much easier to do when the carpet is out, but the carpet has to be in for the complete fit and finish, and some parts of it are easier when the carpet is in place (drilling holes through floorboard and carpet together, for example). IOW, it's simpler to do without carpet if you don't plan to put carpet back in, but if you have carpet or plan to have carpet then it should probably be done with the carpet installed.
First thing you have to do is swap the transmission shifter with a late-model unit. This is pretty simple, and just requires removing some bolts and popping the shifter cables loose. However I did run into two problems here. For one, the bushing post on the steering column release cable is slightly different and I had to enlarge the bushing to get it on the post--just rough it out with sandpaper around a drill bit and slather it in silicon dielectric grease to make the bushing easier to press onto the post. Second is that I had replaced the shifter handle with a ZJ handle, which has a slightly different thumb button design that was too short to engage the late-model XJ rod--I fixed that by cutting 1/4" off the ZJ rod and supergluing it to the XJ rod, which made it just long enough to reach. Here is a pic of the shifter and rod, and you can see the dark line where the rod pieces were glued together:
Next I had to fit the console to the floor in order to determine placement for the heater tubing, the rear support bracket, and the parking brake handle. I found that this was easiest to do by screwing the front of the console to the shifter brackets (this forced the HVAC tubing into place and prevented the rear from sliding around too much), then lining up the rear parts accordingly through the open console bucket in the rear. These pictures show the determined placement, with the screw holes highlighted in the first pic, and the rear pieces positioned in the second:
Everything more or less depends on the placement of the support bracket, so that is where you have to start mounting. I found it easiest to use a silver paint pen to mark the holes in the rear support bracket and then drill them out separately. At first I used some small #8 sheet metal screws to hold the bracket to the floor but that put too much pressure on it and the plastic cracked. For the second attempt I used some rubber well nuts that were pushed through the floor, with #8 machine screws holding the bracket down. This makes the bracket a bit less rigid, but it seems to work just fine and I am less worried about breaking the bracket.
Once the bracket position was determined, I fitted the parking brake handle in the holes to see what would work best, and found that the front parking brake mounting hole had the handle too far forward (part of the handle metal was exposed through the console), so I had to use the rear hole, which required some clearance trims of the bracket. Here is a picture of the first bracket and parking brake handle fitted, although later pics show how it was clearanced again after the first one broke: