• Welcome to the new NAXJA Forum! If your password does not work, please use "Forgot your password?" link on the log-in page. Please feel free to reach out to [email protected] if we can provide any assistance.

The Nail Salon

I just replaced my transmission mount as well and also noticed lots of interior vibes.. ..and I also ordered the wrong one first as well! Ha!
 
Nice fix Dustin, where did the tranny mount come from?
I contacted Don from 4WD Hardware on here. 4WD is a forum sponsor, and he was able to get me a great price on it. Be sure to hit him up for any future parts needs.

Unfortunately, I ordered the wrong one, but was able to find the right one collecting dust at Winton's shop. Go figure. :laugh:
 
LJ_Daryl, Handsome_Josh, The Gresham Boyz, and I made an attempt at one last snow run for this so called winter we had last weekend. Goal was to make it to Lost Lake in the Mt. Hood National Forest.

Snow level was right around the 3000' mark.
042A7C5C-573B-4F8B-9575-FDF9225AF86F.jpg


The snow sucked, but it was a good day none-the-less. I think I was the only one not to get stuck, and Scott was even behind the wheel for a bit. :D
537B7241-067D-4EE9-8410-1ABEAAE35184.jpg
 
I've been itching hard to tear into the Nail Salon and get the new axles under it, but I still lack parts and time. So I settled on some axle prep work today instead.

Start with a bolt in HP44.
DF8EE18F-B941-4B48-8D8E-C62995967F48.jpg


Since I don't plan on using the factory upper control arm bushings with this axle, the upper control arm bracket needed to come off. I probably could have used the track bar bracket, but since I like to over complicate things it too would be coming off.
65F3E25F-578C-496E-8A17-28BDED7D9523.jpg


Having one factory style bushing on the truss would look goofy, so this little kid would be getting deleted as well.
1E615D09-B8BE-4CF1-A0D4-89D3A3EB23D2.jpg


The old bracket setup was welded on really well. I didn't even attempt to grind out the welds like I did on the 60. I went straight for the oxy torch, and they came off like butter. Only started one small fire too.
FAC20C79-8153-49C4-8E36-C3B1A1385B88.jpg


Clean up on the other hand was a b!tch. I'll be blowing black boogers for awhile. I will say Makita makes a great product.
48BB4E29-9A95-4E2B-A533-F6CC2FDD35C3.jpg


After getting the welds ground down, and tubes sanded smooth, I gave it the wire wheel treatment and hosed it down. Ending the day with a gigantic paper weight.
EEE68B05-1914-4599-9568-5C485D36D70C.jpg
 
Hit up Kingsley Reservoir last weekend with Bmikes for his shakedown run. It was a good day with no issues.

photo cred to bmikes
80A6F4EE-B8A1-447E-913A-294FAA1A10EB.jpg


7C254EE0-1E4D-4E15-B52E-4D18175DB923.jpg


After Kingsley I had a few projects I wanted to tackle before hitting the trails again. The first being the substantial oil leak coming from my oil filter adapter. Just idling in the driveway you could see a steady drip-per-second coming off the motor.

Looking down at the oil filter you can see the fresh oil leaking from the top of the filter adapter housing.
10A93292-3760-4024-9FD5-F243EFC9381A.jpg


The filter adapter housing on the 97+ models require a T60 TORX to remove it. The problem is a standard T60 socket doesn't allow enough room for a ratchet.
BDB3F027-A553-434B-A2BF-D6AAF6248777.jpg


I took the T60 socket and pressed out the Torx bit. I could then use a 12mm end wrench on it. After a few four letter words I grabbed a two foot cheater pipe, and finally got it to budge loose.
3216BB58-C72C-4B55-A112-FF78AFFC302A.jpg


Filter adapter housing removed and cleaned up. There's three O-rings total for the housing. You can purchase a "kit" from the dealer, but I found them to be standard sizes and just picked some up from the hardware store for less than a dollar.
C6543B70-40B6-4047-92C6-B0C6A288CEF0.jpg


The next project was to address my anemic exhaust situation. Over the years the OEM muffler has taken some good hits. The last run to Kingsley in the rocks delivered the final blow though. I noticed on the drive home a loud exhaust drone at cruising speed, and a good leak coming from the inlet side.
9CE10EB5-8F93-42B8-8A2B-C73454A02512.jpg


I really like the quietness of the OEM exhaust, but the truth is the muffler is just too much of a rock magnet at 20". I shopped around, and found this Thrush welded muffler on Summit for ~$30. It's a chambered design similar to most aftermarket mufflers, and since it's fully welded it should hold up better in the rocks.
00F6FF1B-18B9-4532-9DD1-216FBD04936D.jpg


I sliced out the OEM muffler, fitted the new Thrush into place, added a short section of 2.25" pipe to make up the difference in length, and then burned it all on. The Thrush is narrower by about an inch so I gained some clearance between the muffler and driveline too (The 8.8's diff is offset, so I always had some self clearance action going on).
1D8FCDE8-6F0C-4BB0-A752-A27C0114A660.jpg


Overall I really like the new muffler. It's a bit more throaty than stock, but not loud at all. However, I now have a very annoying rattle. At first I thought it might be my cat (see new dent ^), but then it dawned on me. While cutting the OEM muffler off I remember a piece of metal falling into the cat outlet tube. I'm hoping it either works it's way out or gets lodged somewhere. I really don't want to have to cut it all apart and have to find the little bastard. :confused1

Feeling productive, the last project was rebuilding the control arms. I haven't really messed with them since before Rubicon, Trophy Challenge, and Moab so they were a bit neglected and had some stories to tell. Yikes.
378CA6A7-2AFB-4247-975B-0F13976F6A78.jpg


The SuperFlex joints were super sloppy, and pretty much dry. I pulled them all apart, re-greased, and then tightened them up. The bushings looked worn, but still have some life left in them. Either way this will help eliminate a lot of those suspension clunks I've developed.

Good ole maintenance!
 
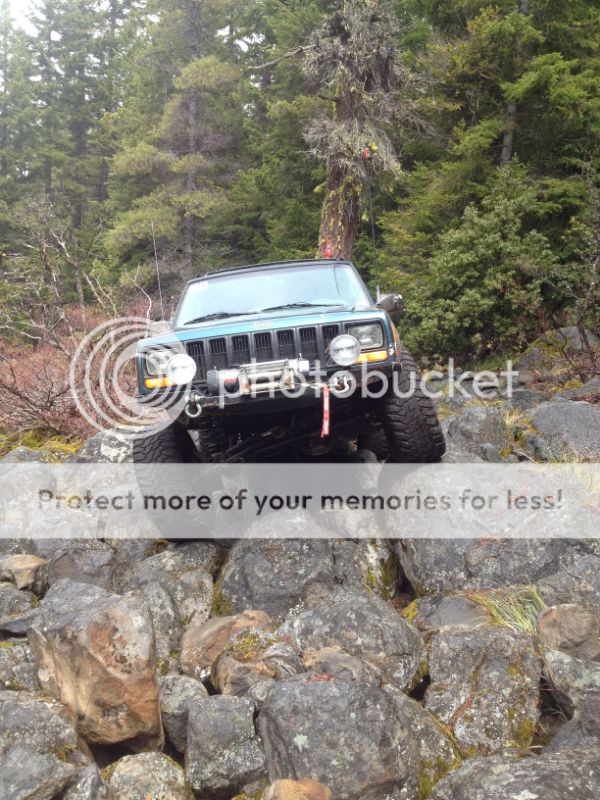
Went to TSF last weekend for a bit of wheeling, and to check up on our chapter's adopted trail, Saddle Up. Wheeling was meh, Saddle Up looked awesome, and the Nail Salon did awesome.

Lately though I've been getting slightly annoyed with the AW4's shifting. Mainly the whole not being able to hold second off-road, and lack of compression braking. Holding it in 1-2 is too slow, and 3 is too fast.

The answer to this problem comes in the form of Rory at RADesign's, Rail II Shifter. The Rail allows for full manual control of the AW4, while also allowing you to keep the TCU and have it shift normally. After putting purchasing one of these since day one of owning an auto, I finally ordered one up after returning home from TSF.

A few days later I had a package waiting for me.
ADC8AEDF-A41F-43AB-A68A-77541383F741.jpg


The Rail II is a slick little unit all aluminum CNC machined.
A4893C92-41C8-481D-B511-DE0936A08EBD.jpg


In addition to the Rail Shifter you'll also need some switches. One On-On three terminal to control the torque converter, and one On-On six terminal to control the Rail/TCU mode.

Thank you RedJeep2.0 for the #'s.
On-On DPDT Three Terminal NAPA#6261
On-On DPDT Six Terminal NAPA#6064

With all the parts needed for install I got to work mounting the switches and Rail.
C4C3793B-B071-4604-ABF5-9CEA81017C10.jpg


The next step is locating the appropriate wires needed spliced. On the OBDII XJ's the transmission control unit (TCU) is located above the gas pedal under the dash.
E16850D1-06E4-4A2A-9DDC-750E47B1FCEB.jpg


Locate these wires on the TCU harness, and then proceed to cut them in two.

Solenoid #1 - White
Solenoid #2 - Orange w/white stripe
Torque Converter - Dark blue w/white strip

6DED4A38-0239-46A0-ACF3-DB19D178DC95.jpg


With the wires separated in two (one side coming from the TCU and the other going to the transmission) add the appropriate length wires to reach your switches. I had some red and green 18ga wire on hand so red would be from the TCU, and green would be to the trans. Just to ease with confusion I labeled the wires too during the wiring process. Also use some zip-ties or electrical tape to keep the loom neat and tidy.
43A3406D-00A3-4F93-BC54-AE83D3E4BFE8.jpg


Here's how I wired my torque converter control switch.
Post 1 - 12V (I spliced into the cigarette lighter power wire which is hot when keyed on)
Post 2 - To transmission
Post 3 - From TCU

So basically when the switch is flipped for 12V the torque converter will lock up, flip it again and it functions automatically.
7D9371D5-0B18-473D-B86C-65F42302CFE0.jpg


The six post switch is for selecting between having the Rail control shifting or the TCU (normal). It wires similar to the torque converter switch. The two terminals on one side are from the TCU (solenoid 1 and 2 wires), the other side are the yellow and blue wires from the rail, and the center terminals are for the solenoid wires going to the trans.

Left side of switch - blue rail wire, solenoid 1 to trans, solenoid 1 from TCU
Right side of switch - yellow rail wire, solenoid 2 to trans, solenoid 2 from TCU
C1E02DC5-C90F-4CCA-B249-43A70100A0D8.jpg


The last step is giving the Rail power via the red wire. Find a keyed 12V source.

Interior all buttoned up, and ready for a test drive.
4016C797-C53D-48A1-BE2A-6C51B2DA7CED.jpg


Rail is easily within arms reach, and the e-brake is still semi-easy to grab.
B469CED9-1B92-489C-B98B-A598FBD0A3AF.jpg


Some helpful advice for operating the rail.
stuoffroad said:
Manual Control:

(AW-4 transmission shifter position is noted first in each line)
  • DRIVE position: not true manual control during compression braking as transmission still wants to shift "out". This is just fine as long as you are on level ground (or going up a hill, ledge, etc...) and not descending a steep ledge or grade in low range.​
  • 1 - 2 position: transmission will lock in 1st or 2nd gear and compression braking is now possible.​
  • 3 position: transmission can be shifted between 1st, 2nd and 3rd. Don't expect the transmission to stay in 1st gear​
  • REVERSE: operates normally​
I don't have a ton of time using it yet, but it does exactly what I want it to. I can hold second gear, and using the engines compression on descents. The torque converter lock-up switch will be handy to have on road trips. Thanks Rory, for offering a great product. I already regret not getting one sooner.​


Some additional installation write-ups I found helpful.
RADesigns Rail Shifter- Install/review-01 xj
RADesigns shifter install on a RENIX

Now to test it out on the trail. :cool:
 
Yours is a 97' right? This makes me happy as I e learned and read that the 97' transmission are a special breed and be a hassle to do mods to. I've wanted this mod but was always shy away
 
I absolutely LOVED the rail shifter in my last XJ.. infact, I single handedly believe the control in what little power that XJ had is what made the difference in "Making it" or not, Last NWFest..
 
The Nail Salon has pretty much been sitting since the last trip to TSF. I haven't even driven it to test out the Rail II, sad. With a trip to Evans Creek coming up next weekend I wanted to make sure all was well still.

Well a few miles from home the Jeep started pulling hard to the left. If I braked it straightened out. I pulled over and immediately smelled brakes, and felt each wheel. Wonderful, seized up caliper. :rolleyes:

Some of you may remember I had this happen a few years ago on the passenger side. Rather than changing both I opted to cheap out and only change the bad one. Lesson learned.

The next day I pulled the wheel and seized caliper off. I noticed one of the grade 10.9 bolts was actually bent.
8978DF56-519D-4442-8533-55B9270E27AE.jpg


I could feel the threads were a bit gummed up, so I ran a tap to chase them out. FYI, the threads are metric.
B46FB2BD-03B2-42CB-B57F-BC11291C1C78.jpg


Threads chased, anti seez applied, and new caliper installed. We're good to go!
D474F8F8-8C27-4866-86AC-0A44B653EAAC.jpg


I put about 15 miles on it using the Rail shifter. At first it was kind of hard remembering which switches to flip, and which gear to select, but it didn't take long before it became second nature. Definitely fun, and nice being able to have full control of the not-so-automatic.
 
Evans Creek was a blast. It was great to run some fun tight and technical trails for a change. We had a small group, and covered a lot of ground quick.

Weather was perfect. We were on the side of Mt. Rainier all day.
95346BA5-791E-40D2-AD6D-89C256A17ED0.jpg


However...

As soon as we hit the first trail I heard a new sound. It started as a popping coming from the front driver corner. Then as the day went on it turned into a creaking. By the time I got home it evolved into a cracking sound every time I turned the wheel.

Well... there's your problem.
89E0D4B1-B6EE-4D59-B998-F4D9CEBCF0E7.jpg


I had a hunch this is what it was, and checked it periodically throughout the day. I actually discovered small cracking before Rubicon last year. So this has taken the abuse of Rubicon, TTC, Moab, etc. It's something I knew I'd have to address someday, but was hoping I would get to my three-link before I'd have to. I blame this failure on the massive pot holes on the gravel road up to Evans. I had a good pace going up, and then hit a good sized section of bomb craters. That's a lot of force to put on an already cracked mount.

So with a weekend wheeling trip coming up this weekend, that meant I had to come up with a fix. I started by prepping the metal, and grinding out the cracks and welds to get a better look at what I was dealing with.
B26A9C51-4EF8-4CE0-A0AB-CA4AAC43A8DC.jpg


I hammered the mount back into place-ish, and then welded it back together. While this probably would have worked, I decided to add some reinforcement to the mount while I was at it. I cut some .188" plate to reinforce the back of the mount where the majority of the cracking was.
753F4C60-A2B2-48F4-95FF-E06EFAB083F2.jpg


After the Rustoleum treatment. If I was planning on staying short arm for the long term I would have also did this to the other side. However, these mounts will be going away shortly.
3C8DC16B-7CD7-4CF9-A85B-720AE8CCAA9D.jpg


In addition to cracked suspension mounts, I've also been putting off on changing out a bad unit-bearing. I've noticed some play in my front driver side unit-bearing for quite some time, but never really had any vibes or wobbles because of it. However, that small amount of play was enough to take out the axle seal on the road trip to Evans Creek.
1B1460F2-BAED-4527-AF37-C60FB3374F68.jpg


I picked up a new Timken unit-bearing from NW-ZJ-SCOTT and got to work on replacing the axle seal. Not a difficult job, just time consuming. I think I had it all back together in about three hours. Pressing the new seal in was the biggest chore.
1A21CA14-4854-4842-A99A-C14B877595FE.jpg


I'll be ordering up another Timken for the passenger side, and then converting that bearing to spare duty. I'll be curious if this tightens up the front end at all. Nail Salon is ready to go for this weekend, and then it's prep time for Northwest Fest!
 
Went up to the good ole TSF last weekend for BPB's bachelor party. It was fun, and I was surprised to see the amount of work ODF done up there. Props to them!

The Nail Salon tackled everything like a champ. I came back with nothing really major on the to-do list for Northwest Fest. However, I did want to tackle a few maintenance items that I've been putting off, and do a good once over.

I started off by replacing my passenger side unit-bearing since when I had it off last week I could feel some slop in it. Ordered up a new Timken from Rock Auto. I'll keep the old one around for a spare.
498F164E-0BE2-4A26-9F11-FD906BD40ED0.jpg


As I pulled my caliper off I was surprised to only find one bolt. Apparently I shed a lower caliper bolt sometime in the last 300 miles. I could feel the threads were a bit boogered, so out came the tap again. This time I put applied a bit of thread locker to the bolts just because. Installed the new unitbearing, and torqued hub bolts to 65 ft/lbs.
8B1F3417-296E-4B64-B761-6FA3057A9A20.jpg


I also noticed my front passenger brake hose was starting to fray. Just to be safe I replaced it with a new Chevy C1500 line, and did a thorough bleed. Brakes feel great!
D78DA5F7-37ED-4993-BF92-41F38BD83F62.jpg


Sometime last year I lost all speed control for my blower motor. Usually this means the HVAC resistor has failed. I finally got around to ordering a new one from Rock Auto, and swapped it in. It's located under the kick panel underneath the glove box. It's nice to have all the fan speeds back. Just in time for AC season. :cool:
B46081B6-40ED-4539-90D8-2881E330A778.jpg


The last task for the day was checking all fluids, checking all the bolts for the steering and suspension, greasing the joints, and checking all the joints. Aside from finding some slop in my track bar superflex joint, and discovering my pitman arm nut was working itself loose, all was well. I've also gotten in the habit of marking pretty much all my bolts and nuts for the steering and suspension.
C2979AD9-D69B-4476-8834-31B3DA765665.jpg


Nail Salon gets a detail job tomorrow, packed full of gear, and then we're off for NWF, Wednesday!
A5A07BC7-669D-48FD-91C4-B0F6BB43C7FB.jpg


In past trips to Naches I've flopped twice, destroyed a ring and pinion, lost a slave cylinder, broke a front axle housing along with the Detroit, and sunk a Jeep. We'll see how I fair this year. :D
 
Wait, so you lost a caliper bolt after just putting it in?
And then discovered a loose pitman arm bolt?

You lucky dog, those were the same problems I found last week
 
Back from NWF, and once again Naches was a total blast. Trails were slick, views were amazing, and to top it off we had a great group of people this year.

TORXreport: Northwest Fest 2014

Nail Salon did great on the drive up. Heading up and over Chinook Pass.
10C32248-AD44-4643-9AB7-C32B189DB3CF.jpg


Top of Little Bald Mountain.
IMG_1188.jpg


Leading the group up Manastash Ridge.
IMG_1254.jpg


Moon Rocks poser.
IMG_1319.jpg


In the past Naches has always been my kryptonite. This year I did pretty well, and only managed to slice a sidewall. I don't blame the Cooper, I blame the driver.
9934E010-86B8-4901-9889-36154424FC18.jpg


I tossed my spare on, and finished the rest of the trip with no issues. My Cooper's have upwards of 25,000 miles on them, and are getting toward the end of their lifespan for an off-road tire. However, I'm not quite ready to step up tire size yet, nor do I want to purchase a new set of 33's.

Lucky for me, SpecFab, had two 33x12.5 Cooper STT's with similar tread depth he was willing to part with. I picked them up, and now have complete set of Cooper's (including the spare).

Project for this weekend was tire swapping. My plan was to put the "new" tires on two of the wheels, and swap one of my current Coopers to spare status. First order of business was breaking beads. Hi-lift and some tire spoons came in handy for this.
E9F593F6-AC6F-4383-8970-7A5670A296EF.jpg


Even after washing my bead lock bolts they were still fairly corroded after three years of being exposed tot he elements. I chose to take the time and wire wheel each bolt before reassembly. What a chore.
AC326C75-4783-413F-A696-2BCEFE711FDC.jpg


I also decided to change up my color scheme, so in the end all my wheels ended up coming apart. Reassembly wasn't hard by any means, just way too time consuming doing it by yourself.
5ADC9724-74CF-4E4E-B223-EE1330131C00.jpg


All back together, and ready to wheel! I'm totally digging the black with silver rock ring.
0C0191F4-CF57-4220-8CFE-5B9CA319E662.jpg


On another note, parts have been arriving steadily for Phase2 to begin soon. ;)
 
Back
Top