• Welcome to the new NAXJA Forum! If your password does not work, please use "Forgot your password?" link on the log-in page. Please feel free to reach out to [email protected] if we can provide any assistance.

Seiler's Fab/Welding thread.

Seiler

NAXJA Forum User
NAXJA Member
Location
Aurora, Colorado
Hey guys,

First - I wasn't sure if this specific forum was appropriate for this thread. I wanted to have a place where I could document all my welding and fabrication stuff on NAXJA within the CO chapter area. I had contemplated starting this in the "Other Rides and Builds" sub-forum, but since this isn't dedicated to one single project I decided to put it in the main forum.

Please move this to the appropriate area if need be Moderators. :patriot:

Quick info -

My name is Scott, I've been on NAXJA for awhile now. I got sick of not being able to weld on my own projects, so I went to school for it and finished earlier this year. I'm Currently employed in Boulder where I TIG Stainless and have been doing so for almost 2 years now. I'd love to show you guys some stuff I do at work, but there is a no camera rule on the floor so that's out the window. :laugh:

Picked up my own TIG/Stick welder a few months ago and finally have my first real project worth showing!

If you guys have any questions or comments please feel free to join in. I will try to keep this thread updated with personal projects and what's related. I am not looking for or seeking business, merely sharing some of my work with you fine folks. :cheers:

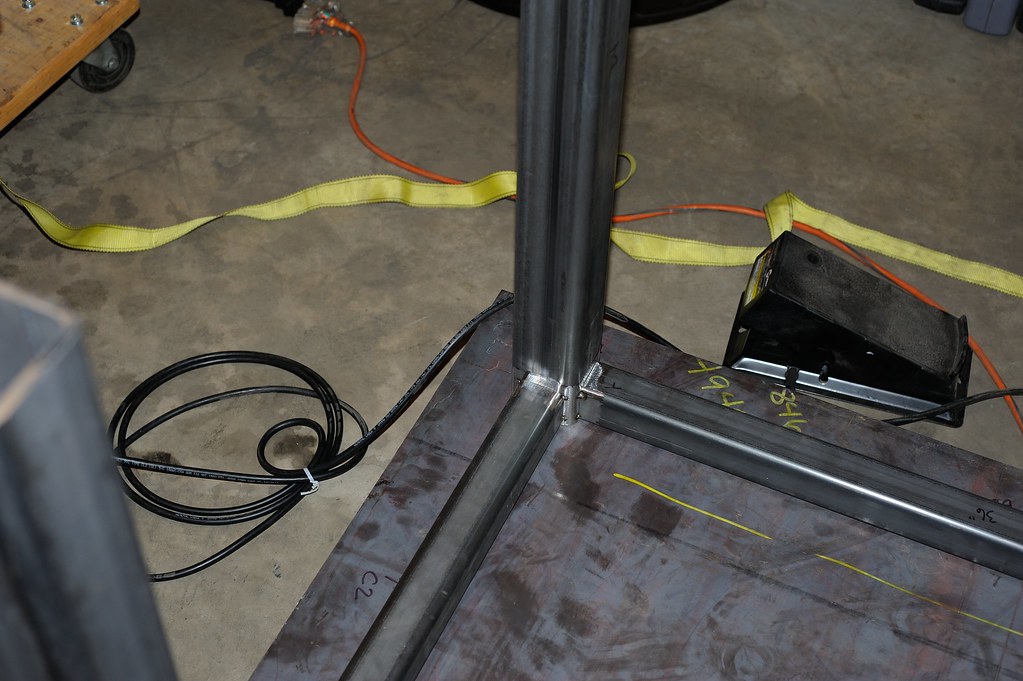
Without further ado, here's the new toy -


DSC_3672 by The Color Orange, on Flickr


DSC_3694 by The Color Orange, on Flickr


DSC_3701 by The Color Orange, on Flickr

Scott
 
Last edited:
To start, my first project has been a welding/fab table. I knew I wanted something I could BEAT on. I did a lot of research on GarageJournal, WeldingWeb and other forums/galleries throughout the internet. So, for my materials I chose:

-20' of 2" x 2" x .188" wall square tubing
-20' of 3" x 3" x .250" wall square tubing
-48" x 36" x .750" thick A36 plate

At the end of the day the table needs to snug up in a corner for safe keeping which explains the 48" x 36" plate size. I also wanted the table to roll around with ease. I purchased four 6" Fairbanks casters from Northern Tool (two swivel and two rigid) rated for 900 lbs each.

I wanted a simple, strong design for the base with a final height of ~36" with 3.5" of overhang. The primary use of this table will initially be TIG and/or stick welding.


IMG_1504 by The Color Orange, on Flickr


IMG_1505 by The Color Orange, on Flickr

At first I cut everything into pieces 1" bigger than they needed to be with my portaband. I quickly began to realize I could not achieve a straight cut to save my life so this is where the Dewalt comes in. Time to make some noise and spit some chips.


DSC_3844 by The Color Orange, on Flickr


DSC_3845 by The Color Orange, on Flickr


DSC_3846 by The Color Orange, on Flickr

This saw is my first Dewalt tool (aside from a few drill bits). As for dry cut metal saws, there aren't a whole lot of options to purchase these in person that I could find. There's always the option to order something different online and wait for shipping, however at this point I was growing impatient and wanted to begin. Overall the saw cuts very well and definitely made this project easier than it could have been. I would recommend the tool to others, but only if you're willing to shell $450 for this thing.

All done!


IMG_1480 by The Color Orange, on Flickr


DSC_3849 by The Color Orange, on Flickr


DSC_3856 by The Color Orange, on Flickr


DSC_3861 by The Color Orange, on Flickr
 
After all the cutting I decided to lay the plate flat on something allowing me the ability to move it around the garage floor. I knew the plate was the only surface I had that was large enough and closest to flat enough to build this base on.

I purchased a furniture dolly from HD for $20 and it worked perfect.


DSC_3854 by The Color Orange, on Flickr


DSC_3855 by The Color Orange, on Flickr

I built the frame upside down In order to keep it as square and solid as possible. I knew once it was completely assembled I could easily take a grinder to the "bottom" of the legs in the event there was a wobble from something being off.

The plate itself measures 47 15/16 in. x 35 15/16 in. I picked and used a corner to base all my measurements from.


DSC_3857 by The Color Orange, on Flickr


DSC_3858 by The Color Orange, on Flickr

Then I laid out my legs and the "top" of the frame.


IMG_1490 by The Color Orange, on Flickr

Marked what had to be sanded.


DSC_3880 by The Color Orange, on Flickr


DSC_3890 by The Color Orange, on Flickr


DSC_3885 by The Color Orange, on Flickr

Aaaaaaaannnd labeled all the pieces.


DSC_3872 by The Color Orange, on Flickr


DSC_3874 by The Color Orange, on Flickr


DSC_3875 by The Color Orange, on Flickr
 
Nothing makes TIG welding easier than clean, shiny metal!


DSC_3898 by The Color Orange, on Flickr

Time to start tacking.


DSC_3904 by The Color Orange, on Flickr


DSC_3908 by The Color Orange, on Flickr

Next leg.


DSC_3913 by The Color Orange, on Flickr


DSC_3910 by The Color Orange, on Flickr

And I eventually got sick of taking pictures between every leg. You get the idea. All tacked.


DSC_3917 by The Color Orange, on Flickr


DSC_3921 by The Color Orange, on Flickr


DSC_3923 by The Color Orange, on Flickr


DSC_3926 by The Color Orange, on Flickr

Best part? No wobble and solid as a rock.

I then started on the bars between legs.


DSC_3930 by The Color Orange, on Flickr


DSC_3931 by The Color Orange, on Flickr

Did the same on the other side.
 
After going up and down, and up and down all day... Grinding, moving metal, lifting, pushing, pulling etc. I had to put up a fight with the last bar that went long ways near the bottom. I was least interested at this point in taking pictures.

Which leads me to the base being all tacked.


DSC_3938 by The Color Orange, on Flickr


DSC_3940 by The Color Orange, on Flickr

Unfortunately, that's as far as I got this week. I work weekends and won't be able to continue until next week. I will keep you all updated!

Scott
 
Looking good man, looks like you'll be able to park a 747 on that thing with more than enough strength to spare!
 
42048-Dis-gon-b-gud-gif-ngmE.gif
 
Nice welder! I am trying to get rid of my Miller 180 tig welder as it is too small for me, I should have waited for the 200dx like that!
 
I'm glad you are putting wheels on that heavy beast. I get tired just looking at it. ;)
 

:laugh: Everytime.

Nice welder! I am trying to get rid of my Miller 180 tig welder as it is too small for me, I should have waited for the 200dx like that!

I feel very, very spoiled being able to afford this machine. Right after I bought my machine though, Miller released the Dynasty 280's. I had a really hard time deciding between the 200DX and the 350. A 280 would have been PERFECT. :banghead:

OMG. :loveu:

So Jelous! I'm still using a dinky Maxstar 150. Those Dynasty's are the bee's knees.

Miller is all we use at work, I had to own one. I've used Lincoln, ESAB and Thermal Arc. Honestly, had I not been able to afford the Miller I would have went with a Thermal Arc. I don't like the ESAB or the Lincoln's TIG performance at all.

I'm glad you are putting wheels on that heavy beast. I get tired just looking at it. ;)

Me too! You want to come over and help me move it around before the casters go on? :D

I didn't get a chance to work on the table today. I need to source a few Irwin 18SP clamps before I begin welding. Only friggin' place around here that has any in stock is Matheson Trigas off I-70. None at HD, Lowes, Ace, Murdochs etc. (n)

Side note - I would highly recommend Matheson (formerly Linweld) to anyone in need of a LWS visit. SO much better than Airgas and their pricing is fantastic. I will NEVER go to Airgas again.

Scott
 
Seiler said:
You want to come over and help me move it around before the casters go on?
Sure! I bring my hoist and moving dollies. Then, I'll help you move those Wiltons around and into my truck. :loveu:
 
Sure! I bring my hoist and moving dollies. Then, I'll help you move those Wiltons around and into my truck. :loveu:

Pffffffffffft. :D

Update!

I started with the "top" of the base. I took a few minutes to grind a slight groove for the weld to penetrate a little better.


DSC_3952 by The Color Orange, on Flickr

My dad is into woodworking and has more clamps than anyone I know. I asked if I could borrow a few and he was more than happy to lend them out. So, I clamped a few sides.


DSC_3961 by The Color Orange, on Flickr


DSC_3960 by The Color Orange, on Flickr

Laid a few beads on the top.


DSC_3967 by The Color Orange, on Flickr

I then flipped the base over and clamped the "top" to the plate. This is the orientation the top plate and base will attach against one another in the end.


DSC_3978 by The Color Orange, on Flickr


DSC_3979 by The Color Orange, on Flickr

Here comes the real fun!


DSC_3986 by The Color Orange, on Flickr


DSC_3989 by The Color Orange, on Flickr


DSC_3991 by The Color Orange, on Flickr

I had to use my knee for the foot pedal more than ever today. Finding a comfortable position proved to be a challenge. I got through it though and now my knees are killin' me. :laugh:
 
Results:


DSC_3994 by The Color Orange, on Flickr


DSC_3995 by The Color Orange, on Flickr


DSC_3998 by The Color Orange, on Flickr


DSC_4011 by The Color Orange, on Flickr


DSC_4018 by The Color Orange, on Flickr


DSC_4020 by The Color Orange, on Flickr

I had a few fun vertical ups for fun as well.


DSC_4027 by The Color Orange, on Flickr


DSC_4036 by The Color Orange, on Flickr


DSC_4049 by The Color Orange, on Flickr

It has been a little while since I've welded on plain carbon steel. I forgot how much heat you can pour into this material. I still have 24 more welds to complete tomorrow. I'll post pictures after those are finished and the base is complete.

Cheers everyone, time for bed.
:cheers:
 
Just out of curiosity, how long does each weld take? I wouldn't put wheels on it, what I miss the most is a flat table that won't move despite any leverage I apply to it. And don't forget, despite the beautiful welds, it's only worth $0.07-0.12/lb. You could probably spend a little less time on each weld. Just saying. :)
 
Pure sex!

Love the attention to detail; all the way from design, prep, to finish welds. Also love the photo quality too. Makes it that much better! Keep up the good work.
 
I'm feeding with 1/16" rod, so each weld takes about 25-30 seconds. I could have purchased 3/32" rod but meh, I like the puddle control and appearance of using a smaller rod diameter. Honestly, I thought about welding the entire thing out with 7018 because I have a bunch, but stick just isn't fun for me like TIG is. What I'm doing isn't efficient, but half-assing or not taking my time on these welds goes against my attention to detail and who I am as a person. If it doesn't look damn near perfect then I don't like it and I would get upset every time I look at it. :kissyou: :laugh:

The casters are going on just so I have the ability to move the thing around (it's forecasted to weigh in around 700 lbs when it's done). I don't have the setup for a stationary bench. I do plan to fab up some adjustable padded feet so I can level the bench out after I move it to where I want it. :)

SleeperXJ, I have the welder plugged into my dryer's 220V outlet and my Coolmate is plugged into the 115V feed.

Thanks for the feedback guys, I appreciate it.
 
Back
Top