• Welcome to the new NAXJA Forum! If your password does not work, please use "Forgot your password?" link on the log-in page. Please feel free to reach out to [email protected] if we can provide any assistance.

'98 "Anasazi" Build.

I would consider pulling out one of the extra leafs, see how it sits. Maybe use an MJ shackle?
I installed some 4hole injectors on my renix. Idle smoothed a bit, small increase of MPG.Probably due to combo of the injectors and bored TB and maybe the renix setup?
 
I would consider pulling out one of the extra leafs, see how it sits. Maybe use an MJ shackle?
I might do either or both. For now I'm going to drive it as-is and see how i like it. Maybe get back to working on my truck project. If I don't like the ride, maybe this Spring I'll tear into the leaf packs again & figure something out for the shackle angle. Could remove a leaf & add bolt-in shackle brackets + leaf spring liner, see where that puts me. For now it's done.

I installed some 4hole injectors on my renix. Idle smoothed a bit, small increase of MPG.Probably due to combo of the injectors and bored TB and maybe the renix setup?
Y'know, I go back and forth on what I think of the injector upgrade. I bet a lot of the benefit is just that they are in better condition than the old stuff, but I can see the logic in a different injector tip giving a better atomization and how that would help combustion. My idle got a little smoother, I think, and a slight bump in fuel economy. What I'm unsure of is if it's the cleaner injector or the newer style spray.
 
The good: My rear bastard pack settled out to 3" (20" from hub to flare), which equals about 1" per leaf I added (I started out with UpCountry packs). It rides stiffer than it used to but I like it. Dips & bumps that used to be flinch-worthy, the Jeep now handles with authority.
The bad : my lower control arm bushings have been walking in / out of place in the arms ever since I replaced them. After lifting it, this has begun to make pop / clunk sounds.
The ugly : I took a low-dollar approach to the problem this morning. Class was cancelled & I want the welding practice. Did I mention, too, that this was cheaper than RE arms?
Stage one - two pieces of 3/4" square welded into the bottom of the LCA's channel
IMG_20140306_104951_zpsccd13306.jpg

Stage two - 1.5" flat strap welded across top (actually bottom) & bushings tacked to the arm in multiple places.
IMG_20140306_110454_zpsca93d1e6.jpg

It's ugly but every fabricator has to start somewhere. This little project cost me $15 in steel. Way I figure it, it's cheap practice. If it works, I can put off buying after market LCAs a few years.
 
the biggest issue with stock arms is that they contact the coil bucket, limiting droop. you can grind the bucket to gain more. at stock ride height with the swaybar, its likely a non issue. aftermarket arms remedy this (good ones should at least) as well as provide a nonaggressive surface to run on. again, with stock tires, likely a non issue.
 
I generally agree, though the biggest issue *I'm* having with my stock arms was bushings walking out of place & minor rock damage threatening to become major. At some point, I'll clearance the brackets or call it a day & replace them. Probably not until I'm out of school & working again, though, unless these polished turds give out on me.
 
if your replacing arms continually, quality arms will alleviate the issue. if your continually replacing bushings on stock arms (are they even serviceable?) then reinforcing them likely wont help. just keep an eye on your local chapter, people upgrade to long arms all the time, a lot of my jeep is used items.

words of wisdom from someone else in school (FWIW)... you can go to school and still work, i do, and i compete in the baja SAE collegiate design series while managing a girl friend. strait As baby! putting the jeep on the back burner while i finish my college career was the best thing i ever did. i got a hell of a deal on a DD, sure its not as cool as driving the jeep, but cost less than my tires and is much better on gas. you can always build a jeep later, focus on school if you cant manage it all. youll be thankful you did in the long run.

/rant
 
My fiance, currently entering her second trimester, makes good money. We talked & decided it's better for "us" if I'm home more. Wasn't my idea. On the weekends I fix cars in our garage to pull in my spending cash. She's handling the bills. When she goes for her doctorate a few years down the line, it'll be my turn.
After this Spring semester, I'll be looking for a paid internship or job that will flex with me when I start school again this Fall semester. Might be taking a couple summer classes, depends what's offered in my department.

The issue I was having was that after replacing the bushings (yes, they are serviceable) the holes they pressed into were loose on the bushing, allowing the arm to slip out of place on the bolted-in-place bushing. Not a lot of side loading on the part, so a few tack welds (I hope) will fix it. If not, I'll find an extra brake job to do & buy RE stuff off of Amazon (if I can't find used)
 
I worked 5 nights a week and a paid internship through grad school. Totally do able. Actually had tons of money to spend .
 
Well, I didn't really feel like replacing a track bar but I found the frame side joint pretty loose in mine.
Thinking IRO or Rough Country, leaning IRO because it uses a larger joint. Could replace with OEM (axle is only off 1/4" at my lift height) but thinking I may as well upgrade. If nobody has any compelling arguments one way or the other, and it's still a bad joint when I look in the morning, I'll put an IRO on it this coming week. The Passat I'm working on this weekend will pay for it, which gives truth to the "will work for jeep parts" joke.
 
Even if you get some fixed LCA's new or used. You will be ahead of the game and not have to deal with crap like you are meow. For no/low lift, and can't afford full set of adjustable arms,I recommend fixed lowers and adjustable uppers.

Do NOT buy an RC trackbar. Have heard WAY TOO MANY "fold like a taco" situations. IRO is the way to go for 200$ since the bracket is included.
 
The Jeep hasn't gotten any love lately as I've had my LS swap project taking space in the garage. Now that the truck is, roughly speaking, drivable - I pulled the Jeep in for a small project I'd been wanting to do.
The tow hooks hang down from the body just far enough to put some 2" square tube in there like so..
IMG_20140410_144626_zpscc5c6990.jpg

Add welds + under coating...
IMG_20140410_170947_zpsd5cd9806.jpg

Nothing fancy, just a little bracing + welding practice. The 4 10mm bolts should be good for as hard a yank as I need. I'm thinking about tying a HD bumper in to this brace later on.
New track bar is on order, Goferit insert is on hand for the mount if needed.
Random shot of the hobby truck that's been soaking up my car cash / time lately...
IMG_20130807_150805_zps64e4f27b.jpg
 
Rough Country sent me a track bar with a bad TRE.
They replaced it free with another junk TRE.
Then they sent me another junk TRE.
I really wish I hadn't welded the track bar mount onto the frame. If I hadn't, I could have gone double shear + heim and been done dicking around by now. As it is... hard to say, time wise.
 
Why would you weld a stock/un-modified TB bracket to the frame? Maybe get some plate or box tube to make double sheer and run a heim/other joint.
 
Why would you weld a stock/un-modified TB bracket to the frame? Maybe get some plate or box tube to make double sheer and run a heim/other joint.

Because I lack impulse control and become bored easily.

I finally broke down and un-welded the track bar bracket. Came up with an Iron Rock Offroad double shear track bar with poly on both ends, prepped it for 1/2" bolts, added washers to fit a brand-new RE1665 double shear mount & installed the mess.
Two things quickly became apparent.
One, even bottomed out : this particular double shear bar was 3/4" too long.
Two, much more importantly - the IRO bar doesn't have any bends for diff cover clearance. It's hard to describe (may put up pics later) but the factory bar has bends forward, toward the front bumper, to clear the diff cover. So does the Rough Country bar. This is why they clear lower lifts.
Most double shear bars, all of them that I've seen actually, lack this forward bend - and they will bang into your diff cover going over every speed bump in the road if you are below a certain amount of lift.

Sooo, I broke down & paid another $45 for another Moog ES3096L. Got this one from NAPA so I'd have a warranty on it.
I can't believe it but the thing seems tight.

As I see it, the mess teaches a few things.
1.) For lifts under 3", you *cant* expect to use a double shear bar. It won't clear your diff cover, or at least not if you run a Solid cover. Rough Country's TRE bar is bent properly, but not compatible with IRO / Rusty's double shear upgrade. The TRE is pointing in to the mount from forward and to passenger's, so a side-to-side joint & mount won't align.
2.) Auto parts are frequently junk - so buy it local & buy it with a warranty
3. ) Seriously. You can put 4 bad tie rod ends on in a row before you come up with one that doesn't have slop from the box.
 
Re 1600 trackbar flipped sideways then build your own mount don't use a store bought mount. Like a ruffstuff out boarded mount perhaps or just build one out of 2.5 0.250 square tube .
 
I recently switched to a ZJ fan clutch and notice, yes, the noise - but more importantly the engine is slower to reach the electric fan "on" temperature and it cools down much faster than it used to. Still, I live in a pretty steep part of the country and it's been hot out. I decided it was time to help the cooling system out a little more.
First, was to add a flow / burp hole to a Napa 180* thermostat.
IMG_20140622_155937_zps5152ba7f.jpg

While I was in there, I smoothed out the thermostat housing to improve flow a bit. I didn't get a picture of the finished product but you can see the area I was working on here.
IMG_20140622_155944_zps632e3297.jpg

The Jeep is probably right on the edge of throwing a Check Engine Light for not warming up fast enough. On my way home from town, I climb ~500-750 ft of steep hill with several slow-down-turn-accelerate routines. On a hot day, the Jeep used to start running the electric fan about 70% of the way up the mountain. After the ZJ clutch, it wouldn't turn on until I'd crested the hill and stopped at the top, waiting for a chance to pull into "traffic". With the modified 180* thermostat and housing, it gets just up to the low side of the 210 mark and no higher unless I'm idling in my garage, which is lately in the mid 90s.

Next up, satisfied with cooling, was to replace the TPS. No pics because it just isn't interesting.
 
I went in to work today and got sent home soon after because there's no work to be done. Oh, well - garage day.
A project I'd been meaning to get to ever since I married my tow hooks together was to space the factory front skid plate down in the back and re-mount it. The front edge could either be bolted to holes I tapped into the cross-beam under the tow hooks or, better, welded. I went with welded.
IMG_20140623_143522_zps2953f0ac.jpg

Here's a picture through a side opening to show the space I'm working with in there.
IMG_20140623_143542_zps14c33658.jpg

I'm not totally done with the skid plate / tow hook setup.
Further goals are : add gusseting (2" x 1/8" flat stock) between the back of the bar and the skid plate, stiffen up the back of the skid plate & paint it. Maybe add skulls.

With 2.5" lift, spacing the skid plate down covered my steering back up & provides a much / rain guard for the alternator again. I'm happy with the project so far.
 
Well, I was going to go to Bonneville with some buddies and take the Jeep out onto the salt. This got me thinking about rust - which led to a dizzying volume of paint and rubber undercoating being shot at the Jeep.
Then I wanted some arm rests that didn't suck, so I took the door panels apart and had an upholstery shop build them up with padding. Much comfier and better looking than the hard plastic junk.
And finally, when Speed Week was cancelled because of rain, I said "Damned if I'm not having some automotive fun this week..." and finished the WJ swap I've been putting off.
IMG_20140812_092409_zps18da4379.jpg
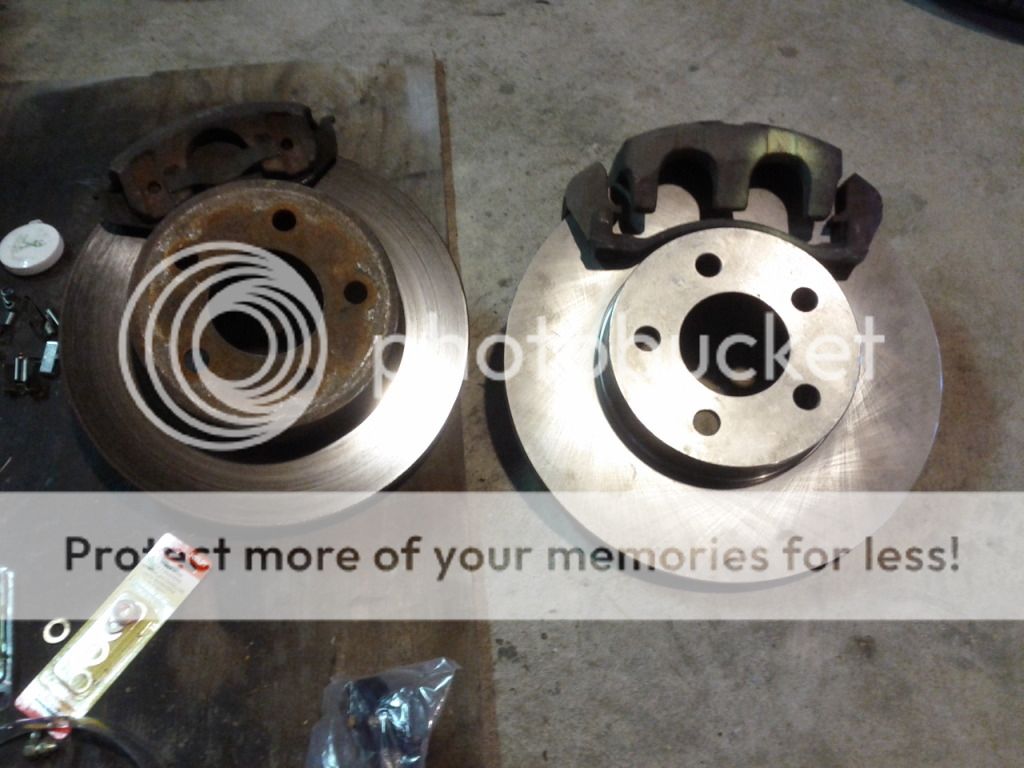
That right there is the motivation. Another 1" of rotor diameter & twin-pot calipers. Another great advantage - the pad support is distinct from the knuckle and uses shims / clips to isolate and quiet the pad. XJ stuff just seems cheap in comparison. Hell, it *is* cheap.
Here's the result:
IMG_20140812_092202_zps2429d969.jpg

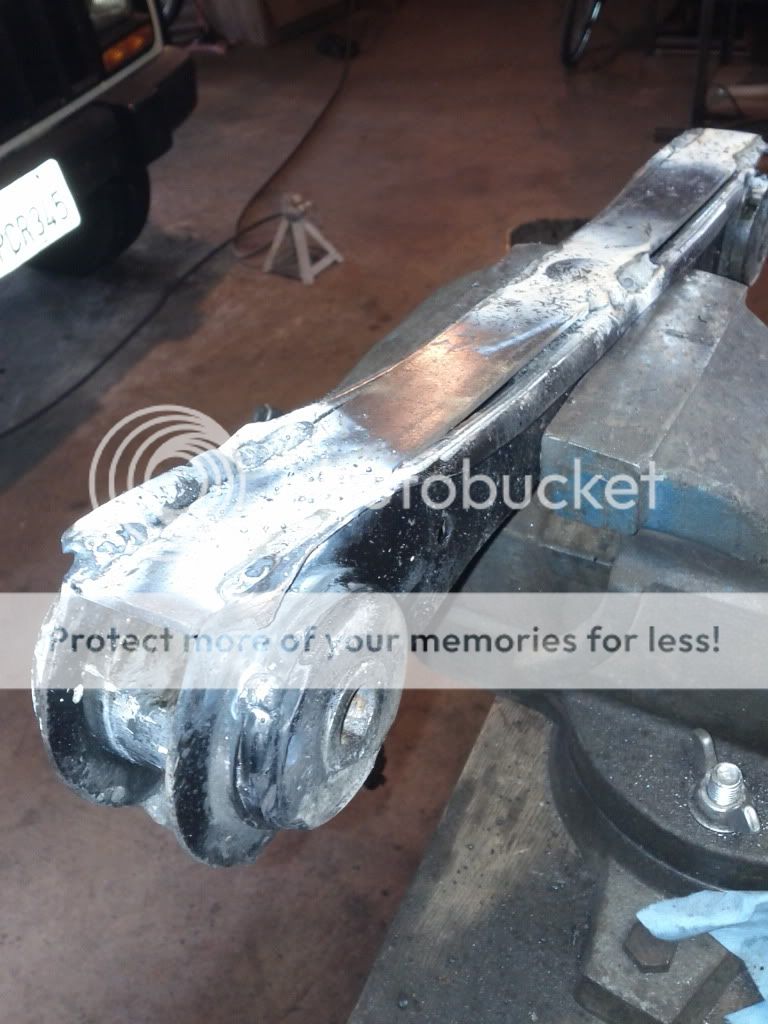
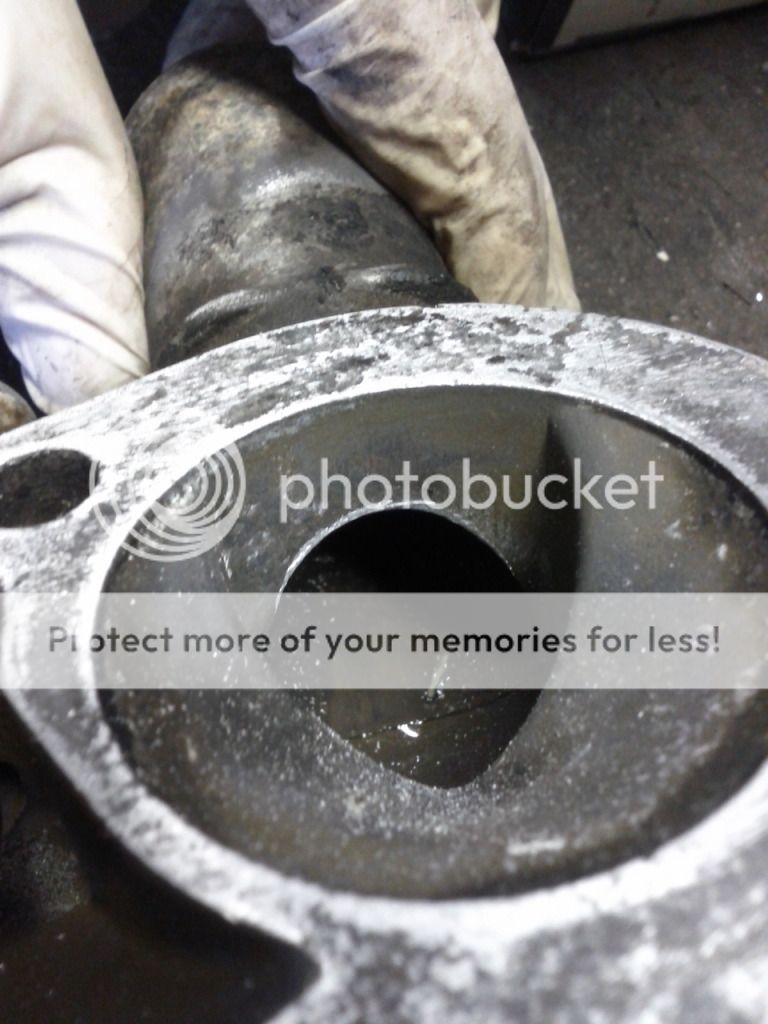
That's the WJ knuckle, Akebono caliper / pads, 01 Ford Explorer Sport-Track front rotor, '00 XJ hub & 1.5" wheel spacer so my factory 15" steelies will fit. Not pictured are the 9/16" grade 8 washers in between the rotor & hub, needed to space the rotor correctly.
IMG_20140812_093202_zps4d59ace6.jpg

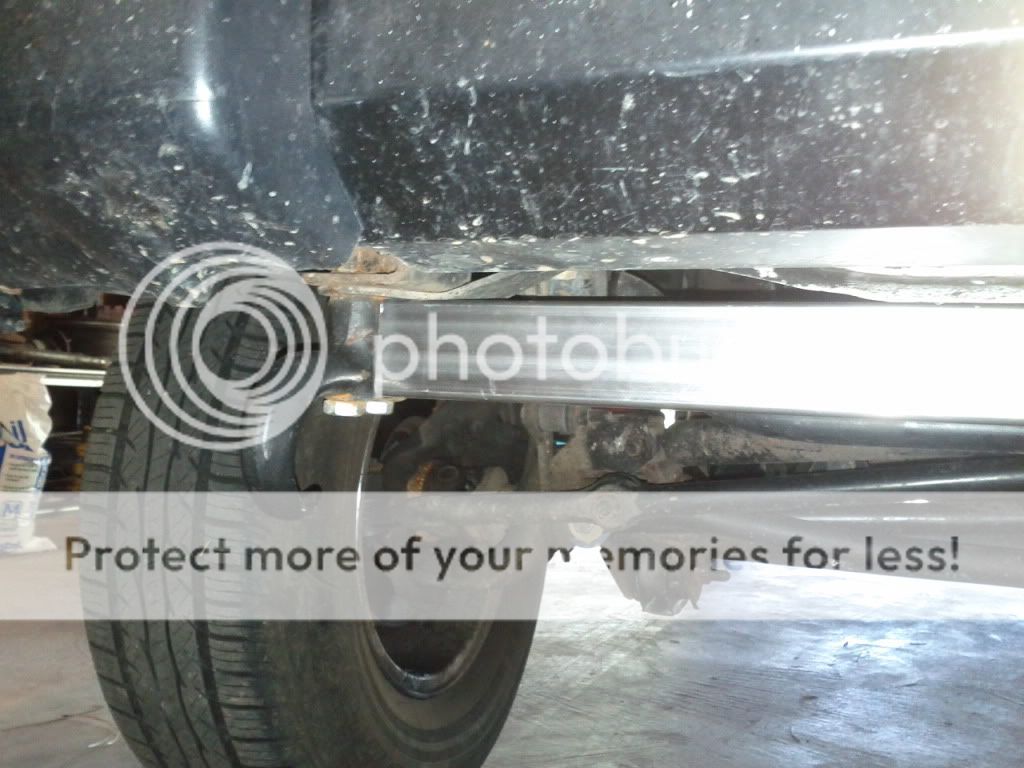
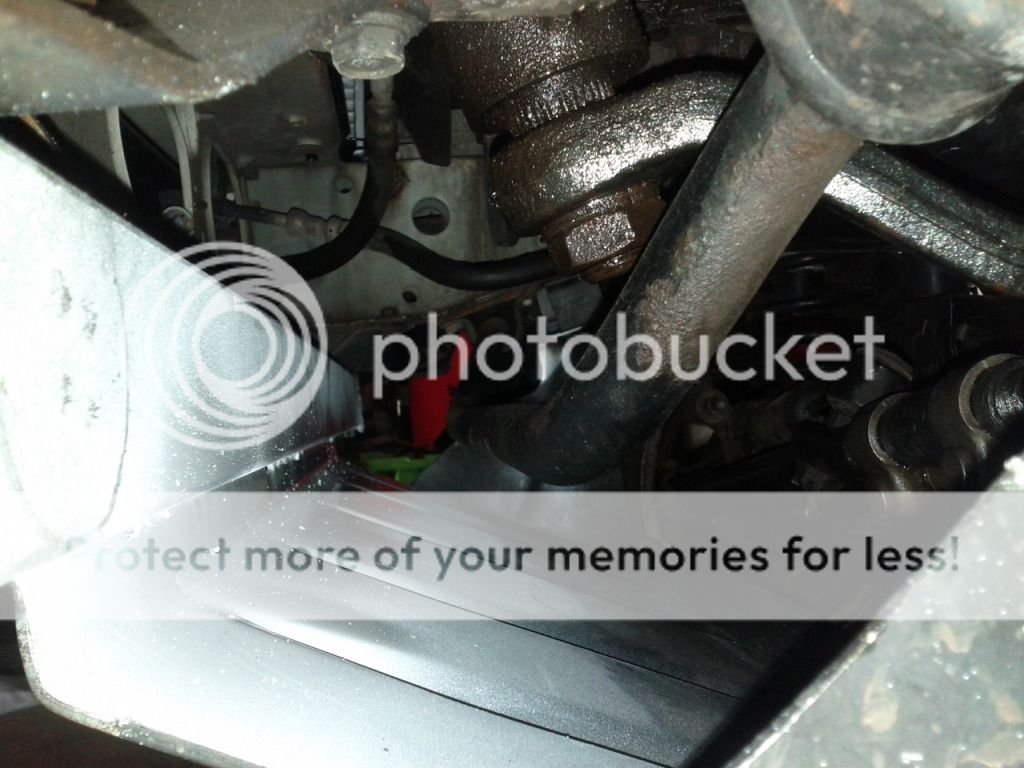
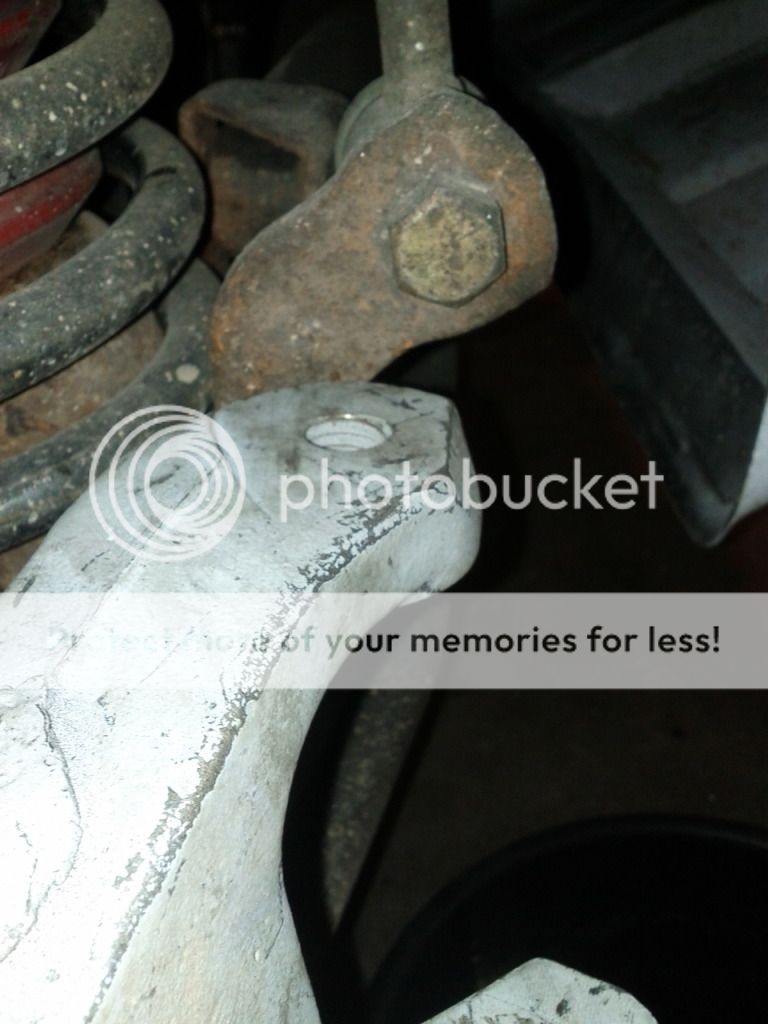
This is a shot of the clearance between the factory sway brackets / coil bucket & the passenger's side upper steering arm. It's no problem for me, I'm using stock linkage, but I include the picture so people can see what's what. If you want to go crossover with Chevy stuff or Heims, you *must* chop the sway bracket & probably clearance the coil bucket. I said "no thanks" to that as well as the OTA track bar.
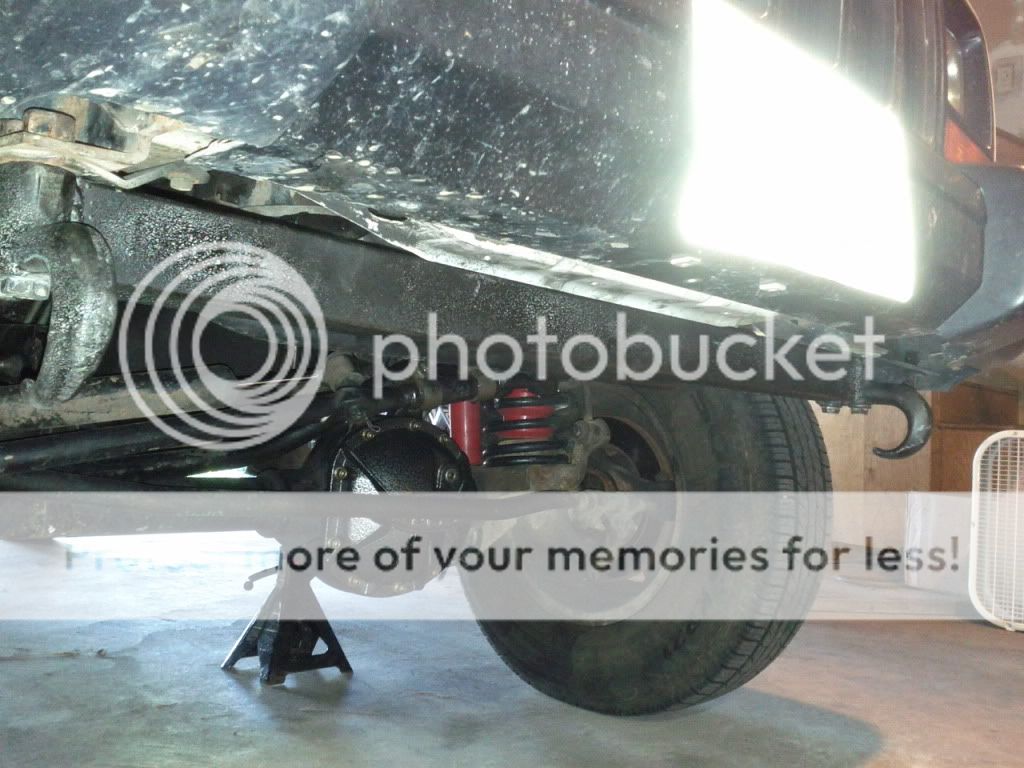
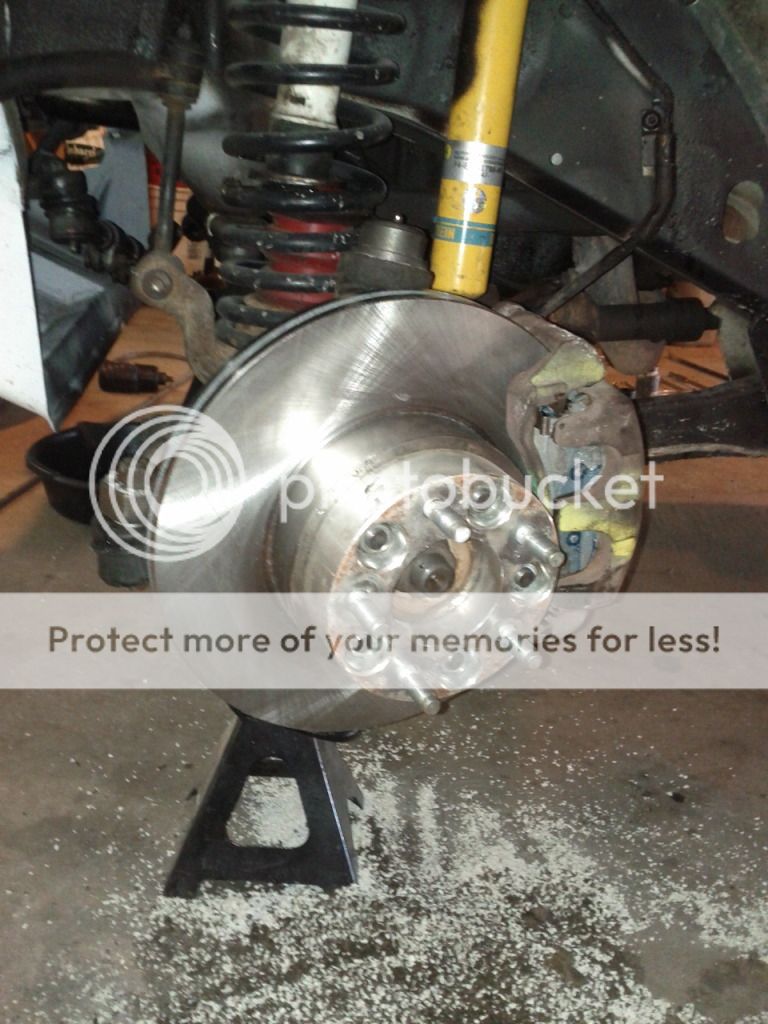
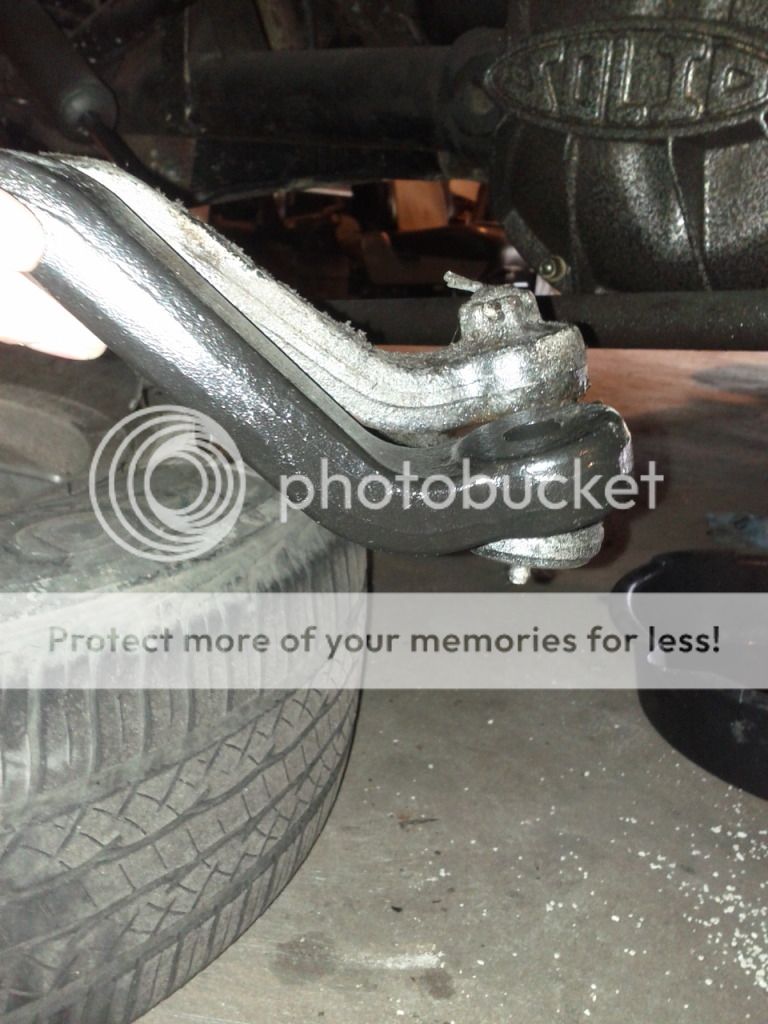
The lower pass. steering arm is 3/4" lower than the steering arm on an XJ knuckle. This means the drag link's angle changes but track bar angle doesn't. This equals bump steer. Here's my solution...
IMG_20140812_154345_zpsd6ac81e8.jpg

ZJ pitman arm. 3/4" drop. On my test drive, I couldn't feel *anything* different about my steering with the WJ knuckles, stock linkage / TB & ZJ arm. Happy as could be.

The results, with Centric OEM replacement rotors / pads, are fantastic. Pedal modulation is present, though I will have to recalibrate my foot a little bit. When I apply pressure like I mean to stop, I STOP. Emphatically. Better brakes than all but the 2 Corvettes I've driven. Very, very worth the time / money. And at $25 for a ZJ pitman arm, anyone who's front end needs a refresh can go WJ brakes for very little extra money. It's awesome.
 
The Jeep has been back-burnered for a while as I've been working on my (other) hobby truck. I started noticing that the brake pedal was sagging under steady pressure, though. Translation: master cylinder going bad.
So after some reading, I decided that the 99 Durango / Dakota master cylinder was in my future. It's available in 15/16" bore and 1 1/8"; Jeeps using a 1" bore.
The compromise with MC size is this: a larger bore generates less line pressure but engages the brakes with less pedal stroke. I opted for the 1 1/8" bore MC, thinking this would improve modulation. Since I'm 6'1 and 185 lbs or so, I figured it wouldn't be too much trouble to compensate for the lost line pressure.
IMG_20141007_171401_zpsd64b282b.jpg

And there's the result. You have to weak the lines running from MC to prop valve, swap reservoirs or build new lines. I opted to tweak the existing lines and took it for a test drive.
Brakes feel good. I think I can detect the loss of line pressure and for some, this makes the 1 1/8 bore a loser. It's worth noting that the WJ runs a 1" bore from the factory. To me, the modulation & pedal feel are more than enough to compensate. I also like that this MC doesn't leak.
Next up: locknut for pitman arm.
 
Well, it was a good run with the XJ but I'm fair certain I'm selling it in the next few weeks. I've already bought the replacement, an 04 WJ w/ V8.
It needs a 120K service, front brakes & maybe some basic recovery / protection stuff but after that, I'm calling it "done".
What this XJ taught me, a lot of things actually, but the final lesson from it was that you ought to start off with the vehicle you want instead of trying to make the vehicle you have into what you want it to be. This may not apply to the hardcore wheelers but for me...
Anyway.
So long and thanks for all the fish.
 
Back
Top