old_man
NAXJA Forum User
- Location
- Loveland, Colorado
Due to the PhotoBucket fiasco, here is a new "Welcome to my build thread". My purpose was to design from scratch and build an offroad “teardrop” trailer.
While technically, the shape is not a pure teardrop, the same purpose is the goal. This was built as a prototype for a possible product.
My design goals were to be able to pull it on severe off road trails behind my 1985 Jeep Cherokee XJ. I’ve had it for over 22 years and it is extremely capable but I got tired of sleeping in the back of my rig and that really doesn’t work for my “city girl” wife.
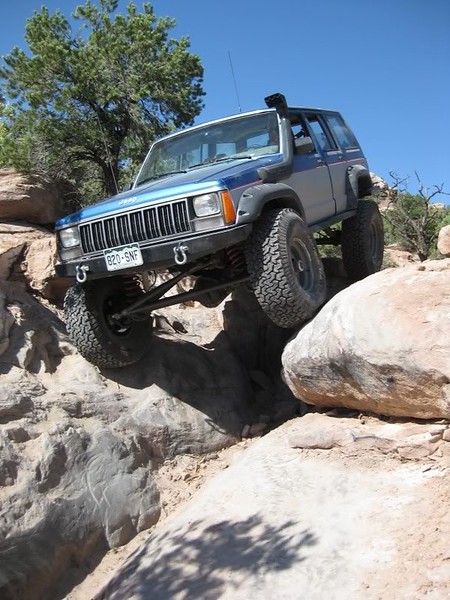
The Jeep is on 35’s and the hitch sits pretty high so the tongue will be non-traditional. The trails I take are really rough and require a lot of twist and rotation as well as being able to take a pounding without beating up the contents.
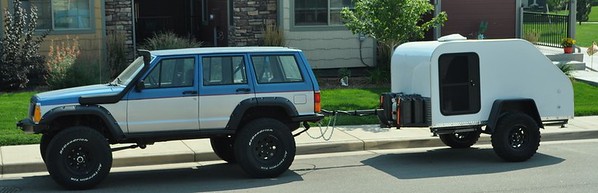
Here is the final result.
My suspension design utilizes a dual air bag suspension with shocks using 31" tires.
Unlike most builders, I didn’t start with a trailer. I started with a pile of steel on the floor.
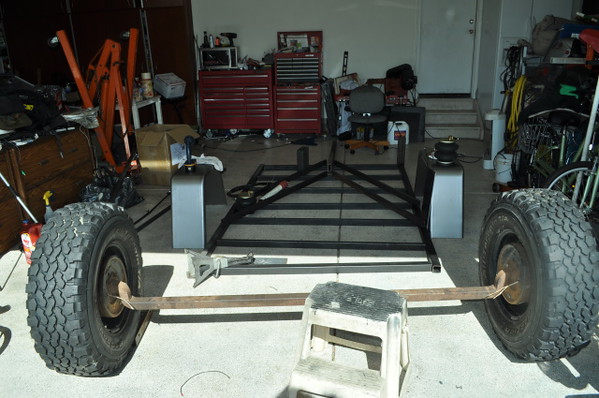
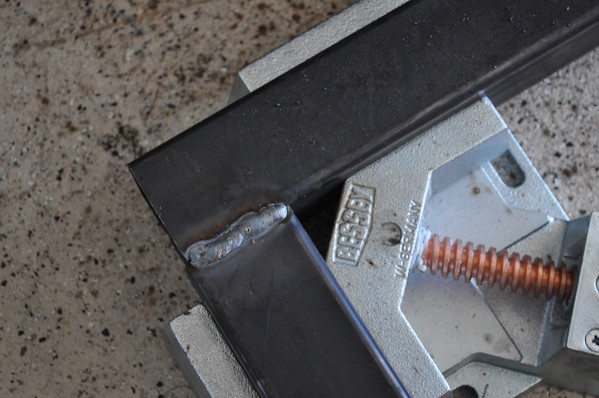
The frame is 2x2 square tubing with 1x2 cross stringers. Getting it precise, square, and flat is important.

Once welded, each weld on the top was ground down flush.
Due to how much I run in the mountains I used electric brakes, even though the trailer weights less than 1000 lbs.
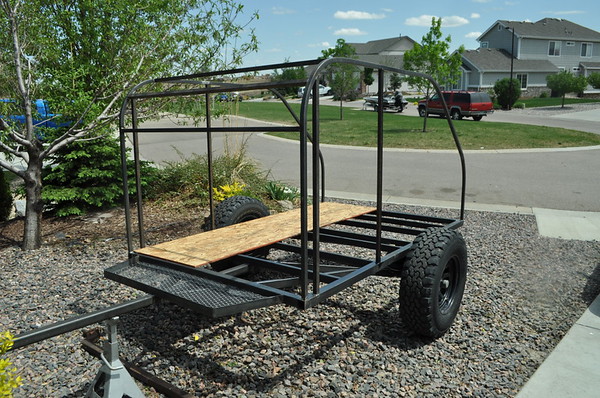
Here is the basic trailer out in the sun for the first time. The suspension is quite different than I have ever seen.
I used a single link utilizing a spherical bearing and a pan hard bar.
The axle is supported by dual airbags and dampened by shocks.

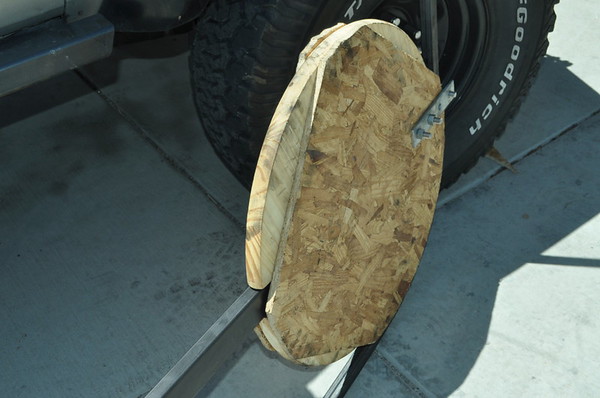
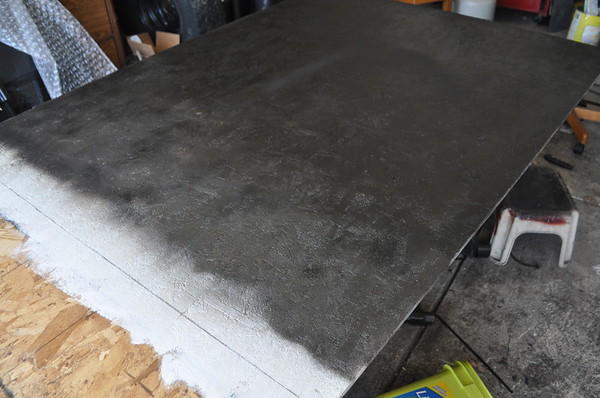
Next came building the steel frame. The frame is mostly 1”x1” thin wall steel. Many people simplify things by working with hard/square corners. Being the pain in the ass perfectionist as my wife calls me, I wanted a more flowing shape. Bending a repeatable large diameter curve is repeatable without some source of tooling. Having grown up on the farm/ranch and later being trained as a tool and die maker and fabricator, I came up with a simple bending tool that worked flawlessly. I started with a round table top blank from Lowes. I modified it with some OSB shoulders to hole the tubing on the bender.

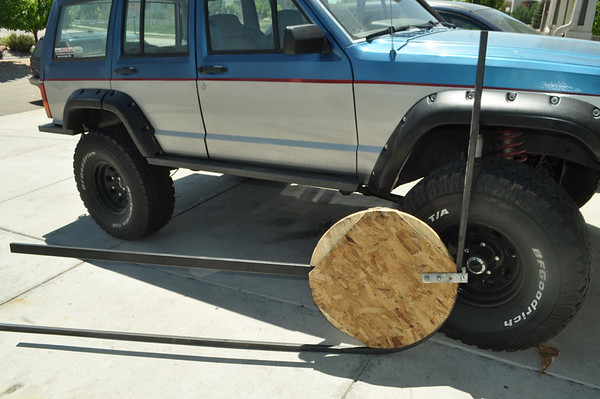
I bent and matched the two sides.

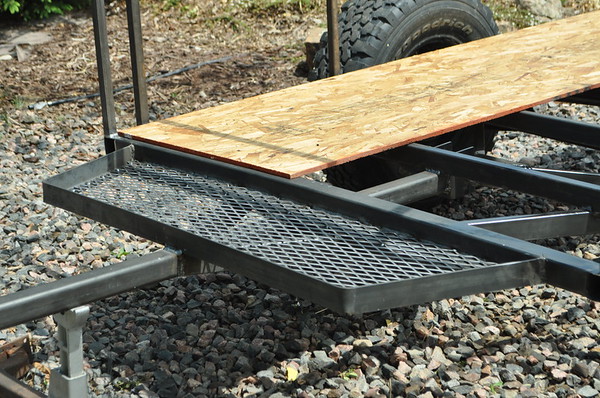
Having welded the sides up and adding some structural bracing, I added a storage area to the front.
A straight trailer tongue would not have lined up with the Jeep’s hitch. That combined with wanting to be able to remove the tongue for security and storage reasons, I added an offset to the tongue.
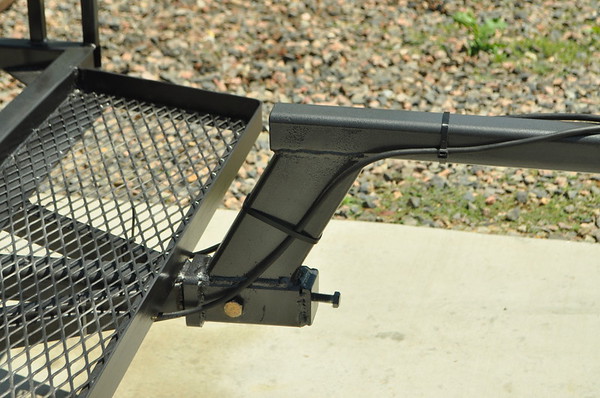
My PIA Engineer self, wanted to build a hitch that could handle all the extreme angles required. A standard trailer hitch ball just does not provide enough movement for the places I go. Many people use a military style pintle hitch but I don’t like the noise and sharp shock you get with those, so I developed a rubber shock isolated section into the hitch.
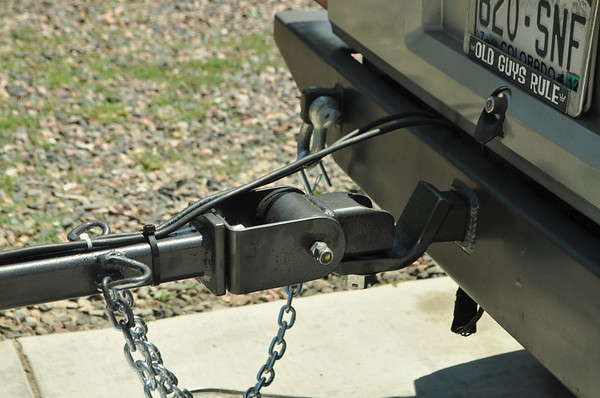
It works flawlessly and you really don’t feel the trailer at all. It also provides significant security if you have to leave your trailer somewhere because it simply won’t hook up to anything else.
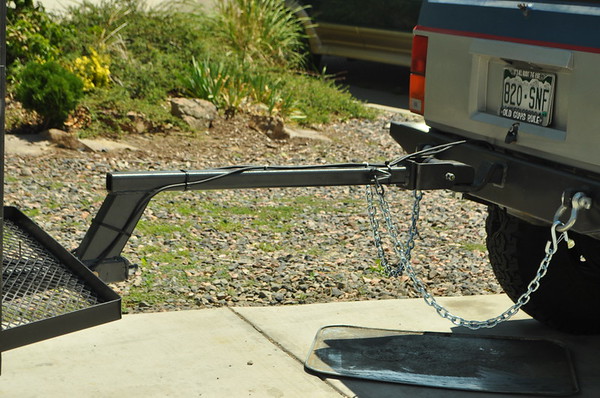
If you look at the hitch, it is a significant distance from the ground to match the Jeep. By flipping the goose neck over, it lowers the hitch lever to where it will work on a compact car.
Next was to put a floor on the trailer. I used outdoor OSB and hit the bottom side with an alcohol primer and then a coat of rubberized undercoating before screwing it down on the frame.
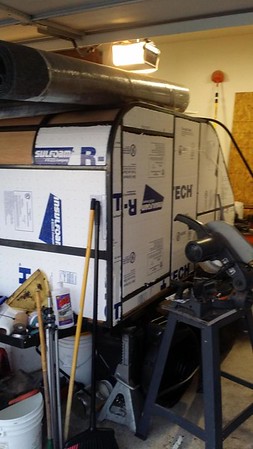
Lots of cross members and pieces were added to the upper frame. The location of the doors was finalized and also framed in. The next step took a bit of figuring and planning in order to get the interior ply installed. The sides were fairly easy, but making the sheathing follow the contour of the top took a lot of work.
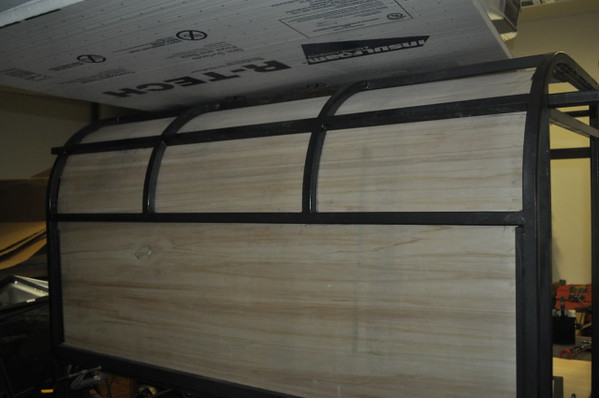
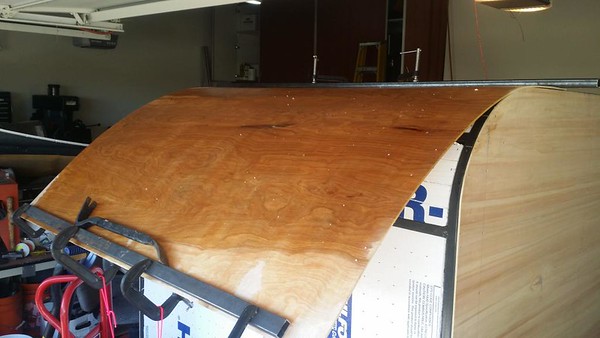
The ply had to be soaked for quite a few hours and then forced to follow the radius with metal bars and clamps.
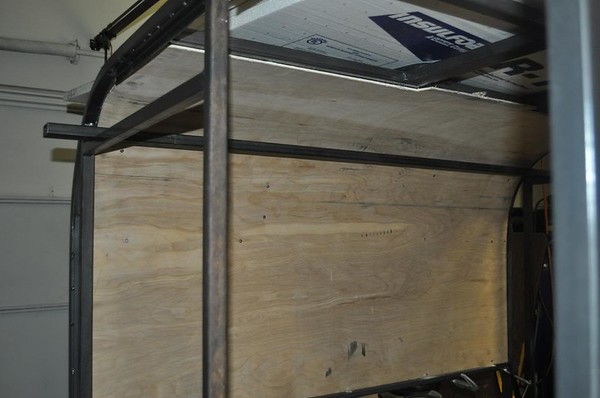
This was a lot harder than expected.
Once the top was installed, the interior walls were next.
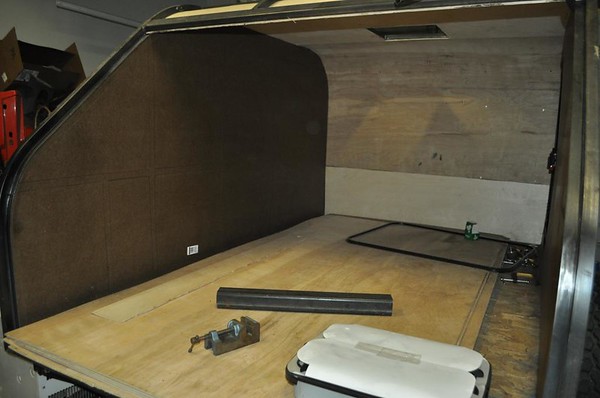
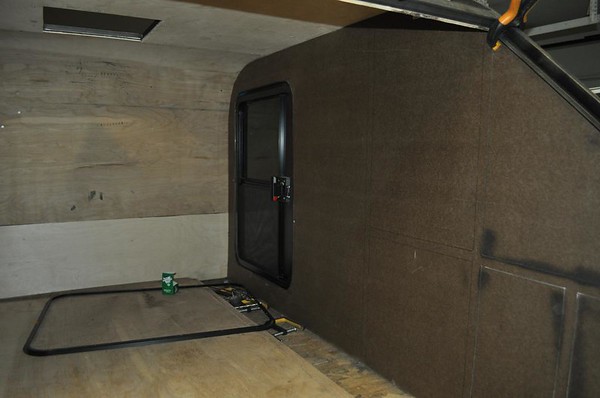
The trailer is designed to be a four season trailer and the 1” space provided is filled with rigid Styrofoam.
Once the interior walls were covered, the task became to weld a lip that followed the hatch radius for the weather stripping to mount to and then lay the base for the interior cabinets and the galley counter top.
The galley has a sink and two burner stove top built in.
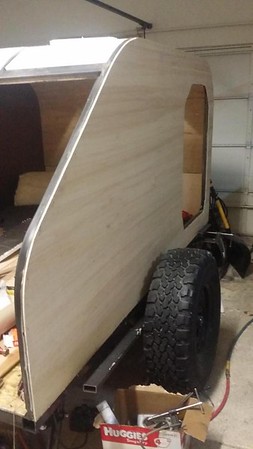
Once that was in place, I turned my efforts into covering the exterior. I covered it with ¼” ply . The sides were easy, the top was a job. No matter how much I soaked the ply, I couldn’t get it to conform to the front radius without sanding it down thinner at the radius. I ended up causing some cracking that I ended up having to fill, sand, and re-radius.
Notice the cutout for the Passenger side door.

The doors were the most expensive part of the build. At the time I framed for both doors but did not cut out for the Driver’s side door.
Later when I had some extra bucks I just cut out the second door and added the door.
Many people simply paint the exterior but I used contact cement and glued Filon to all the exterior. Filon is kind of like Formica but is fiberglass based and is what is used to cover the high end motor homes.
Getting the weather stripping angle formed to the radius and welded up required determining what weather stripping was going to be used followed by a bit of calculating. The hatch was fabricated using ¾” square tubing formed to the radius of the 1” frame. It took a bit of fudging to use the bender to do a slightly different radius due to the smaller tubing. It was insulated and covered both sides and the exterior covered with the same Filon sheeting.
It took quite a bit of experimenting to figure out the mounting locations for the nitrogen springs and their size and pressure. Once done, the hatch will slowly raise by itself and stay in the upright position.
Sorry for the lack of pix but I was doing it on a day or two a month when I could get back home from working out of state.
Once done, focus went back to figuring out the cabinets. I stick built all the cabinet frames and doors. I even stick built the drawers. The counter top was covered with Formica.

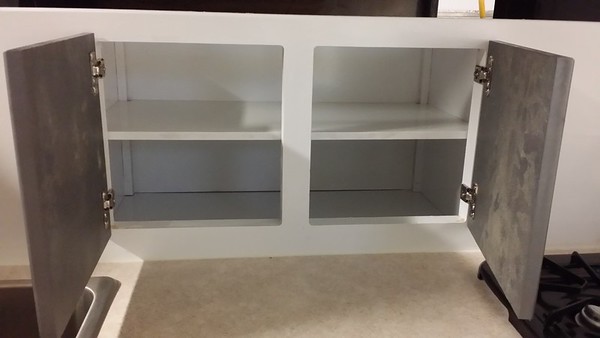
The area under the sink houses a deep cycle AGM battery, a shore power to 12v converter and charger. A 1000w sine wave inverter, fuse block, stereo amp with Bluetooth and FM radio, and shore power/battery transfer switch. The battery can be charged from the vehicle or the charger and can even be tied back to the vehicle to jump start the vehicle.
The stove side contains a 5 gallon water container and a on demand water pump for the sink.
Both the galley and interior have 12v outlets and 120v outlets.
I will work on posting up more pix of the galley and the interior when I get time.
While technically, the shape is not a pure teardrop, the same purpose is the goal. This was built as a prototype for a possible product.
My design goals were to be able to pull it on severe off road trails behind my 1985 Jeep Cherokee XJ. I’ve had it for over 22 years and it is extremely capable but I got tired of sleeping in the back of my rig and that really doesn’t work for my “city girl” wife.
The Jeep is on 35’s and the hitch sits pretty high so the tongue will be non-traditional. The trails I take are really rough and require a lot of twist and rotation as well as being able to take a pounding without beating up the contents.
Here is the final result.
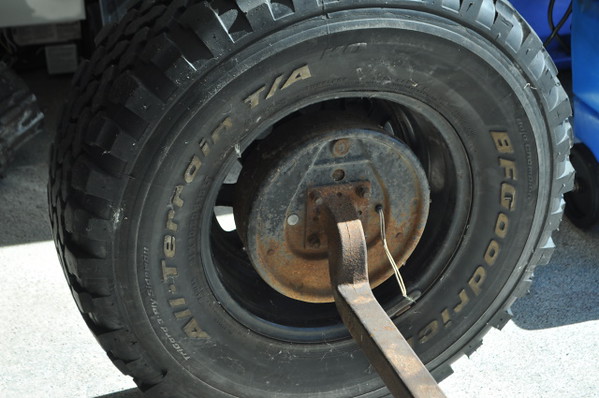
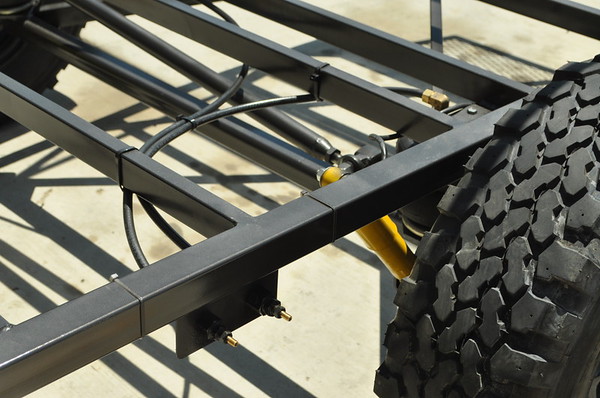
My suspension design utilizes a dual air bag suspension with shocks using 31" tires.
Unlike most builders, I didn’t start with a trailer. I started with a pile of steel on the floor.
The frame is 2x2 square tubing with 1x2 cross stringers. Getting it precise, square, and flat is important.
Once welded, each weld on the top was ground down flush.
Due to how much I run in the mountains I used electric brakes, even though the trailer weights less than 1000 lbs.
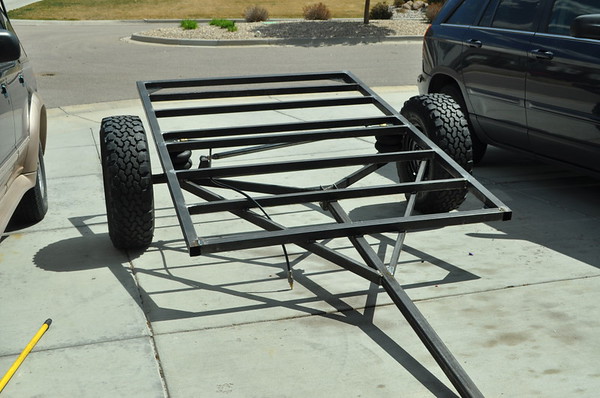
Here is the basic trailer out in the sun for the first time. The suspension is quite different than I have ever seen.
I used a single link utilizing a spherical bearing and a pan hard bar.
The axle is supported by dual airbags and dampened by shocks.
Next came building the steel frame. The frame is mostly 1”x1” thin wall steel. Many people simplify things by working with hard/square corners. Being the pain in the ass perfectionist as my wife calls me, I wanted a more flowing shape. Bending a repeatable large diameter curve is repeatable without some source of tooling. Having grown up on the farm/ranch and later being trained as a tool and die maker and fabricator, I came up with a simple bending tool that worked flawlessly. I started with a round table top blank from Lowes. I modified it with some OSB shoulders to hole the tubing on the bender.
I bent and matched the two sides.
Having welded the sides up and adding some structural bracing, I added a storage area to the front.
A straight trailer tongue would not have lined up with the Jeep’s hitch. That combined with wanting to be able to remove the tongue for security and storage reasons, I added an offset to the tongue.
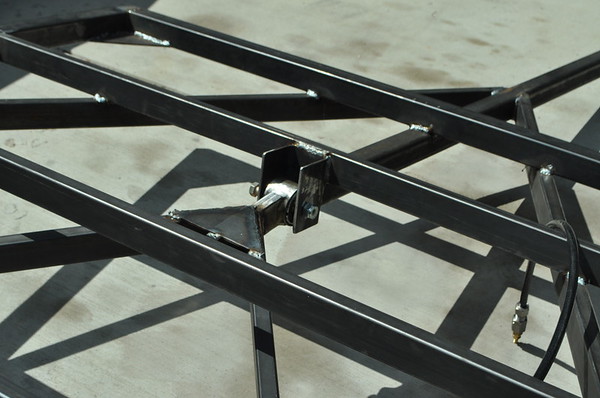
My PIA Engineer self, wanted to build a hitch that could handle all the extreme angles required. A standard trailer hitch ball just does not provide enough movement for the places I go. Many people use a military style pintle hitch but I don’t like the noise and sharp shock you get with those, so I developed a rubber shock isolated section into the hitch.
It works flawlessly and you really don’t feel the trailer at all. It also provides significant security if you have to leave your trailer somewhere because it simply won’t hook up to anything else.
If you look at the hitch, it is a significant distance from the ground to match the Jeep. By flipping the goose neck over, it lowers the hitch lever to where it will work on a compact car.
Next was to put a floor on the trailer. I used outdoor OSB and hit the bottom side with an alcohol primer and then a coat of rubberized undercoating before screwing it down on the frame.
Lots of cross members and pieces were added to the upper frame. The location of the doors was finalized and also framed in. The next step took a bit of figuring and planning in order to get the interior ply installed. The sides were fairly easy, but making the sheathing follow the contour of the top took a lot of work.
The ply had to be soaked for quite a few hours and then forced to follow the radius with metal bars and clamps.
This was a lot harder than expected.
Once the top was installed, the interior walls were next.
The trailer is designed to be a four season trailer and the 1” space provided is filled with rigid Styrofoam.
Once the interior walls were covered, the task became to weld a lip that followed the hatch radius for the weather stripping to mount to and then lay the base for the interior cabinets and the galley counter top.
The galley has a sink and two burner stove top built in.
Once that was in place, I turned my efforts into covering the exterior. I covered it with ¼” ply . The sides were easy, the top was a job. No matter how much I soaked the ply, I couldn’t get it to conform to the front radius without sanding it down thinner at the radius. I ended up causing some cracking that I ended up having to fill, sand, and re-radius.
Notice the cutout for the Passenger side door.
The doors were the most expensive part of the build. At the time I framed for both doors but did not cut out for the Driver’s side door.
Later when I had some extra bucks I just cut out the second door and added the door.
Many people simply paint the exterior but I used contact cement and glued Filon to all the exterior. Filon is kind of like Formica but is fiberglass based and is what is used to cover the high end motor homes.
Getting the weather stripping angle formed to the radius and welded up required determining what weather stripping was going to be used followed by a bit of calculating. The hatch was fabricated using ¾” square tubing formed to the radius of the 1” frame. It took a bit of fudging to use the bender to do a slightly different radius due to the smaller tubing. It was insulated and covered both sides and the exterior covered with the same Filon sheeting.
It took quite a bit of experimenting to figure out the mounting locations for the nitrogen springs and their size and pressure. Once done, the hatch will slowly raise by itself and stay in the upright position.
Sorry for the lack of pix but I was doing it on a day or two a month when I could get back home from working out of state.
Once done, focus went back to figuring out the cabinets. I stick built all the cabinet frames and doors. I even stick built the drawers. The counter top was covered with Formica.
The area under the sink houses a deep cycle AGM battery, a shore power to 12v converter and charger. A 1000w sine wave inverter, fuse block, stereo amp with Bluetooth and FM radio, and shore power/battery transfer switch. The battery can be charged from the vehicle or the charger and can even be tied back to the vehicle to jump start the vehicle.
The stove side contains a 5 gallon water container and a on demand water pump for the sink.
Both the galley and interior have 12v outlets and 120v outlets.
I will work on posting up more pix of the galley and the interior when I get time.
Last edited: