• Welcome to the new NAXJA Forum! If your password does not work, please use "Forgot your password?" link on the log-in page. Please feel free to reach out to [email protected] if we can provide any assistance.

XJ Buildup III

I guess it's time to update this thread with some of the stuff I've done to the XJ in the past year.

I've gotten tired, as most XJ owners who wheel their rigs have, of dealing with broken shock bar pins in the upper rear mounting location. After considering all of the options, the best one for me was to weld on 1/4" steel shock mount tabs and C-notch the cross member to allow the install and removal of a 1/2" shock bolt.
My goal was to keep the upper shock eye as close as possible to the stock location, as to not loose a significant amount of travel or dramatically alter the shock angle, which can affect how the shock performs.

Uppershockmountmod.jpg


NotchandShocktabplacement.jpg


I sourced these shock tabs from Ruffstuff Specialties and trimmed one ear off, as shown by the marker line.

XJRearUppershocktabs.jpg


After cleaning off the paint with a flap wheel, I tacked on the shock mount tabs and then C-notched the cross member in alignment with the shock tab mounting holes. Without the C-notch, one could not install the shock mount bolt.

I didn't want to weaken the cross member by leaving the notch unplated, so I cut a piece of 1.5" OD x .188 wall HREW tube to length to fit in the notch and then sliced the tube in half, leaving me with 2 C-shaped gussets to patch the pass. and drivers side notches. (sorry, no pics of this :dunno:)

With everything welded on and cleaned up, I threw on some metal etching primer and then a couple of coats of Rustoleum black to keep the rust at bay.


Shot of the completed shock mount and notch. (Hard to get a great shot in close quarters.)

RearUppershockmountmod-completed.jpg


I've aired out my Jeep several times at the dunes since completing this mod and it was great to not have to worry anymore about snapped bar pins.
 
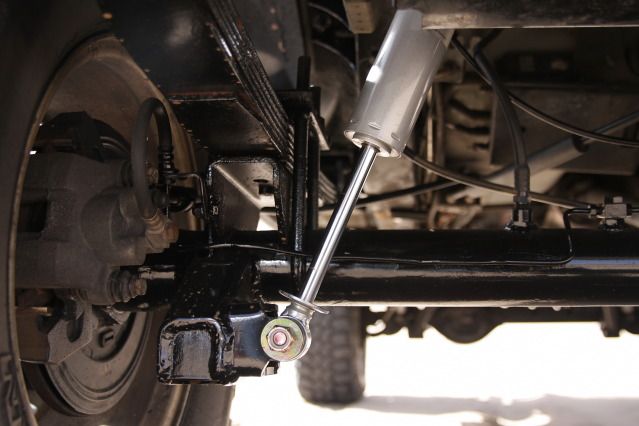
When I build my D44, I moved the axle shock mounts up flush with the bottom of the axle tube to protect the shock from rock bashing. This required me to stick with an 8" travel shock, due to the reduction on overall length from mount to mount.

When shopping for new shocks, I decided that I wanted the have a bit more travel in the rear and punching through the floor was not an option for me, so I pondered the relocation of my lower mounts.

While following a JK Wrangler down the road, the placement of their lower shock mounts caught my eye. They hang fairly low, but they are placed further outboard than the stock XJ shock position, which reduces the potential for them to get smacked by a large rock that could damage the shock eye.

I decided to fab up a lower shock mount that would move the mounting point nearer to the tire, and lower than the axle tube, to net 2" of additional shock travel. This would also allow me to keep the shock mounting position at a reasonable angle so as to not effect the performance of the shock.


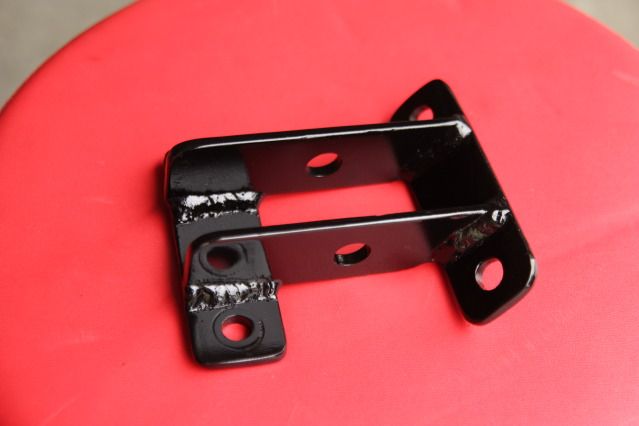
I started with this Ruffstuff axle tube shock mount.

RearlowershockmountwithPVCmock-up.jpg


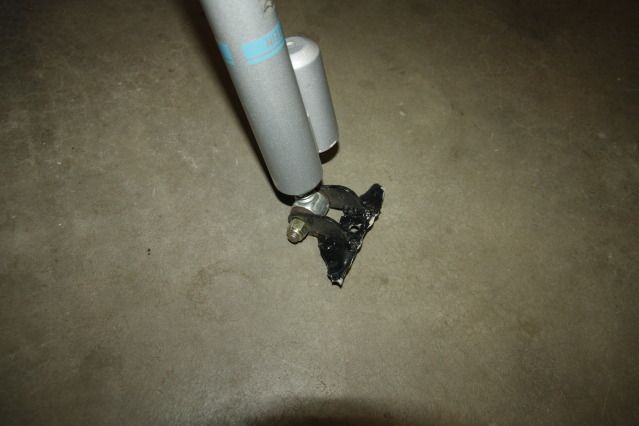
(more on using PVC pipe to mock up your shock mount locations later....pretty slick trick)


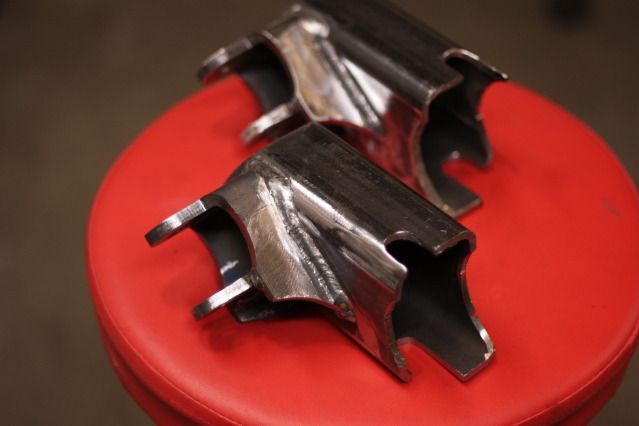
I then notched a piece of 2" x 3" x .188 wall rectangle tube to fit the axle tube and allow access for the spring U-bolts and them mated the shock mounts to the tube.

IMG_7018.jpg


With the mounts fabbed, I used my PVC mock shock to set the correct position for the mount and then I burned them on to the axle tube, then primed and finished them.


Completed shots of lower shock mount.

IMG_7025.jpg


IMG_7034.jpg


These mounts are positioned further outboard and higher than the stock position, so time will tell if this mount will attract rocks or not.
 
Funny you would mention these.....I had failure a on the passenger rear upper mount a few weekends ago. No shocker, (punny) as I welded my mounts to the factory sheetmetal mount, which is actually a sandwich of two parts in the shock mount area.

I'm fabbing up the new and improved upper rear shock mount design this weekend, which eliminates the issue....shouldacouldswoulda, I considered this design the first time around, so now I get to rework them.

Stand by for updates with photos.
 
Last edited:
Maybe you shouldn't jump your Jeep so much? :looser:

I do have much respect for you though as my awesome Jeep has turned into a pile of shit.
Wish I still had a clean functional rig I could drive to work every day. I'm working on getting a new one to build soon but finding a late model 2 door is very hard.
 
Ha, punny. :laugh: What caused your failure, trying to jump in the mall parking lot?:D

What are you changing in this design? My last jeep had issues with the upper mount so on the new one it would be nice to fix that issue before it becomes an issue. The lower mount is interesting, does the shock mount out further away from the axle? (to the rear of the jeep) or is it still in line with the factory mount?
 
RearUppershockmountmod-completed.jpg


I've aired out my Jeep several times at the dunes since completing this mod and it was great to not have to worry anymore about snapped bar pins.

MMMMM, those words were tasty.......no bar pin issues to worry about, but I did locate another point of failure. Welding shock tabs to a sheet metal sandwich that is thinner than the tabs themselves......no bueno.

IMG_0856.jpg


I was bombing off the mountain with the family a few weeks ago and the sound of a broken bar pin/floppy shock struck a chord in my memory bank.....but wait!?....I have no bar pins? A quick inspection found my pass. side rear upper mount almost completely torn off, so I unbolted the shock from the axle, gave it a couple of wiggles and off it came, chunk O' crossmember and all.

The next week I spent some time on the creeper, pondering a solution that didn't mean cutting a hole in the floor or extensive plating of the uniframe with a new x-member tie-in........K.I.S.S was what I was after.

I came up with this solution.....

IMG_1013.jpg


I drilled holes in the X-member to accommodate 7/16" bolts and snaked the 2 near the unirail in by taping them to a string and fishing it through with a wire. Worked pretty slick. I then welded these in from below; I made the holes large enough that my weld would penetrate to the bolt head and make them secure so they wouldn't spin when tightened. I welded the sandwiched X-member back together where it tore apart.......fwiw, welding overhead on sheet metal sucks, at multiple levels.

IMG_1051.jpg


I mocked up this mount using CAD (cardboard aided drafting- empty cereal boxes work great) and then fabbed them using 1.5" W x 3/16" T strap.........can't believe JCR doesn't sell something like these already......wink:wink


IMG_1101.jpg


Primed, finished and shock re-installed. 2 bolts are welded on because you can't access the head with a wrench, the 2 inboard bolts can easily be reached through the hole in the stock X-member.

I lost about 1/2" of uptravel with the new mount but this actually puts my shock in the center of it's 10" stroke at static height......5" up and 5" down travel. I'll install the driver side mount when I get my rear bumpstop project off the bench and onto my rig.
 
Any bump pads or straps in the back to keep the rear shocks from bottoming out up or down?

New bump pads are in the works, not sure if I'll run limit straps out back, as the leaves limit full extension of the shock. I do runs straps up front.
 
Back
Top