Hey guys i need some advice before i shell out big bucks at the Warn Service center.
I bought a used XD9000 off a guy a few weeks back; got a good deal and got the seller to demo it before i paid. I was satisfied and the winch seemed fine, the winch is older im guessing but looks clean. The serial number is: 193850 and the date code is: LB0.
So i pulled off my ARB bumper, Bought Welding cable aka 2AWG, brass connectors, resin core solder, a refill of propane for the tiger torch a couple meters of heatshrink and headed to work. All of which was advice of a recognized battery shop.
First i worked on my ground wire and 12v+ (Red wire), as these were the only 2 wires i needed to lenghthen. Made certain i made good solder points and heat shrunk all terminations to a high standard.
Next i clocked the winch so that the engagement lever would work under my bumper; again i was carefull not to mess around with the clutch pack or get things too messed up in there.
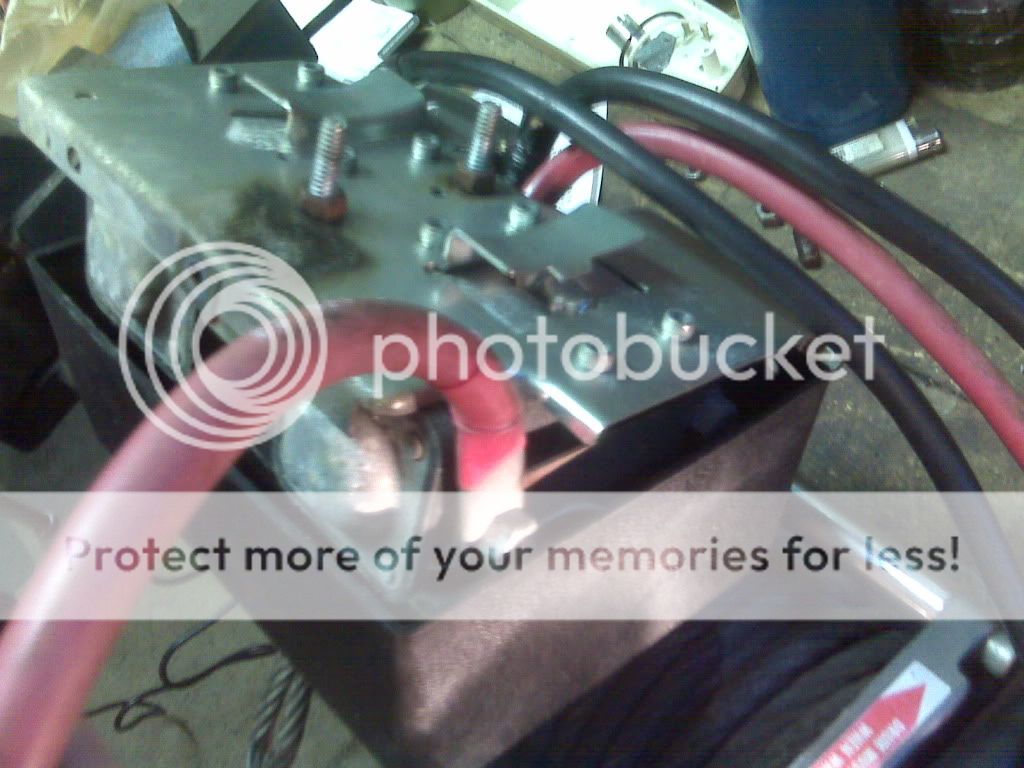
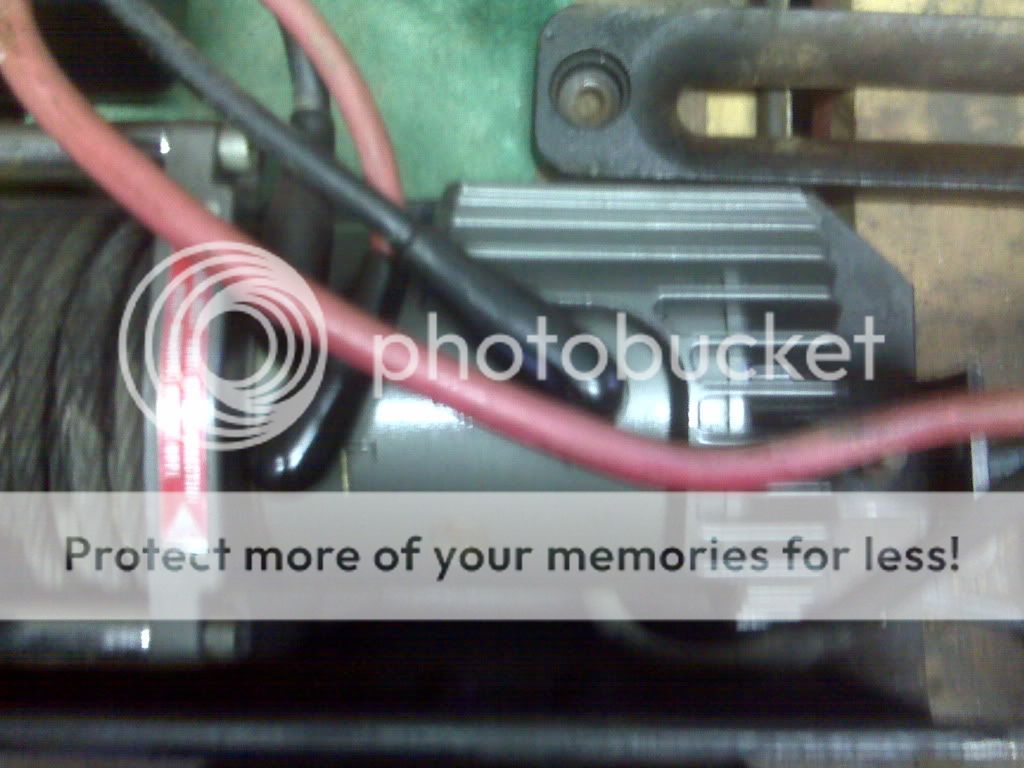
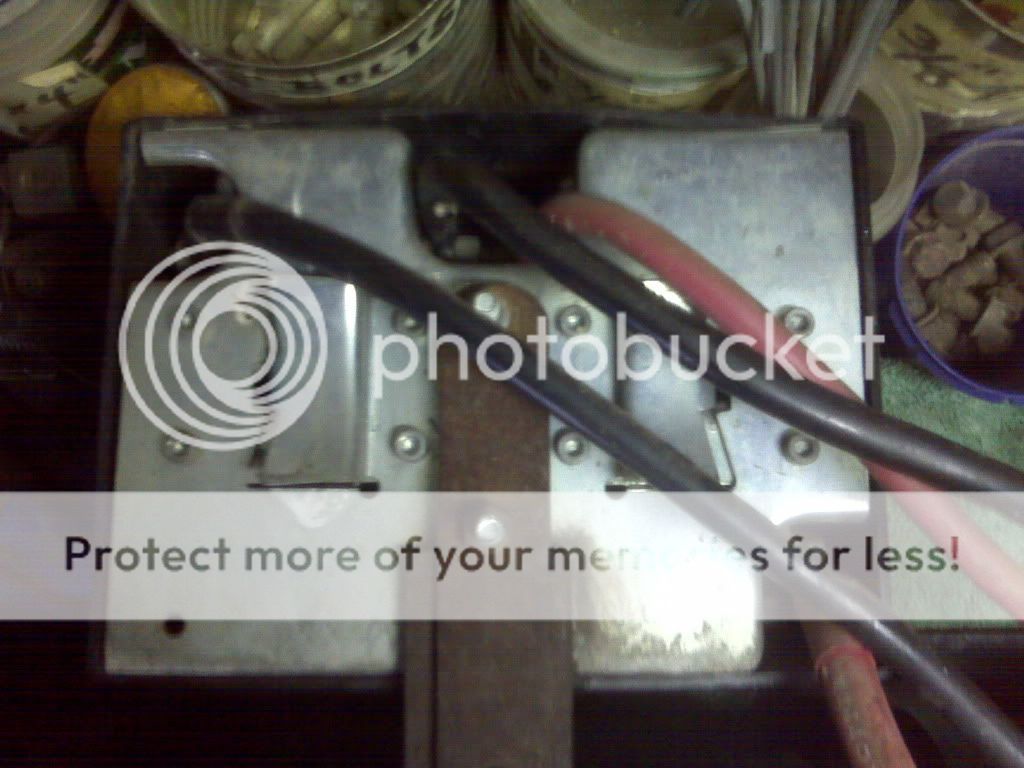
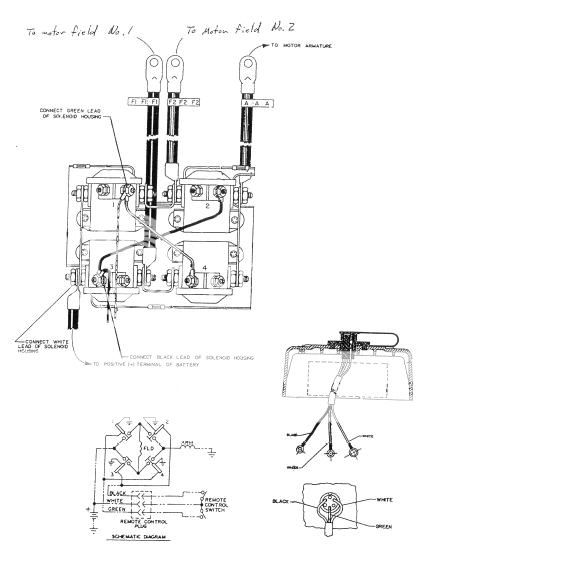
then i took some pictures of both the winch and the Solenoid/ Controller pack so that when i rewired it i could duplicate it accurately. I also drew a quick wiring diagram for easy use at the bench. I removed the Solenoid/Controller pack and taped up my wires for ease of installation.
Now came time to put the winch up into the bumper, so with some effort managed to convince the winch into its new home in my ARB. I ran the longer wires to the battery on the side GMC mounts on a yellow top Optima. I ty-rap'd the cables neatly and was ready to install the Solenoid/ Controller pack.
I referenced my wiring diagram; with the F-1, A and the sort and ran each wire according to the pictures i took on my camera phone. Each coincided with the other for redundancy so i felt the install was going to be a breeze. Murphy did not agree with this and somehow reared his ugliness.
Without putting the final 3 screws in place i thought i should try the winch "just in case".
There was nothing.
I turned on my Jeep.
Again nothing.
So with the help of the neighbors and some friends we began going through the check list... Did you do this? Yes... Did you try this? yes...
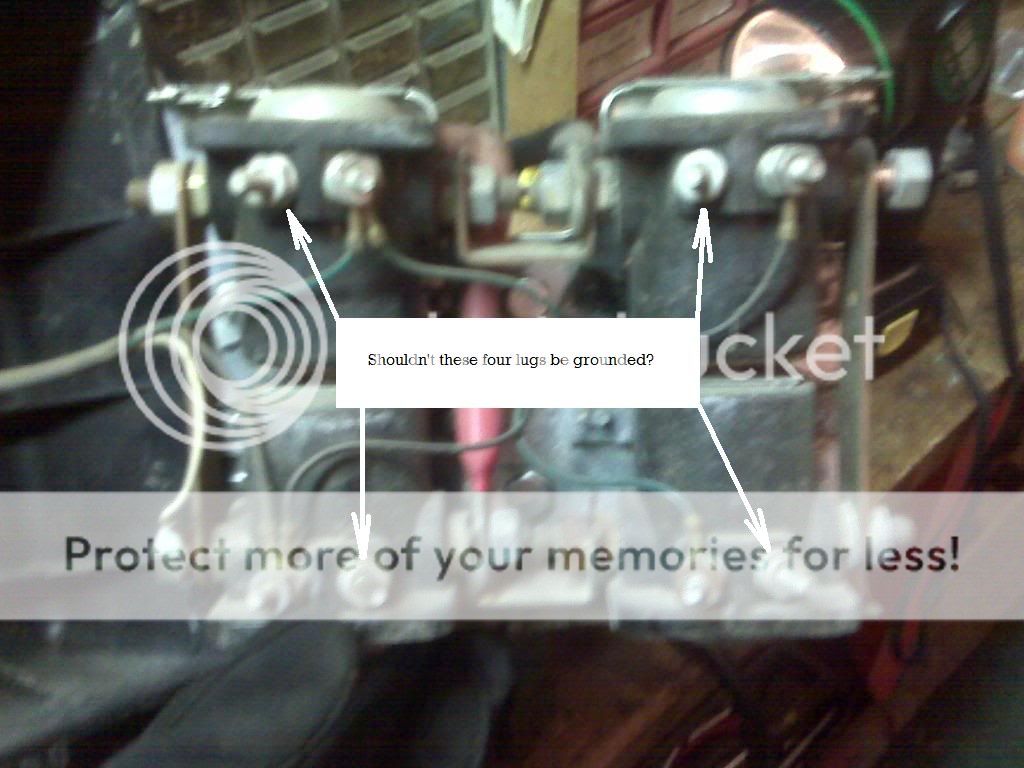
I began by testing the continuity of my wires which was fine.Next i tested voltage at the solenoid array which yielded 12V at the bottom left corner (red wire to 12V+) and top right corner as viewing Solenoid/ Controller pack with cover off. Obviosly i had no voltage on the other sides of the solenoids. (This would have voltage when winch in operation)
One point which raises an eyebrow is that the pins on the remote seem a little loose and the female connectors on the Solenoid/ controler pack cover seem loose/ corroded
May i also say that the Solenoid/ Controller pack seems a lot different than most i have seen.
Any suggestions, concerns or feedback would be greatly apreciated.
:wierd:
I bought a used XD9000 off a guy a few weeks back; got a good deal and got the seller to demo it before i paid. I was satisfied and the winch seemed fine, the winch is older im guessing but looks clean. The serial number is: 193850 and the date code is: LB0.
So i pulled off my ARB bumper, Bought Welding cable aka 2AWG, brass connectors, resin core solder, a refill of propane for the tiger torch a couple meters of heatshrink and headed to work. All of which was advice of a recognized battery shop.
First i worked on my ground wire and 12v+ (Red wire), as these were the only 2 wires i needed to lenghthen. Made certain i made good solder points and heat shrunk all terminations to a high standard.
Next i clocked the winch so that the engagement lever would work under my bumper; again i was carefull not to mess around with the clutch pack or get things too messed up in there.
then i took some pictures of both the winch and the Solenoid/ Controller pack so that when i rewired it i could duplicate it accurately. I also drew a quick wiring diagram for easy use at the bench. I removed the Solenoid/Controller pack and taped up my wires for ease of installation.
Now came time to put the winch up into the bumper, so with some effort managed to convince the winch into its new home in my ARB. I ran the longer wires to the battery on the side GMC mounts on a yellow top Optima. I ty-rap'd the cables neatly and was ready to install the Solenoid/ Controller pack.
I referenced my wiring diagram; with the F-1, A and the sort and ran each wire according to the pictures i took on my camera phone. Each coincided with the other for redundancy so i felt the install was going to be a breeze. Murphy did not agree with this and somehow reared his ugliness.
Without putting the final 3 screws in place i thought i should try the winch "just in case".
There was nothing.
I turned on my Jeep.
Again nothing.
So with the help of the neighbors and some friends we began going through the check list... Did you do this? Yes... Did you try this? yes...
I began by testing the continuity of my wires which was fine.Next i tested voltage at the solenoid array which yielded 12V at the bottom left corner (red wire to 12V+) and top right corner as viewing Solenoid/ Controller pack with cover off. Obviosly i had no voltage on the other sides of the solenoids. (This would have voltage when winch in operation)
One point which raises an eyebrow is that the pins on the remote seem a little loose and the female connectors on the Solenoid/ controler pack cover seem loose/ corroded
May i also say that the Solenoid/ Controller pack seems a lot different than most i have seen.
Any suggestions, concerns or feedback would be greatly apreciated.
:wierd:
Last edited:


 On a side note, Man can those things take a hit!