Renegade_Azzy
NAXJA Forum User
- Location
- Finleyville, PA
(note, copied from my long running threads on jeepforum)
In my thread on my gauge cluster makeover kits, there were a lot of requests to do a 97+ kit. Im going to go through the development here so the other thread isnt cluttered up.
These things have some technical challenges to overcome, mainly... they are backlit. Which means, replicating the multi-layer gauge layout that came stock, and replacing it.
Ive seen some other kits, some replace it with a lightup cluster that is indiglo, and has weird looking cutouts for all of the things like fuel and ABS. nifty, sorta, if you like the sound of the whining electronic box that powers it.
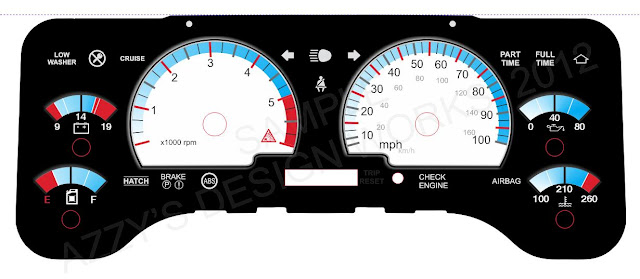
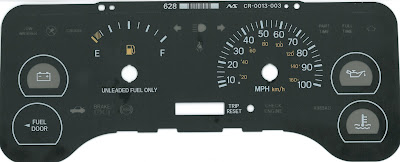
So I started with artwork. thats the easy part for me, Ive already done how many of the 89-96 clusters. Easy, relativly. takes scans of the original, lots of measurements, test fitting paper cutouts... etc. So I got to work on that, and this is what I came up with. Used a warning light cluster, because that's what I could find on ebay for less than $100 at the time. Besides, those guys need something too! (and the wife wouldn't let me pull hers)
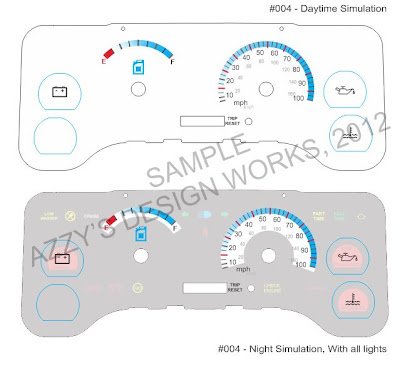
(Prelim design)
Then it was finding the material. Thankfully, Digital Media Solutions and my man Tim over there helped in finding some injet back-lit sign film. Cool stuff, its heavy duty and is made to be in outdoor installations. Its good stuff, but may be a bit too thick for our printer (we use an HP Z3200 42" photo printer for projects at work, and I am allowed to pay for consumables and use it. Being the Director of Tech and having a cool President helps things greatly).
Material found, I made some test prints to test out some theories, and they worked. So time to find a place to get them cut at. That was the real issue... no one wanted to do it, or wanted an exorbitant amount... and then still couldn't guarantee they could cut it out on the imagery!
That's when I found this little gem, the Silouette Cameo, a home cutter designed with crafting in mind. Guess thats the way of Jeeping, find something that might work, hack it and craft it into doing what you want!.
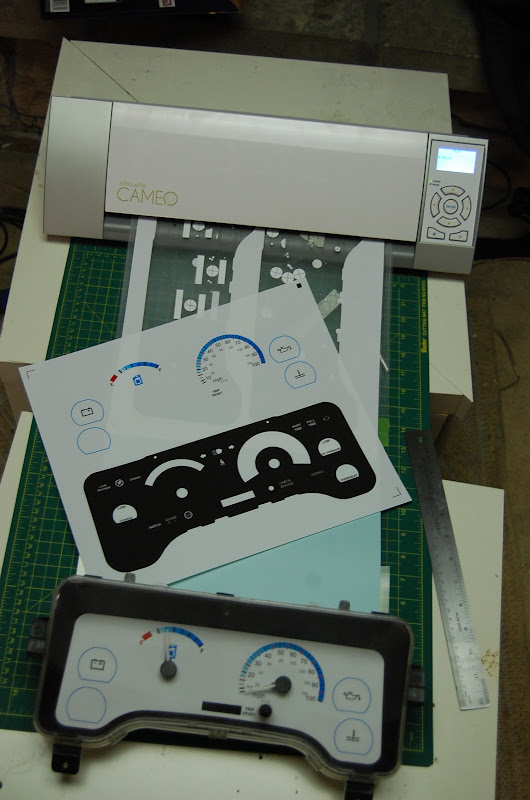
The second test cut and an assembled gauge
Making it work for what I do with these took about 12 hours of getting software and prints to come together correctly. That was my weekend... but, on a plus side, it lets us get the other kits out the door a bit quicker, only requiring assembly and a few cut touch ups before they head out the door.
Convinced my lovely wife to let me tear apart her dash to test them out, and after some tweaks in the design... here is the result of the first batch:
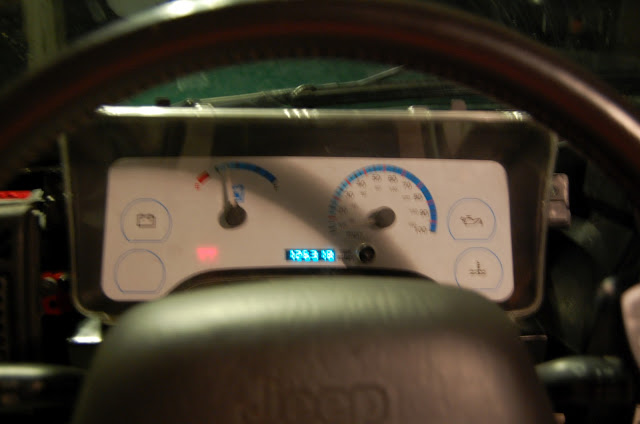
(ambient light and no tripod)

End of the test cycle, just like it is sitting when the engine is off
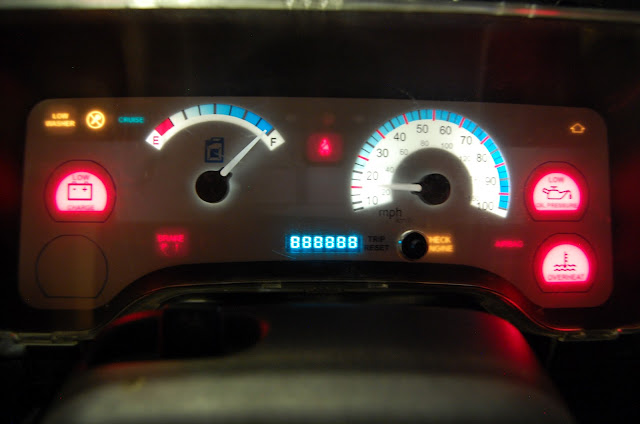
and finally, test cycle with everything lit, note the added messages for warning lights
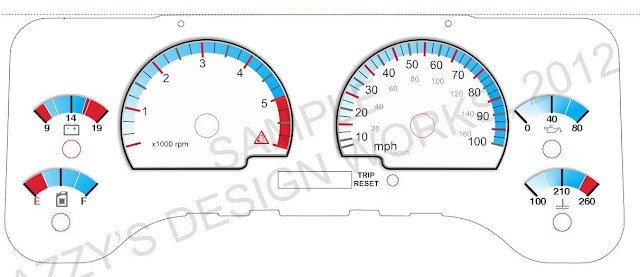
Got a sample worked up for the standard version:
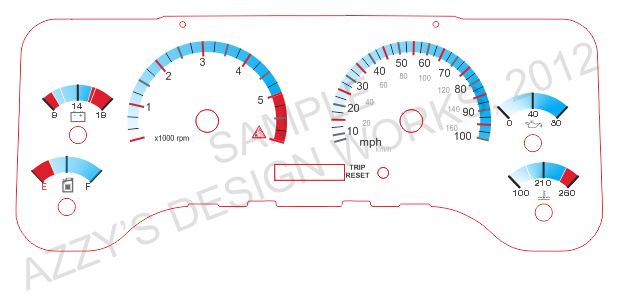
(Red outline and circles are a cutline... something you would never see)
Comments and thoughts graciously accepted :cheers:
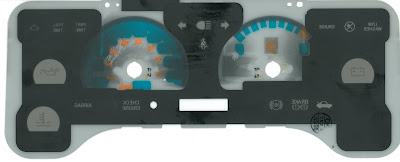
Oh, and this is the inside of one of these clusters.... another reason its hard to change the color of your lights:

In my thread on my gauge cluster makeover kits, there were a lot of requests to do a 97+ kit. Im going to go through the development here so the other thread isnt cluttered up.
These things have some technical challenges to overcome, mainly... they are backlit. Which means, replicating the multi-layer gauge layout that came stock, and replacing it.
Ive seen some other kits, some replace it with a lightup cluster that is indiglo, and has weird looking cutouts for all of the things like fuel and ABS. nifty, sorta, if you like the sound of the whining electronic box that powers it.
So I started with artwork. thats the easy part for me, Ive already done how many of the 89-96 clusters. Easy, relativly. takes scans of the original, lots of measurements, test fitting paper cutouts... etc. So I got to work on that, and this is what I came up with. Used a warning light cluster, because that's what I could find on ebay for less than $100 at the time. Besides, those guys need something too! (and the wife wouldn't let me pull hers)
(Prelim design)
Then it was finding the material. Thankfully, Digital Media Solutions and my man Tim over there helped in finding some injet back-lit sign film.
Cool stuff, its heavy duty and is made to be in outdoor installations. Its good stuff, but may be a bit too thick for our printer (we use an HP Z3200 42" photo printer for projects at work, and I am allowed to pay for consumables and use it. Being the Director of Tech and having a cool President helps things greatly).Material found, I made some test prints to test out some theories, and they worked. So time to find a place to get them cut at. That was the real issue... no one wanted to do it, or wanted an exorbitant amount... and then still couldn't guarantee they could cut it out on the imagery!
That's when I found this little gem, the Silouette Cameo, a home cutter designed with crafting in mind. Guess thats the way of Jeeping, find something that might work, hack it and craft it into doing what you want!.
The second test cut and an assembled gauge
Making it work for what I do with these took about 12 hours of getting software and prints to come together correctly. That was my weekend... but, on a plus side, it lets us get the other kits out the door a bit quicker, only requiring assembly and a few cut touch ups before they head out the door.
Convinced my lovely wife to let me tear apart her dash to test them out, and after some tweaks in the design... here is the result of the first batch:
(ambient light and no tripod)
End of the test cycle, just like it is sitting when the engine is off
and finally, test cycle with everything lit, note the added messages for warning lights
For now, my next steps:
(Update)- Find a slightly thinner material, or tweak the printer to raise the heads
- tweak the black piece that you see above, that is where the messages for warning lights and indicators go
- work on the design for the lit areas and non lit areas
- work on the full 6 gauge cluster face, with the addressed above areas
- and get these in the hands of a few testers!
Got a sample worked up for the standard version:
(Red outline and circles are a cutline... something you would never see)
Comments and thoughts graciously accepted :cheers:
Oh, and this is the inside of one of these clusters.... another reason its hard to change the color of your lights: