• Welcome to the new NAXJA Forum! If your password does not work, please use "Forgot your password?" link on the log-in page. Please feel free to reach out to [email protected] if we can provide any assistance.

XJ Front Midarm 3 Link Build

98xjjeeper

NAXJA Forum User
Location
nc
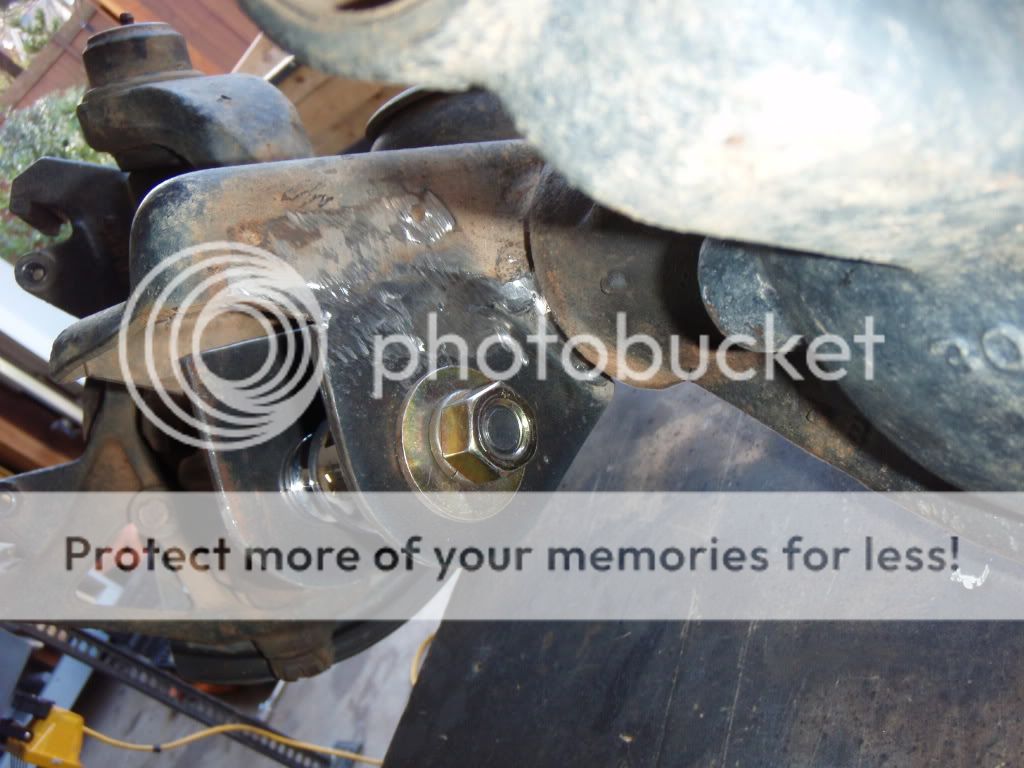
So I decided to upgrade my crappy rustys short arm kit that i purchased a few years ago. I wanted something that won't bind, gives me good down travel, a better more solid ride and something that isn't the typical radius arm all the cherokee guys run.

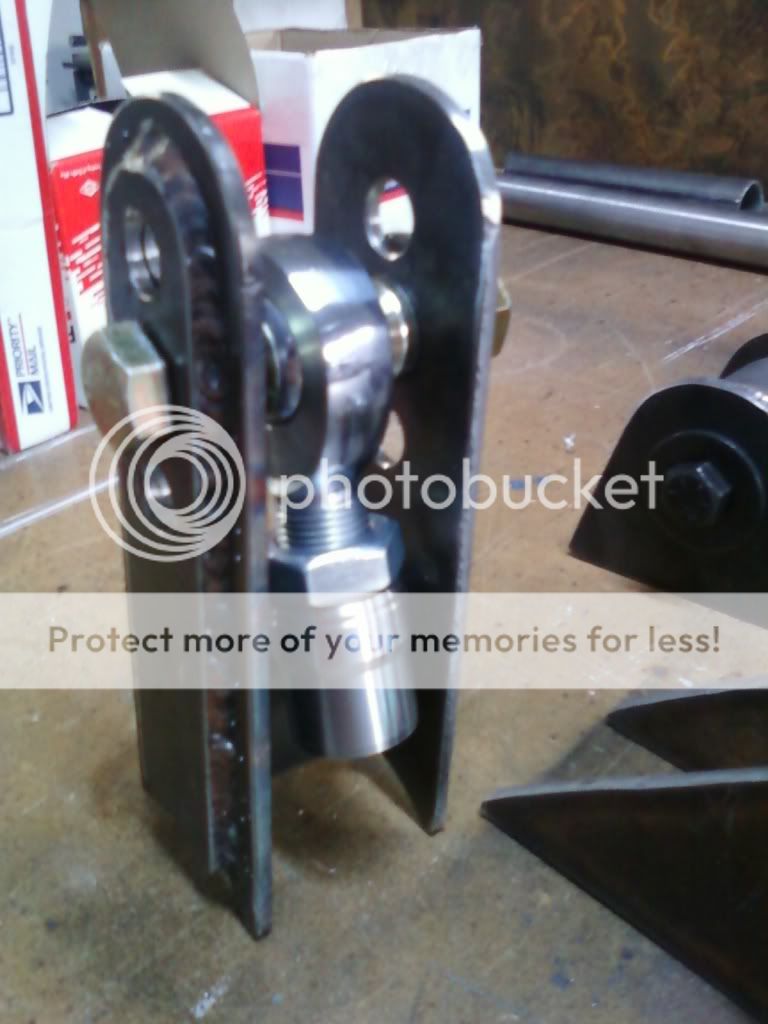
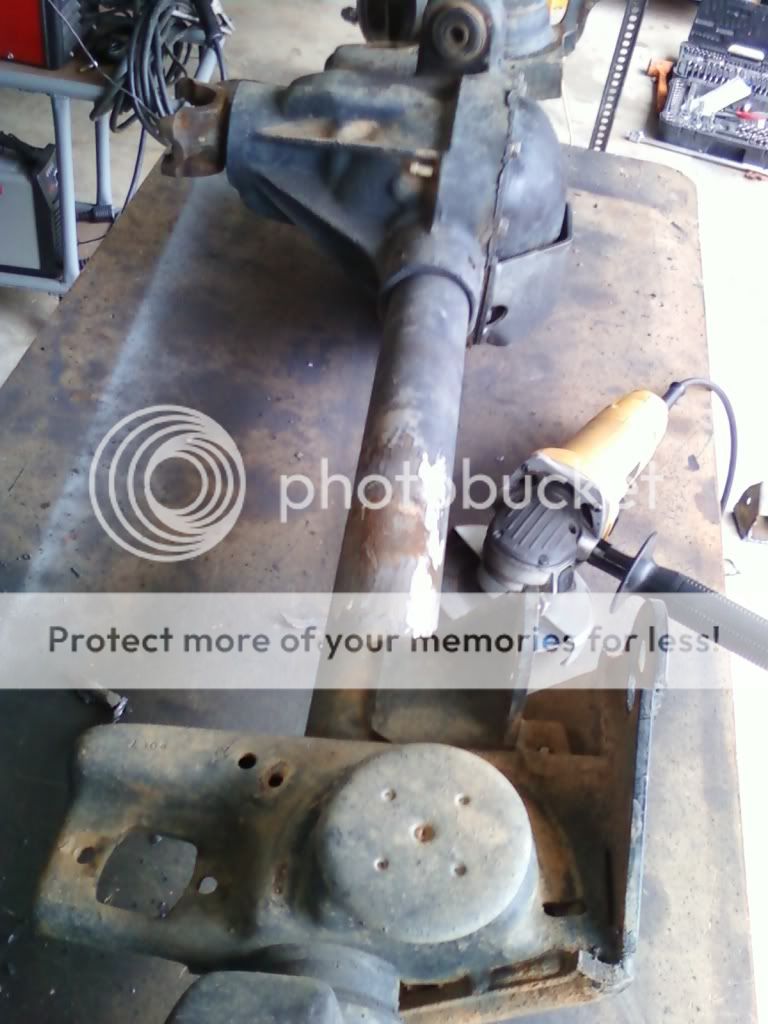
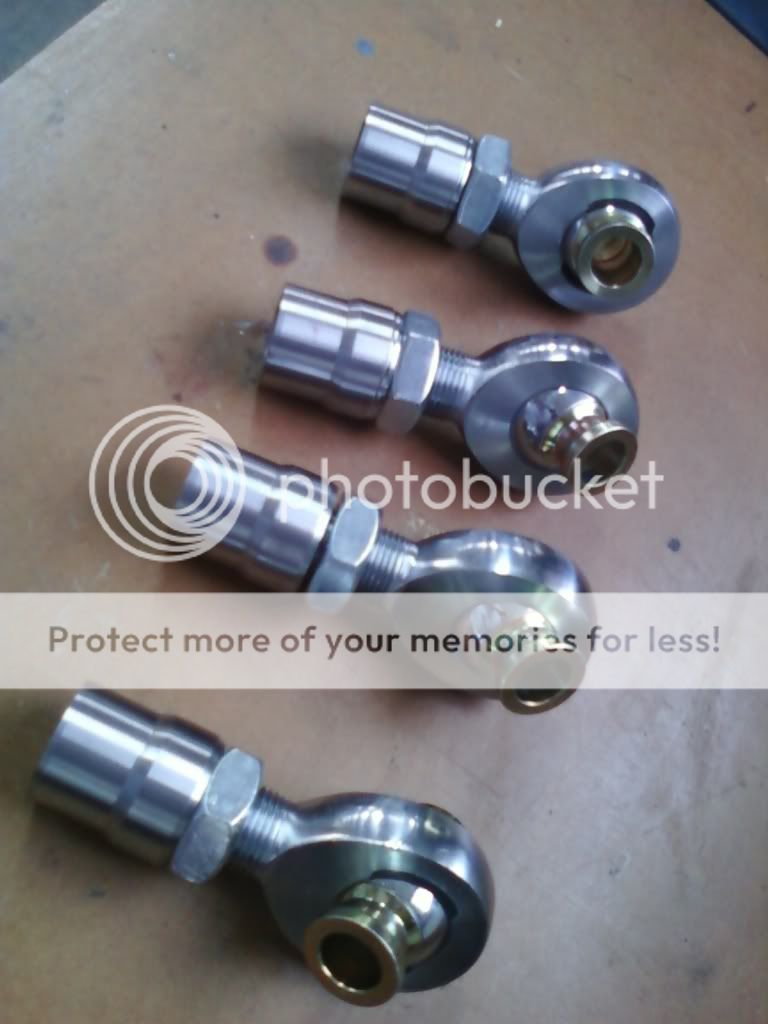
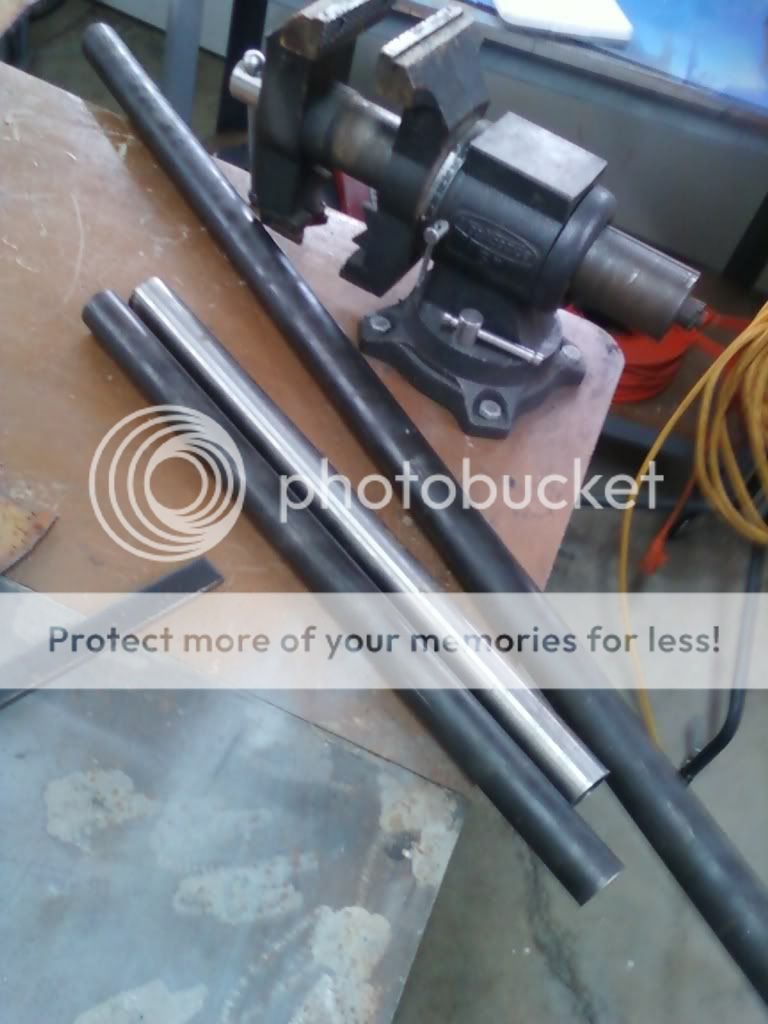
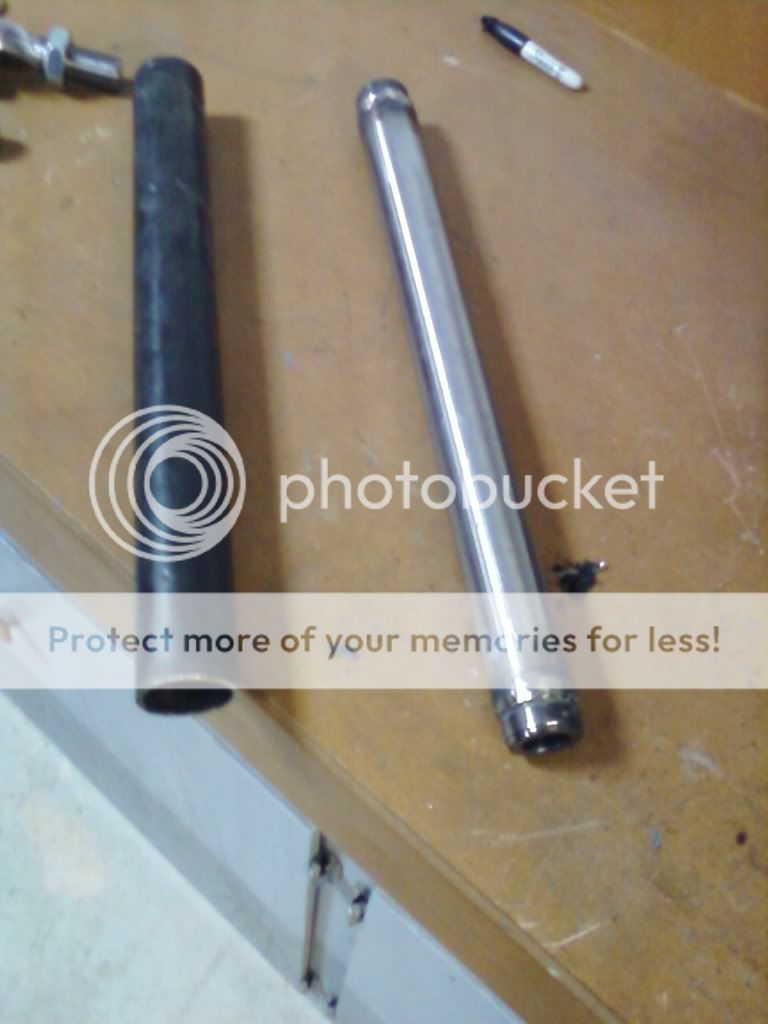
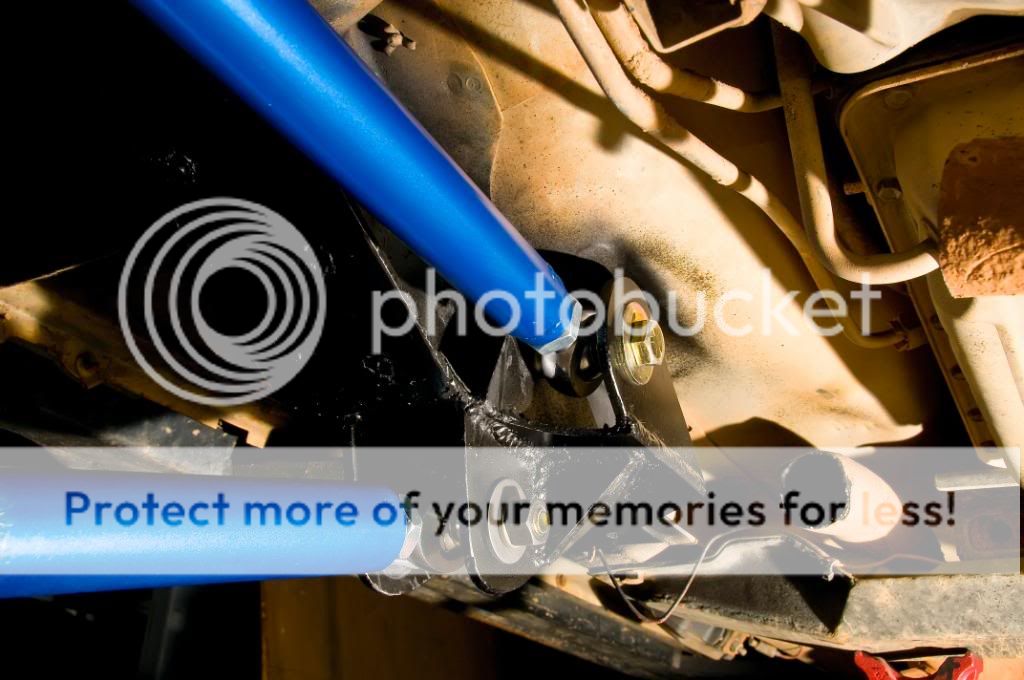
I bought 7/8" hiems for the single upper from Ruffstuff and will be using 1.5" .120 wall DOM. The upper will be sleeved at the ends with 1.75" .120 tubing to help with strenth.

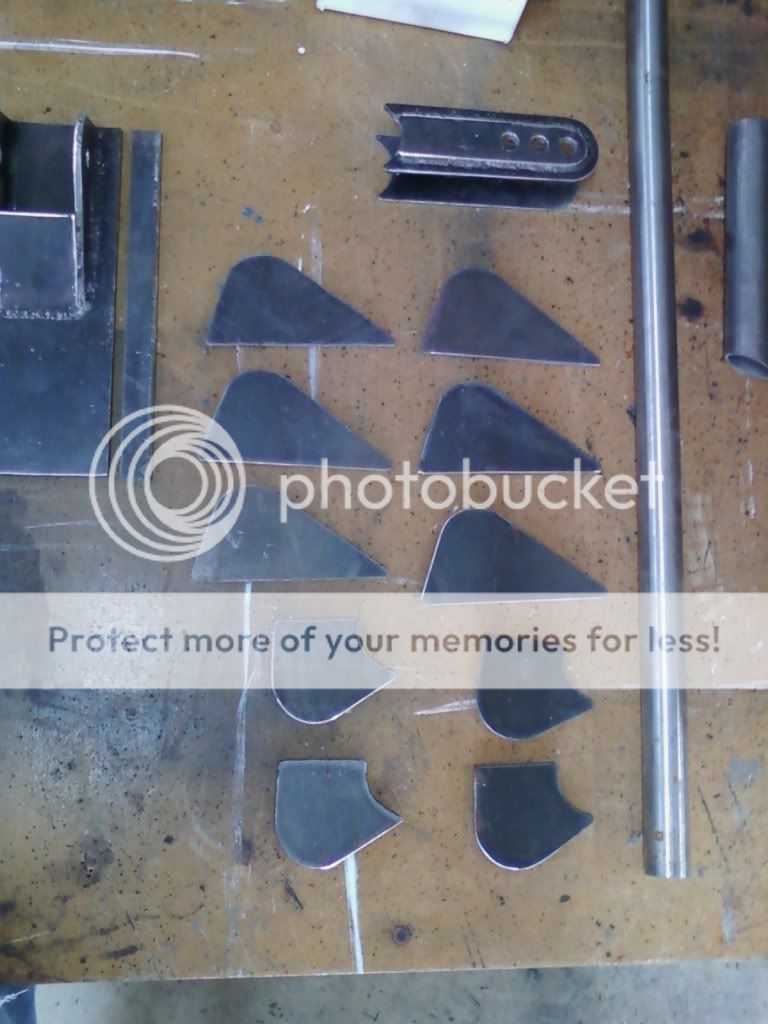
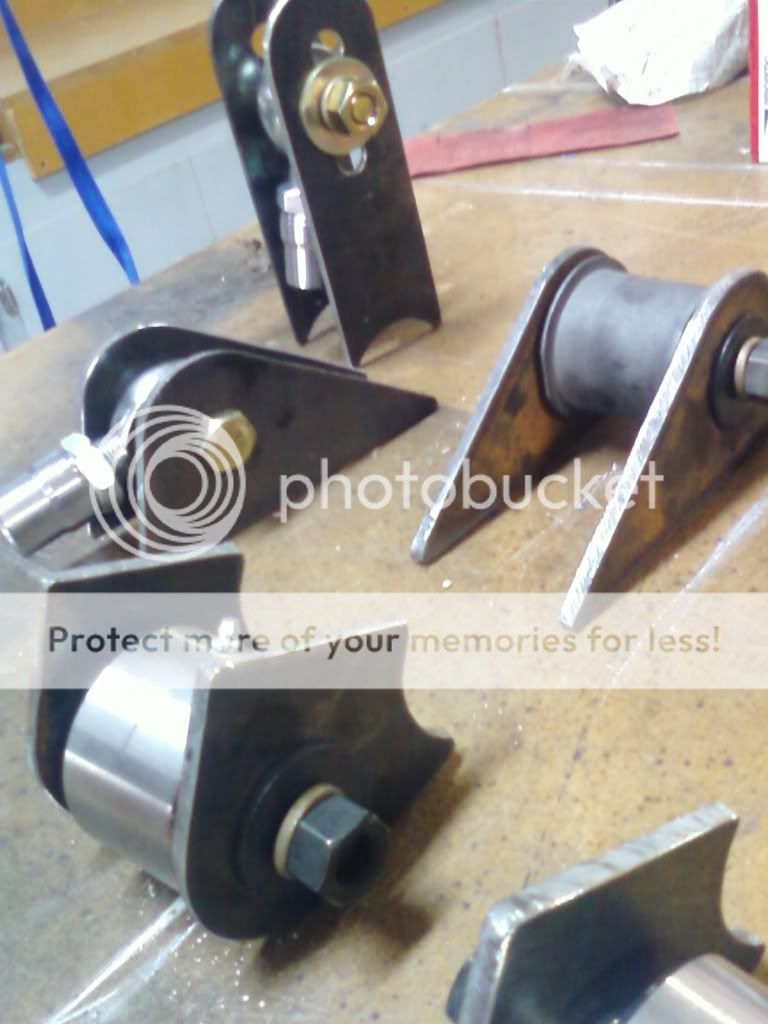
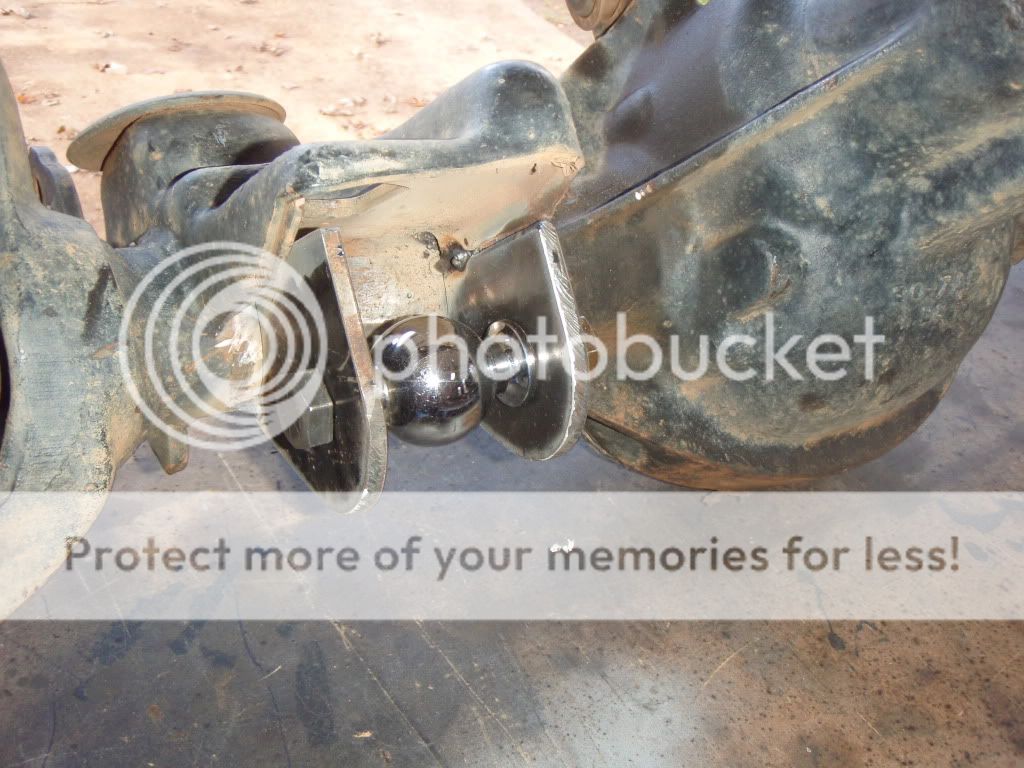
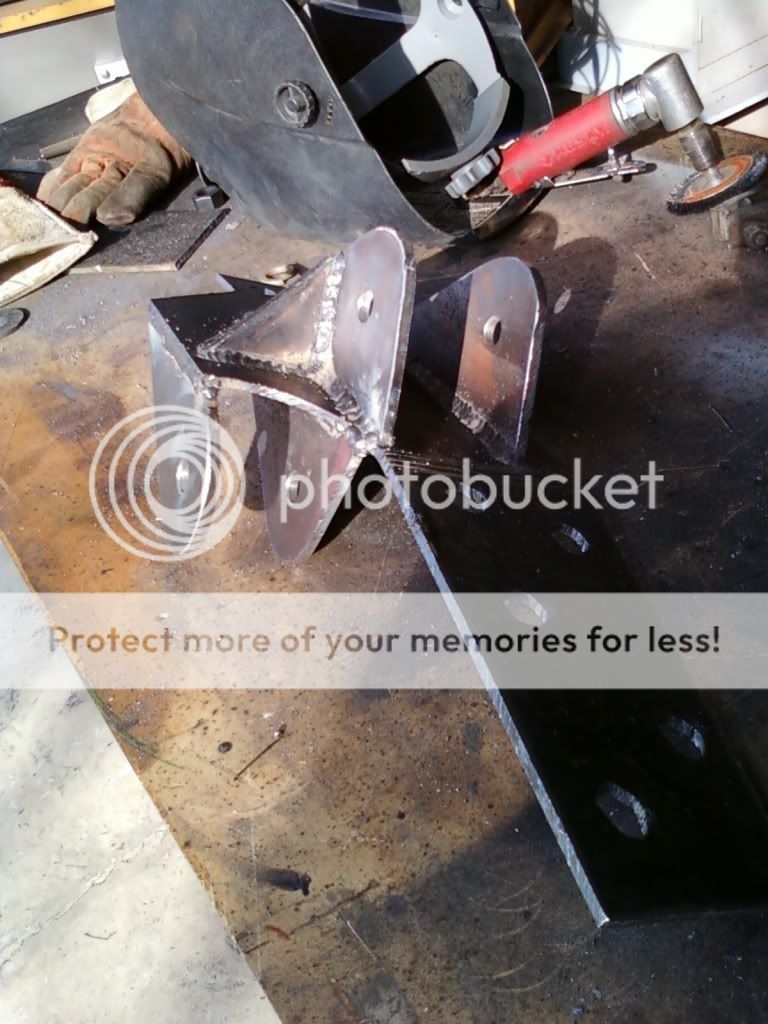
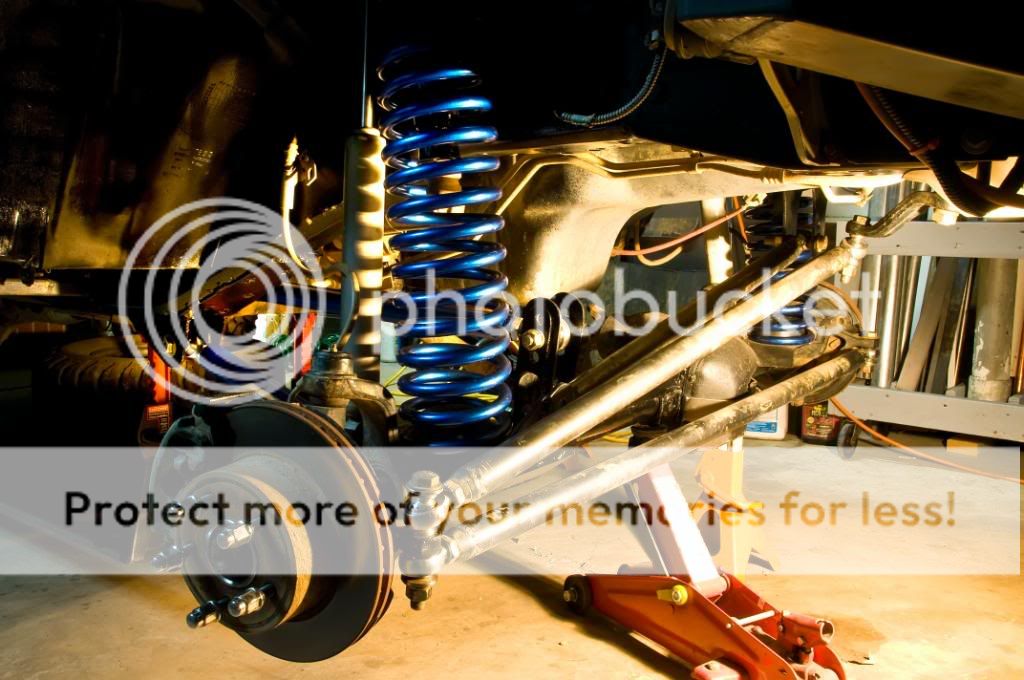
For the lowers I have bought ballastic 2.63" flex joints for the axle end. I am using stock rubber bushings for the frameside to keep the ride good and they flex more then poly. I will be making the lowers out of 1/4" plate and the design is kind of confusing so you just have to wait till I build them and take pics. :flipoff2:

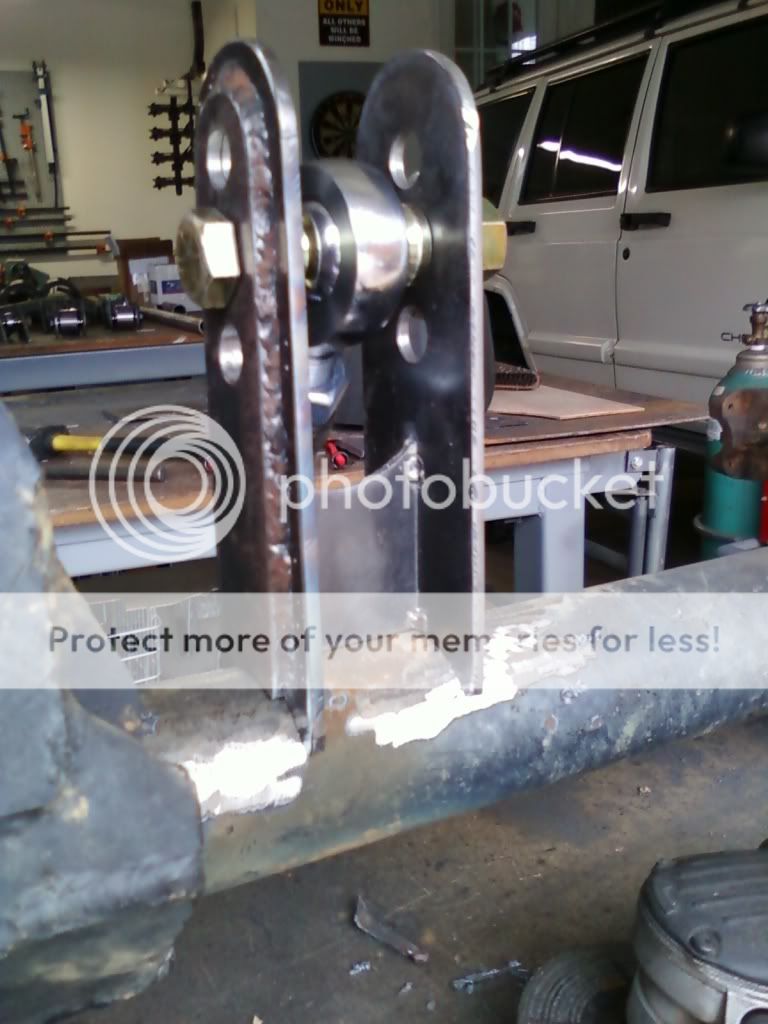
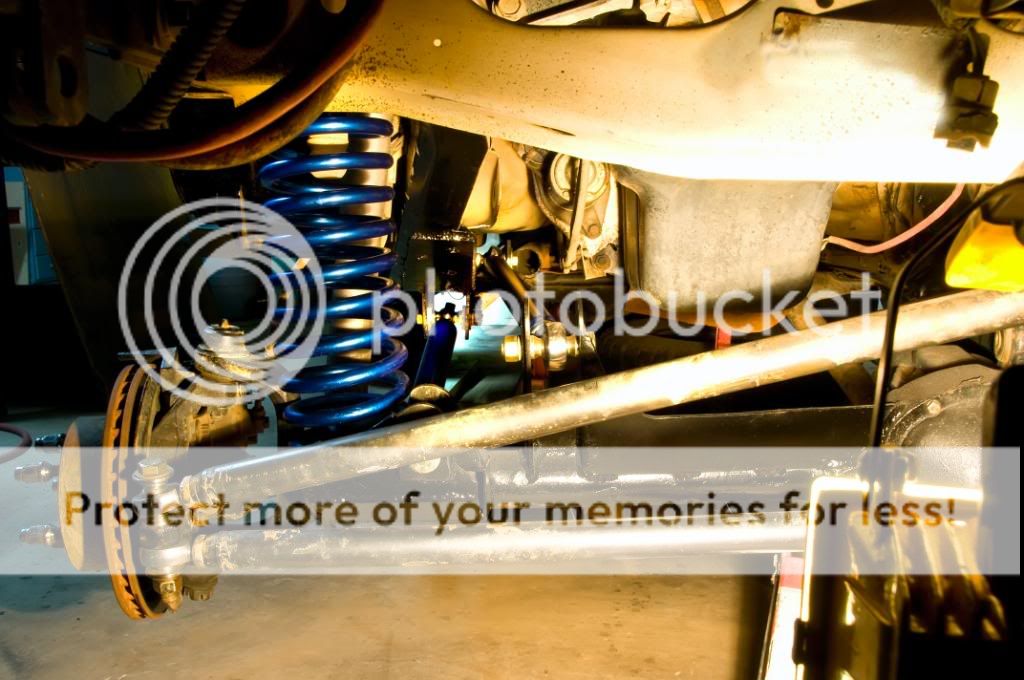
All the brackets are 1/4" and can run either 7.5, 8.5, or 9.5 inches of seperation. The new lower brackets will give me about an inch of extra clearance under the axle.

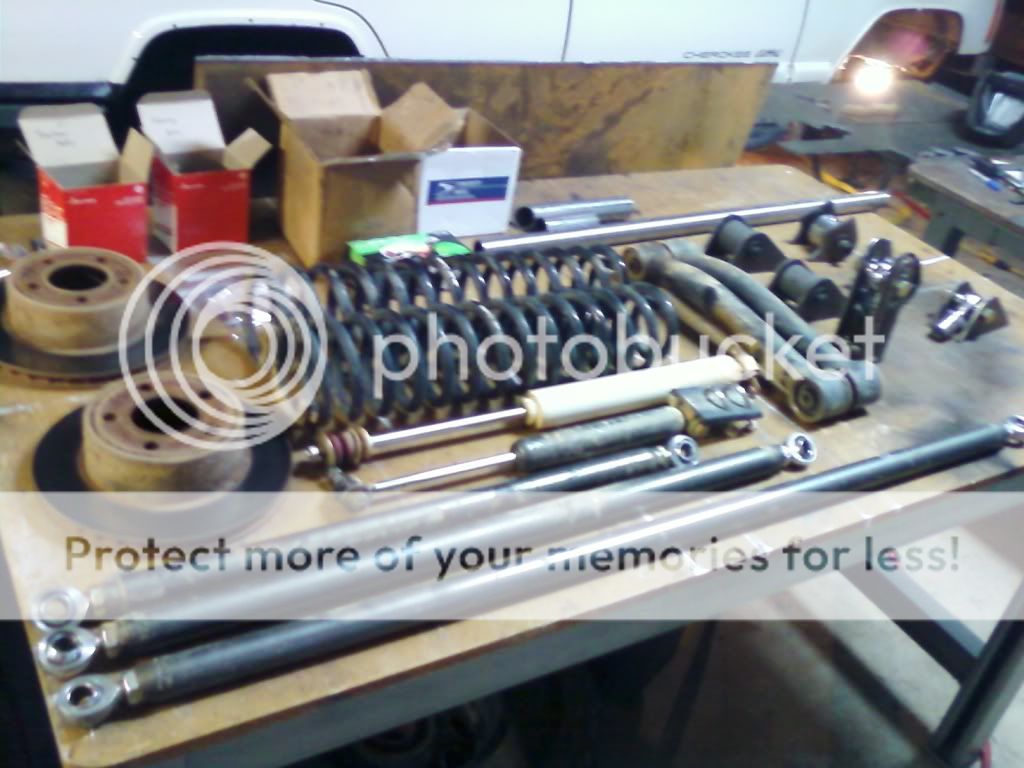
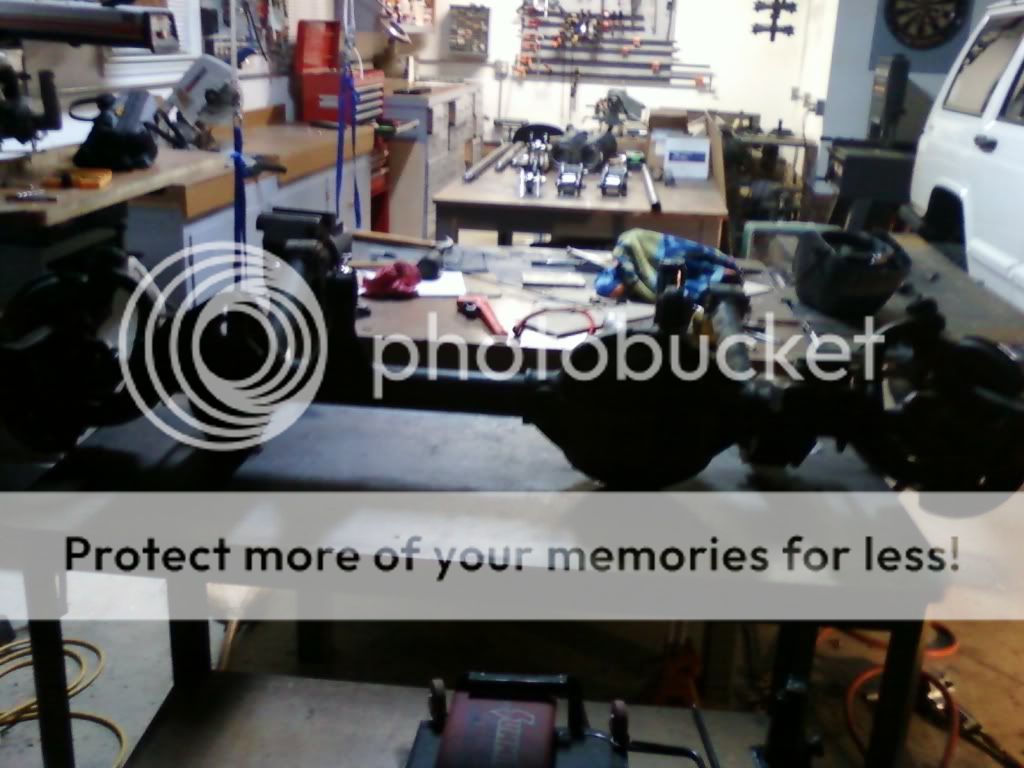
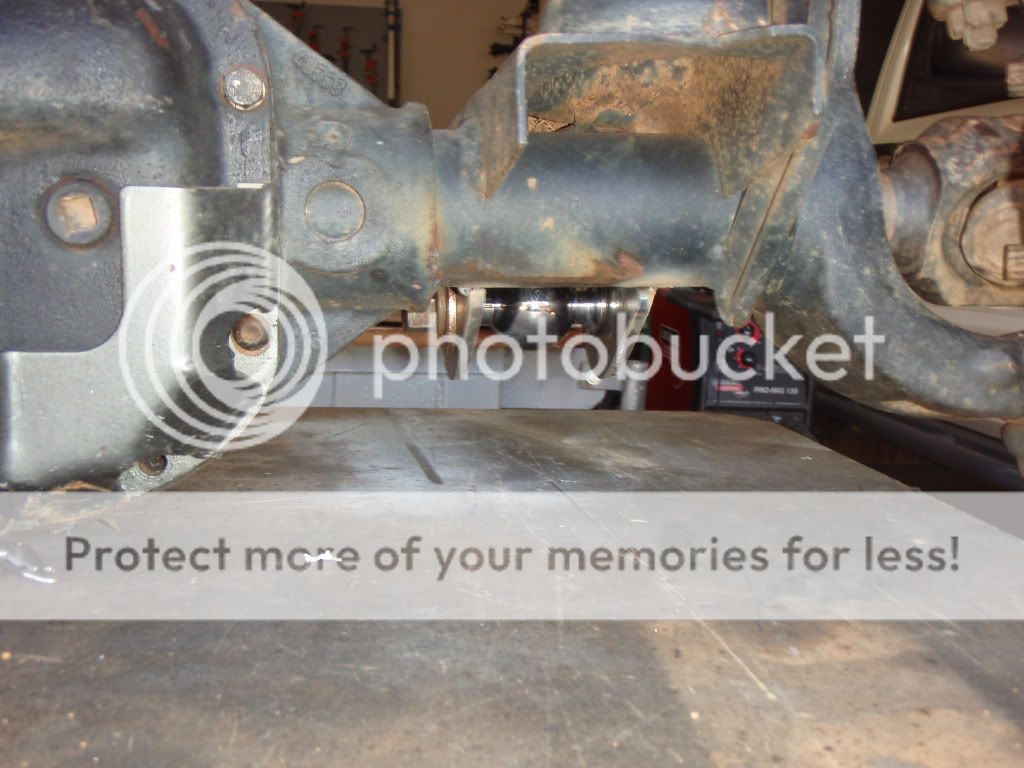
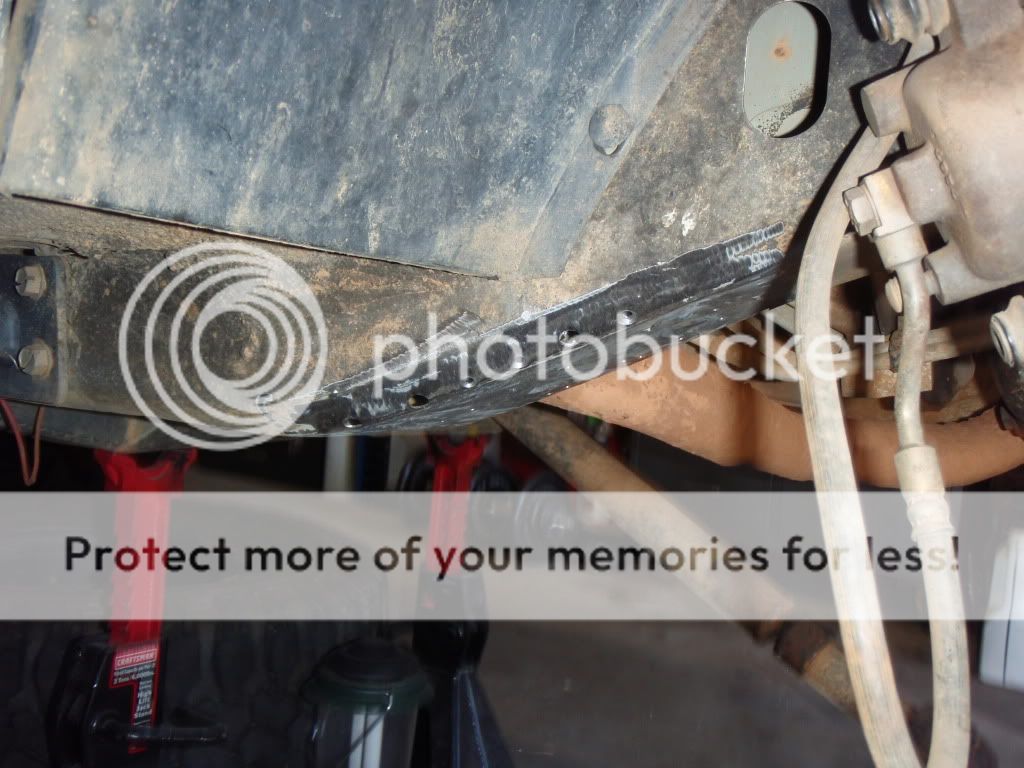
So far I have taken the axle off along with the control arms, steering, shocks, ect. I have the axle on the table ready to cut the old stuff off and weld the new stuff on. I still have to work on bracket for the frame side. Hopefull i will be done by Wednsday but we will see.

I will post pictures in a second....
 
On with the pics....

Some brackets i have cut
SSPX4462.jpg


With the joints
SSPX4465.jpg


SSPX4467.jpg


Upper axle side mount
SSPX4466.jpg


7/8" hiem compared to a 3/4"
SSPX4471.jpg


Old and new parts
SSPX4477.jpg


Axle dropped
SSPX4473.jpg


Axle off
SSPX4478.jpg


Dana 30 sitting on the table
SSPX4476.jpg
 
Update...

Got the upper and lower control arm brackets off the axle. I still have to clean up the lowers. I cleaned up the where the passengerside upper mount was and mocked up the new bracket. I also made a template for the truss so i can cut it out when i get home from work. Do you guys think the seals will be ok welding the truss and driverside lower control arm bracket on?

SSPX4482.jpg


SSPX4483.jpg


SSPX4484.jpg


SSPX4485.jpg


SSPX4486.jpg


SSPX4487.jpg
 
just one piece of advice, make sure your upper mount on the axle side is located so that it will clear the oil pan and tranny lines, i already had my axle under the jeep before i messed with that mount, im glad i did, because where i had originally wanted to put it, it would have hit the tranny lines:eyes:
 
Saw this on pirate, cant wait to see how it turns out.

Thanks

just one piece of advice, make sure your upper mount on the axle side is located so that it will clear the oil pan and tranny lines, i already had my axle under the jeep before i messed with that mount, im glad i did, because where i had originally wanted to put it, it would have hit the tranny lines:eyes:

Yeah it should be ok where it is. I am going to build everything with the axle at full compression to make sure though. Thanks for the advice!
 
no problem, i hope everything works out, definately a good start, and nice to see someone else doing this to a post 97 as well:guitar:
 
On with another update....

Got the Lower control arm mounts tacked on the axle along with the upper and truss. Bringing the axle to my buddies house tonight so he can weld it with his 220 instead of me welding it with my 110. Also got the passangerside lower control arm mount cleaned up last night.

P1011504.jpg


P1011505.jpg


P1011508.jpg


P1011509.jpg


Even with the LCA mounts below the center line i still have good clearance.

P1011510.jpg


What a B*tch to remove!

P1011511.jpg


P1011512.jpg
 
Where do you plan on attaching the frame side of the upper arm, how high and how far back? Are you raising the axle end mount?

John
 
Sorry for the lack of updates. I got tired of posting up pictures right away but do have some to post up when I put them on my computer. So far I have now all I have to do is get some metal for the lower control arms today and weld them up. I have been going back a forth on what material I want to use for the lowers. I would really like to use 1.75" .25 DOM but can't find any locally without paying for 20 feet. I only need 4 feet. I may just buy some square 2" .25 wall tubing becuase I can get that at any lenth.
 
It will be interesting to see how this turns out.
While you are at it, make sure to add some skids to the axle LCA brackets.
 
It will be interesting to see how this turns out.
While you are at it, make sure to add some skids to the axle LCA brackets.

Thanks. I didn't do a full skid but i did box the front a little. I wanted the most clearance i could. If I boxed the whole thing I would lose another inch underneath because i would have to leave room for the flex joint to move.
 
ok so heres a few pics of progress last week. Sorry no recent ones. I have run into a problem though. I screwed up one of the Flex joints and im thinking just buying heims for the lowers. That way i will get some adjustablity and i can't F them up. I think 7/8" heims will be fine. I do wheel on rocks but I don't bash it to hard. I know the ride will be a little rougher but I dont mind as long as it wont rip the brackets off using all hard joints. Please let me know what yall think.

Scott welding the brackets on.

SSPX4491.jpg


Passenger side frame bracket

SSPX4495.jpg


SSPX4496.jpg


SSPX4497.jpg


Upper control arm. This is the color of the springs and control arms. a little darker then in the picture. Looks really nice.

SSPX4498.jpg
 
Update.
I got more heims in today and went to Olivers Custom Drive Shaft to get some tubing. 1.75 .25" wall DOM is hard to come by so I used 1.5 .120 wall and sleeved it with 1.75 .120 wall. Very happy with how the links turned out. Tomorrow I just need to make new shock mounts and reinforce a couple areas and I will be good to go.

LCA Heims

SSPX4504.jpg


Tubing

SSPX4505.jpg


Tubing bungs welded on to inner tubing

SSPX4506.jpg


1.75 .120 DOM slid over

SSPX4507.jpg


All welded up and painted

SSPX4510.jpg
 
I finished the syspension up today! All I have to do now is redo the exhaust and i will be good for a text drive.

_DSC3062.jpg


_DSC3064.jpg


_DSC3070.jpg


_DSC3075.jpg


_DSC3076.jpg


_DSC3080.jpg
 
Back
Top