• Welcome to the new NAXJA Forum! If your password does not work, please use "Forgot your password?" link on the log-in page. Please feel free to reach out to [email protected] if we can provide any assistance.

Stock XJ gas tank skid + receiver hitch combo

kndrewa

NAXJA Forum User
NAXJA Member
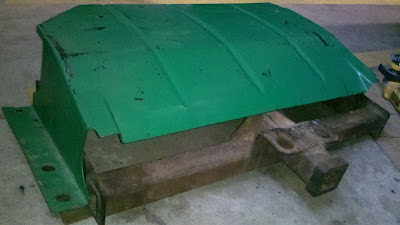
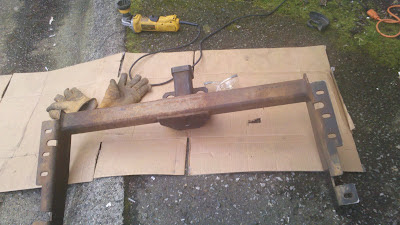
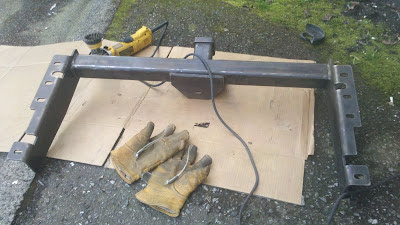
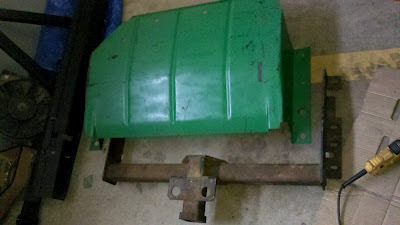
I started working on a little project this weekend. I've had a stock XJ gas tank skid taking up space in my apartment, or taking up space in the back of the Jeep for almost 5 years..

2012-04-28_12-42-00_956.jpg


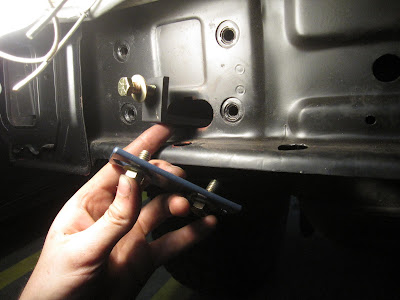
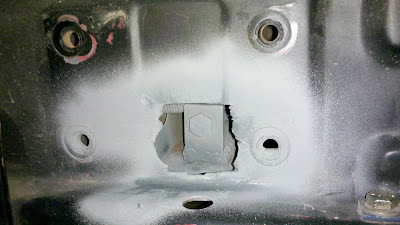
Then, a year or so ago friend of mine from the NAXJA NWChapter (Thanks RedJeep2.0!) gave me a gift certificate for a Detours Tailbone which he won in our NWFest raffle the year before (Thanks NWC!). Unfortunately, the tailbone's mounting system also interferes with the nut-strips inside the frame rails so I couldn't install either the hitch or the skid - now I had 3 awesome accessories and could only mount one at a time! It was a frustrating situation I got myself into.

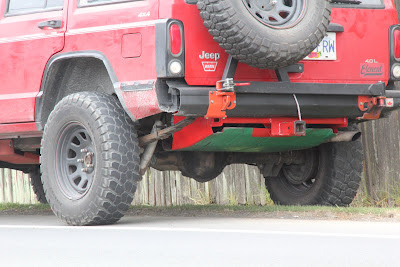
Detours Tailbone Installation Pictures

2011-04-23_11-28-46_131.jpg


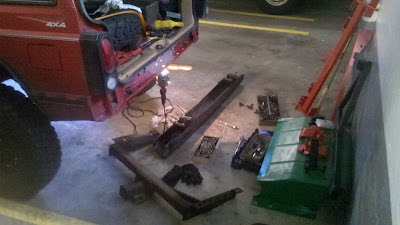
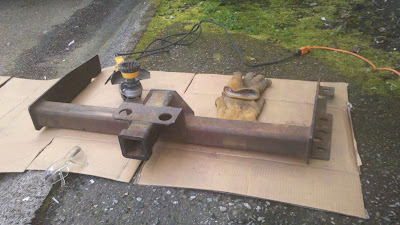
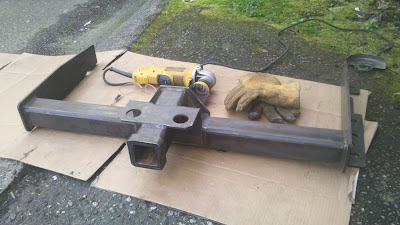
I had wanted a tire carrier to free up space in the back of the Jeep for a long time, but they aren't easy on the bank, and I honestly couldn't make up my mind when considering all of the pros/cons of the various aftermarket bumper options. Weight, price, aesthetics, rigidity, functionality, latch quality, ease of use, etc.. ..I'm pretty picky. The Tailbone fell into my lap (and price range!) so I ordered one up, requesting the custom tilted tire option (there's those aesthetics I was talking about!). Detours was a pleasure to work with and I received my bumper (or rather, bumper-sub frame and tire swing arm) in a timely fashion.
The bumper is great, and it won priority of installation on the Jeep over the skid and hitch.

2011-06-10_17-41-12_262.jpg


But now I couldn't pull a trailer.

2010-08-30_19-07-02_702.jpg


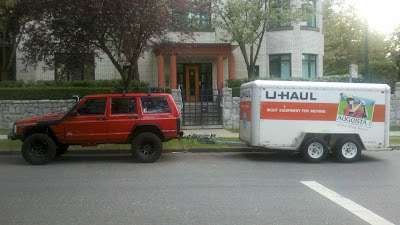
In summary, I finally made space in the back of the Jeep by getting the spare outside on my Detours Tailbone, and then I couldn't install my hitch OR my skid. For a while, I kept the parts in our living room, but when I got married, the skid plates had to go. My wive gave the order, "NO SKID PLATES IN THE HOUSE!" These parts ended up right back in the back of the Jeep - taking up the cargo space I just gained by getting my spare outside on the Tailbone, defeating the whole point!

2011-08-23_10-31-15_810.jpg
 
Last edited:
First, I attacked the problem that the skid and the hitch couldn't mount simultaneously. The skid was from an older body style XJ, and my Cherokee is a 1997. The differences are minor, but it didn't feel like a factory fit. If I tried to mount the skid over the op of the hitch, the mounting flanges flared upwards and outwards due to the shared dimensions of the two accessories. The bolts wouldn't line up through both mounting flanges.

2012-04-28_12-44-30_703.jpg


Another part of the problem was that the center of the hitch conflicted with the center of the skid, preventing it from laying completely flat in the first place.

2012-04-28_12-44-38_166.jpg
 
So - I decided to cut the mounting flanges off the skid, and weld what was left to the more durable hitch mounting system.

2012-04-28_12-56-54_658.jpg


2012-04-28_13-37-11_612.jpg


I spent some time taking measurements and carefully cutting to fabricate this nice and snug slot which allows the hitch the clearance it needs and enables the skid to lay flat. I will also weld along this slot to increase rigidity in the center of the skid. It should end up stronger than it was in it's stock configuration.

2012-04-28_14-54-03_852.jpg


2012-04-28_14-55-13_717.jpg
 
__________
______________
_________________

BEFORE: Conflicting mounting flanges had prevented me from installing both accessories.

2012-04-28_12-44-08_452.jpg


AFTER: The skid's mounting flanges removed and a central hitch clearance notch has been created.

2012-04-28_14-54-27_765.jpg


_________________
______________
__________

I'll clean up the mounting surfaces with a wire wheel this week in preparation for welding. I was also considering drilling some holes in the sides of the skid for some rosette welds along the mounting surfaces, thoughts on this? Next weekend, I'll go to a friend's house to use his welder and hopefully get these parts installed on the Jeep once and for all!
 
Another of the many facets of this problem was the conflicting internal mounting hardware for inside the frame rails. The Tailbone uses L-shaped brackets to tie into the rear-most 2 hitch mounting holes on the frame. Obviously, this wasn't going to work with the new nut-strips I ordered from JCR.

2012-04-25_19-33-38_594.jpg


This was exciting for me, as this project is my first experience with welding. I really enjoy it and am looking forward to learning a lot more and improving my techniques and generally getting more experience on various projects (like my skid plate). To me, welding is like performance art - I am intrigued by the requirement of perfecting a diverse array of movement techniques, from on-the-fly adjustments, to various voltages, material thicknesses and consequential changes in the patterns, wire speeds, angles, and even paying attention to the sounds its making. . . I'm having a great time learning.
 
I prepared the brackets for their union. I cut the weld nut off of the end of the JCR nut-strips. Then, I cut the end off of the Tailbone bracket. In the picture below, the original pieces are on top, the modified on bottom.

2012-04-25_19-58-31_0.jpg


I tack-welded the two together to hold them steady while welding the rest of the bead. Note the differences in thickness of the two materials. This was a challenge for my first weld, becasue the heat can burn away the thinner material without fully penetrating and bonding to the thicker material if you don't perfect the technique and speed variations in your arc movement. Considering this is my first official weld to be used for on the Jeep, it was a challenge! (I had ran some practice beads on scrap metal for 5 or 10 minutes prior to this as my truly 'first welds' . . .) I have a great friend who is teaching me on his 110v Lincoln MIG, and he is very encouraging and motivating.

2012-04-25_20-45-13_729.jpg
 
My first weld! I went a bit slow at the end, causing some extra material to build up as seen in the top of the picture below, but I'm proud of that section in the middle, even if I did have to double back real quick while the pool was still molten. I started out the bead at the bottom of the picture, and I went a bit fast (scared to burn through the thin nut-strips), causing some gaps. I truly spanned the gamut of possibilities (mistakes!) didn't I?

2012-04-25_21-07-20_937.jpg


I also ran a bead down the back and ground it flush, as this is a mounting surface. I think it looks like pretty decent penetration where I ground it down, because it appears to be a single piece of metal.

2012-04-28_11-58-19_973.jpg


I'd be happy to hear any critique or suggestions for improvement.
 
I had to further enlarge the slots in the frame to insert the new, longer angle brackets. Here is a picture of the old brackets and the size of the frame slot from my original Tailbone installation.

IMG_8427.jpg


I kind of regret not taking a bit more time to make the enlargement nicer, but I was eager to finish up. I sprayed the bare metal which was exposed with a bit of primer, and called it a day!

2012-04-28_16-06-07_264.jpg


My father always taught me that if a job is worth doing, it's worth doing right, so I am kind of embarrassed to put this picture of that hacked hole on the internet and include it in this thread. I guess that's why I never got around to this project until now - I couldn't do this job 'right' without the right tools. I haven't ever had access to a welder until recently. Even though I did cut corners on the access slot, I'm still proud to have this ball rolling...!

Stay tuned for the rest next week.
 
Last edited:
Don't forget to thank your wife for making you finally deal with it.:D

Thanks, I did!
I showed her the thread and she said, "I never said that!"

It's true - she didn't complain once (part of why I married her - she "gets it" about my Jeep)
But now that we're married, I wanted things to be nice for her - we don't have much space in our apartment, and no garage/storage space.
So in a way, she prompted the "NO SKID PLATES IN THE HOUSE" just because that's what I wanted for HER!
 
Cleaned up the hitch tonight. It had developed a good amount of surface rust when I lived in Chicago - they use too much dang salt on the roads there!

2012-05-04_18-10-38_820.jpg


2012-05-04_18-42-53_69.jpg


2012-05-04_18-21-41_225.jpg


2012-05-04_18-39-17_303.jpg


And there you have it. Ready for their glorious union!

2012-05-04_18-50-11_429.jpg
 
That's cool man! Good job on tackling that even if you weren't sure about it, I think it looks good! I like the idea of having them together
 
Looks good! It's too late now, but I have to ask... Did you try mounting the skidplate first, then the hitch? (so the skidplate is inside the hitch, instead of outside the hitch). I put a factory skid on my '97 a few years ago, and I don't remember having any issues... Maybe the older skid is different?
 
I couldn't mount the skidplate first because the hitch sits closer to the framerails than the skid. I'm not sure exactly how different it would have been to have a 97+ skid, but it seems like to stack them in the other order would require trimming the skidplate a lot more than the notch I cut.

It's a pretty tight fit either way, since both are built to the same dimensions. The skidplate is thinner and I could force it on over easier than pinch it inward- the hitch is built of much thicker material so I couldn't bend it at all.
 
I know this thread is somewhat old, but I just wanted to point out that I'm pretty sure that's a ZJ skid plate. I just installed mine this past weekend, had to drill new holes for it to line up. I also have a Detours bumper that has the same inserts as you. I wish I would've thought to weld them to the JCR nut strips that I also have, like you did! That's a great idea. Too late for me, though!
 
Ah that may very well be true that this was a ZJ skid! I'd had it for several years just kicking around while I drove the Jeep with the hitch installed instead. So are you saying you installed a ZJ skid or an XJ skid? Is your XJ a 97+ or older?
 
On my '98 I had the stock gas tank skid, a hitch and the Tailbone with minimal issues. I had to trim the skid a little to fit around the bracing on the Tailbone and had to cut the end off the factory nutstrip to fit the "L" braces that came with the Tailbone. My skid was sandwiched between the subframe and the hitch and fit just fine.
 
Back
Top