Devilfrog
NAXJA Forum User
- Location
- Duncan, BC
Well been wanting an MJ for a loooooong time, finally many years later I find a girl that lets me have one (good thing I married her).
It's an 88 MJ, 4.0L, 5spd, 2wd Sport Truck ... thinks that was Jeep's name for the base model back then. Has the full guage pack though.
SO as expected the closed cooling system was in need of work, ran fine, just burbled coolant out a myriad of cracks here and there. The radiator had seen better days a few years ago ... still did it's job after a fashion, just didn't have all too many fins remaining and those that were there crumbled when looked at.
SO I had a few spare bits left over for the XJ ... old stock Rad in good shape, and recently flushed. A few other bits that I will toss on over the next few months as well ... but the cooling system was the big one.
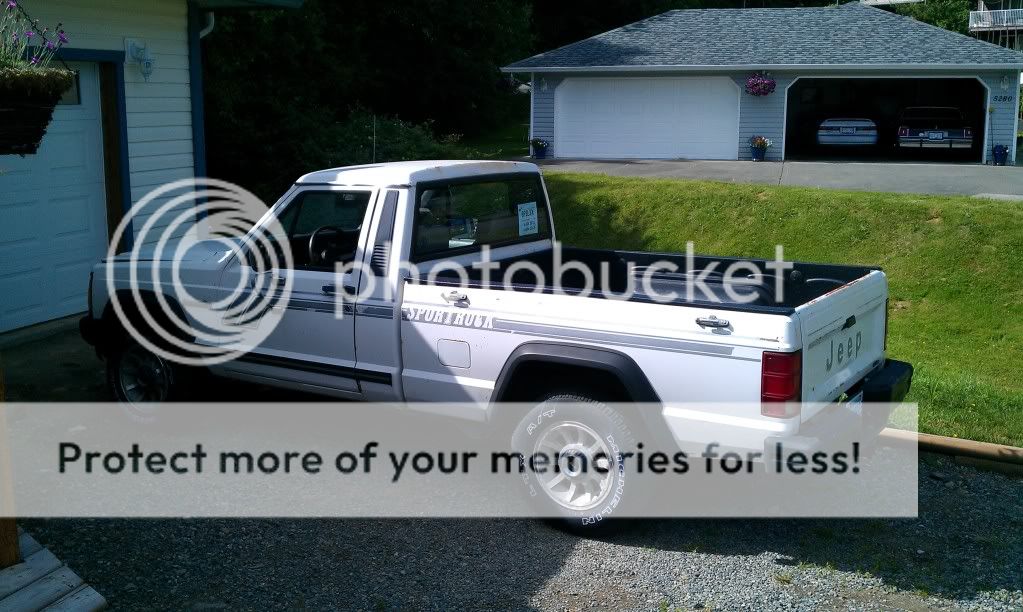
The truck the day I brought it home.

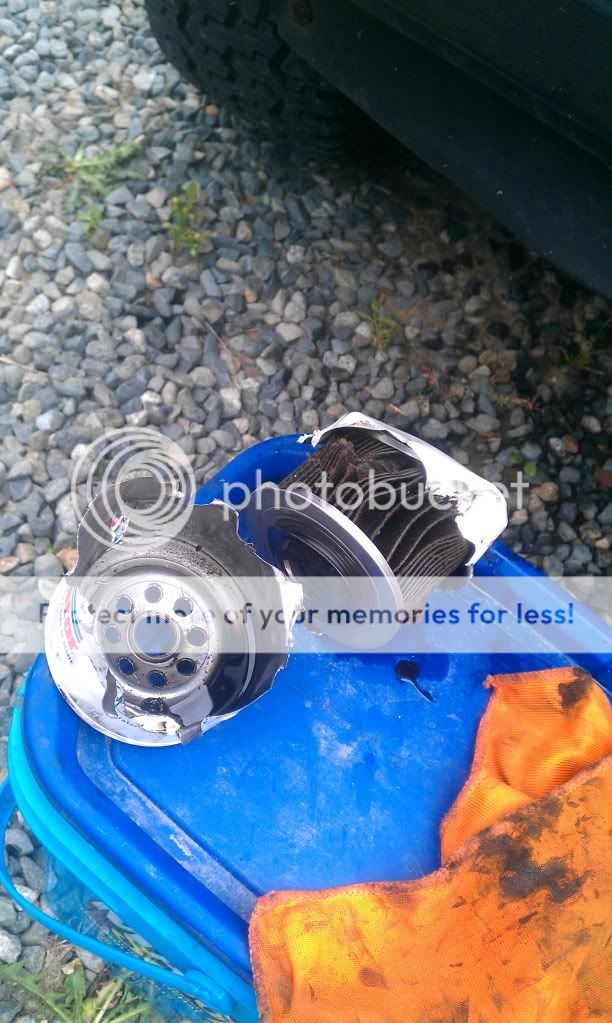
The offending coolant bottle
and few pics to illustrate the general condition in the engine bay ... looks like there are still a few factory bits that have yet to crumble.


So I tore the front grill and bulkhead off and ran into this issue

we'll get into how I will fix that likely tomorrow, already started on getting those out, the whole drivers side came apart like that ... Yay!
Anywho, one, two skip a few and we arrive at today (truck came home Friday - two days ago).
Used 2000 XJ radiator (my old stocker), 6' of 5/8" coolant hose, and some Ghetto fab skills extraordinaire to arrive at this ...


That's a real live Fast Orange Coolant recovery bottle in all it's awesomeness ... and yeah ... that's the old pressure bottle strap recycled just in case anyone wondered
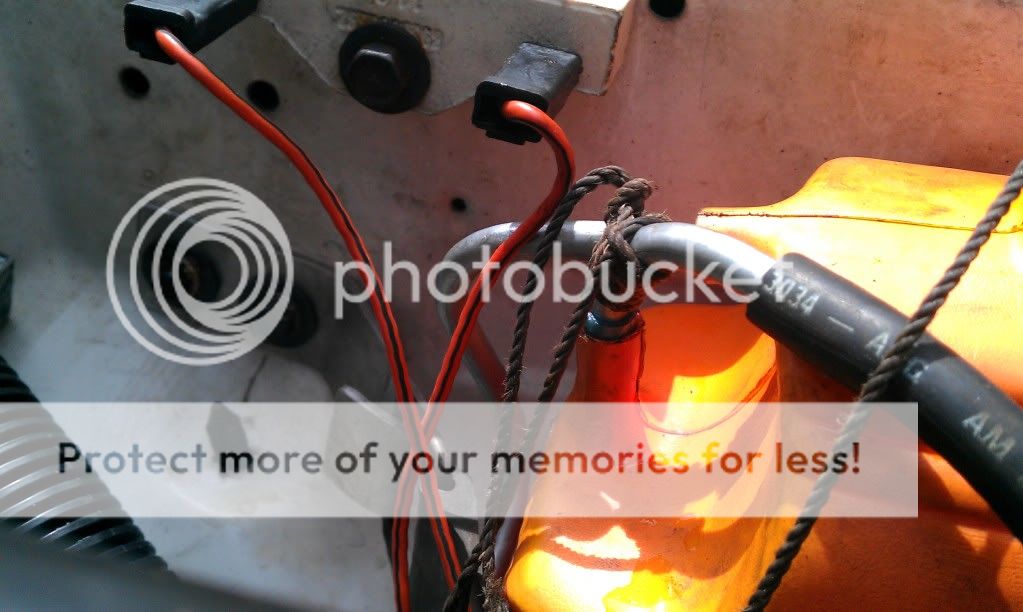
had some fun with some brakeline, part of the old vacuum system and some gerthunkin to create this work of something, not sure.
Otherwise I cut out the old warmup valve from the airbox as it was mostly not there anyway. Deleted the Vacuum connector and the EGR system since it was mostly crumbly and not really doing anything either. Moved the ballast resistor to the EGR valves spot to make room for the catch bottle. Moved the vacuum reservoir to the rear firewall just under where the old pressure bottle used to live. Yarded out the old heater hosing and ran new lines straight to and from the core. Used some poly hose (1/2") to recreate the CCV system and simplified the vacuum system as much as possible (well maybe a lot. being that most of it was for the EGR system anyway). Had to rebuild the Upper radiator isolators as the top studs were spun. Used Goop to seal them back enough to tighten them down, going to have to deal with that again eventually but it's good for now.
Cleaned 25 years of oil, grease and grime off the fenders and engine as much as possible ... it looks 1000x better than it did. went through some of the wiring cleaning as I went, oil was clean, cap and rotor are new, wires are old but in good shape ... she runs great, better than my XJ ... and the MJ has 20,000kms less at 211,000kms on the odo (just under 132,000 miles).
It's got the BA 10/5 from what I can tell but I'll deal with that one day, it shifts fine as is for now.
Looks like the engine was treated well for the most part and from the all the oil grime may have had some internal work at one point.
I did notice the drivers door hinges were pulling from the body so that on the list, as is some interior lighting futzing. The wipers weren't working when I tried them, but she's swinging now so may just need some lubing and some time on ... the truck has sat since January.
Charge voltage is 14.6V but the gauge reads around 12v at idle ... normal?
And the Temp gauge reads ~ 60-70 Celsius warmed up ... but I heard these Renix era motors run cooler.
Had to steal the Rad cap from my XJ for the test run, but tomorrow will be a run to the store for a new Valve cover gasket, and a rad cap ... then the install and trackbar replacement ... then I think we're good to insure the old gurl. after repairing the front bulkhead so I can get all the lighting back on. Ironically the passenger side had all stainless screws in place ... all different sizes, but at least someone tried.
And the stereo sounds decent - aftermarket with 6x9's behind the bucket seats.
Not planning anything special for this beasty, just a decent get me to work truck ... might rework the suspension a bit with some leftovers from the XJ and try to fit a set of 31" muds on the rear and some 30's for the front ... maybe swap in a 3.55 or so geared 8.25 or d35 eventually as well. one day I may consider a 4wd swap, but that's just pipe dream for now. It's a nice little truck as is.
It's an 88 MJ, 4.0L, 5spd, 2wd Sport Truck ... thinks that was Jeep's name for the base model back then. Has the full guage pack though.
SO as expected the closed cooling system was in need of work, ran fine, just burbled coolant out a myriad of cracks here and there. The radiator had seen better days a few years ago ... still did it's job after a fashion, just didn't have all too many fins remaining and those that were there crumbled when looked at.
SO I had a few spare bits left over for the XJ ... old stock Rad in good shape, and recently flushed. A few other bits that I will toss on over the next few months as well ... but the cooling system was the big one.

The truck the day I brought it home.

The offending coolant bottle
and few pics to illustrate the general condition in the engine bay ... looks like there are still a few factory bits that have yet to crumble.


So I tore the front grill and bulkhead off and ran into this issue

we'll get into how I will fix that likely tomorrow, already started on getting those out, the whole drivers side came apart like that ... Yay!
Anywho, one, two skip a few and we arrive at today (truck came home Friday - two days ago).
Used 2000 XJ radiator (my old stocker), 6' of 5/8" coolant hose, and some Ghetto fab skills extraordinaire to arrive at this ...


That's a real live Fast Orange Coolant recovery bottle in all it's awesomeness ... and yeah ... that's the old pressure bottle strap recycled just in case anyone wondered
had some fun with some brakeline, part of the old vacuum system and some gerthunkin to create this work of something, not sure.
Otherwise I cut out the old warmup valve from the airbox as it was mostly not there anyway. Deleted the Vacuum connector and the EGR system since it was mostly crumbly and not really doing anything either. Moved the ballast resistor to the EGR valves spot to make room for the catch bottle. Moved the vacuum reservoir to the rear firewall just under where the old pressure bottle used to live. Yarded out the old heater hosing and ran new lines straight to and from the core. Used some poly hose (1/2") to recreate the CCV system and simplified the vacuum system as much as possible (well maybe a lot. being that most of it was for the EGR system anyway). Had to rebuild the Upper radiator isolators as the top studs were spun. Used Goop to seal them back enough to tighten them down, going to have to deal with that again eventually but it's good for now.
Cleaned 25 years of oil, grease and grime off the fenders and engine as much as possible ... it looks 1000x better than it did. went through some of the wiring cleaning as I went, oil was clean, cap and rotor are new, wires are old but in good shape ... she runs great, better than my XJ ... and the MJ has 20,000kms less at 211,000kms on the odo (just under 132,000 miles).
It's got the BA 10/5 from what I can tell but I'll deal with that one day, it shifts fine as is for now.
Looks like the engine was treated well for the most part and from the all the oil grime may have had some internal work at one point.
I did notice the drivers door hinges were pulling from the body so that on the list, as is some interior lighting futzing. The wipers weren't working when I tried them, but she's swinging now so may just need some lubing and some time on ... the truck has sat since January.
Charge voltage is 14.6V but the gauge reads around 12v at idle ... normal?
And the Temp gauge reads ~ 60-70 Celsius warmed up ... but I heard these Renix era motors run cooler.
Had to steal the Rad cap from my XJ for the test run, but tomorrow will be a run to the store for a new Valve cover gasket, and a rad cap ... then the install and trackbar replacement ... then I think we're good to insure the old gurl. after repairing the front bulkhead so I can get all the lighting back on. Ironically the passenger side had all stainless screws in place ... all different sizes, but at least someone tried.
And the stereo sounds decent - aftermarket with 6x9's behind the bucket seats.
Not planning anything special for this beasty, just a decent get me to work truck ... might rework the suspension a bit with some leftovers from the XJ and try to fit a set of 31" muds on the rear and some 30's for the front ... maybe swap in a 3.55 or so geared 8.25 or d35 eventually as well. one day I may consider a 4wd swap, but that's just pipe dream for now. It's a nice little truck as is.