• Welcome to the new NAXJA Forum! If your password does not work, please use "Forgot your password?" link on the log-in page. Please feel free to reach out to [email protected] if we can provide any assistance.

Help with freezeplug nightmare.

Muddy98

NAXJA Forum User
Location
Medford, OR
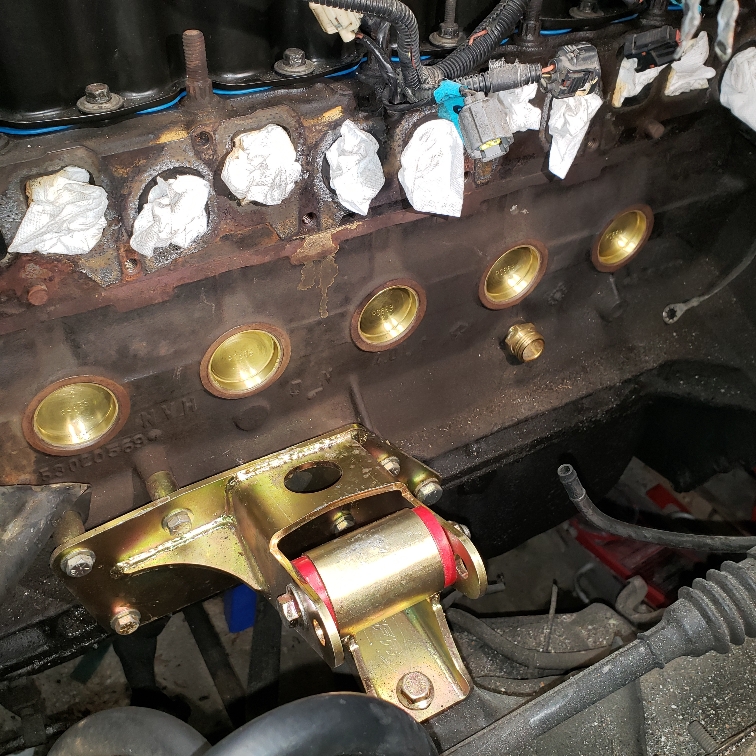
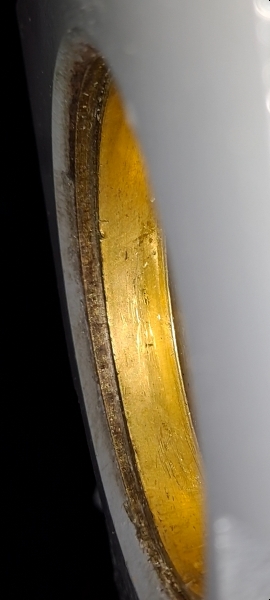
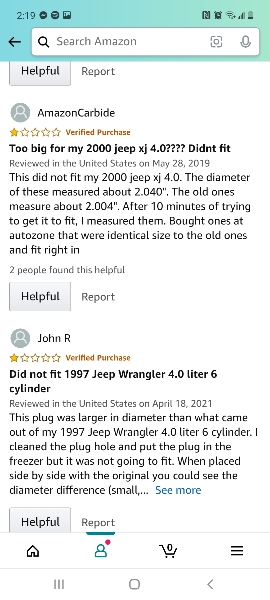
Okay pics suck but iv installed new freeze plugs all around and worried some are too much of an angle and probably gonna pull the one on the back of head because it's got a dent and its angled 😖 just looking for some feedback.. now I have 4 stainless ones I can install but I'm worried this is gonna happen again so i know if I'm good the way they are or? I bought the melling kit from amazon and they were a pain to install more than usual because i think they are slightly oversized by a thousands or something and using a socket I had to really hammer them in hard just to get then to start took me a half a day. I had to redo 2 of them and use stainless on the rear ones behind the flex plate that I got from the autostore just because I was uncomfortable with them but yeah i suck at freezeplugs..

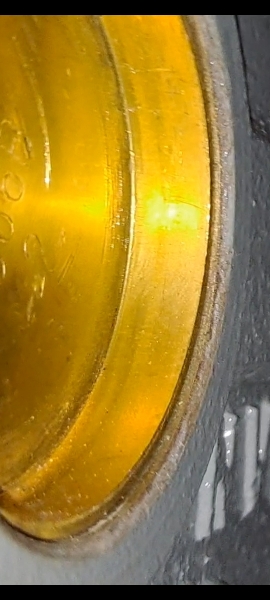
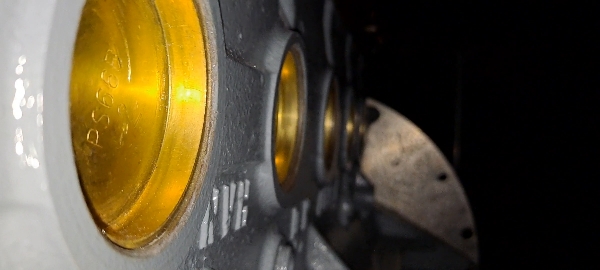
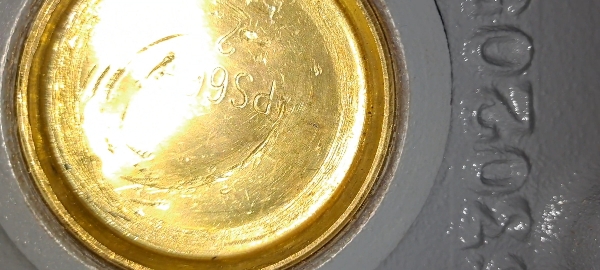
The last 2 photos are the one on the back of the head and the picture before that is one that's on the side witg a slight dent.

98cbea08011ed62165ede0655b378451.jpg
137773bb73d89e22176555cbc55ad31e.jpg
1cbbca8e231ffebf991ac5ec04948832.jpg
adfe85ec5bf14df0276dedcbecb6484d.jpg
40e28c3f600a5a2ae6b88751b513146d.jpg
fec52909c67d0cb1f62d655e812065f0.jpg


Sent from my SM-A516U using Tapatalk
 
Anytime I've put freeze plugs in since the 60's I've used a coat of Prematex. The Permatex seals the imperfections, also acts as a lubricant until it hardens, and may even slow down electrolysis. Electrolysis is a long-term issue and is almost unavoidable with dissimilar metals. There may be new improved sealers or techniques, but the old way works so I stick with it.
You have to check for burrs, they are often at the very beginning of the hole and can start you off crooked.

The more important thing is for the freeze plugs to seal.
 
Disclaimer: I've never done plugs myself, but I did stay at a Holiday Inn Express last night... I'm getting ready to install the Melling plugs in my 98. After LOTS of reading and overanalyzing, I plan to use Permatex (No 1). Some use a sealer others claim to "never" use it, and I've read a spectrum of results both sides both positive and negative.

My freeze plugs did not come with instructions, but I have read multiple different places (can't put anything on the internet that isn't true!) that the plugs are designed to be installed via contact with the outer lip only, and that the inner cup portion should not be impacted because it can deform the shape of the plug (effectively impacting the roundness and/or diameter of the plug) and cause leaking. Conceptually, this makes sense to me.

Your photos seem to show witness marks all over the cup area. Personally, I would knock those out, confirm everything is deburred, and re-install some NEW plugs (with a sealer), being careful to ensure they are straight and not overdriven.

You could always try it and see if it holds. How much is your time worth if you have to tear it all down and do it again? If the worst case happens and you blow a plug, is it going to leave you stranded somewhere?

TL/DR: I don't think any definitive conclusions can be made from the photos other than the installation appears to not be "ideal," but perhaps it's "good enough." :)

Sent from my SM-G960U1 using Tapatalk
 
Thank you guys, I did use blue permatex threadlcoker as I read alot of assembly plants used it but yeah gonna redo atleast 2 of them tomorrow with the one one the back of the head being the utmost important.

(I don't wanna pull the engine after having just replaced every seal and maintenance part on the thing lol)

None of the autoshops around me have a freeze plug installation tool for rent and I had previously bought a nice peice of pvc with backing to drive them in but it wasn't working with the melling kit i think it was too tight of a fit to let the freeze plug flex and there were reviews saying they are slightly too big as well.

From the videos I watched they all drove them in from the inside and it would seem kind of hard to just hit the outsides but maybe there's a better way that iv just not seen.

The reason there's so many marks is because they kept having that slight angle and I had to try and use a smaller socket in different corners to straighten them out and they don't exactly move without hammering hard but I'm gonna grind my peice of pvc diameter down a little and try on the other 2" plugs I have tomorrow.


Sent from my SM-A516U using Tapatalk
 
Side note, if you decide to attempt this again, the other thing you could try is sticking the plugs in the freezer over night. It works for steel bearings, so not sure why it wouldn't work for brass plugs (which have a higher expansion coefficient).

Also, in all seriousness, you might want to try a bigger hammer. If you're whaling away with a lightweight hammer, it will be harder to precisely control the impact location and get things all crooked. Heavy hammer with lighter taps using something like a bearing/seal driver (instead of a socket inside the plug cup), might yield better results. Not positive, but you may even to be able to borrow a seal driver kit from AutoZone for no charge.

https://knowhow.napaonline.com/know-how-notes-how-to-install-freeze-plugs/

Sent from my SM-G960U1 using Tapatalk
 
I did use the freezer method as well but I think your right in that they could have been installed with the right tools, iv done freeze plugs on a 4.0 once in the past with a socket and they didn't dent or need near as much force as this melling kit and the one stainless steel one behind the flexplate that I bought that wasn't part of this kit and just a 2" one from the autostore installed alot easier (not too easy) and felt more "correct"

Sent from my SM-A516U using Tapatalk
Well, I'm going to go stick mine in the freezer now, because now I'm worried I'll need to order another set after I mangle the Melling plugs. lol

I'll give it a go this weekend. I'm only doing the 5 plugs on the side for now, as my engine is still mostly residing in the Jeep. 🙃

Sent from my SM-G960U1 using Tapatalk
 
It could just be a design flaw somewhere and some are good and some arnt, would explain why some went in straighter than others but they were all tight and took a beating to get in lol. I think if you use that tool you mentioned you'll be alright. If nothing else once you get then in they will never leak lol

Sent from my SM-A516U using Tapatalk
 
Well, I got two of the 2" Melling plugs in the side (engine still installed), but not before smashing my thumb between the bearing driver and a 4lb mini sledge giving myself the worst blood blister of my life. 🤣 #internalbleeding #forscience

Couple of learnings (so far):

1) I didn't find much of a difference in required installation force between frozen and room temp plugs.

2) The Permatex tended to clump up and not spread smoothly on the frozen plug, so will continue to use plugs at room temp, since I want to use sealant.

3) Bearing driver and heavy hammer FTW. I still had to apply quite a bit more force with the 4lb hammer than I was expecting to get them to move.

4) Start with a much bigger seal driver. A couple of good whacks with the hammer (watch your thumb!) and one side started to seat. I then gently "walked" it in evenly all the way around until the face of the bearing driver was flush against the block.

5) Once flush with the block, I used the 50mm bearing driver to slightly countersink the plug until the edge of the plug rim was even with the taper in the block casting. Relatively light taps with the 4lb hammer were all that was required until final desired position was achieved.

6) Since my engine is still installed, I did not install the "handle" on the driver plate, so I had a little more room to swing the hammer. Start with the easiest plug to get the technique down, then move to the next easiest.

7) For God's sake, make sure the stampings on the new plugs are properly aligned. 🤪

I'll finish up the other 3 plugs when my thumb stops throbbing, probably sometime next year. 🤣
d6bcb885f009c537b2d8305155216d99.jpg


Sent from my SM-G960U1 using Tapatalk
 
Got the rest in. What a bitch!

Having the engine out would definitely be the time to do this.

The engine mount made that one tricky, and I ended up boogering up that one a bit due to the weird access angles. If that one happens to leak, that's where I'll put the block heater. 😬
c3d1a5c5889e64045de9d5e907d53cff.jpg


Sent from my SM-G960U1 using Tapatalk
 
Back
Top