Well thanks for the comments guys i probably will trim the flares. I cant lift it for a while because i am 17 years old my dad is worried about me. but when i turn 18 or so i will probably lift it. my dad also thinks that 33's are too big but i showed him this article and he likes the way that the jeep looks so i might have convinced him
courtesy of madxj.com
<TABLE style="WIDTH: 95%" cellSpacing=0 cellPadding=5 width="95%" align=center bgColor=moccasin border=0><TBODY><TR><TD bgColor=lightgoldenrodyellow colSpan=2>
In the rear the first thing I did was flex until one tire comes off the ground. Now check to see if the other tire is centered in the opening, if not relocate the rear axle until it is. I had to move mine ¾” forward to center it. Now comes the fun part. Remove the flares and cut the thin ¼” wide single wall steel edge back to where it becomes single wall, make this taper off to the top where the curve starts. Do this to both the front and rear wheel well edges. Now you will need to fold the outer part that is double wall outward 90 degrees. Start at the lower edges by folding them out to where the inner wheel well meets the fender. Continue to fold this out 90 degrees up towards where the curve begins, tapering it off slightly along the way. Now fold the upper single wall edge out 90 degrees to where the double wall begins. I used a hammer and pliers to fold it and a jigsaw to cut it with. Now sand off the paint that flaked and seal and paint accordingly. Now you can refit the flare using the upper bracket only. Check and cut away the inside part of the flare so it fits the body flush. Next mark and drill the mounting hole in the upper position in the rear and the two upper holes in the front. In the two upper position use ¼” bolt and washer. In the lower hole in the front put a ¼” push nut on the flare and use a bolt and washer to secure it. Fill in the two screw holes at the bottom with silicone or something and position the flare so it is about 1/8” from the 90 degree bend at the bottom and secure using screws in the lower holes. Now that the flare is back on I cut and reinstalled the original liner with screws to the part that is folded out 90 degrees.
</TD></TR><TR><TD>
</TD><TD>
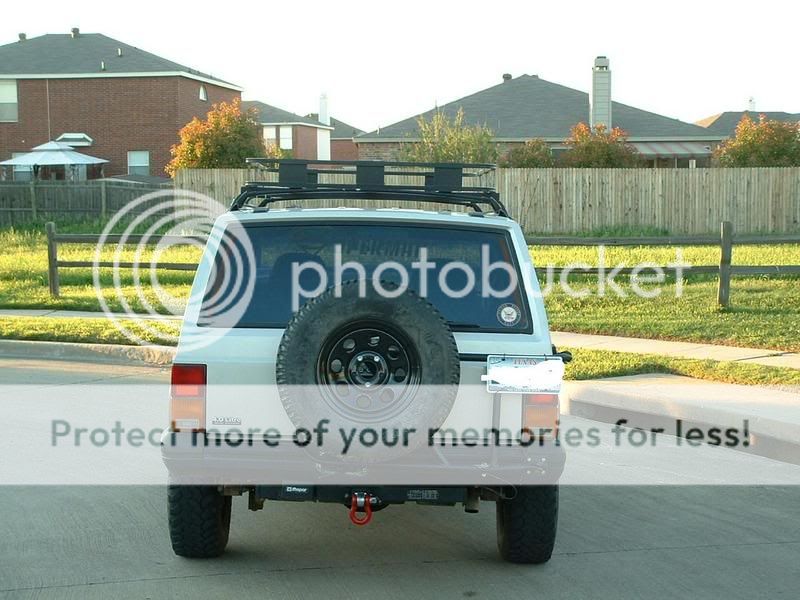
Flexing it with 33x10.5-15's and 3.5" of lift.
[
Large image]
</TD></TR><TR><TD>
</TD><TD>Close-up of rear flexed. </TD></TR><TR><TD>
</TD><TD>The rear flare leading view. </TD></TR><TR><TD>
</TD><TD>The trailing view. </TD></TR><TR><TD bgColor=lightgoldenrodyellow colSpan=2>
Now for the front. This works with uncut flares, if your flares have been cut in the rear portion they may not fit right. First remove the liner, flare, headlight bezel and front bumper. Take a marker or a paint pen and mark a line straight across the front edge of the fender at the bottom of the marker light. Remove the fender brace and cut off the lower part of the fender. You have to be a little creative to cut the part under the headlight. I used a jigsaw to cut the fender just make sure you hold the fender so it doesn't bend. Now mark around the fender opening at the point where the mounting surface where the flares ends, about 1/8" from the edge of the bend, taper this line off towards the lower rear edge of the fender just behind the front mounting bolt. Where the mounting holes for the flare are mark a line 1" from the center of the holes on each side. The tabs by the holes will be left on and folded out 90 degrees, also mark a 2"long tab to be bent out at the lower front edge of the fender that you previously cut off. These tabs will be used to reattach the inner fender liner. Now cut out all the rectangular spots in between the above describe tabs, while supporting the fender. On the rear inner wheel well of the fender there is a seam that needs to be trimmed and folded outward. Cut up toward the seam and taper off your cut so it ends at the end of the double wall. Now fold the double wall seam outwards 90 degrees. Hold up the flare to see where it needs to be trimmed to fit the body tightly. You also need to trim the curve where it wraps around under the fender and heat it some so it fits the body tightly. Position the flare up to the bodyline and mark the mounting holes and drill them. I used a piece of the flare that was cut off to fill the gap caused by raising the flare. Mount it to the inner part of the flare using a push nut and a screw. Now bend the tabs out 90 degrees and put a push nut over the center tab and the fender support. Now paint and seal the fender as needed. I used ¼" bolts, nuts, and washers to mount the flare. I also put large round rubber fender washers in between the flare and the body to keep from distorting the flare. Next comes the inner liner. Cut the rear part of it so it can be screwed to the seam on the inner wheel well that was folded out. Now trim and fold the liner with a heat gun so it fits inside the flare like it did before. Use a bolt in the center support for the fender where you put the push nut. Now secure it to the tabs using some push in christmas trees like the ones that originally held the liner in. Now all that's left is to trim the front portion to match the fender and the rear portion to fit nicely. And then you are done. </TD></TR><TR><TD>
</TD><TD>Side view with cut fenders.
[
Large image] </TD></TR><TR><TD>
</TD><TD>Front view of raised flare. </TD></TR><TR><TD>
</TD><TD>Front view of raised flare. </TD></TR><TR><TD>
</TD><TD>Filled in gap left by raised flares.
[
Large image] </TD></TR><TR><TD>
</TD><TD>Using existing Inner fender liner. </TD></TR><TR><TD colSpan=2>
I am very happy with the end results, but wish I would have gotten 33x12.5-15 tires. With longer bumpstops and maybe a little more lift, 35's should work.
</TD></TR></TBODY></TABLE>
Thank you guys for your support and i hope to maybe meet some of ya' all to do some wheeling some time.
Bubba


") Just because of you.
Just because of you.