• Welcome to the new NAXJA Forum! If your password does not work, please use "Forgot your password?" link on the log-in page. Please feel free to reach out to [email protected] if we can provide any assistance.

What was done to YOUR rig(XJ/MJ) today MECHANICALY????

any check engine lights?

Nope. This thing has never thrown a CEL lol

O2 sensor, or lack of electrical power to the thermal resistor in the O2 sensor causes open loop/closed loop confusion at idle. Sensor is too cold at idle to work right with out that heater working. It can be tested like a resistor, and test for the power to it from the O2 heater relay.


Tiny easy to miss loose hose on tube, and crack tubing is very easy to miss on the run to the MAP sensor (fire wall on yours????) Or attached the manifold, in which case (its hidden under the MAP) it may be leaking there.


Cracked manifolds can drive a good O2 sensor and ECU nuts and force them to switch to open loop-gas guzzling mode.


I am now a firm believer in crusier 54's Dizzy indexing fine tuning mod!!!! And in checking for issues with the Cap rotor, and Dizzy shaft bearings and for slop side to side and rationally. I almost pulled and scrapped an engine, that turned out to be a failing 2 cent rolled sheer pin holding the drive gear on the shaft on mine. The symptoms started out small and got worse over the weeks.


Also check the Vac line at the FPR nipple to see if the FPR is leaking fuel into the Vac line!!!! And for fun make sure none of the fuel injector wires or plug wires got swapped like 3+4 plug wires in any recent work, LOLOL.


Check the plugs business ends for signs of all or just 1 plug being lean or rich, or oil fouled!!!!

Thanks for the info! Will check these out this weekend!
 
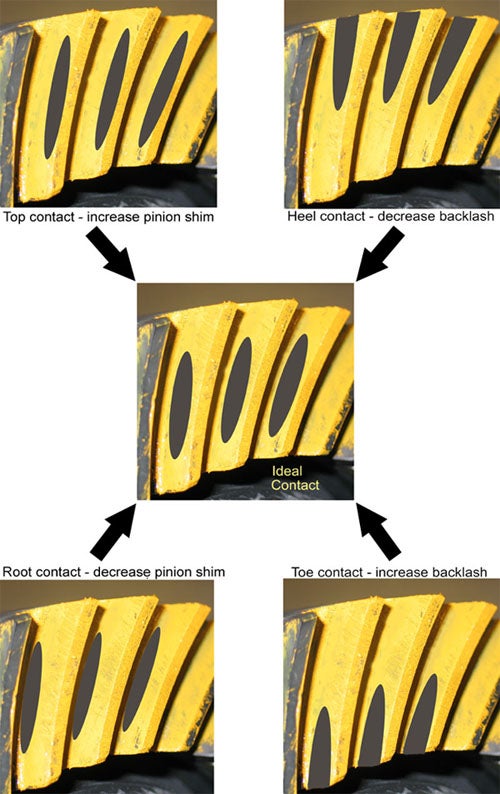
Working on gears tonight. Here is my story. Procure Ford 8.8. Swap in 8.8. Listen to very noisy gears. Check pattern. Learn that I do not currently possess skills necessary to check gear patterns. Every pattern on the net looks beautiful or you can at least see where the pinion contacts in a nice oval. Mine is some sort of weird line. It is possible my gears are borked.
Drive Side:
aSYC35fm.jpg

m2TUNOdm.jpg

Coast Side:
PBmR0V2m.jpg

mrJRiLDm.jpg

GOing off of this chart it looks like you need to decrease pinion shim and increase backlash. But I'll defer to anyone who has more experience than me at setting gears. It just looks like you have a really deep version of the bottom left picture.

Figure_28.jpg


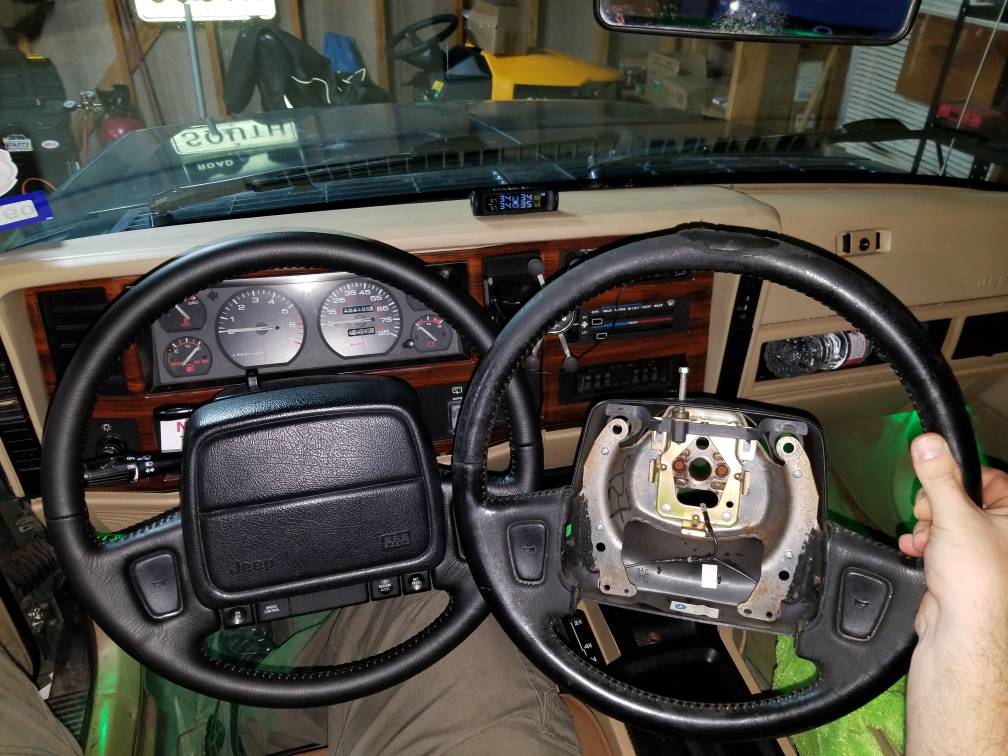
Replaced the slip yoke bushing and seal on the transfercase ot the Jeep and swapped in the new old stock steering wheel........while also watching kids haha

37656047177bc6e76e9b3eb0efe9fe84.jpg
 
Thanks for taking a look devildog0. I think you’re right. I think I’m going to pull the whole axle out, make a setup bearing and take it to my workplace where I have a press. I might check the backlast first for the heck of it.

Is that a tire pressure monitoring system on your dash?
 
Thanks for taking a look devildog0. I think you’re right. I think I’m going to pull the whole axle out, make a setup bearing and take it to my workplace where I have a press. I might check the backlast first for the heck of it.

Is that a tire pressure monitoring system on your dash?

Yes sir just a cheapie off of Amazon. Pretty accurate comparing it to my good tire pressure gauge. I got the version that has the screw on valve caps that transmit to the headunit (which is solar charged/powered but you can also cable charge it if needed). They sell another unit with the same head unit that has internal in the wheel transmitters for like 10 dollars more. The valve cap types are large enough I'd be worried about them being ripped off in real tight trails or lots of deep rutted mud holes with roots and whatnot.
 
R/Red the header, drivers side motor mount and transmission mount. Passenger side mount is coming up so just waiting on a part.

Wound up having an exhaust leak right after restarting. Snugged up the lower center manifold bolts and it went away.

936d5e3483ece0d5f6bfc0e89378ba6a.jpg


https://uploads.tapatalk-cdn.com/20181215/ebb9c759d2d42a4ab7bd72699cd87cc0.jpg[/IMG

Sent from my SM-G892A using Tapatalk
 
What did you go with for a replacement motor mount?
 
Anchor.....which apparently has bad reviews haha. I'm going to grab one from Napa probably and keep it close by. The trans mount came from NAPA.

Sent from my SM-G892A using Tapatalk
 
Anchor.....which apparently has bad reviews haha. I'm going to grab one from Napa probably and keep it close by. The trans mount came from NAPA.

Sent from my SM-G892A using Tapatalk

There’s lots of good upgrade mounts out there. I’m running stinkyfab. Had MORE on my last rig. Brown dog is well reviewed as well
 
Trans temp gauge installed.

287f66cdcccef2abeb741ec434f2f47a.jpg


Sent from my SM-G892A using Tapatalk
 
how do ya like the ram mount?
I've used them on motorcyclesfor the better part of a decade. I wont use anything else for mounting. They aren't cheap but they are well made.

Sent from my SM-G892A using Tapatalk
 
I have Ram Mounts in all my vehicles! I like the fact that I cam "MacGuyverize" them to mount just about anything like Go Pro's and even my off the wall cameras. I use for tablet in my F250 and it is solid.
 
Replaced the leaf spring shackles and changed the rear diff fluid with 85w140 and put a lubelocker on. Old shackles had blown out bushings and it's easier to just replace he shackles than press new bushings into the old ones.

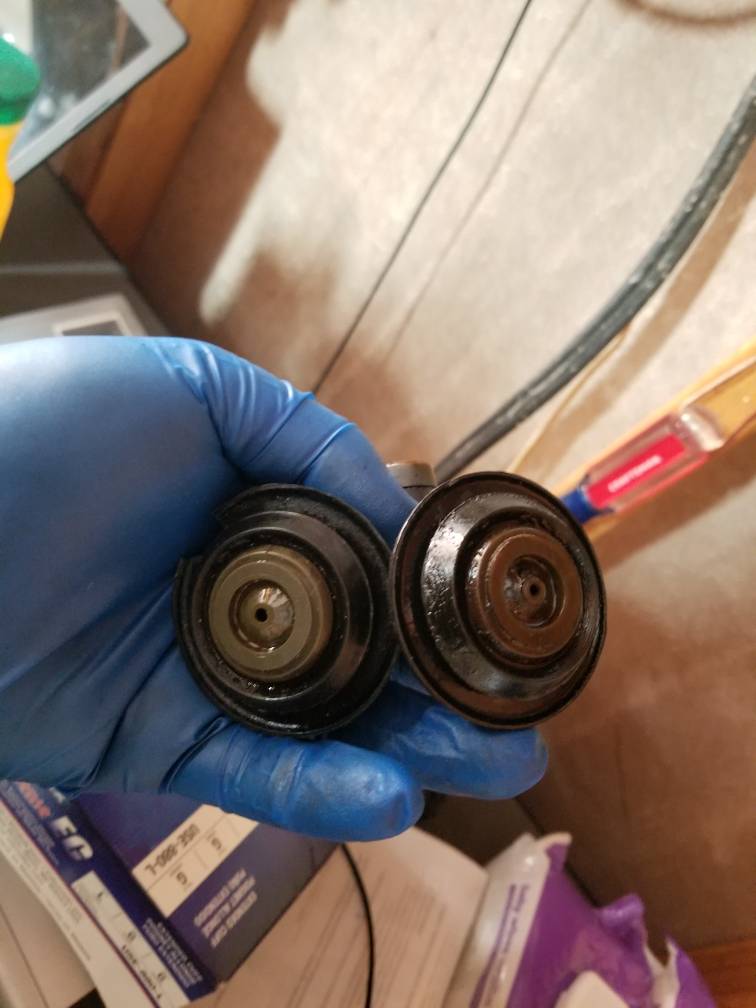
Also replaced the CCV elbows and grommets in the valve cover. One of the previous owners used the wrong front elbow and used two of the small orifice elbows which is incorrect.

bcfcd10f5a0a2d48cf80a9e773cd2b13.jpg


Sent from my SM-G892A using Tapatalk
 
Pulled my front driveshaft to try to track down a vibration. Found the slip yoke had a little play so currently shopping for a new one. This did clear up a good bit of highway speed vibes removing it but not all of it

While inspecting my tcase leak which I think I've tracked down to the speedo sensor, I found the rear driveshaft slip yoke with play as well. I pulled the rear drive shaft and checked the output shaft for play and found none so I ordered up a new Dana/Spicer slip yoke for the rear drive shaft.

Sent from my SM-G892A using Tapatalk
 
I need to remove my front shaft and see if my vibe goes away or not as well.

I to have some play in the front shaft splines.

When I took the rear driveshaft out, no vibes. But someone mentioned that it could be the front shaft still as when it is under load the vibes might not be there...I dunno
 
Replaced the water pump, again, on my Saturn. No more DuraJunk for me. Used an NOS GM water pump. Ebay was $20, dealer wanted $188, but said they were out of stock now, LOL. Found an NOS GM on Amazon for $88. :)

292,xxx miles on the Wagoneer and counting. :cheers:

I had to grind the shit out of and sand the outside roof on my Wagoneer last 3 months, pulled the luggage rack strips in the middle off, that had rusted holes under them in the roof, and ended up with about 30 holes in my roof by the time I got the deep rust pits out of the roof.

I used Rustoleum Rust Restore spray cans to prime and convert the remaining flash rust to primer, 3 coats, still need to go back this spring and finish sanding and grinding some locations, and I used a 30 year outdoor siliconized acrylic latex caulk, paint-able to seal the holes, for now. Then I had to pull the windshield top side trim as the head liner was still dropping a lot of water on the floor in the rains here, and found the same serious cancer rust (deep pits and all) hiding there as well. Ended up with a 20% hole area on the span of the tray. I used steel filled epoxy to seal and reinforce the large holes, one was 2" long by 1/4" wide. Used GE 30 year Silicone II, to seal the mini holes.

Caulked up the last leak locations in the passenger wing window.

Then still had some water getting in. Shinned a light from the inside up between the steel roof lip that supports the windshield and the windshield gasket and found a few paper thin gaps between the metal roof support for the windshield and the gasket, so I used a spray can of rubber like sealant/sealer on the entire tray/gasket area, after I had sprayed the cleaned up rusted tray with the Rustoleum Rust Restore rust converter primer. IIRC it has Tannic acid in it that converts the rust to primer. I have very high hopes for it. Used it on the hood about 3 months ago. But it must top coated as the primer is not UV/weather resistant. Still need to to put all the top coats on all of it.....Plan to use sandable grey primer (Rustoleum auto formula), then the OEM silver (Duplicolor), then a UV resistant outdoor clear coat (Rustoleum). The Rustoleum these days is easy to use in rattle cans, sprays sideways, up side down and the nozzle never clogs between uses. Awesome stuff if it holds up? I also bought a sealer primer for some of the areas. I plan to rattle can spray the entire rig and clean coat it the same way. Wish me luck!!!
 
Last night I patched up some of the wiring on the Jeep. Namely the oil pressure sensor wire that had some missing insulation which was grounding out causing the oil pressure gauge to go haywire. Cut out the bad section and spliced it back together. Same for the O2 sensor wires. On the Jeep side of the harness I had some bare wires from heat and oil soaking the wires for so long :/, maybe the cause of my poor fuel mileage? Who knows but we'll see if it helps at all.

I took apart the connector which still had a good seal and cleaned up the wires and applied some electrical tape and heat shrink for now, I can no longer find this specific connector so I'm going to see if I can find any of the female pins that go into connector itself and cut out the bad sections of wire and rewire with new pins. If I can't do that I'm going to rewire with a another connector of somesort.

Also dropped the driveshaft out of the rear....again, and installed a new slip yoke onto it. The old one had a bad spot where the seal would normally ride and a 60 dollar slip yoke was a lot cheaper than a 230 dollar driveshaft.
 
All the Renix Jeep connectors 87-90 are the old style GM Weatherpack connectors. The plastic parts and the male/female puns are dirt cheap on Ebay. I mean dirt chip.

The newer XJs I think use the newer style GM connectors

https://www.google.com/search?q=1989+GM+weatherpack+connectors&ie=utf-8&oe=utf-8&client=firefox-b-1

I recently bought the tools also for the removing the metal pins from the plastic with out damage from China for about $5, Banggood.com website, kind of like Amazon or ebay, all new stuff and huge discounts on stuff from China. I got great service and prices on a lot of electronic stuff there.
 
It is a 95 but the O2 connector doesn't look like anything in those links. These are round barrel looking pins. The jeep side even has some brass or copper looking sections in the connector. I'll take a picture when I get home today I'll pull one of the wires.

I've never personally seen any pins that look like these.

Scratch that. These (weatherpack) look the closest I guess but the ones I looked at on the O2 connector had no seams on the barrel of the female side.

weather-pack-terminals-male-female.jpg
 
Back
Top