• Welcome to the new NAXJA Forum! If your password does not work, please use "Forgot your password?" link on the log-in page. Please feel free to reach out to [email protected] if we can provide any assistance.

T&J cage install thread

crazyjim

NAXJA Forum User
Location
SoCal
So I figured I'd start a thread here, and add to it as I make progress. I have to have this done before May 23rd night race, working around my schedule and my buddies schedule, it's going to be tough but I think we can do it!

Got this done today and started test fitting some pieces, this cage TUCKS!


IMG_0352.jpg


Keep in mind, ALL my interior pieces are out for these fitment shots, and it's still tight. This is honestly the tightest pre-bent cage I've seen... I'm impressed!

IMG_0346.jpg

IMG_0348.jpg

IMG_0349.jpg

IMG_0351.jpg
 
Yes, definitely. However I'm not sure on the 96 and older interiors, as those glove boxes go to the end of the dash right?
yes they do!

btw i love that cage looking forward to seeing the final product!
 
The tubing is nice and clean,is that chromo?

No, it's ERW. It IS clean though, I bet T&J cleaned it :D

You got 3 weeks!:laugh3:

Hahahaha I know I know... Tony would kill me if I didn't make it!!

Keep going! I got mine done in a weekend. And built an inside tire carrier. You suck for your glove box working. My '92 hits bad. I too am very happy with how tight the fit is for a prebent cage.

:laugh3: Neener neener neeeeeener. My glovebox opens! On a side note though, I didn't know you had a T&J cage... now I'm looking at your build :D
 
Update!

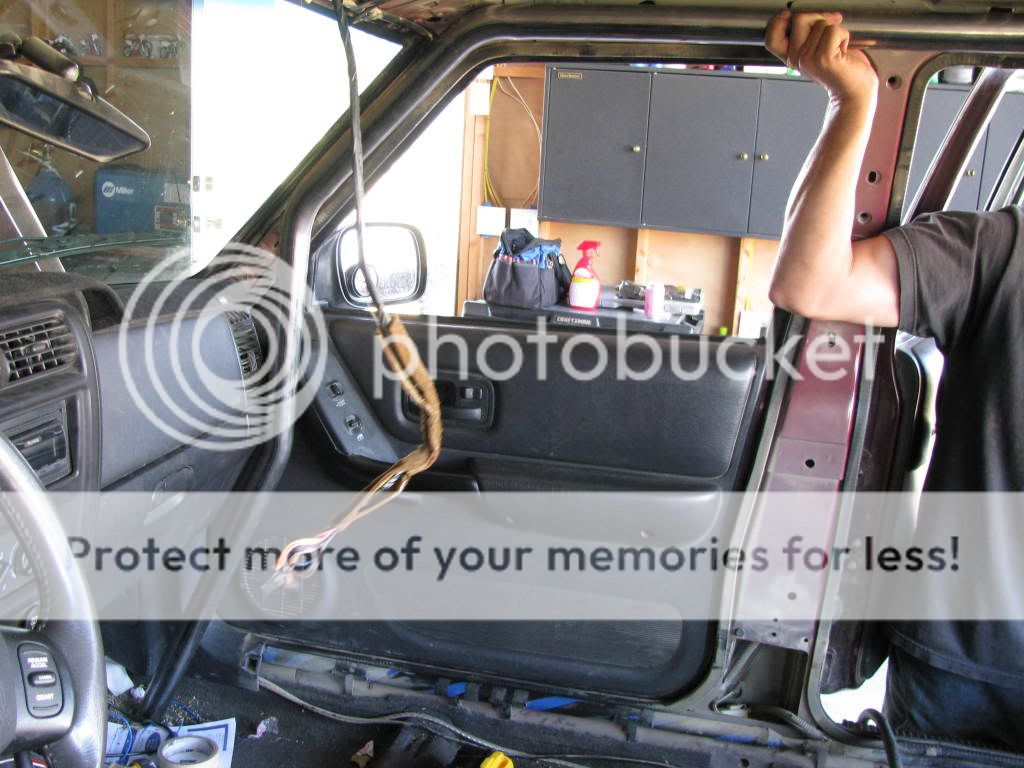
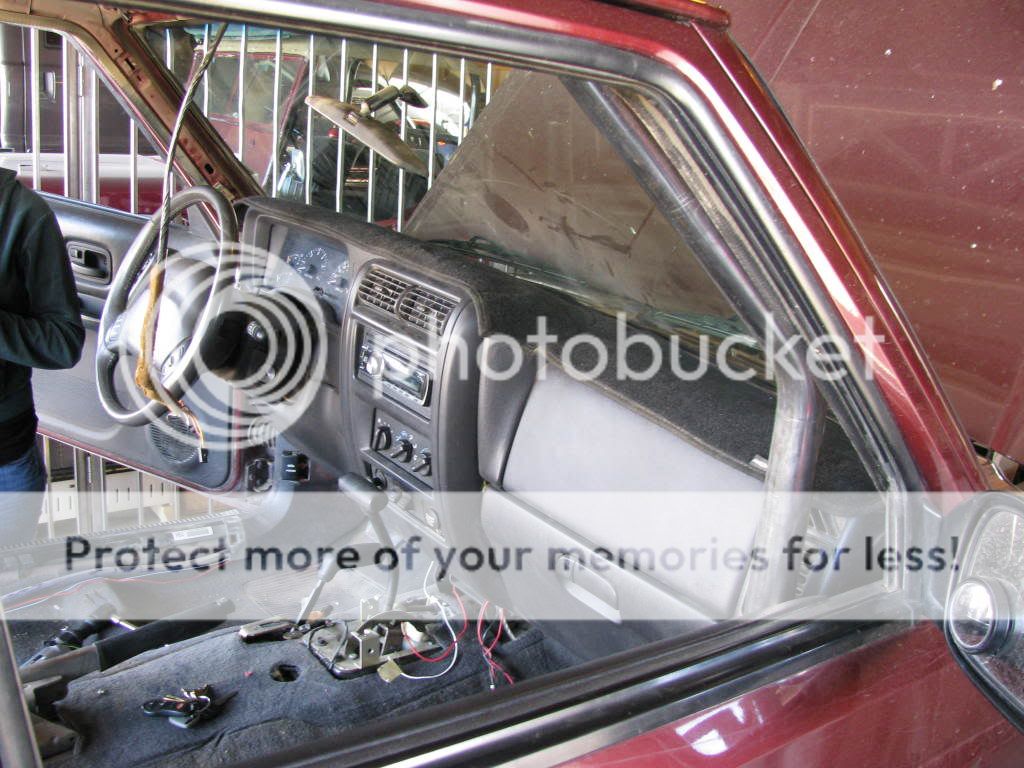
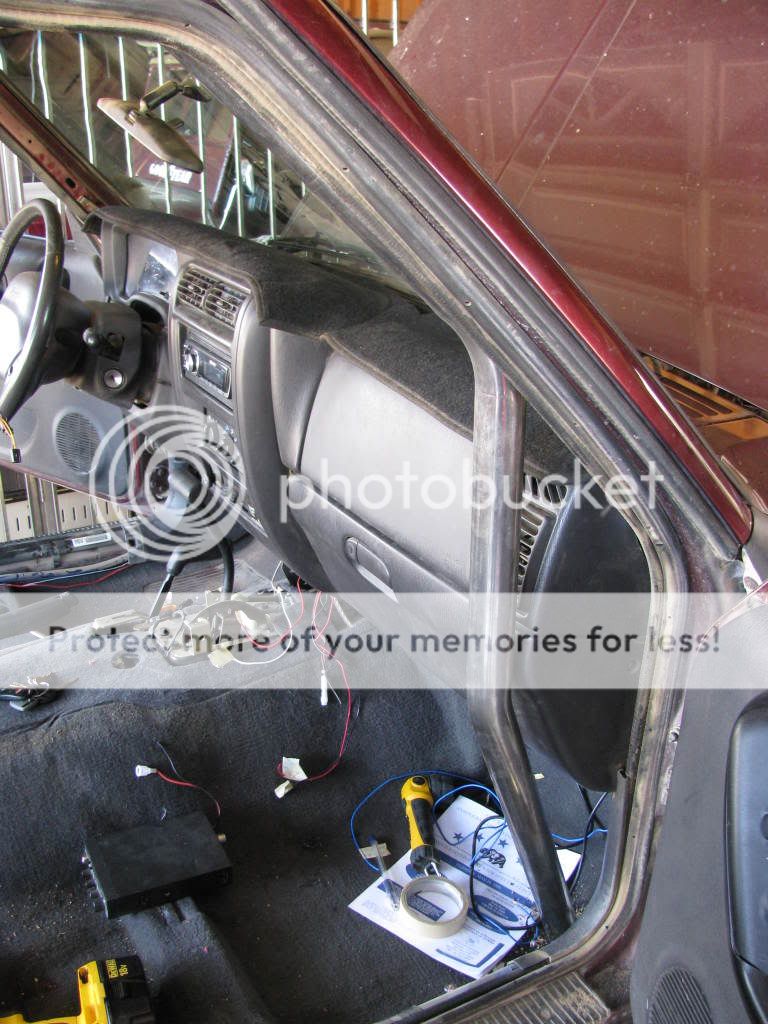
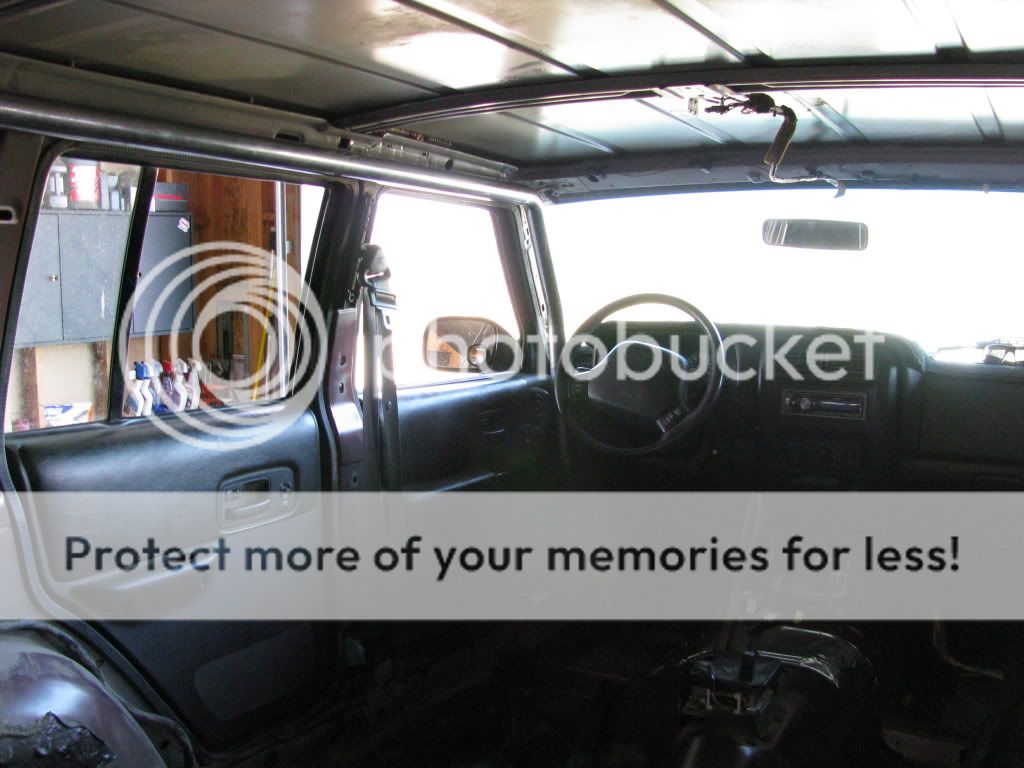
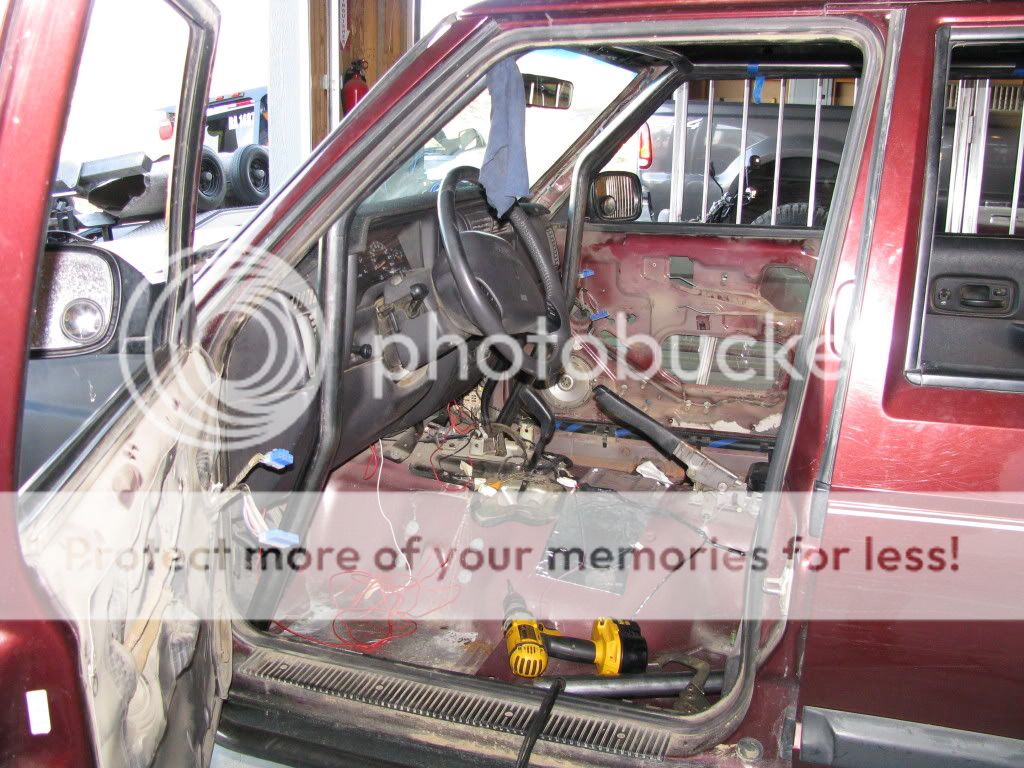
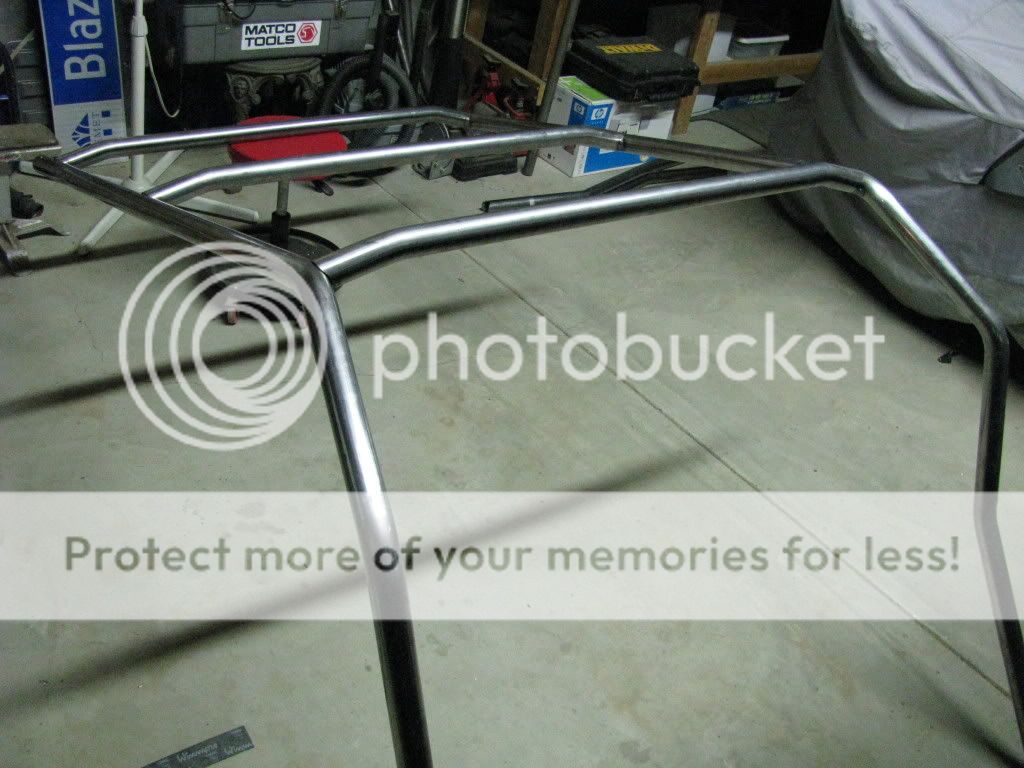
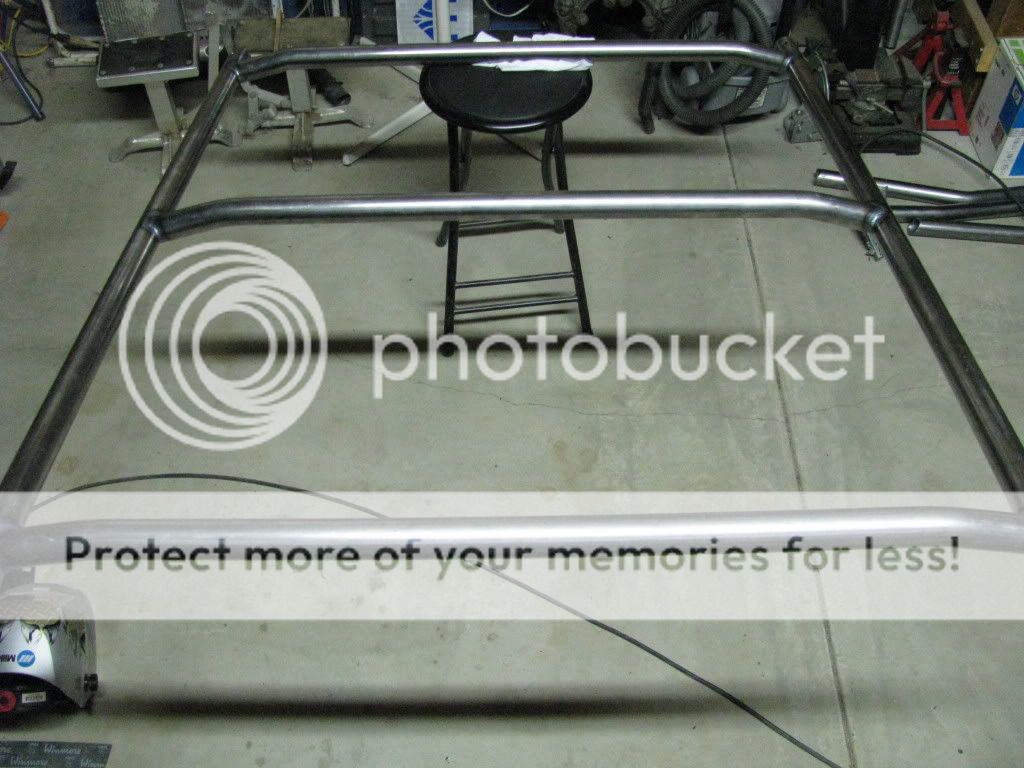
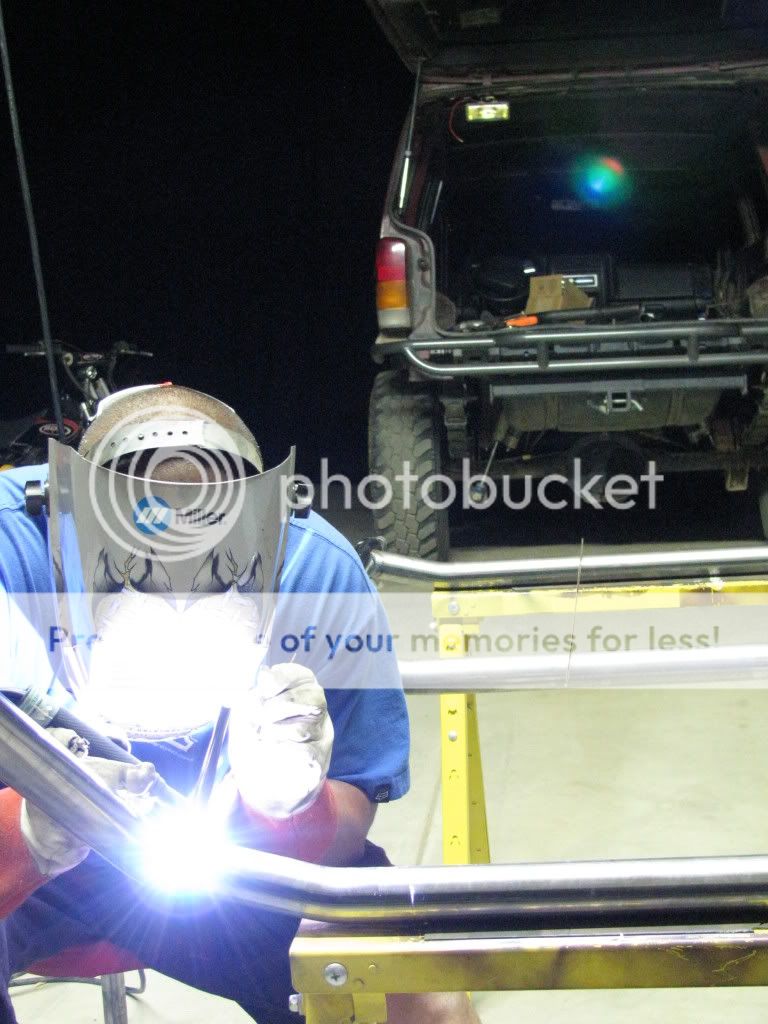
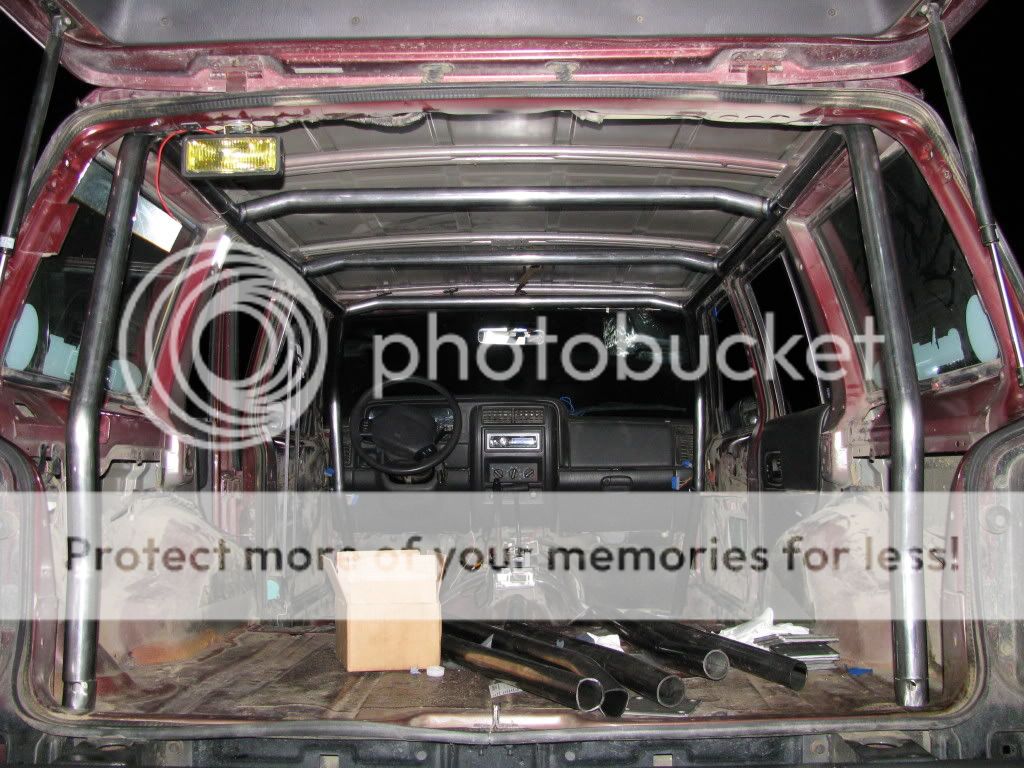
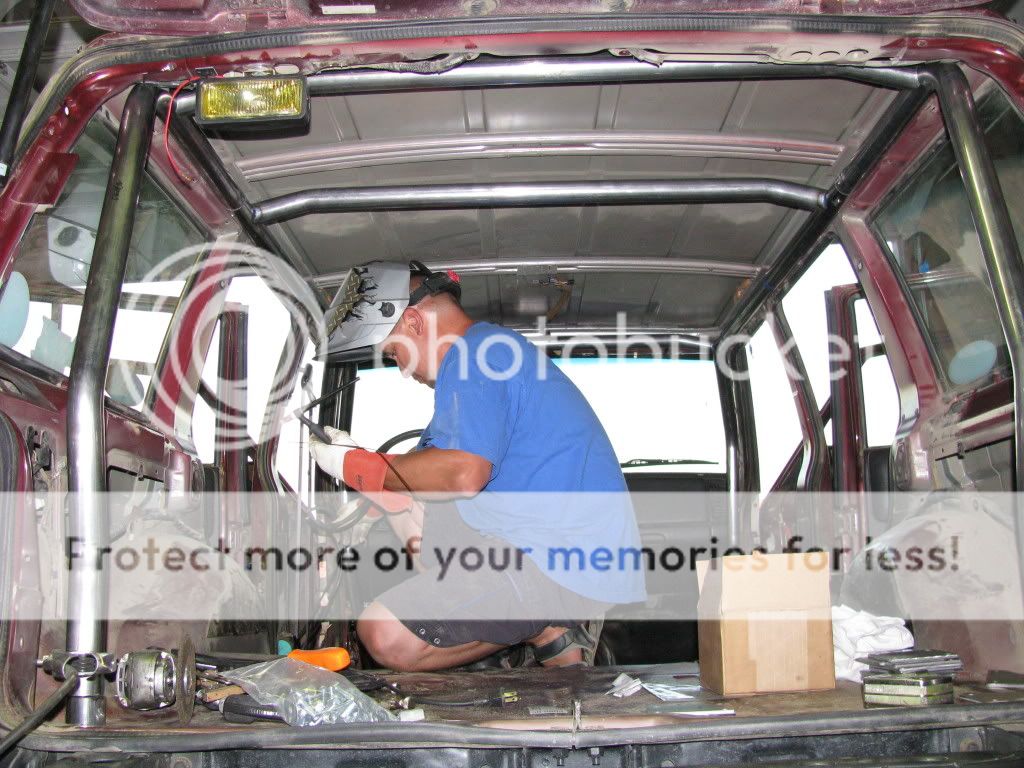
So I found out I had a cracked head today, so it was time to park the Jeep. To put me in a better mood, I used the repo truck and towed it over to my buddy's house and we worked on the cage! We decided to get it to tuck as much as possible, we'll remove all the interior. I'll end up carpeting or using tweed on my roof, and rhino lining the floor. Aluminum door panels are also on the list (oh daaaaaaaaaaan) Here are some pictures of the mock up.


IMG_0936.jpg

IMG_0945.jpg

IMG_0947.jpg


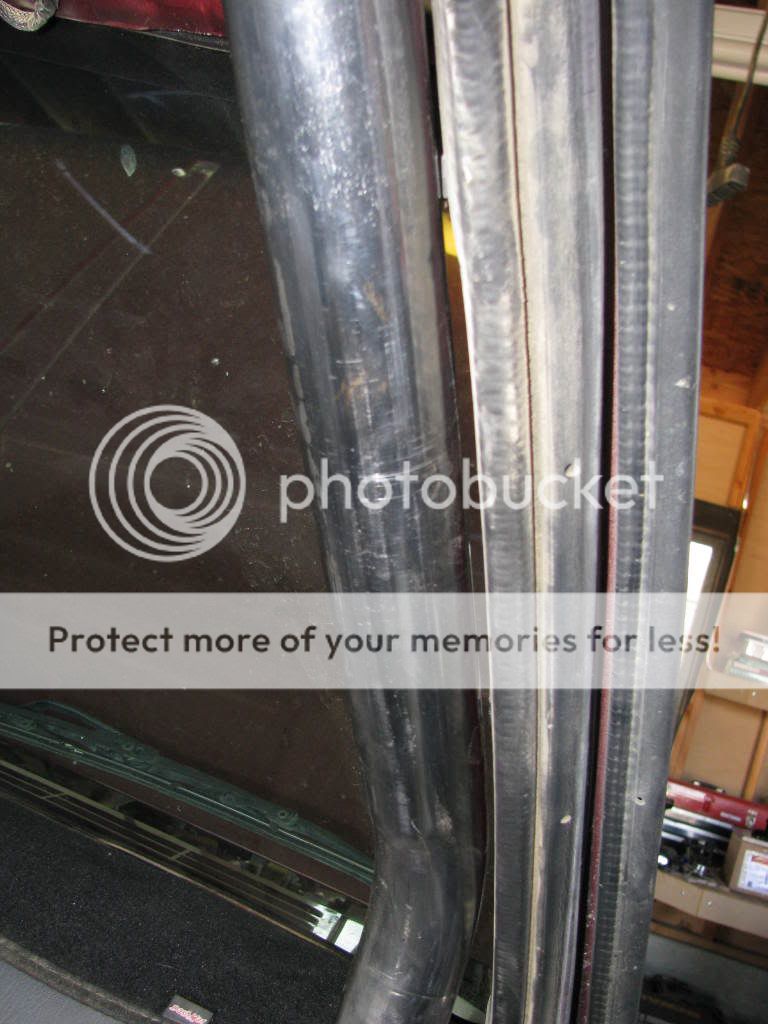
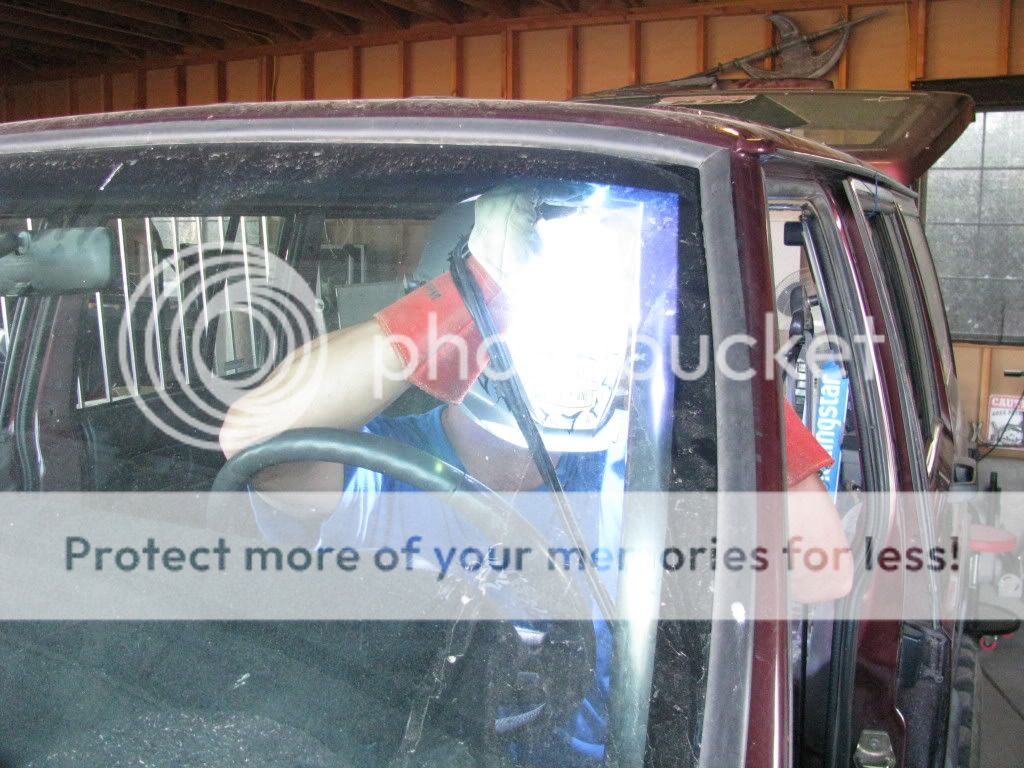
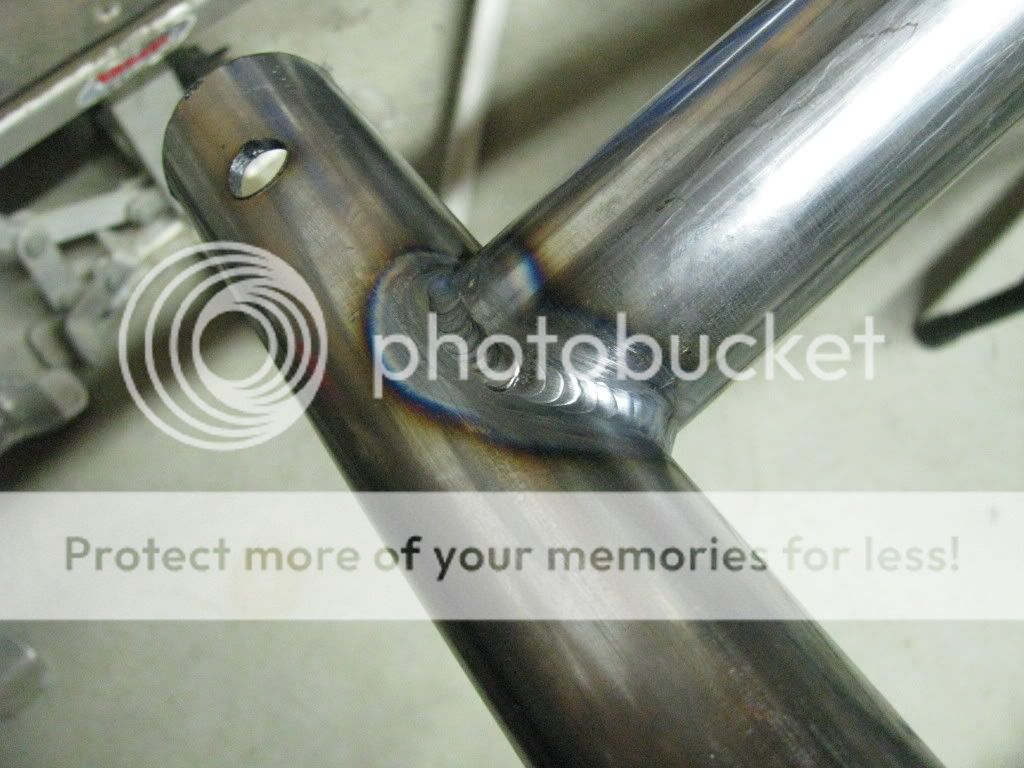
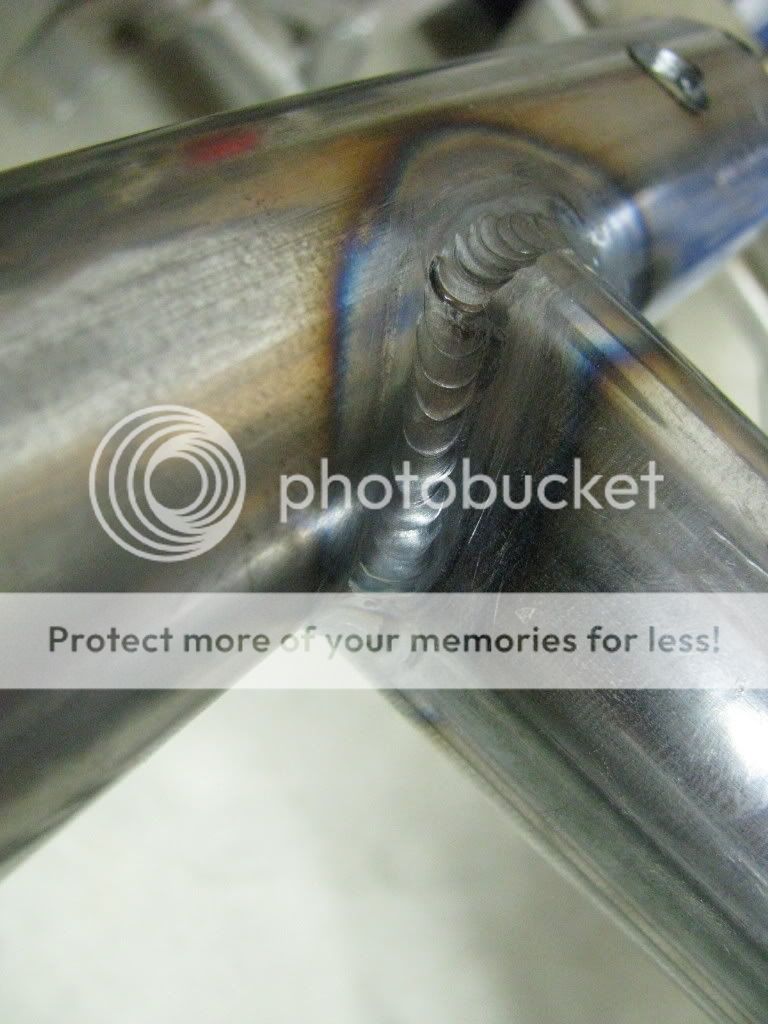
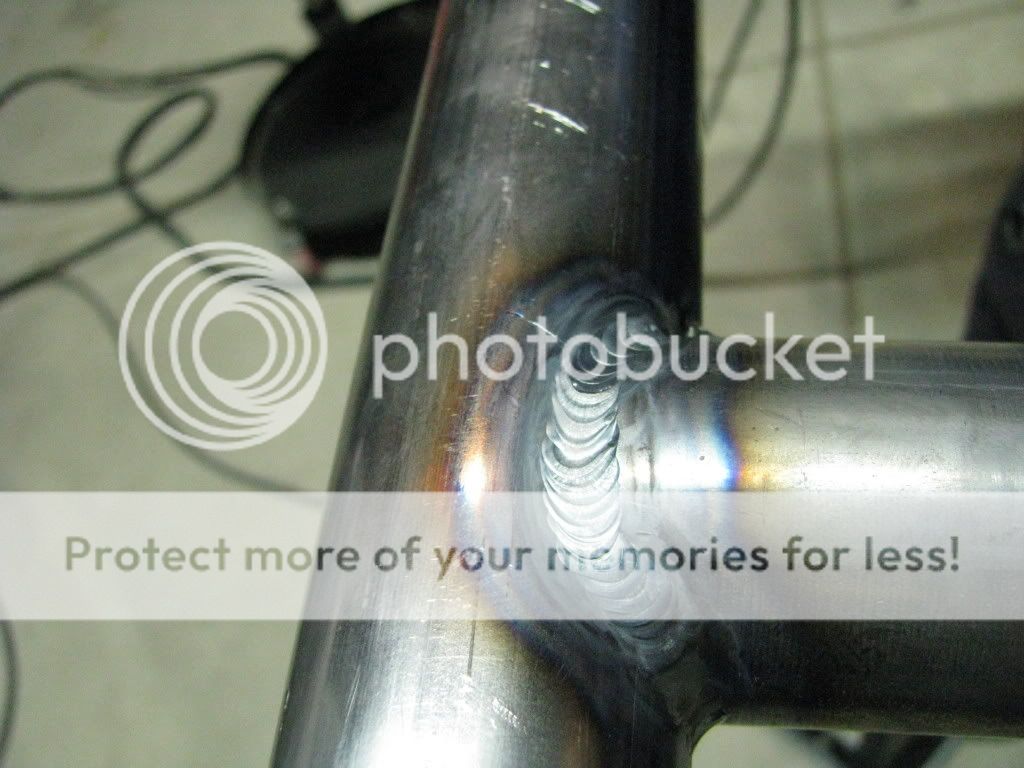
This is Lee's idea of a tack weld :laugh: Good thing we checked it over 50 times before laying a single bead. I swear I adjusted for over an hour to get it perfect before I finally just said eff it let's do it.


IMG_0950.jpg

IMG_0954.jpg


We started by slipping the A-pillar bars into the D-pillar bars, and letting them rest, we had to trim about 2 inches or so off, as Tom had already told me the newer style dash takes up more room. We used those ends to raise the back of the cage up higher. We're going to sleeve it later, but they made it perfect for mock up.

IMG_0958.jpg


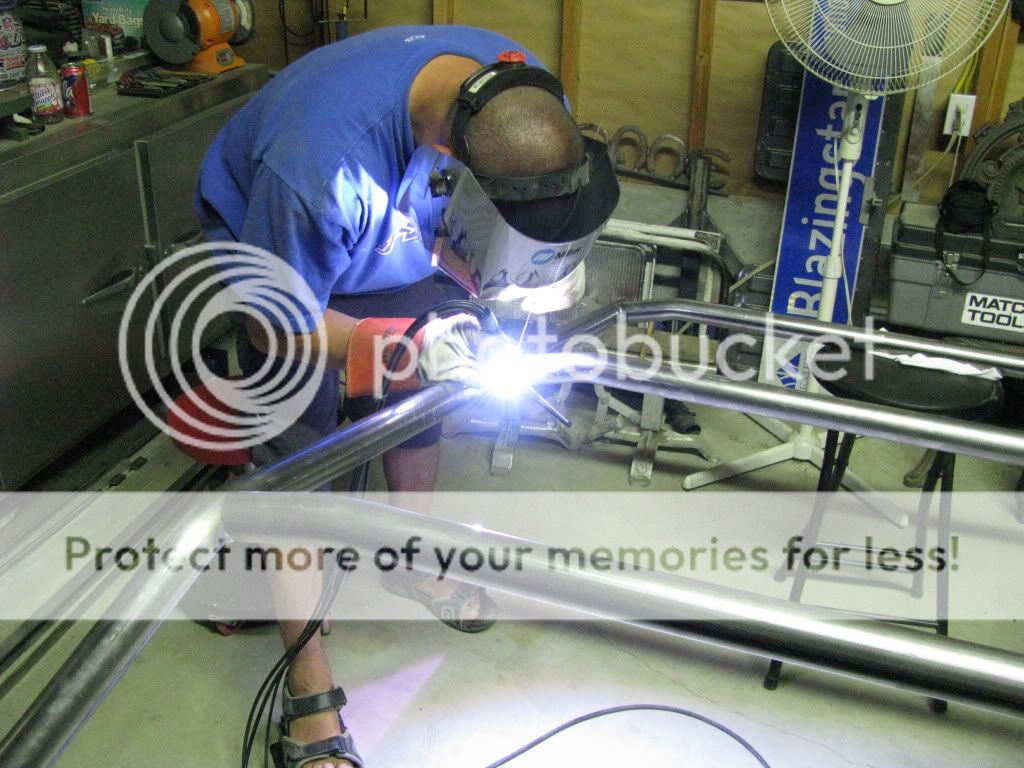
Now... here's the important part. It's VERY important to me to get a good 360 degree weld around all points, this is a huge problem with a lot of cage builders, they just half ass it and leave the top unwelded. If you have a well tucked cage, like this one, it'll be near impossible to weld around IMO. So the bitchin' part is that singe T&J designed these to sleeve into each other, we were able to get the spreader bars all tacked in, then remove the D-pillar and remove the entire front end of the cage. Mind you we don't have any down bars yet, just the spreaders to get full welds. Also keep in mind I have no interior left, you won't be able to do this if you weld it in with a full interior.


IMG_0960.jpg

IMG_0963.jpg

IMG_0966.jpg


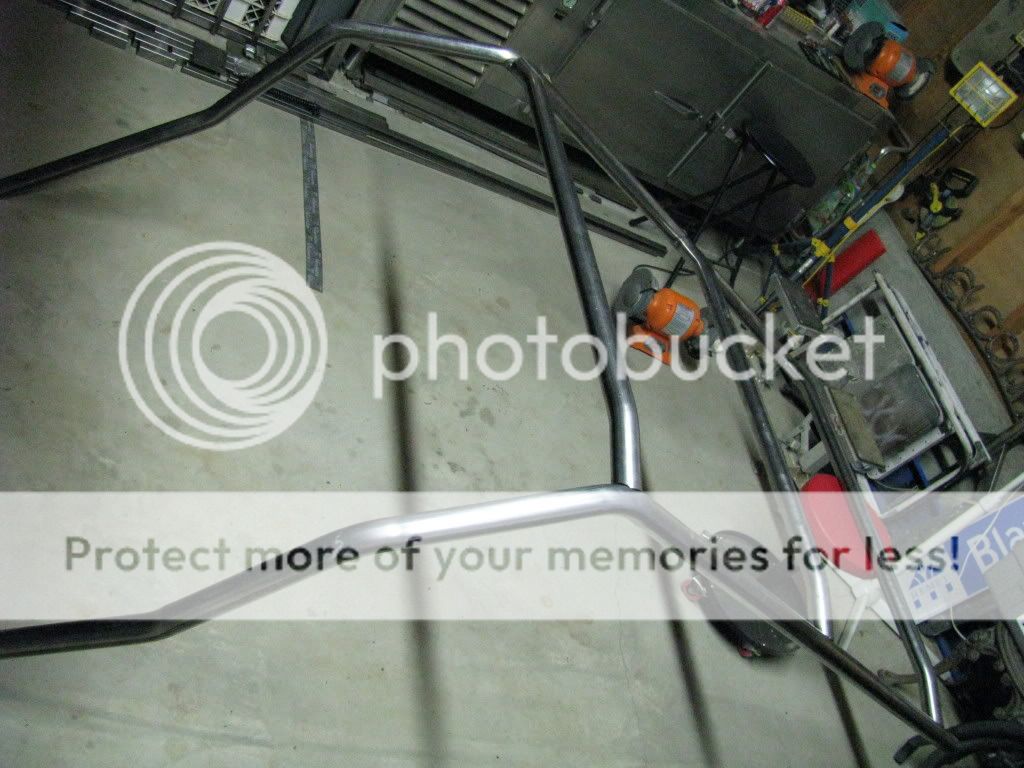
Ohhhhh yeaaaa tig welded cage :D


IMG_0967.jpg

IMG_0971.jpg

IMG_0977.jpg
 
IMG_0978.jpg


I thought this one was kinda artsy


IMG_0986.jpg


Filling a gap that was there, I think it turned out nicely!


IMG_0993.jpg


And here's where we left off!


IMG_0997.jpg


Again, I'm extremely impressed with how well this cage is going together, I was worried without interior it would be sloppy looking, but I was wrong, it still fits nice and tight. I also will be running no door panels, to get the cage away from my size 15 feet. :banghead:
 
Back
Top