Dozer11B
NAXJA Forum User
- Location
- Ft Polk, LA
This was my first major wiring job so if I "over-did" anything or took the long way around just let me know so other folks reading this might learn as well as meself for the future.
This was also my first attempt at drawing a wiring diagram...
So a little background:
When I bought the Wartoad MKII it came with 4 over-head Hellas wired to 2 switches with a single inline fuse. The wires were run under the window seal on each side and I wasn't too excited about it, but they worked so I didn't mess with them.
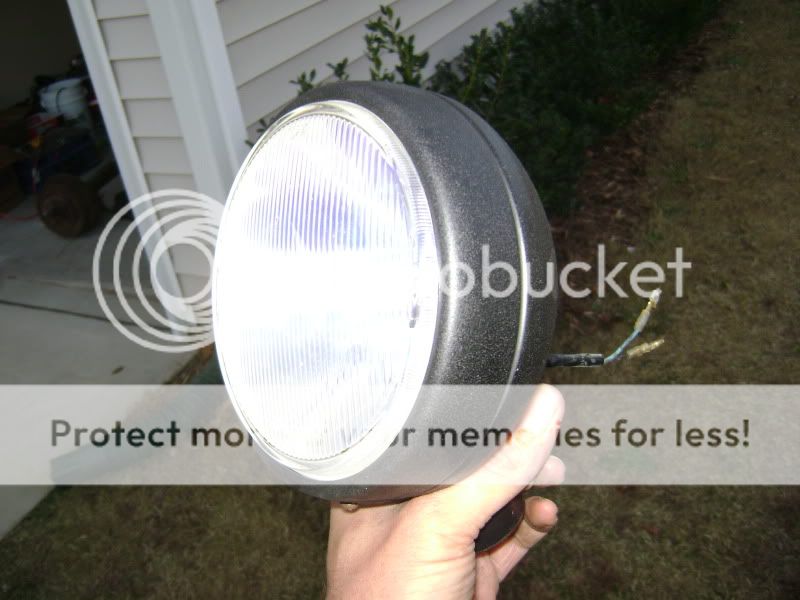
When I started this project I was just adding 2 jy SRB lights I pulled off of a TJ or YJ. Since installing my tail light housings I lost my reverse lights and this would be my answer if the cops came-a-knockin'. After sanding all the rust off, I primered and painted them with bedliner to get this:
I mounted them to the rear of my roofrack with an old 60's Triumph motorcycle fender brace I chopped and bent up. The mounts will be re-worked since the lights vibrate a lot on them. I may move them inboard as well since my 102" longwhip hits the left one sometimes...
OK, so on to the wiring portion. I didn't want to have a bunch of random switches everywhere so that I would be looking for them so I went with this panel to keep everything centrally located:
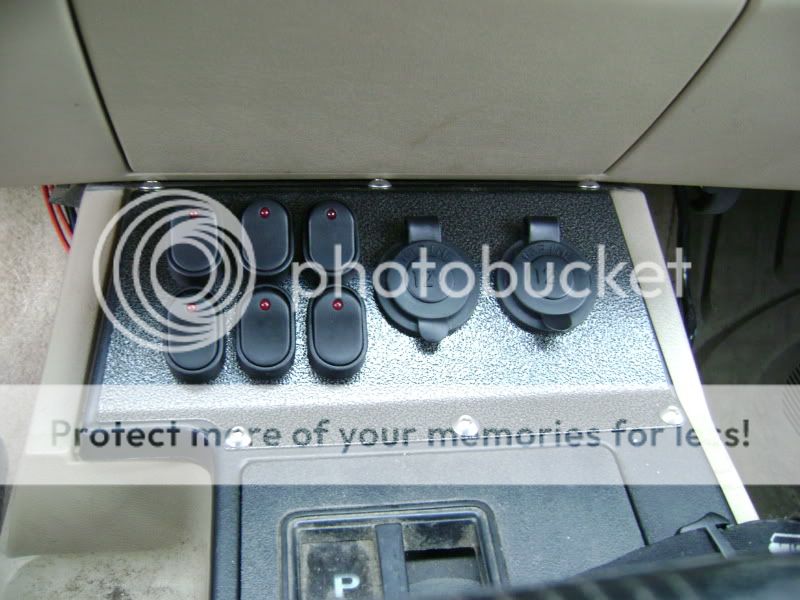
I got it from this guy: http://www.prime4x4.com/shop/Switch--Control-Panels.htm. The switches are rated at 30amps each and the 12v receptacles are rated at 10amps each. The panel comes with the bottom right switch wired to power the 12v receptacles, but you can rewire it. The switches are two-way (on/off), three prong LED toggles- ground, accessory/load, and 12v supply.
BTW: Bruce, the guy who builds it was really quick to answer all my questions and he wired the panel up with good connectors and heatshrink. I was really happy with it.
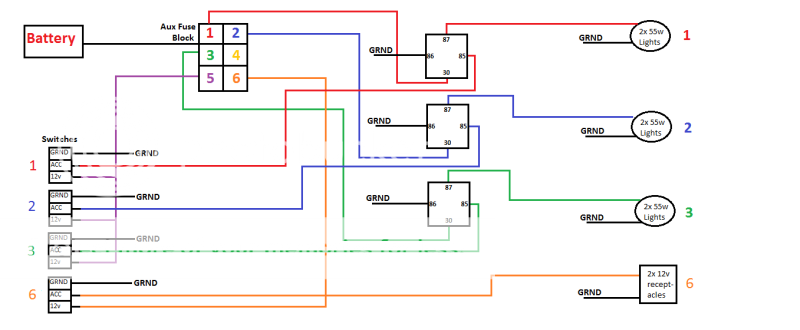
I started at the battery with one 10ga wire running to my auxillary fuse block:
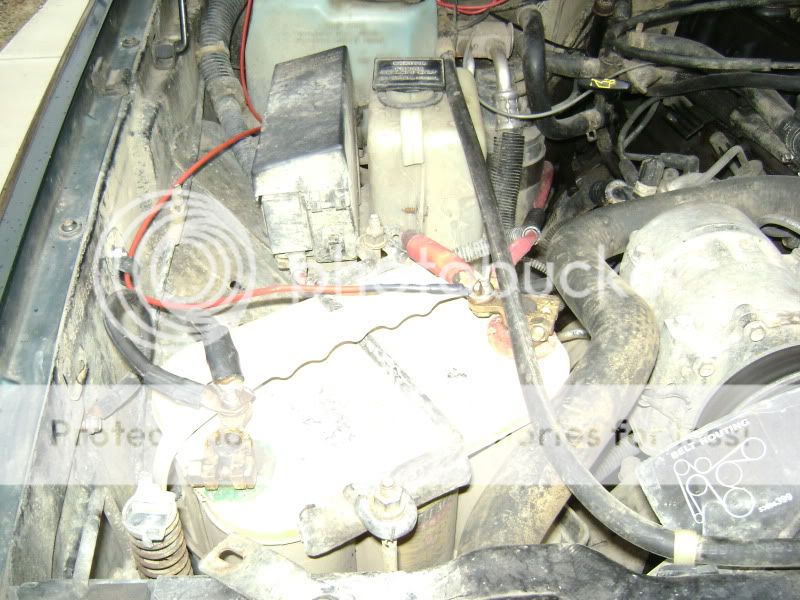
The fuse block has 6 slots for fuses. For simplicity I numbered the fuse block and switch panel from left to right 1-6. Slots #1-3 take 20amp fuses for the lights, slot #5 takes a 5amp fuse for the switches themselves, slot #6 takes a 10amp fuse for the 12v receptacles. The relays are also numbered 1-3, left to right.
Fuse Block:

After reading this: http://www.stu-offroad.com/electrical/elec1/wire-1.htm, I tried to use 10ga wire as much as possible under the hood... Maybe overkill.
The lines from fuse block go to pin 30 on the corresponding relay using 10ga wire. I "fabbed" up a panel to hold my relays:
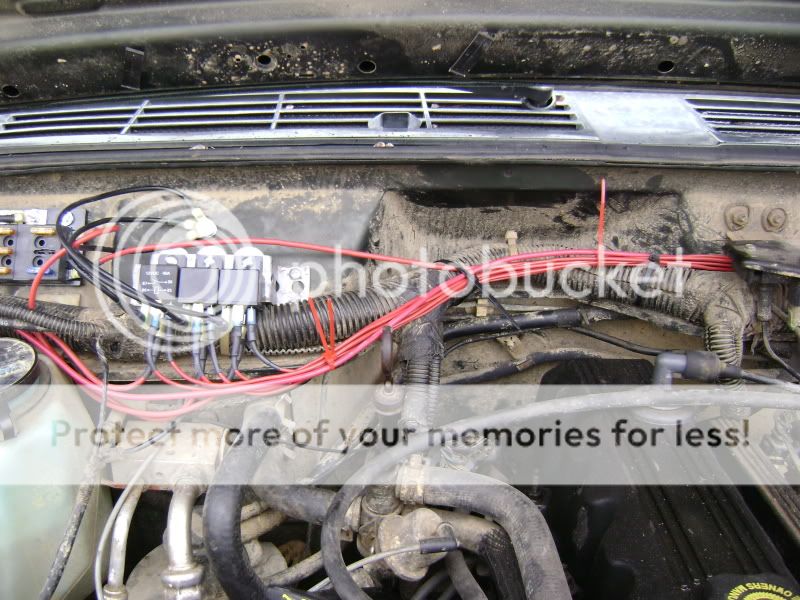
Pin 86 goes to ground just above the relay panel using 10ga wire.
Pin 87 goes to the lights. Front 4 lights are 14ga wire, back-up lights are 16ga (I ran out of 14ga, I will upgrade in the future)
Pin 85 goes to the accessory prong on the corresponding toggle switch using 14ga wire.
All wires going through the firewall go through the existing hole for the hood release cable. I cut the existing rubber grommet out so that I could re-use it. I wish I would have taken a pic, but it was dark and I was in a rush. Basicallly I slit it all the way down the side, cut the "cone" portion off and with a razor I took material out of the inner diameter to accept the wire bundle and hood cable.

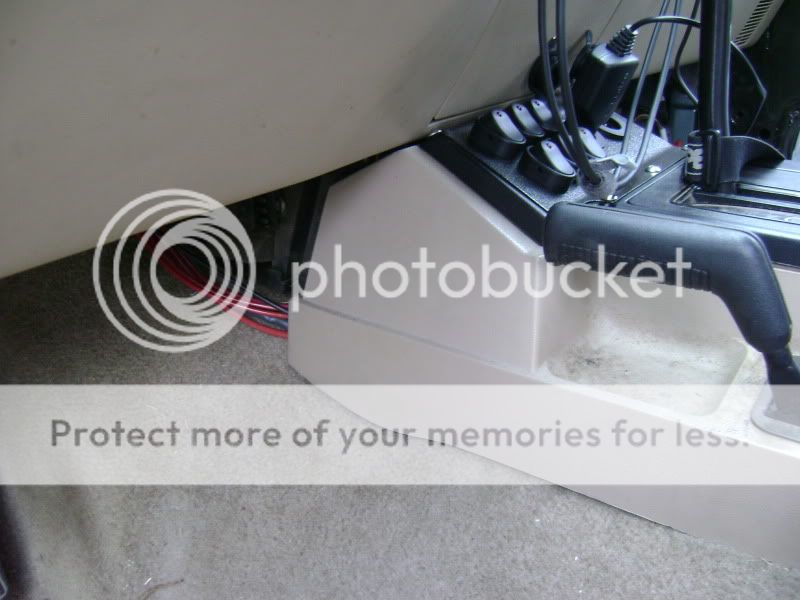
All wires going to the switch panel are routed under the dash to the center console:
For the switches:
The ground prongs are all wired and spliced to one 14ga wire going to ground under the on the driver's side.
The accessory/load prongs go to pin 85 on the corresponding relay
The 12v supply prongs are spliced and go to a single line to fuse block slot #5. From the switches it is 14ga and jumps to 10ga under the hood.
The 12v receptacles come pre-wired to switch #6 with a 14ga lead that I jumped to 10ga under the hood and I ran it to fuse block slot #6.
All wires going to the lights are routed along driver's side A-panel.

The wires for the four front lights go through two holes over the driver's head. I tapped the holes with black primer and used a rubber grommet in the holes and sealed them around the wires from the top with polyurethane roofing caulk from Lowe's. I could have fit both wires through one hole, but I was feeling froggy with the drill for some reason. Plus I think it simplified the top a bit with the conduit.

The wire to the back-up lights continued to the rear of the jeep and it's own hole. I used a couple of rubber lined "wire eyelets" and some self tapping screws to keep it up and out of the way. Hopefully if anyone rides in the back (all passengers must show proof of recent tetanus shot to ride in my junk), they will use the provided marine grab handle and not my wiring in off-camber situations...
I finished off the wiring up top with black counduit and zip ties. The conduit is cheap and adds a real professional appearance to the job.
Front lights:

Back-ups:

Switch #1:

Switch #2:

Switch #3

Like I said, I only planned on wiring up the back lights, but ended up getting a little carried away and re-did everything. Eventually I will upgrade my aux fuse box and relay panel to this:
http://wagongear.com/WiredWagon_files/6062RelayBlock_1.JPG
It's $110 shipped, has 5 micro-relays and 10 fuses inside a waterproof Bussman box.
Time invested: approx 8 hours a day for for all four days of MLK weekend, plus about half of that following tuesday cleaning up some wiring up top up and running the conduit.
I spent probably around $200 on all wiring, connections, heat shrink, a mini-torch that sucked after my heat gun failed, a new heat gun, relays, fuses, terminals and everything else. Oh yeah, plus the switch panel.
So there it is, I think I covered everything. If anyone has any questions, suggestions or what-not let me know.
This was also my first attempt at drawing a wiring diagram...
So a little background:
When I bought the Wartoad MKII it came with 4 over-head Hellas wired to 2 switches with a single inline fuse. The wires were run under the window seal on each side and I wasn't too excited about it, but they worked so I didn't mess with them.
When I started this project I was just adding 2 jy SRB lights I pulled off of a TJ or YJ. Since installing my tail light housings I lost my reverse lights and this would be my answer if the cops came-a-knockin'. After sanding all the rust off, I primered and painted them with bedliner to get this:
I mounted them to the rear of my roofrack with an old 60's Triumph motorcycle fender brace I chopped and bent up. The mounts will be re-worked since the lights vibrate a lot on them. I may move them inboard as well since my 102" longwhip hits the left one sometimes...
OK, so on to the wiring portion. I didn't want to have a bunch of random switches everywhere so that I would be looking for them so I went with this panel to keep everything centrally located:
I got it from this guy: http://www.prime4x4.com/shop/Switch--Control-Panels.htm. The switches are rated at 30amps each and the 12v receptacles are rated at 10amps each. The panel comes with the bottom right switch wired to power the 12v receptacles, but you can rewire it. The switches are two-way (on/off), three prong LED toggles- ground, accessory/load, and 12v supply.
BTW: Bruce, the guy who builds it was really quick to answer all my questions and he wired the panel up with good connectors and heatshrink. I was really happy with it.
I started at the battery with one 10ga wire running to my auxillary fuse block:
The fuse block has 6 slots for fuses. For simplicity I numbered the fuse block and switch panel from left to right 1-6. Slots #1-3 take 20amp fuses for the lights, slot #5 takes a 5amp fuse for the switches themselves, slot #6 takes a 10amp fuse for the 12v receptacles. The relays are also numbered 1-3, left to right.
Fuse Block:
After reading this: http://www.stu-offroad.com/electrical/elec1/wire-1.htm, I tried to use 10ga wire as much as possible under the hood... Maybe overkill.
The lines from fuse block go to pin 30 on the corresponding relay using 10ga wire. I "fabbed" up a panel to hold my relays:
Pin 86 goes to ground just above the relay panel using 10ga wire.
Pin 87 goes to the lights. Front 4 lights are 14ga wire, back-up lights are 16ga (I ran out of 14ga, I will upgrade in the future)
Pin 85 goes to the accessory prong on the corresponding toggle switch using 14ga wire.
All wires going through the firewall go through the existing hole for the hood release cable. I cut the existing rubber grommet out so that I could re-use it. I wish I would have taken a pic, but it was dark and I was in a rush. Basicallly I slit it all the way down the side, cut the "cone" portion off and with a razor I took material out of the inner diameter to accept the wire bundle and hood cable.
All wires going to the switch panel are routed under the dash to the center console:
For the switches:
The ground prongs are all wired and spliced to one 14ga wire going to ground under the on the driver's side.
The accessory/load prongs go to pin 85 on the corresponding relay
The 12v supply prongs are spliced and go to a single line to fuse block slot #5. From the switches it is 14ga and jumps to 10ga under the hood.
The 12v receptacles come pre-wired to switch #6 with a 14ga lead that I jumped to 10ga under the hood and I ran it to fuse block slot #6.
All wires going to the lights are routed along driver's side A-panel.
The wires for the four front lights go through two holes over the driver's head. I tapped the holes with black primer and used a rubber grommet in the holes and sealed them around the wires from the top with polyurethane roofing caulk from Lowe's. I could have fit both wires through one hole, but I was feeling froggy with the drill for some reason. Plus I think it simplified the top a bit with the conduit.
The wire to the back-up lights continued to the rear of the jeep and it's own hole. I used a couple of rubber lined "wire eyelets" and some self tapping screws to keep it up and out of the way. Hopefully if anyone rides in the back (all passengers must show proof of recent tetanus shot to ride in my junk), they will use the provided marine grab handle and not my wiring in off-camber situations...
I finished off the wiring up top with black counduit and zip ties. The conduit is cheap and adds a real professional appearance to the job.
Front lights:
Back-ups:
Switch #1:
Switch #2:
Switch #3
Like I said, I only planned on wiring up the back lights, but ended up getting a little carried away and re-did everything. Eventually I will upgrade my aux fuse box and relay panel to this:
http://wagongear.com/WiredWagon_files/6062RelayBlock_1.JPG
It's $110 shipped, has 5 micro-relays and 10 fuses inside a waterproof Bussman box.
Time invested: approx 8 hours a day for for all four days of MLK weekend, plus about half of that following tuesday cleaning up some wiring up top up and running the conduit.
I spent probably around $200 on all wiring, connections, heat shrink, a mini-torch that sucked after my heat gun failed, a new heat gun, relays, fuses, terminals and everything else. Oh yeah, plus the switch panel.
So there it is, I think I covered everything. If anyone has any questions, suggestions or what-not let me know.
Last edited:
 sponsors/vendors carries the same thing but less expensive. Take a look. There are also plenty of goodies on the site.
 uke:
uke: