- Location
- Southern Maryland
I bought a custom DirtBound Offroad Mojave Tire Carrier in April, received it in July, and finished the install this weekend. I wanted to write up the process and thought I should put it here for people who are thinking about getting one. Installation was fairly difficult but overall its a nice kit, and I have no real complaints with it.
The main reason I chose this bumper is because I want to have a ladder / bicycle rack on the bumper, next to the tire carrier. I prefer having the tire on the driver side (like stock) so that it doesn't block my view of the passenger lane, but most of the rear bumpers either have their tire carrier in the middle or are offset on the passenger side. The Mojave can be ordered with the tire on the drivers side already, and Max was willing to add a second arm, so pretty much golden setup. Plus I like the look of the bumper, so it was nice to be able to get it.
First step was to remove the gas skid, hitch, and stock bumper

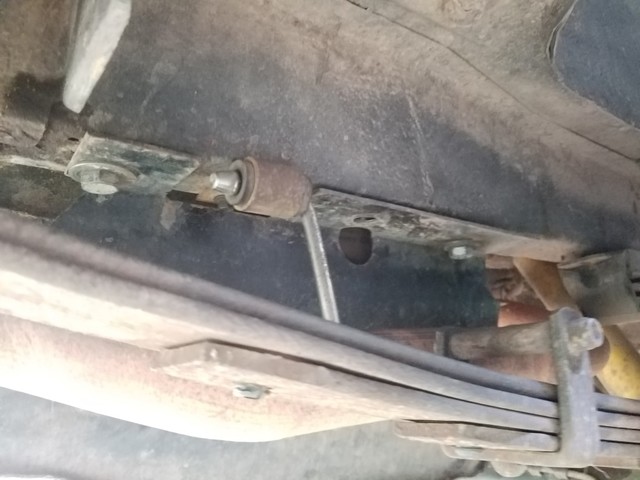
Next was to open up the rear frame to accept the square tube tie-in brackets

The tie-in brackets have nuts welded in so they can act like nutstrips, however the positioning was a little off from stock and I had to enlarge the holes with a step bit. The brackets also did not have the far forward weld-nut that is needed for the gas skid, so I ordered a couple of TJ belly-skid nutserts from Black Magic Brakes and drilled new holes for them. You can see the nutsert bolt at the front of this pic, as well as the missing bolt in the center.
The gas skid was reinstalled and I started fitting the main bumper. In my case the bumper was just barely touching the body on the passenger side, enough to prevent the holes in the bumper from lining up with the tie-in brackets. I cut off 1/2" on each of the sides, since that was the size of the bolt holes. This left a little gap on the sides, which is covered up by the quarterpanel guards.

Another issue I ran into here was the hatch rubbing on the bumper when it was closed. In order to get around that problem, I pushed the bumper down as far as it would go, and then added 2 more shims to each of the hatch hinges. Now it doesn't rub, although the hatch sits a little high on the sides of the body.
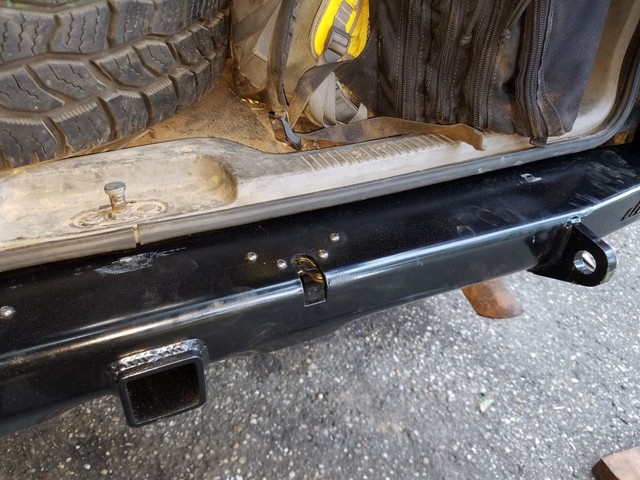
Bumper and swing arms installed

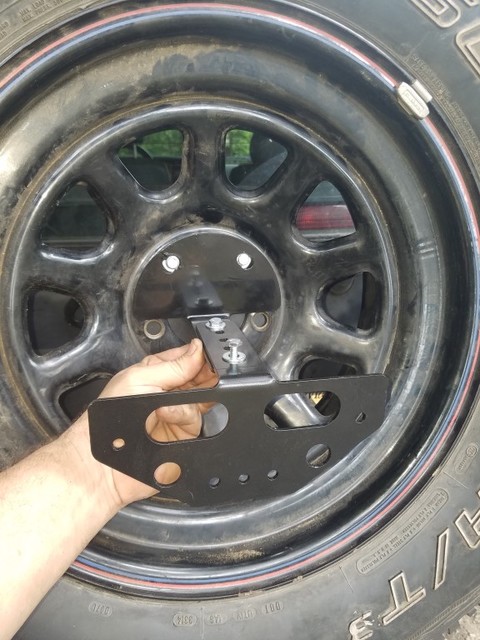
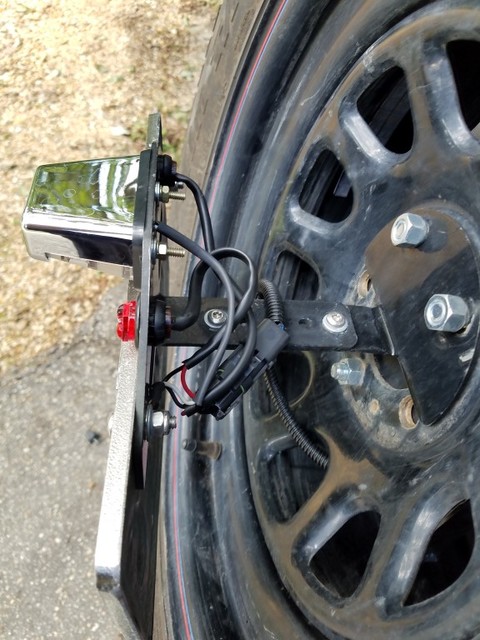
The kit included a license plate bracket that mounts to the tire ...
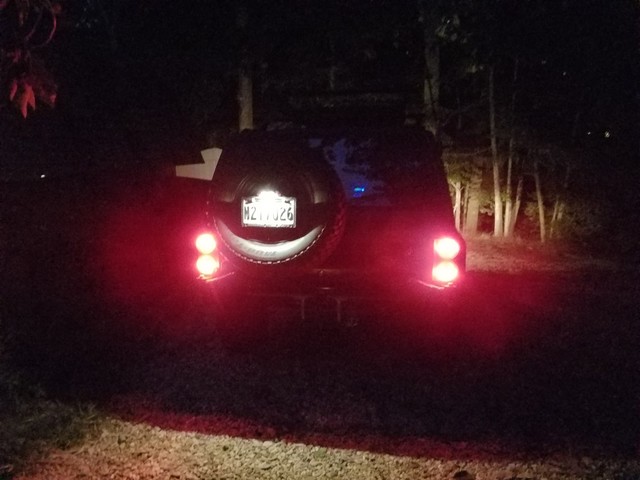
... but did not include the lights. For those I bought a license plate light at Autozone, and a pair of 3/4" red LEDs from Amazon, and ran the wiring under the tail-light and up the arm.
Lastly, I cut the quarterpanel armor to fit my Napier v2 flares, and bolted them to the body while the interior panels were out for the wiring. You can also see the pull-straps I installed for the bear claws

Then I made my final adjustments to the position and angle of the bumper to match the lines on the quarterpanel armor

(before last alignment)
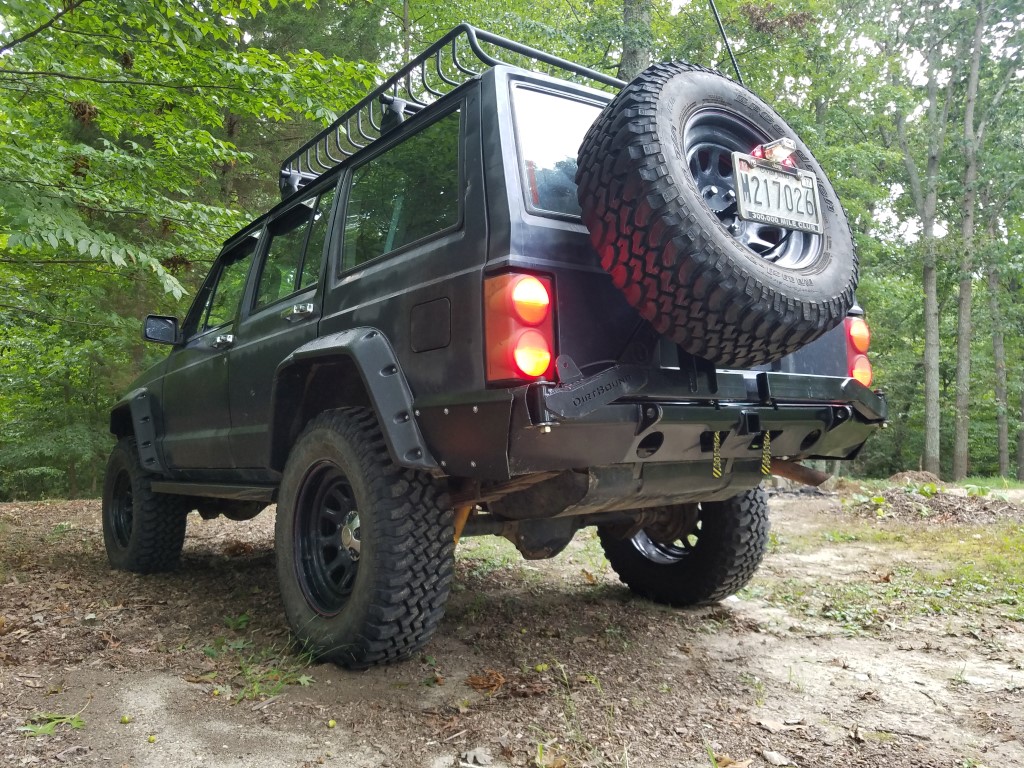

A lot of work, but overall very happy with it. The lines are great, and it gives a ton of clearance in the back. It also let me move my spare out of the cargo area, so I can start camping in the jeep. And it will let me build a ladder on the other arm, which I can use for carrying more gear or for getting on the roof.
The main reason I chose this bumper is because I want to have a ladder / bicycle rack on the bumper, next to the tire carrier. I prefer having the tire on the driver side (like stock) so that it doesn't block my view of the passenger lane, but most of the rear bumpers either have their tire carrier in the middle or are offset on the passenger side. The Mojave can be ordered with the tire on the drivers side already, and Max was willing to add a second arm, so pretty much golden setup. Plus I like the look of the bumper, so it was nice to be able to get it.
First step was to remove the gas skid, hitch, and stock bumper
Next was to open up the rear frame to accept the square tube tie-in brackets
The tie-in brackets have nuts welded in so they can act like nutstrips, however the positioning was a little off from stock and I had to enlarge the holes with a step bit. The brackets also did not have the far forward weld-nut that is needed for the gas skid, so I ordered a couple of TJ belly-skid nutserts from Black Magic Brakes and drilled new holes for them. You can see the nutsert bolt at the front of this pic, as well as the missing bolt in the center.
The gas skid was reinstalled and I started fitting the main bumper. In my case the bumper was just barely touching the body on the passenger side, enough to prevent the holes in the bumper from lining up with the tie-in brackets. I cut off 1/2" on each of the sides, since that was the size of the bolt holes. This left a little gap on the sides, which is covered up by the quarterpanel guards.
Another issue I ran into here was the hatch rubbing on the bumper when it was closed. In order to get around that problem, I pushed the bumper down as far as it would go, and then added 2 more shims to each of the hatch hinges. Now it doesn't rub, although the hatch sits a little high on the sides of the body.
Bumper and swing arms installed
The kit included a license plate bracket that mounts to the tire ...
... but did not include the lights. For those I bought a license plate light at Autozone, and a pair of 3/4" red LEDs from Amazon, and ran the wiring under the tail-light and up the arm.
Lastly, I cut the quarterpanel armor to fit my Napier v2 flares, and bolted them to the body while the interior panels were out for the wiring. You can also see the pull-straps I installed for the bear claws
Then I made my final adjustments to the position and angle of the bumper to match the lines on the quarterpanel armor
(before last alignment)
A lot of work, but overall very happy with it. The lines are great, and it gives a ton of clearance in the back. It also let me move my spare out of the cargo area, so I can start camping in the jeep. And it will let me build a ladder on the other arm, which I can use for carrying more gear or for getting on the roof.
Last edited:
 arty:
arty:
