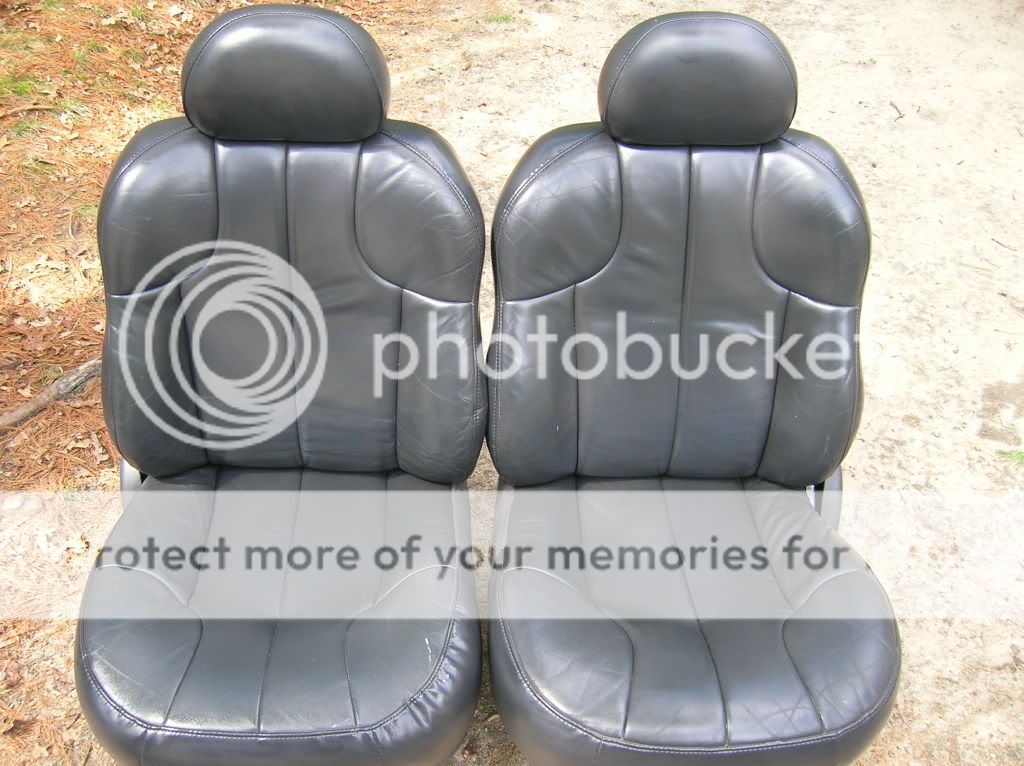
So after searching Jeepforum and  for a write up on a 2 Door seat swap I came up with nothing, but when looking through the classifieds noticed that someone was selling WJ seats that they converted to manual and flip forward for their 2 Door. I PMed him and asked how he did and he helped me out so I decided to do it myself. Found some nice leather seats out of a 1999 WJ for $25 each at the JY and was on my way to doing the conversion myself. Since I had trouble finding a write-up on this I decided to do one. This will only work with the 2 door seats that have the flip forward on the bottom back of the seat back. Not the earlier ones with the lift handle at the top side of the seat. I hope this helps all those 2 Door guys out there who desperately want to swap their seats for some ZJ or WJ Grand seats but haven’t done it yet because of the no flip.
Now there are plenty of write-ups on ZJ/WJ seat swaps and this is ideally the same. The XJ seat tracks will be reused and the seats from the ZJ/WJ will bolt directly to them. So before starting on the side brackets of the seat, unbolt both the XJ and ZJ/WJ seats from their seat tracks and swap them accordingly with the four bolts that are underneath the seat cushion. Then move on to the next step of making your new ZJ/WJ seats flip forward for your two door.
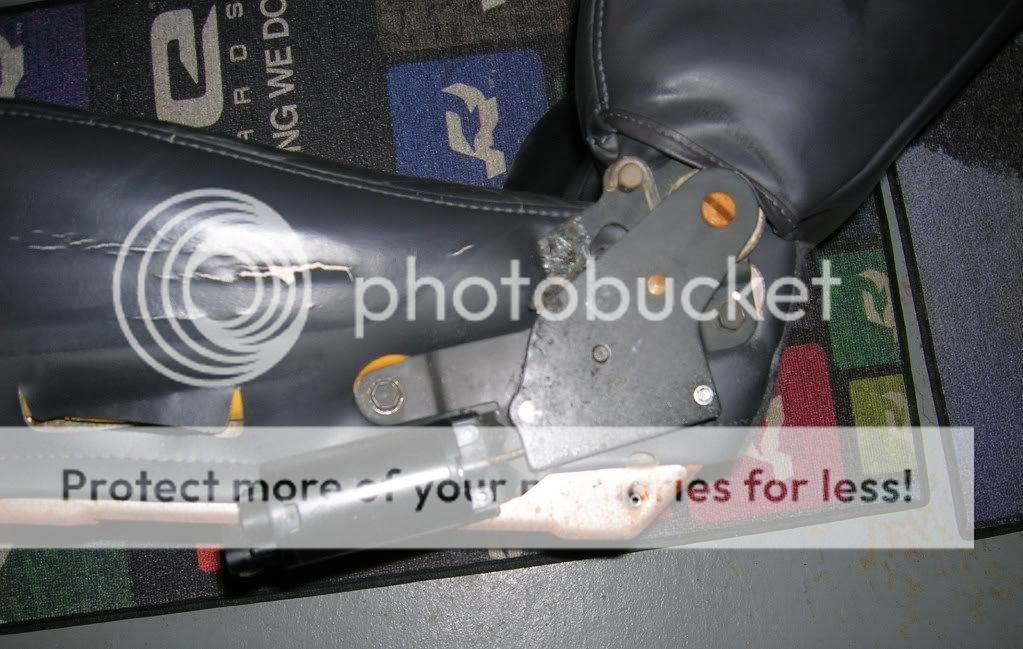
Step 1: First take the plastic trim piece off that has the power switches and disconnect all the harnesses so you are left with the side seat bracket on the side the seat with the 2 bottom bolts exposed that are bolted to the seat frame.
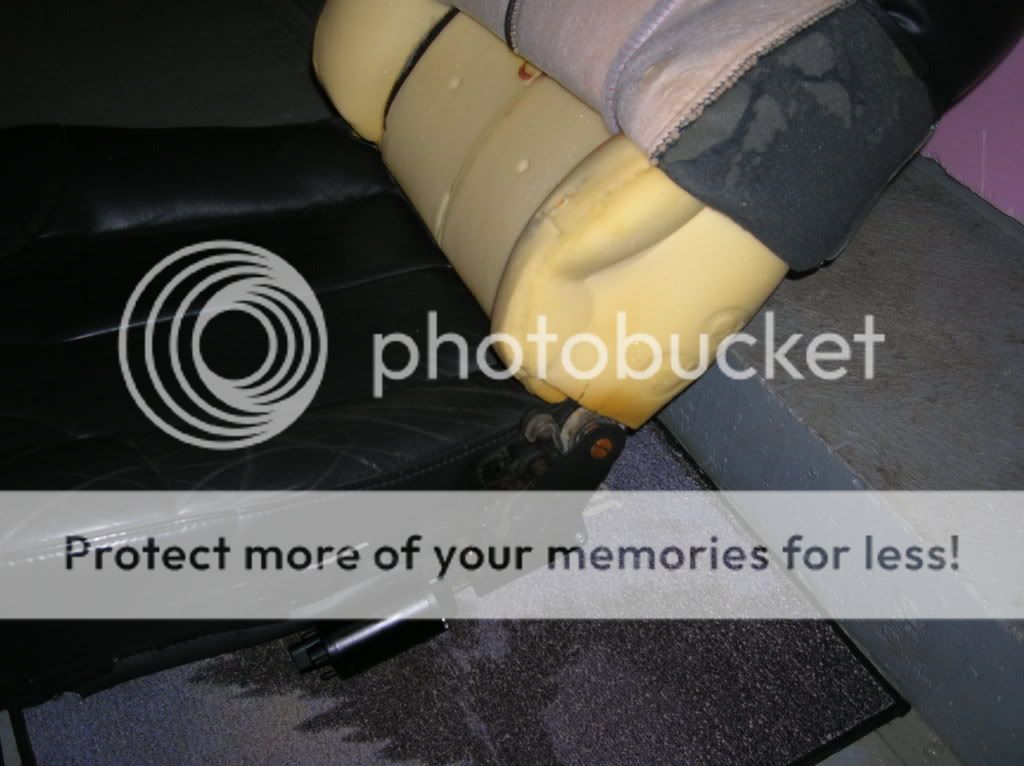
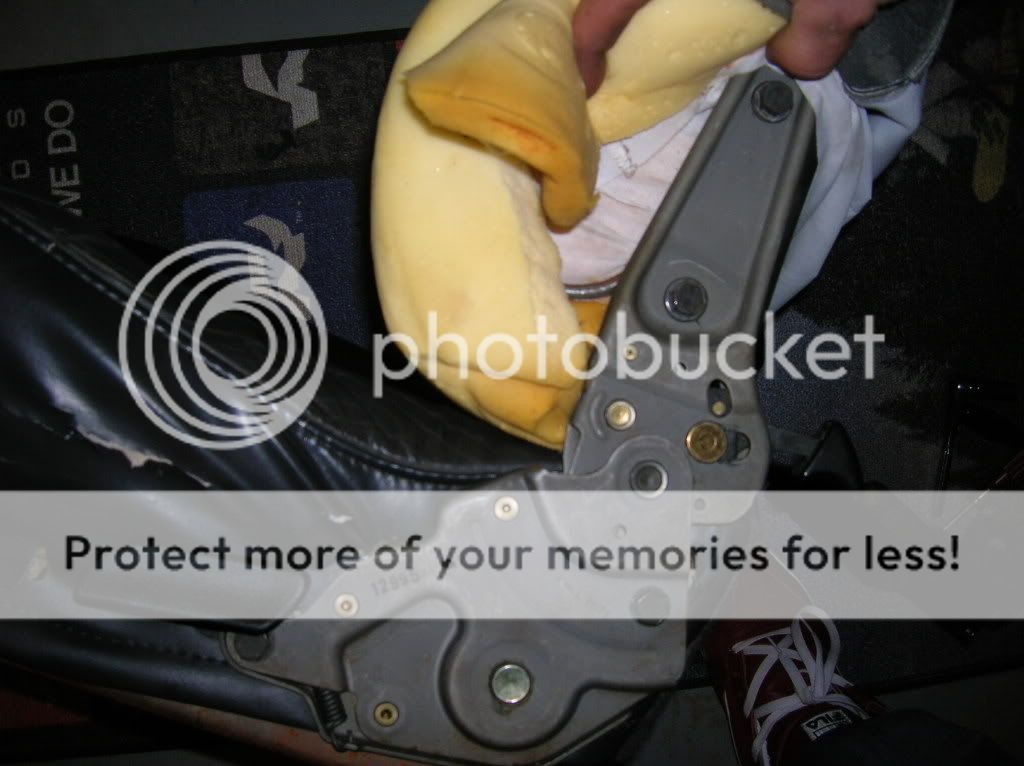
Step 2: Next you are going to have to unclip the seat cover on the seat back and carefully fold the seat cover up so as to expose the two top bolts that bolt to the side of the seat back. Once you have done this you will have the entire side bracket showing with all four bolts exposed that are needed to remove the bracket.

 Step
Step
3: Proceed to unbolt these four bolts with a 13mm socket and the side bracket will be completely removed.
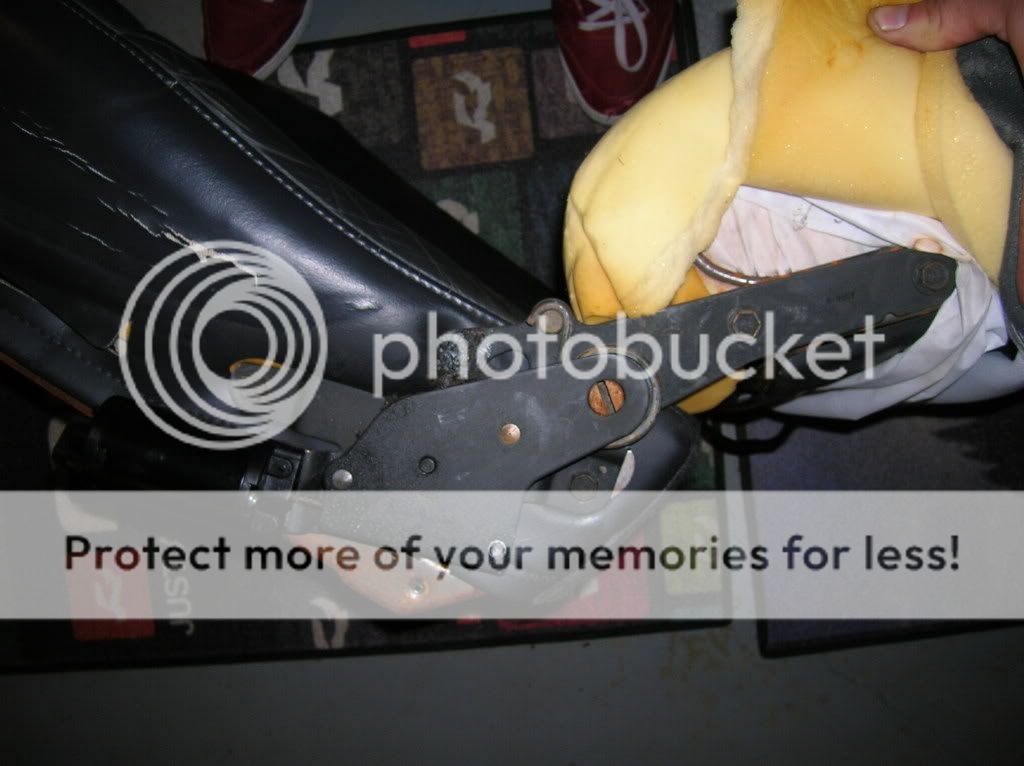

*NOTE: The bolt closest to the rear of the seat bottom may be covered by part of the bracket. If the is the case you can use a small screwdriver and stick it in the end of the recline motor to turn it. It doesn’t seem like it is moving at first but keep going and you will eventually be able to get that bolt exposed.
Step 4: Now repeat steps 1-3 on your old XJ seat to remove the side brackets needed to make your new seats flip forward like those old ghetto ones you just took out.

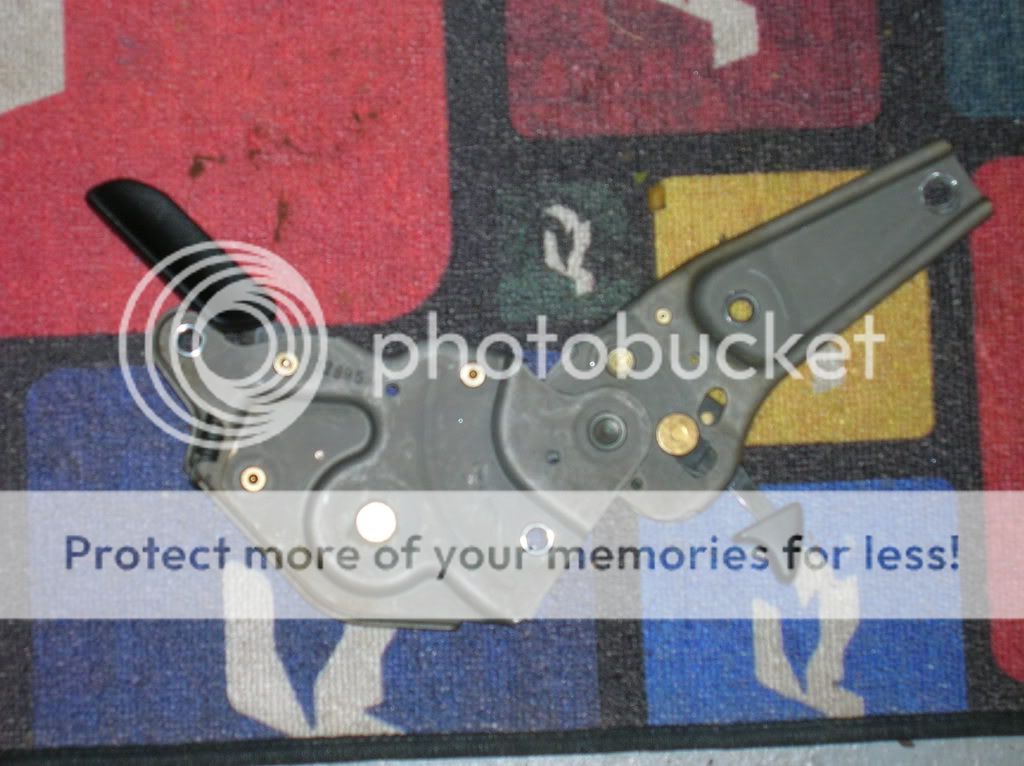
Step 5: Once all this has been completed you will have the side bracket from the XJ and your ZJ/WJ seat that it will bolt directly up to. The XJ bracket will appear that not all four holes line up to the WJ seat but look under the cover about a half inch under the front hole where the ZJ/WJ one bolted and there will be the hole that the XJ bracket uses. I bolted the bracket to the seat back first and then the seat bottom after.
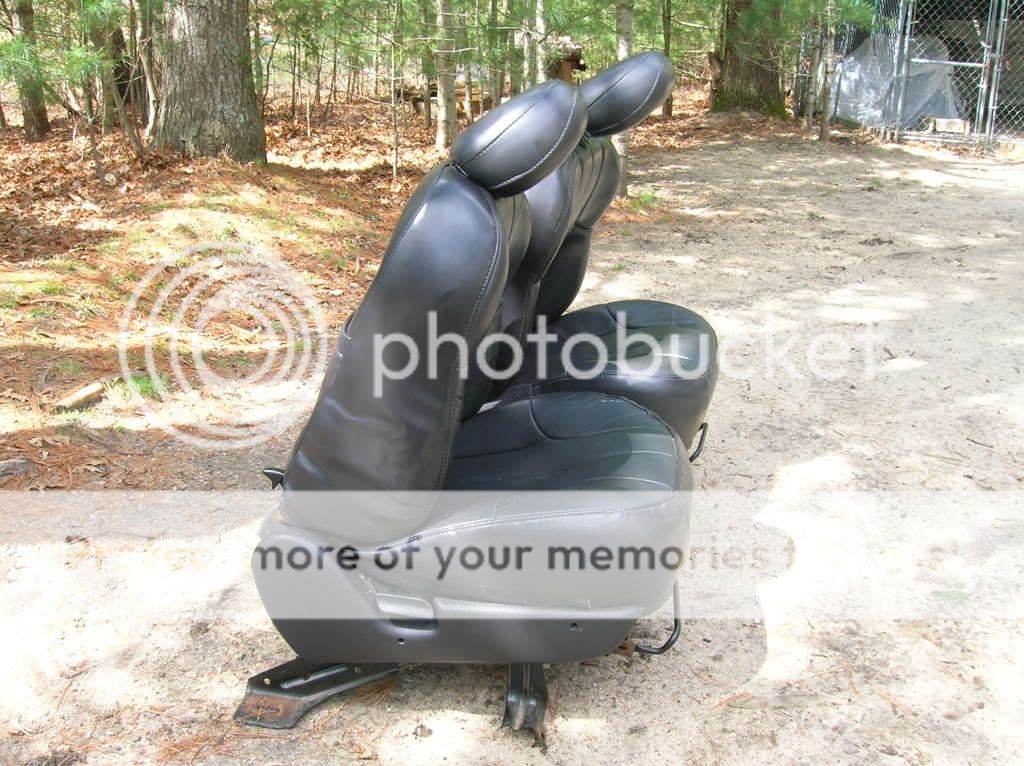
Step 6: Now that you have all four bolts tightened up check to make sure that it functions correctly. Mine had no problems at all and functioned exactly the same as it did with the original XJ seat. Now fold the seat cover back down and re-clip the cover back together on the seat back. The flip forward tab will be just below the cover on the back of the seat back and function completely normal. The guy that I PMed about this said he cut a hole to put the tab through but I did not see the need to. It looks factory just below the cover IMO.


Step 7: I got the plastic trip pieces from another WJ that had manual seat and used those instead of the ones that came with the power. There are three screws that have holes already there for the trim piece. Like step 5 there is an alternate hole that the manual seat trim uses. Look under the cover and you will see the hole.

Now Your DONE with One of them. Go repeat the process for the other seat and you will have some nice comfortable seats that look way better and perform like they came from the factory. A small piece of advice would be to do the passenger seat first in case you run into any problems. That way you will still be able to drive your XJ if something doesn’t go as planned. The total time for this swap was about 1 ½ - 2 hours. After you get that first one done the second one is cake. Hope this helps you guys out, Good luck.
for a write up on a 2 Door seat swap I came up with nothing, but when looking through the classifieds noticed that someone was selling WJ seats that they converted to manual and flip forward for their 2 Door. I PMed him and asked how he did and he helped me out so I decided to do it myself. Found some nice leather seats out of a 1999 WJ for $25 each at the JY and was on my way to doing the conversion myself. Since I had trouble finding a write-up on this I decided to do one. This will only work with the 2 door seats that have the flip forward on the bottom back of the seat back. Not the earlier ones with the lift handle at the top side of the seat. I hope this helps all those 2 Door guys out there who desperately want to swap their seats for some ZJ or WJ Grand seats but haven’t done it yet because of the no flip.Now there are plenty of write-ups on ZJ/WJ seat swaps and this is ideally the same. The XJ seat tracks will be reused and the seats from the ZJ/WJ will bolt directly to them. So before starting on the side brackets of the seat, unbolt both the XJ and ZJ/WJ seats from their seat tracks and swap them accordingly with the four bolts that are underneath the seat cushion. Then move on to the next step of making your new ZJ/WJ seats flip forward for your two door.
Step 1: First take the plastic trim piece off that has the power switches and disconnect all the harnesses so you are left with the side seat bracket on the side the seat with the 2 bottom bolts exposed that are bolted to the seat frame.
Step 2: Next you are going to have to unclip the seat cover on the seat back and carefully fold the seat cover up so as to expose the two top bolts that bolt to the side of the seat back. Once you have done this you will have the entire side bracket showing with all four bolts exposed that are needed to remove the bracket.
3: Proceed to unbolt these four bolts with a 13mm socket and the side bracket will be completely removed.
*NOTE: The bolt closest to the rear of the seat bottom may be covered by part of the bracket. If the is the case you can use a small screwdriver and stick it in the end of the recline motor to turn it. It doesn’t seem like it is moving at first but keep going and you will eventually be able to get that bolt exposed.
Step 4: Now repeat steps 1-3 on your old XJ seat to remove the side brackets needed to make your new seats flip forward like those old ghetto ones you just took out.
Step 5: Once all this has been completed you will have the side bracket from the XJ and your ZJ/WJ seat that it will bolt directly up to. The XJ bracket will appear that not all four holes line up to the WJ seat but look under the cover about a half inch under the front hole where the ZJ/WJ one bolted and there will be the hole that the XJ bracket uses. I bolted the bracket to the seat back first and then the seat bottom after.
Step 6: Now that you have all four bolts tightened up check to make sure that it functions correctly. Mine had no problems at all and functioned exactly the same as it did with the original XJ seat. Now fold the seat cover back down and re-clip the cover back together on the seat back. The flip forward tab will be just below the cover on the back of the seat back and function completely normal. The guy that I PMed about this said he cut a hole to put the tab through but I did not see the need to. It looks factory just below the cover IMO.
Step 7: I got the plastic trip pieces from another WJ that had manual seat and used those instead of the ones that came with the power. There are three screws that have holes already there for the trim piece. Like step 5 there is an alternate hole that the manual seat trim uses. Look under the cover and you will see the hole.
Now Your DONE with One of them. Go repeat the process for the other seat and you will have some nice comfortable seats that look way better and perform like they came from the factory. A small piece of advice would be to do the passenger seat first in case you run into any problems. That way you will still be able to drive your XJ if something doesn’t go as planned. The total time for this swap was about 1 ½ - 2 hours. After you get that first one done the second one is cake. Hope this helps you guys out, Good luck.