I agree with RCP Phx about having the entire block checked, at a block shop. To do that correctly, imho, there will be some tear down, and restoration of stuff by that shop, and the extra cost. This is so done in order to best to determine that you have not obtained a mystery engine with issues exacerbated by the conditions causing the blown head gasket in the first place, etc. Such a shop will insure all oil/coolant passage ways will be clear, and line-bore checked, etc.
1) Are you physically able?
2) Are you working indoors, or outdoors?
3) Do you have a good selection of mechanic tools?
4) Have time, and sufficient dinero?
I am not so perfectly able, and have replaced heads indoors, and out, i.e. of a few.., once in a blizzard, under a makeshift piece of tarp. Indoors is best, lol.
Typically one purchases a package of Plasti-gauge in order to check the rod bearings. Ask your shop what they did to check your rod bearings. Answer that for us. Details, details, details.
That said, many of us just go 'fer it. The job you are looking at is not too difficult, but you have to do everything correctly. Suggest you get a repair book. The common ones will share how to correctly cross-hatch the cylinder in question, (any cyl.), and how to ridge ream the top of it in order to send a rod/piston down into the hole. The problem with your #3 is that after miles the walls become glazed, but to expert, or non-expert eyes the glaze is there never-the-less. You must remove the glaze to ensure that the new rings marry the cylinder walls. As ANAK said; you can get that tool to utilize in a common electric hand drill. Follow the directions in a manual.., easyish. Thanks ANAK for the link!!!!!!
In replacing the rings to your rod/piston, just take it to a shop, along with the rod bearing cap, and let them do it. There are different ring sizes, blah, blah, and without special measuring tools it can be a bit confusing for most. However there are simple clues as to that subject, (like breaking rings to use as tools to clean out same channels as the old rings came from), but since you are not a mechanic, let a mechanic do it, i.e., to clean out the piston ring channels with proper tools, and to determine the correct size of a replacement set of rings for that piston, and their positioning for you. You can then install the completed unit. Be sure to protect crank shaft bearing surfaces with a rag when you knock down the rod/piston towards positioning, i.e., pull out the rag from below, pull the rod/piston down over surface, and install bearing rod cap. The bearing in the cap may be good, or not. Ask a mechanic what he/she thinks. Sorry, I digress, as a manual for your engine should explain all of that.
sflier is correct, but to qualify his statement a compression check is always mandatory. It appears you did not do that, and you can only do that once it's all together. But he, like many of us just go for it, but the major downside is if the check is bad, then sheesh you gotta do it all over. I think your draining of the oil test sez something. I'd be hard pressed to ignore that. Could be a 50/50 thing, but I'd make sure that that #3 is correct, hence a bit of a tear down.
I agree with four_shot, just do all the cylinders, that way everything will be balanced as best as possible, i.e., your final compression check should all be tightly together from one to the next, etc. His suggestion to keep parts in order is most useful. I have fount empty egg cartons are part of that triage. Anyway the idea is to have all pistons to compress the same pressures, thusly minimizing any overheating of any overworked one, so as to wear bearings evenly. All pistons/rods are at the shop, being reworked, whilst you are busy de-glazing piston cylinders, and such.
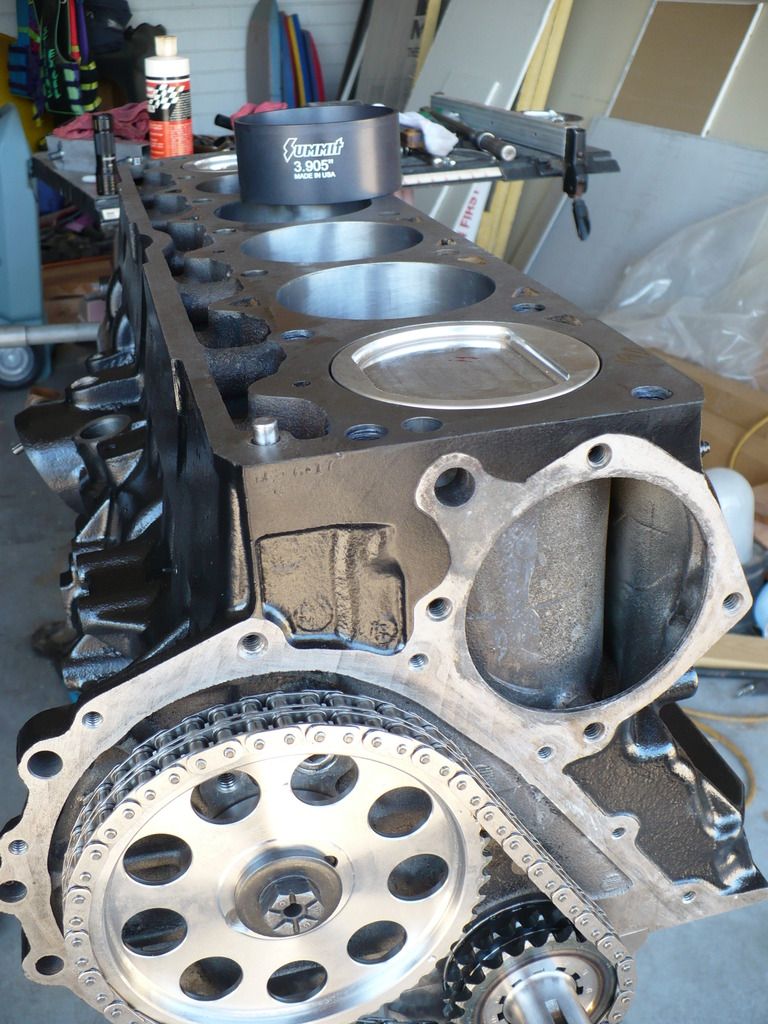
Hey RCP Phx, nice looking engine so far.
linksvu: Be absolutely sure you obtain brand spanking non-chinese head bolts. USE THAT LINK. I hope others will remind us which head bolts need to utilize some waterproof, and/or glued use.., I can't remember at the moment, lol. Your old bolts will have stretched, and are maybe useful in putting together parts of a back yard wood project. Secondly, after a few hundred miles you MUST do an in-service head bolt re-torque procedure, meaning you remove the valve cover, loosen the bolts a bit, and re-tighten to spec. You have a quality torque wrench.., right?
Also I wonder if the shop planed the mating surface of the head. One way to check is to get a can of WD-30, and a sheet of glass that will easily fit the entire head, (have a glass shop fab one for you). Flip the head so as to present the mating surface up to the sky. Use a level, and some shims in order to get that head sea-level. Spray the mating surfaces with the can getting the surfaces evenly well wetted. Place the glass onto that mating surface. The pattern you will see will indicate areas that are more, or less even in appearances. Think gasket. You should see an even display of oil between the head, and glass showing mostly exactly the same size/shape of a replacement gasket. If so, you are good to go with such a non warped head.