I didn't take it off when I pulled mine a few weeks ago. It comes out fine with the intake and exhaust manifold on.
The MAIN things are
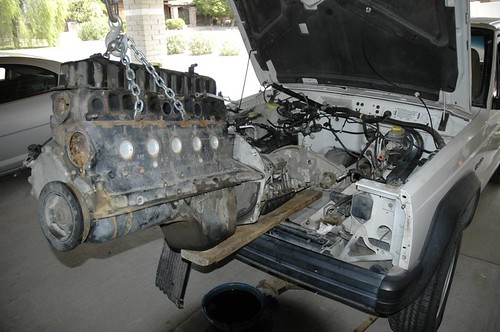
Disconnect the battery (as all the manuals state). Or yank the battery, it gets in way of alternator a little.
Disconnect all the wires to injectors, sensors, etc.
Remove the AC bracket and flip the compressor up out of the way.
Remove the PS and flip it out of the way.
Remove the radiator (looks like it'll clear, but it wont).
Undo the 2 bolts holding the manifold to the exhaust.
Support the tranny (not Sonny and Cher's kid)
Get a reverse Torx 12 i believe to get the top 2 bell housing bolts (lotsa posts on those nastys)
Remove the rest of the bolts and work it out