• Welcome to the new NAXJA Forum! If your password does not work, please use "Forgot your password?" link on the log-in page. Please feel free to reach out to [email protected] if we can provide any assistance.

Longer bumpstops for the rear.

bhicks

NAXJA Forum User
Location
Forest Falls, CA
Does anybody have any ideas or pics of how they fabricated some longer rear bumpstops. My 35"s are rubbing when fully flexed and I would like to get rid of that. I found a couple of companies that make some modified bumpstops that mount between the leaf springs and axle, but the cost is a little much for something so simple. Any ideas?
 
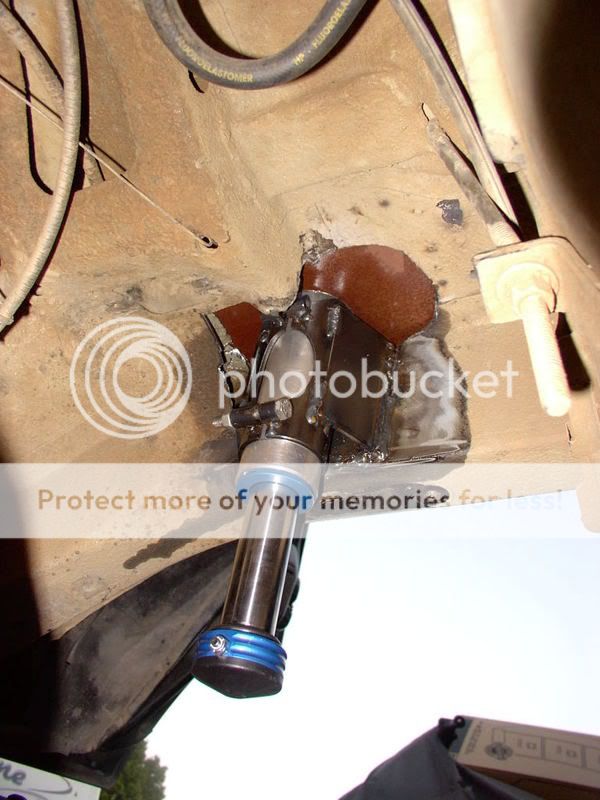
Or you can go air bumps

IMG_0754.jpg


IMG_0750.jpg
 
cds36...why didn't you weld you truss to your chunk? Just out of curiosity cause I'm getting on next week and I was thought you were supposed to do that. How much for those air bumps? X2 on the can mounting pic!!
 
cds36...why didn't you weld you truss to your chunk? Just out of curiosity cause I'm getting on next week and I was thought you were supposed to do that. How much for those air bumps? X2 on the can mounting pic!!
Welding to cast is a LOOOOONG and involved process. Definitely can't be done with all the gears and axles still inside the pumpkin. It'd have to be a shell to be able to weld to the cast.
 
Welding to cast is a LOOOOONG and involved process. Definitely can't be done with all the gears and axles still inside the pumpkin. It'd have to be a shell to be able to weld to the cast.


True dat Jim!! I guess it kinda has to be done though to improve the structural integrity of the truss.
 
If you only need about 2" of added bumpstop with minimal cost you can take 2 pieces of 2x2 tubing that are about 8-10" long and place them on the u bolt plates. Give them each a couple of quick welds and you're done.
 
If you only need about 2" of added bumpstop with minimal cost you can take 2 pieces of 2x2 tubing that are about 8-10" long and place them on the u bolt plates. Give them each a couple of quick welds and you're done.

The 2x2 tubing only gives me 2". I have measured it up while my tires were fully crunched up into the wheel well and I still had almost 4" of space between the bumpstop and axle. I should have been more specific on my original post that I needed 4" bumpstop extensions. I do appreciate your reply. I wonder if there is a way to build up the 2x2 tubing with something else. I used hockey pucks in the front for spacing, I wonder if I could do something similar in the back?
 
If you only need about 2" of added bumpstop with minimal cost you can take 2 pieces of 2x2 tubing that are about 8-10" long and place them on the u bolt plates. Give them each a couple of quick welds and you're done.

Ubolt plates don't hit the bumpstops though. The bump stops hit inside the leaf springs on the axle tube.

Here's what I've seen.
2" square tube betwen the bumpstop and frame to lower bumpstop.
2nd set of spring perches inboard with 2" spacer
longer MJ bumpstops.
DPG style plate bumpstops which replace the factory spring plate.
 
Ubolt plates don't hit the bumpstops though. The bump stops hit inside the leaf springs on the axle tube.


That's why the piece is about 8-10" long. The outboard portion 5-ish inches of that is sitting on the u bolt plate, the remaining is inboard, directly under the bumpstop. I know I have a pict at the house but not here at work.
 
I was on a budget, couldn't afford air bumps (someday) but i had to build something that could take a bit of abuse for getting airborne. Found a set of fresh stock rubber bumps at the junkyard and here's the result.

dsc01264ie2.jpg

Shot with DSC-T1 at 2007-11-28


I don't have a pic of the middle i'll try and get that later tonight.
 
i made my own bumpstops for my rig and in the end i had bumpstops in the rear that are 8" long!! and only 1.5" between the bumpstop and axle. but i only have 4" of lift and have 35's on so even with all my trimming i had to bumpstop like mad to stop from ripping off my bushwackers. but it still flexes fine and rides fine on the highway(even ofer bumps). also, i made mine fully adjustable so that if i change my setup in the future i can just adjust the bumpstops up or down.
 
I made my own DPG style adjustables. Time well spent since I keep changing stuff!

bumpstop7ex0.jpg


A better pic with the axle out for mods.

trailrig29iu1.jpg
 
Last edited:
I was on a budget, couldn't afford air bumps (someday) but i had to build something that could take a bit of abuse for getting airborne. Found a set of fresh stock rubber bumps at the junkyard and here's the result.

dsc01264ie2.jpg

Shot with DSC-T1 at 2007-11-28


I don't have a pic of the middle i'll try and get that later tonight.
Can we see how you built your shock hoop in the rear?
 
Back
Top