fyrfytr1717
NAXJA Forum User
- Location
- Turlock, CA
A few months back, I first posed the question of whether or not it would be possible to slightly raise a 242. Essentially, install a TC lift as opposed to a TC drop. The responses I got were get a 231, clock your case, or build a custom crossmember/skid plate. Well, I like my full-time for snowboarding trips, clocking seemed pretty labor/skill intensive, and I have no welding skills so a homemade skid was out of the question...
Why would I want to lift my TC? I thought you might ask. I have a '99 XJ Classic with an auto trans and the 242. This whole idea started when I shopped around for belly skids. Most were advertised as "not for use with the 242" or they had a different version specifically for the 242 that hung down lower than the 231. I wanted something totally flat on the bottom and decided I liked the DPG Belly Skid, one of the ones specifically advertised as "Not recommended for Cherokees equipped with a 242 transfer case". Not willing to give up, I called Dirk and asked what exactly the issue was. He advised me that his skid was flush with the bottom of the crossmember and that on 242 equipped vehicles the case and the exhaust typically hang just slightly below the crossmember resulting in clearance issues. I measured mine and sure enough, if I put a straight edge on my crossmember, it would just barely touch my case and my (ridiculously large California) catalytic converter. If I could just lift it 1/2" or so....
I inspected how exactly the transfer case, transmission, transmission mount, exhaust, and crossmember were are all related to each other and decided that the easiest route would be to simply increase the distance between the crossmember and the transmission. I looked for taller transmission mounts with a similar bolt pattern but couldn't find one. I then decided that it would be nearly as easy to just install a spacer between the transmission mount and the crossmember. No special tools required, (almost) no fabrication skills required. Here's how I did it:
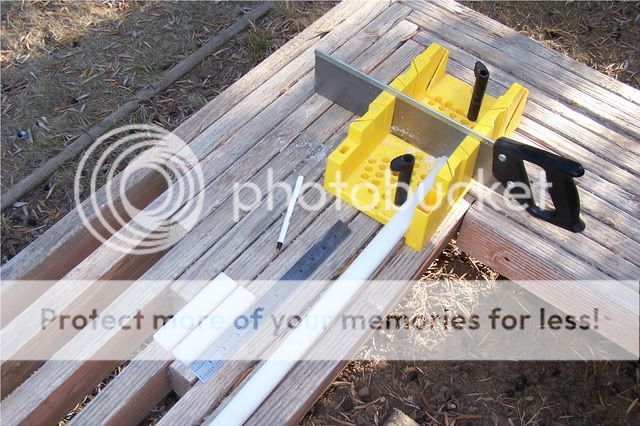
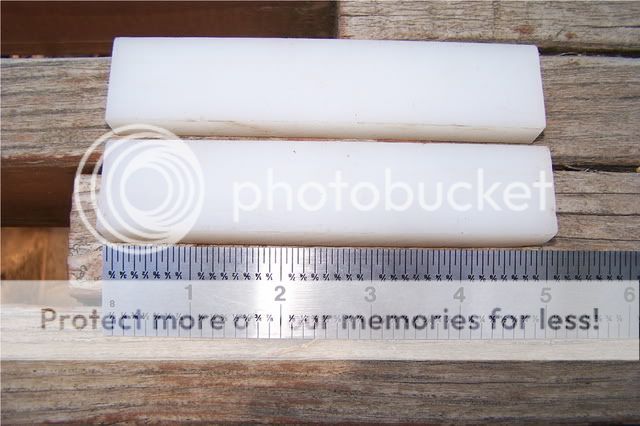
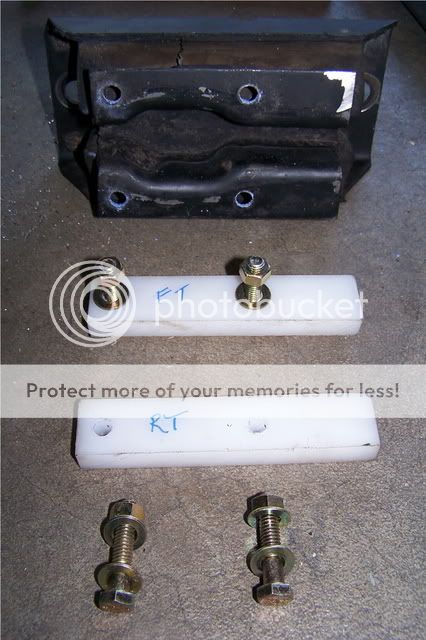
1. Find a suitable material to make the spacers out of. I found that 1/2" thick material gave me just the amount of extra clearance I needed. I happened to have a 1" wide strip of 1/2" thick Delrin laying around at work so I decided to give it a shot. I thought metal might be better suited to the job, but so far the Delrin has held up really well. You need two pieces, each one measuring 1" x 5" x 1/2".
2. Remove your transmission mount. Use a floor jack with a board on it under your tranny pan. Lift just until all weight is taken off the transmission mount and then remove all the nuts and bolts. This may be done with the crossmember in place though I highly recommend removing it as it makes access to the bolts holding the mount to the transmission much easier. (Unless of course you run into some of the typical issues with crossmember bolt/stud removal, then you'll be cursing having ever tried to remove it.) Be sure to use a jack stand to support your transmission if you do remove the crossmember.
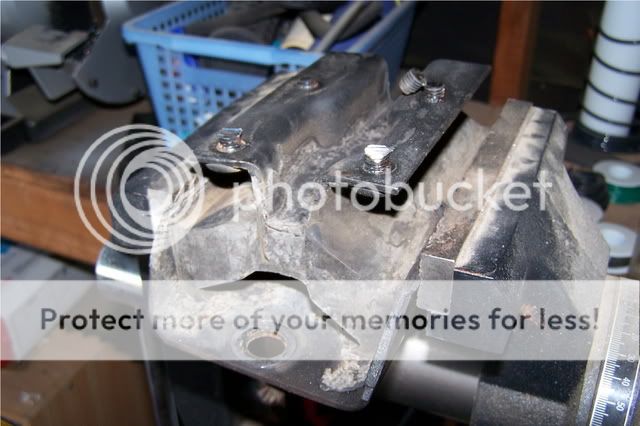
The studs on the bottom of the mount will be too short after installing the spacers so they need to be removed. They are hardened and pressed in place and need to be drilled out. Place the mount in a vice and cut them as short as possible to reduce the amount of hardened bolt drilling you have to do.
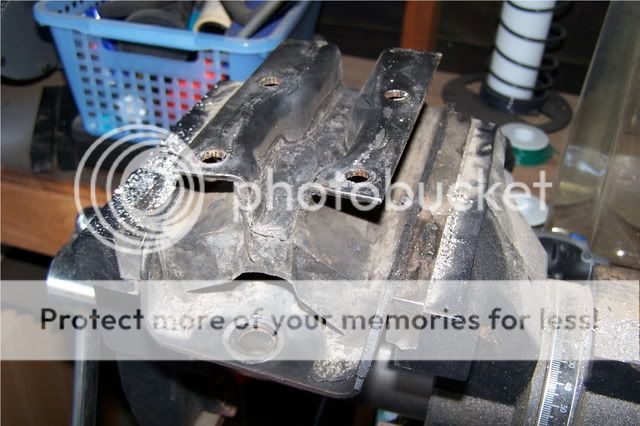
3. Studs drilled and punched out
4. Drill 5/16" holes in your spacers matching the holes in your mount. You can't really use a punch to mark the holes as the upper half of the mount is in the way. Instead, I used some chalk line chalk to transfer the location of the holes to the spacer. For hardware you need 4 bolts, 4 nuts, and 8 washers. All hardware should be 5/16" and the bolts should be just barely long enough to pass through the upper crossmember plate, the mount, the two washers, the nut, plus whatever thickness of spacer you decide to use. You don't want a bunch of extra thread hanging out or it will start tearing into the rubber part of the mount over time. I used Grade 8 as that is the only zinc coated hardware available at my local hardware store, but I'm sure Grade 5 would be fine as well.
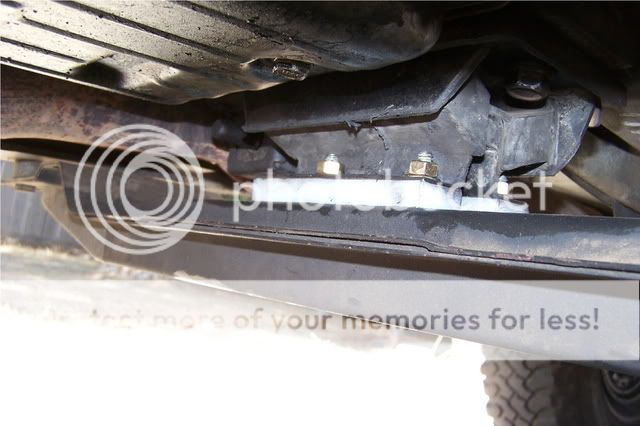
5. Finally, bolt it all in place. Use blue LocTite on the threads and torque everything to factory specifications. As you can see in the picture, there's a decent amount of clearance between the bolt and the rubber isolator up front, but in back it's pretty close.
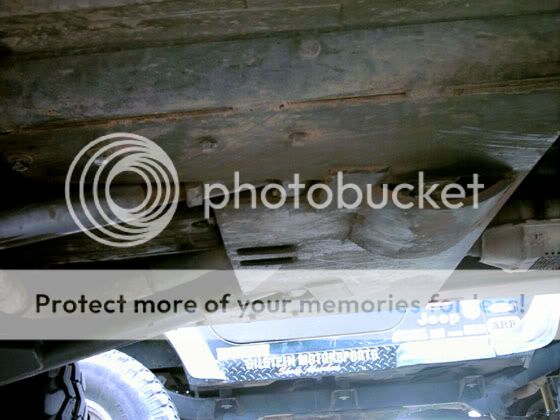
Here's a couple of after pictures. A straight on view from behind shows that the bottom of the case is now safely above the bottom of the crossmember. I've since removed my TC drop kit as the DPG belly skid won't work with that either. Removing it has no effect on the relationship between the crossmember and the case, but it will move the top of the case closer to the transmission tunnel.
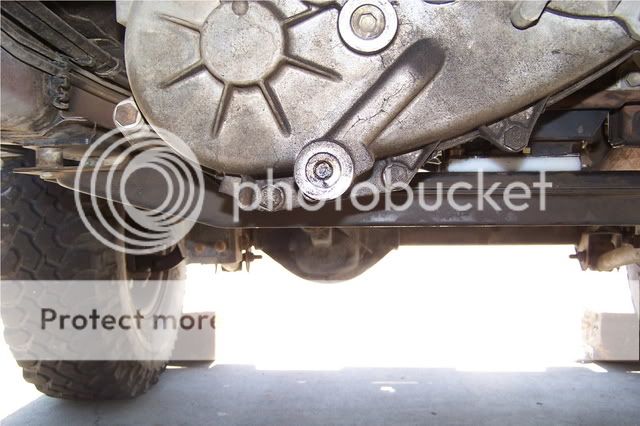
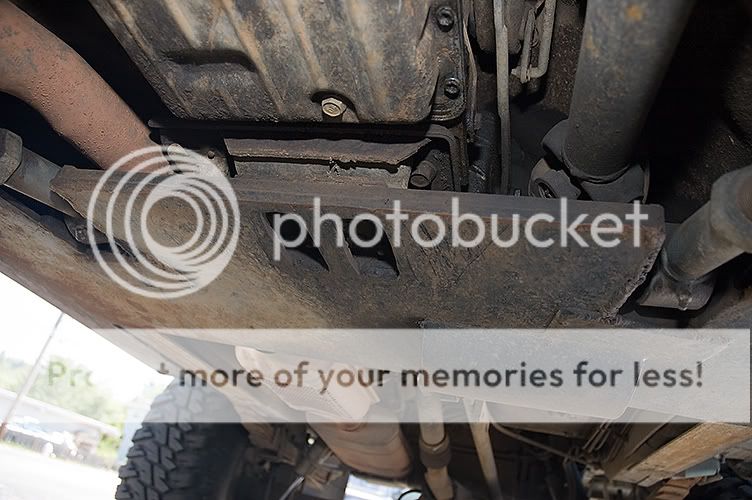
This next picture shows the relationship between the catalytic converter and the crossmember. Again, removing the TC drop has no effect on this, but it will push your exhaust system up closer to the bottom of the vehicle. After installing the skid plate, I still had no clearance issues with my exhaust u-bolt hanging downwards.
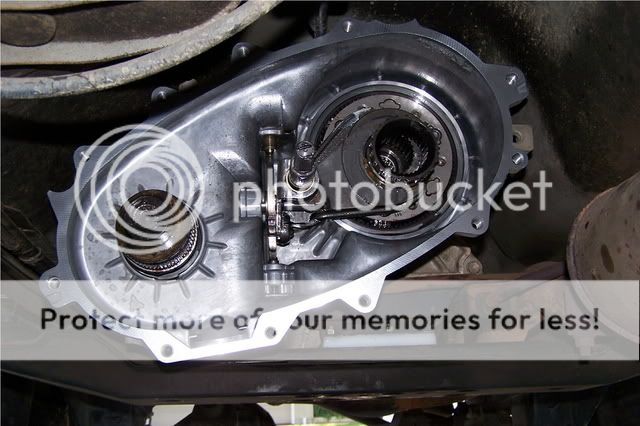
This next picture shows the one place where the TC gets relatively close to the transmission tunnel. Right at the pointy part at the top of the case there's just a little over an inch of clearance. You can pound out the tunnel with a BFH, but I found it unnecessary. (Keep in mind however that I have the Rubicon Express Control Arm Drop Brackets which essentially act as a 1/4" TC drop kit since they bolt on between the crossmember and unibody rails.)
I have been running it like this for about 2 months now (including one pretty extreme rock crawling trip) and have not heard or felt any clunking, scraping, rattling, knocking or other unwanted noises. The auto tranny and TC both shift just fine without any adjustments to the linkages. I figure if people routinely run with everything dropped 1" below stock (as I have for the past 6 years) then raising everything up 1/2" above stock shouldn't be a problem either.
You may of course have to adjust your driveline angles. While lifting your TC does have a negative effect on your rear driveshaft angle, you will find that it has a positive effect on your front driveshaft angle as it actually points your front output yoke slightly further down.
So there you have it, a very long write up for a very simple mod. I now have the belly skid I want and a little extra ground clearance to boot. Hope someone finds this helpful someday...
Why would I want to lift my TC? I thought you might ask. I have a '99 XJ Classic with an auto trans and the 242. This whole idea started when I shopped around for belly skids. Most were advertised as "not for use with the 242" or they had a different version specifically for the 242 that hung down lower than the 231. I wanted something totally flat on the bottom and decided I liked the DPG Belly Skid, one of the ones specifically advertised as "Not recommended for Cherokees equipped with a 242 transfer case". Not willing to give up, I called Dirk and asked what exactly the issue was. He advised me that his skid was flush with the bottom of the crossmember and that on 242 equipped vehicles the case and the exhaust typically hang just slightly below the crossmember resulting in clearance issues. I measured mine and sure enough, if I put a straight edge on my crossmember, it would just barely touch my case and my (ridiculously large California) catalytic converter. If I could just lift it 1/2" or so....
I inspected how exactly the transfer case, transmission, transmission mount, exhaust, and crossmember were are all related to each other and decided that the easiest route would be to simply increase the distance between the crossmember and the transmission. I looked for taller transmission mounts with a similar bolt pattern but couldn't find one. I then decided that it would be nearly as easy to just install a spacer between the transmission mount and the crossmember. No special tools required, (almost) no fabrication skills required. Here's how I did it:
1. Find a suitable material to make the spacers out of. I found that 1/2" thick material gave me just the amount of extra clearance I needed. I happened to have a 1" wide strip of 1/2" thick Delrin laying around at work so I decided to give it a shot. I thought metal might be better suited to the job, but so far the Delrin has held up really well. You need two pieces, each one measuring 1" x 5" x 1/2".
2. Remove your transmission mount. Use a floor jack with a board on it under your tranny pan. Lift just until all weight is taken off the transmission mount and then remove all the nuts and bolts. This may be done with the crossmember in place though I highly recommend removing it as it makes access to the bolts holding the mount to the transmission much easier. (Unless of course you run into some of the typical issues with crossmember bolt/stud removal, then you'll be cursing having ever tried to remove it.) Be sure to use a jack stand to support your transmission if you do remove the crossmember.
The studs on the bottom of the mount will be too short after installing the spacers so they need to be removed. They are hardened and pressed in place and need to be drilled out. Place the mount in a vice and cut them as short as possible to reduce the amount of hardened bolt drilling you have to do.
3. Studs drilled and punched out
4. Drill 5/16" holes in your spacers matching the holes in your mount. You can't really use a punch to mark the holes as the upper half of the mount is in the way. Instead, I used some chalk line chalk to transfer the location of the holes to the spacer. For hardware you need 4 bolts, 4 nuts, and 8 washers. All hardware should be 5/16" and the bolts should be just barely long enough to pass through the upper crossmember plate, the mount, the two washers, the nut, plus whatever thickness of spacer you decide to use. You don't want a bunch of extra thread hanging out or it will start tearing into the rubber part of the mount over time. I used Grade 8 as that is the only zinc coated hardware available at my local hardware store, but I'm sure Grade 5 would be fine as well.
5. Finally, bolt it all in place. Use blue LocTite on the threads and torque everything to factory specifications. As you can see in the picture, there's a decent amount of clearance between the bolt and the rubber isolator up front, but in back it's pretty close.
Here's a couple of after pictures. A straight on view from behind shows that the bottom of the case is now safely above the bottom of the crossmember. I've since removed my TC drop kit as the DPG belly skid won't work with that either. Removing it has no effect on the relationship between the crossmember and the case, but it will move the top of the case closer to the transmission tunnel.
This next picture shows the relationship between the catalytic converter and the crossmember. Again, removing the TC drop has no effect on this, but it will push your exhaust system up closer to the bottom of the vehicle. After installing the skid plate, I still had no clearance issues with my exhaust u-bolt hanging downwards.
This next picture shows the one place where the TC gets relatively close to the transmission tunnel. Right at the pointy part at the top of the case there's just a little over an inch of clearance. You can pound out the tunnel with a BFH, but I found it unnecessary. (Keep in mind however that I have the Rubicon Express Control Arm Drop Brackets which essentially act as a 1/4" TC drop kit since they bolt on between the crossmember and unibody rails.)
I have been running it like this for about 2 months now (including one pretty extreme rock crawling trip) and have not heard or felt any clunking, scraping, rattling, knocking or other unwanted noises. The auto tranny and TC both shift just fine without any adjustments to the linkages. I figure if people routinely run with everything dropped 1" below stock (as I have for the past 6 years) then raising everything up 1/2" above stock shouldn't be a problem either.
You may of course have to adjust your driveline angles. While lifting your TC does have a negative effect on your rear driveshaft angle, you will find that it has a positive effect on your front driveshaft angle as it actually points your front output yoke slightly further down.
So there you have it, a very long write up for a very simple mod. I now have the belly skid I want and a little extra ground clearance to boot. Hope someone finds this helpful someday...
Last edited:

") I still need to go on a good rock crawling trip with my final combination of TC lift installed, TC drop removed, and belly skid installed to be absolutely sure though.
I still need to go on a good rock crawling trip with my final combination of TC lift installed, TC drop removed, and belly skid installed to be absolutely sure though.