• Welcome to the new NAXJA Forum! If your password does not work, please use "Forgot your password?" link on the log-in page. Please feel free to reach out to [email protected] if we can provide any assistance.

Front frame end/crossmember fix - did I do ok?

YELLAHEEP

NAXJA Forum User
Started working on my daily driver project and the main issue was the light front collision that needed repaired. Because the lower part of the pass. frame end was not only pushed back, but had collapsed inward on itself causing tearing on the bottom edge, I didn't feel this was repairable by using a frame jig. Maybe I was wrong, but anyway, here's what I did to repair it - body guys, feel free to critique and also of note, I'll be installing a winch bumper to this XJ - yes, it has the longer frame mounts and won't just be mounted to the stock bumper holes.

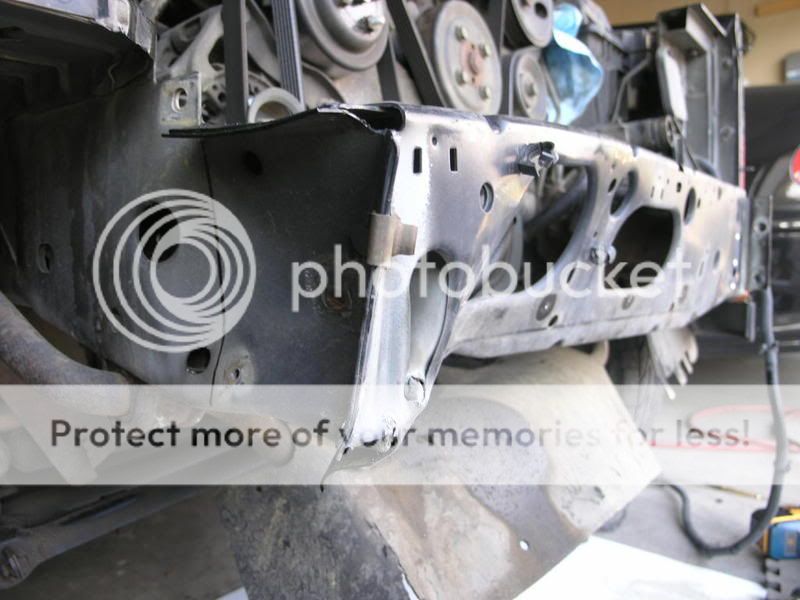
Damage after stripping away the parts. You can see the line where I'll make the cut:

P1011503.jpg

P1011504.jpg


Good section of frame ends and crossmember from a donor XJ:

P1011505.jpg


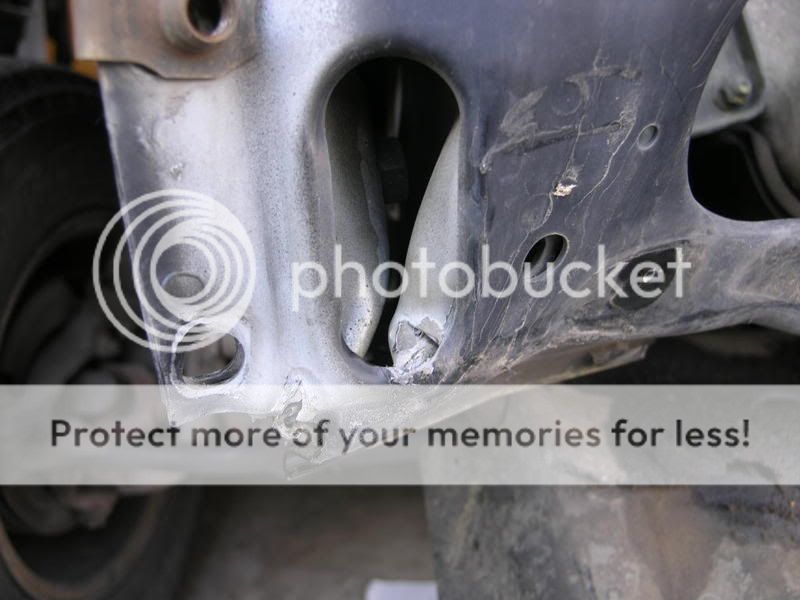
After the cut. A few minutes with a hammer/dolly and pry bar got the outside straightened out. I drilled out the spot welds and ground off the bead weld on the driver's side to install the replacement crossmember as the factory did:

P1011506.jpg


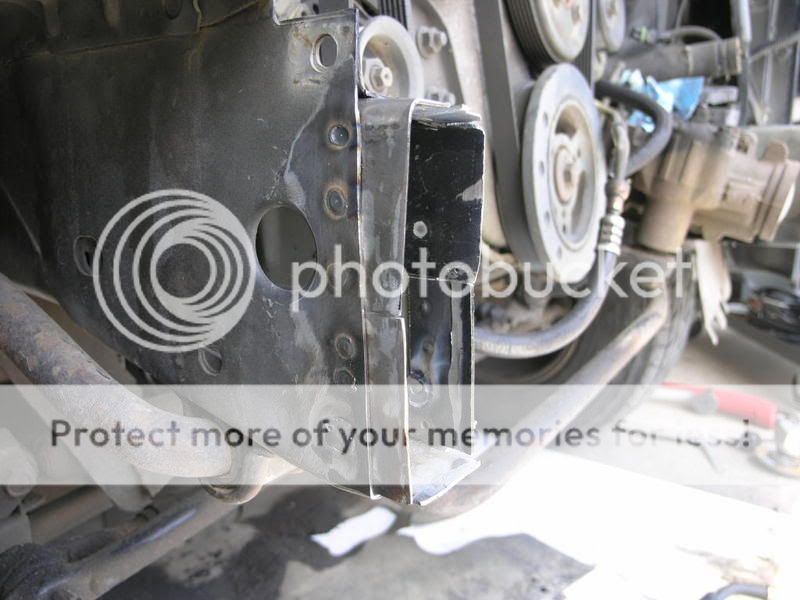
I certainly didn't want to simply butt-weld the new section to the old frame section so I "sleeved" it to give the seam a metal backing - something for the bead to burn into. I rosette welded the sleeve parts in place:

P1011508.jpg


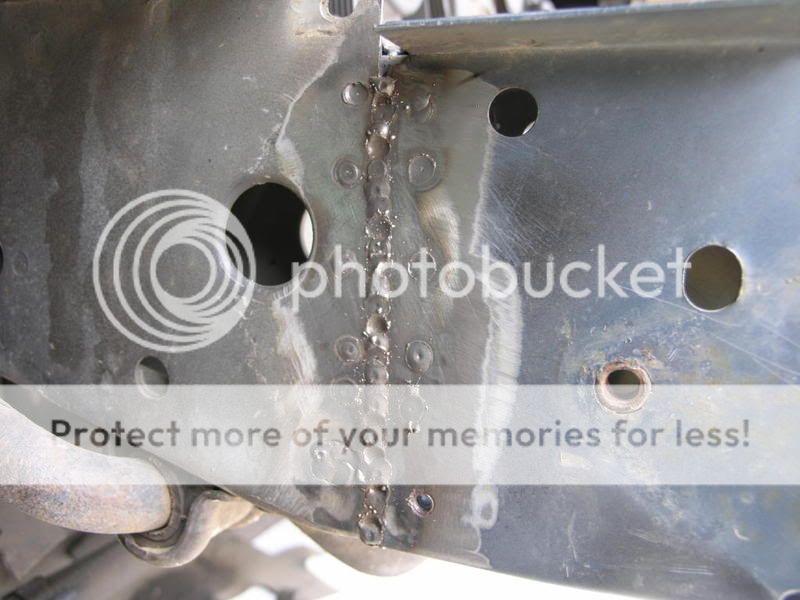
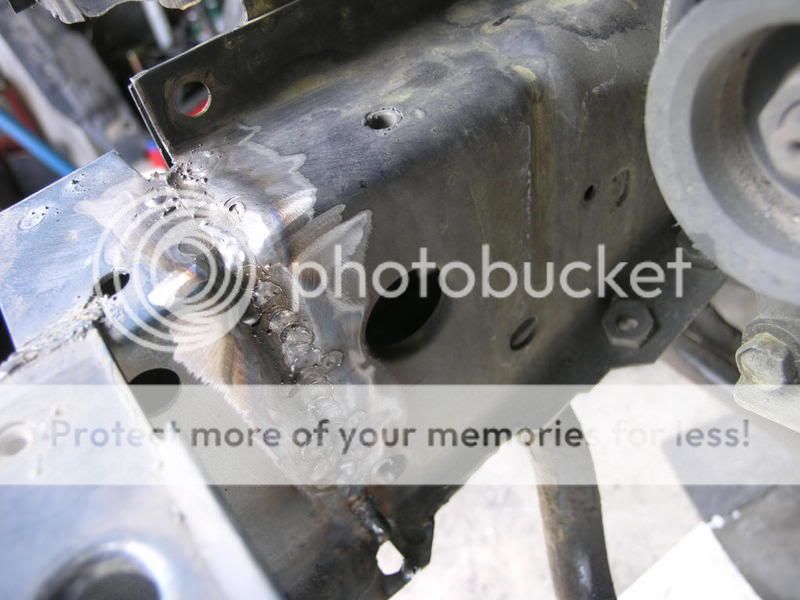
Here's the new section burned in:

P1011510.jpg


The inside - not as pretty as it was hard to work around the alternator (shoulda just removed it to give me some room.....)

P1011511.jpg


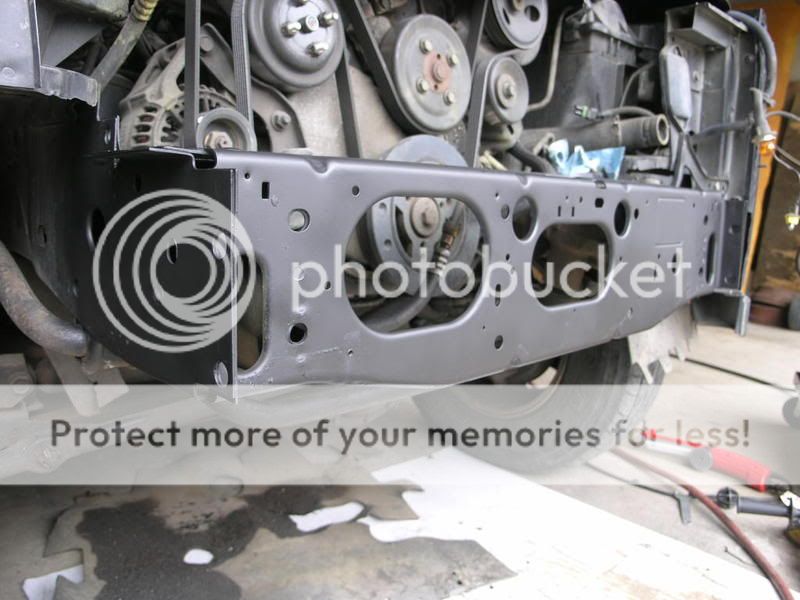
Here it is all finished and painted. Hopefully I won't have it crack apart on me, but I'd think that the winch bumper should actually reinforce it a bit.... :dunno:

P1011512.jpg


Comments?
 
Last edited:
I think you did real well, and I think it will hold up fine! It's very close to an ICAR approved repair method.

For ultimate strength I would have done a couple things different

I may have made the sleeve a little deeper so the spot welds could be a little further away from the verticle weld. The heat effected zone of the metal would have had the heat spread out a little more, and less accumulative heat all in that small area.

Instead of a straight cut joining the two sections, I would have made a Z shaped cut and sleeve (actually more like a Z on it's side cut).

The only other thing I don't know if you did, was to weld only about an inch at a time and move around that seam letting the welds cool, all in another effort to have the heat effected zone, well....... less effected by heat.

But what you did is very comparable to what alot of bodyshops would do for the repair, good job!!
 
87xjco said:
I think you did real well, and I think it will hold up fine! It's very close to an ICAR approved repair method.

For ultimate strength I would have done a couple things different

I may have made the sleeve a little deeper so the spot welds could be a little further away from the verticle weld. The heat effected zone of the metal would have had the heat spread out a little more, and less accumulative heat all in that small area.

Instead of a straight cut joining the two sections, I would have made a Z shaped cut and sleeve (actually more like a Z on it's side cut).

The only other thing I don't know if you did, was to weld only about an inch at a time and move around that seam letting the welds cool, all in another effort to have the heat effected zone, well....... less effected by heat.

But what you did is very comparable to what alot of bodyshops would do for the repair, good job!!


Wow, really? Awesome. I did a little on-line research, but most didn't include many photos of the steps so I just kinda sat back and looked at the damaged area for a while and got busy.

Yeah, I thought about at least doing a "Z" style joint on the outside, but got to thinking that it'd be a measurment nightmare trying to cut the replacement piece close enough. I also thought about fitting another piece of diamond shaped sheet metal over the straight weld on the outside but the winch bumper I have probably wouldn't fit over it without serious heating/bending of the bracket - it fits real tight as it is.

I did alternate the welds - I'd read it in these forums as a matter of fact - so I did a section on the outside, then did a section on the inside, then top, then bottom and worked my way around it as I went.

My first attempt across the top wasn't the best. I tried to burn a continuous bead but I couldn't seem to get the heat setting right - kept burning through when I went slow, and if I sped up, it seemed to just pile the weld high and splatter. So, most of the welds on the cut line were done by touching, burning in for about 1.5 seconds, off, then touch again.

Looking into the hollow of the frame rail at the sleeve parts, I can see a burn line on the back side of them so I hope that's indicative of decent penetration.
 
Back
Top