- Location
- Lafayette, CA
The great crash of ‘07 took my last posting, so here it is again. Enjoy.
I started this project after I decided that I finally needed a winch. Originally I was going to buy a bumper, and bolt it all on. But most of the bumpers that I saw didn’t have what I really wanted: They stuck out really far, cutting down on approach angle, and didn’t seem to have enough mounting holes. So, I embarked on my fun project of making a bumper.
Winch bumpers range from $300-$600. I went down to my local steel store and bought $115 of steel: 6 feet of 2x6x.25 and 3 feet of 2x2. I already had ¼’’ and 1/8’’
I searched around online, and found several bumpers that I decided to model mine after. I combined Hanson’s and JCR’s front bumpers, and came away with what I have now.
So all this sounds good? Want to make your own? Well here’s how I did it.
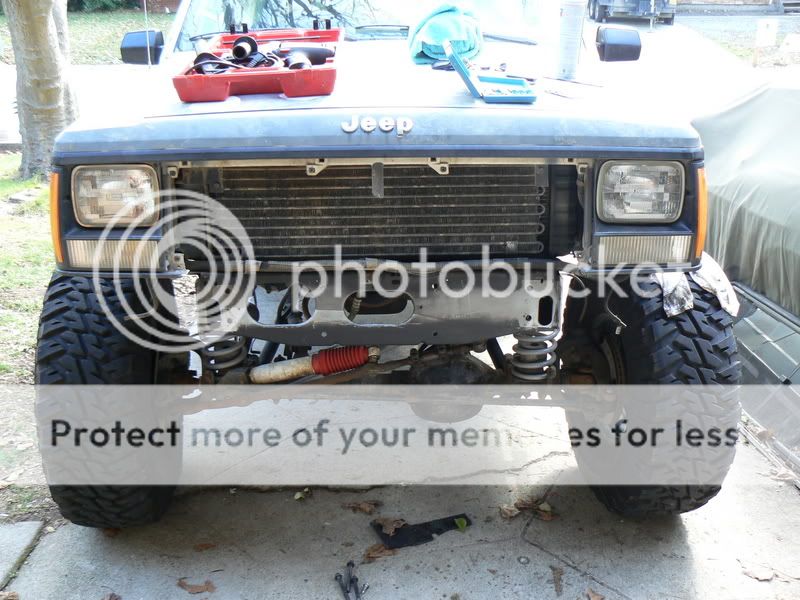
First take off the front grill and other stuff in the way of the winch being tucked up into the grill. This includes the plastic/fiberglass grill surrounding. The grill I will cut to fit around the winch.

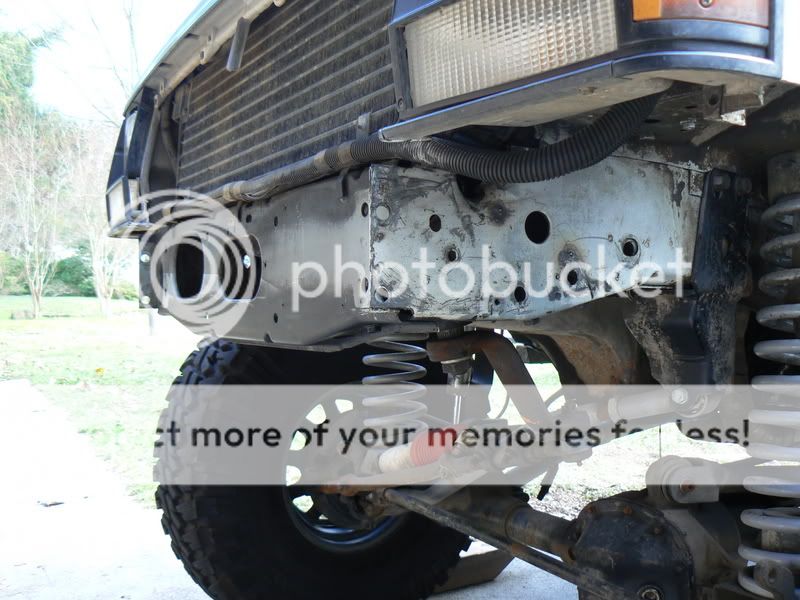
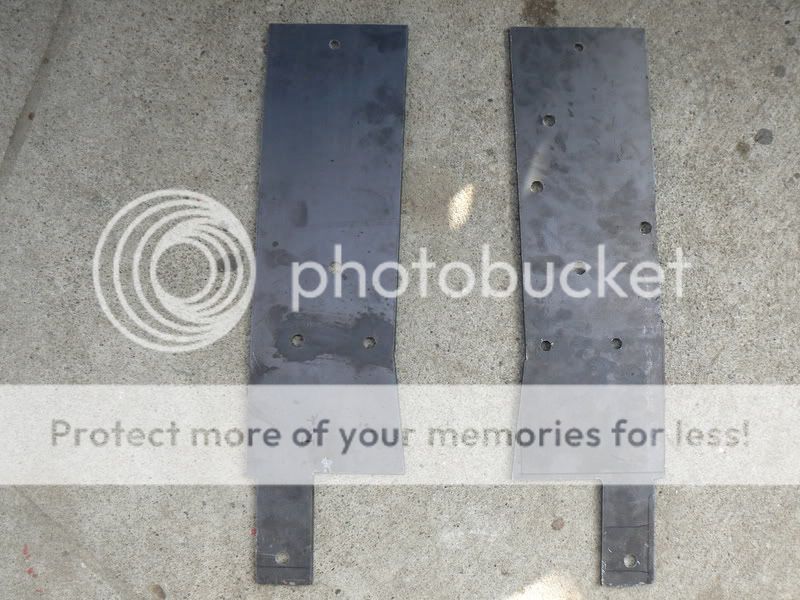
I started with making the frame brackets. They are made out of ¼’’. Make sure to incorporate the steering box bolts for extra strength and as a outside framerail brace. Notice how the D ring tabs are extra long. This allows them to stick through the 2x6 making them stronger and more welding surface.
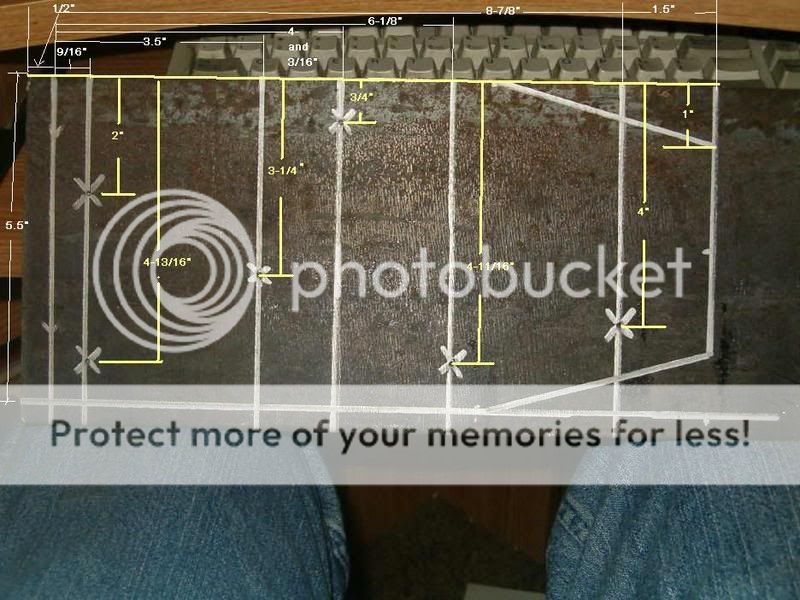
Unfortunately I don’t have any pictures of what I did to the 2x6, but you can kind of see in the pictures that I do have. First the 2x6 had a bottom cut out of it making it a U. Then the face was cut intermittently allowing it to fold down. Outside of where the frame brackets are, the 2x6 was bent back towards the Jeep.
I cut holes into the 2x6 and slid it onto the frame brackets to tack weld them together. The winch mount was then cut and welded in. It was made out of six pieces of ¼’’.
It looked something like: ----\______/----
An additional piece was welded on the back to bolt to the crossmember.
Again, I didn’t take enough pictures to really show how it all went together, but with the couple that I do have, you should be able to see how it went together.
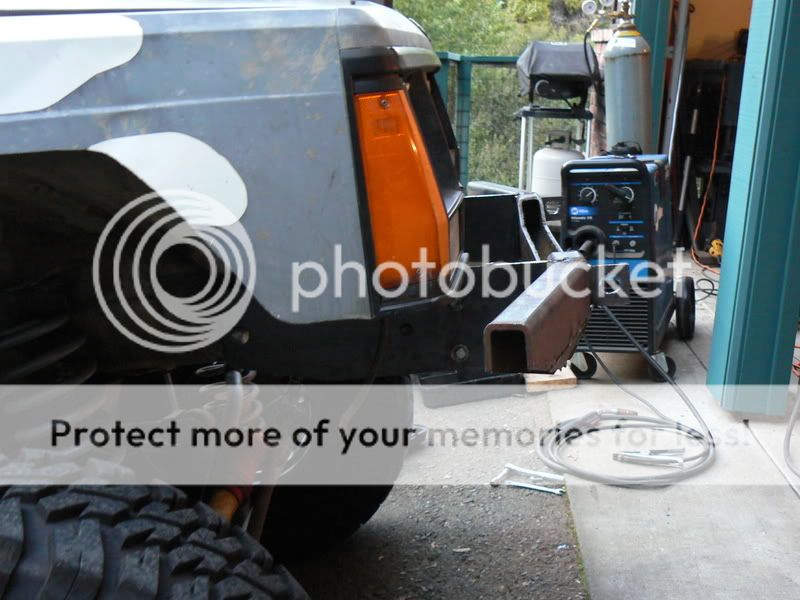
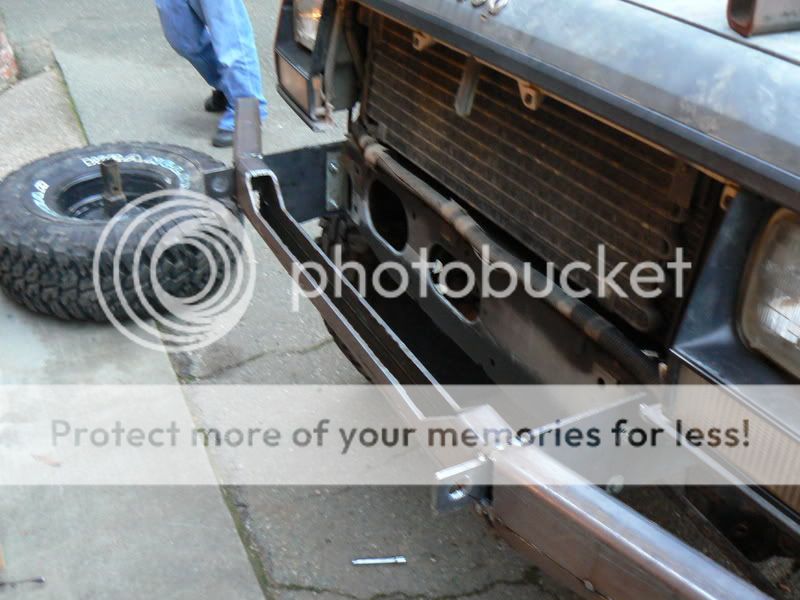

A piece was added from the bumper extending back protecting the corner marker lights. Notice it in the pictures bellow.
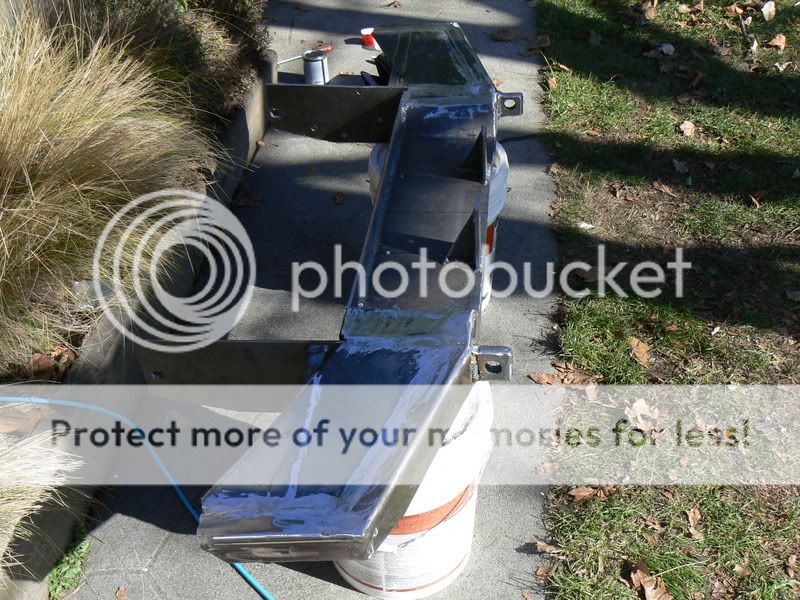
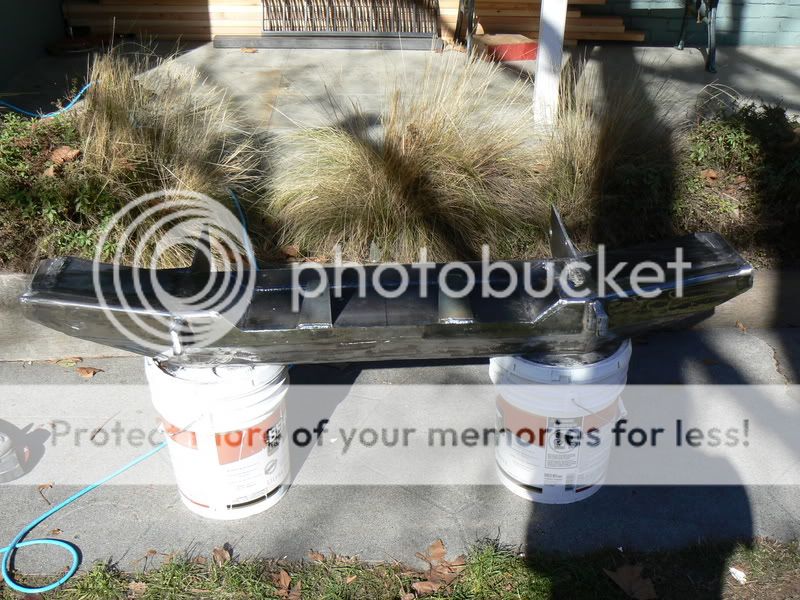
From the frame mounts out to the outside of the bumper I skinned it with 1/8'' and added a brace with the 2x2'' to the additions mentioned above so I can use it as a high lift jack point.

The rest was just finish up work. The shackle mounts are 3 pieces of ¼’’ for a total of ¾’’. The entire bumper is made out of ¼’’ minus the two skinned portions from the frame mounts out.
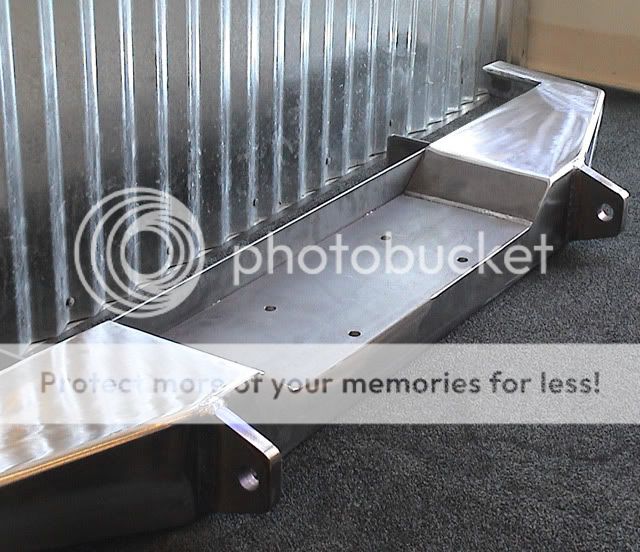
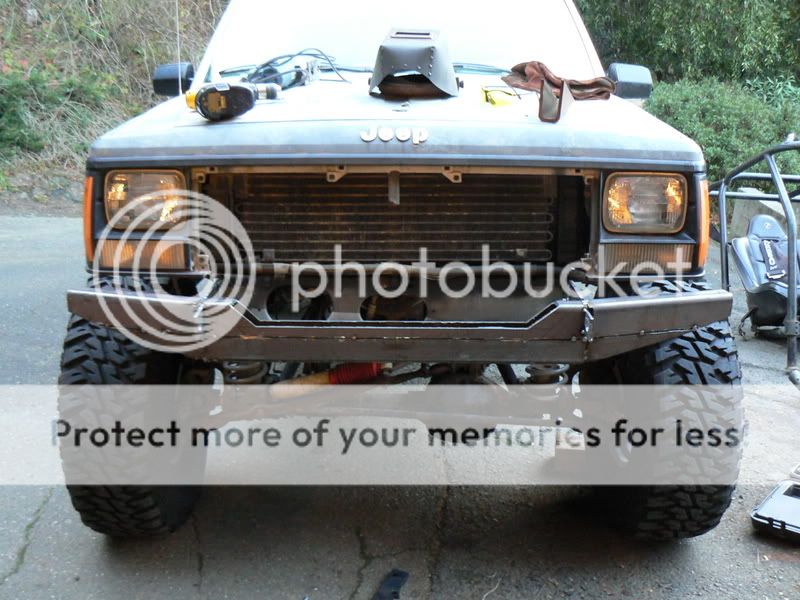
All finished waiting for paint:
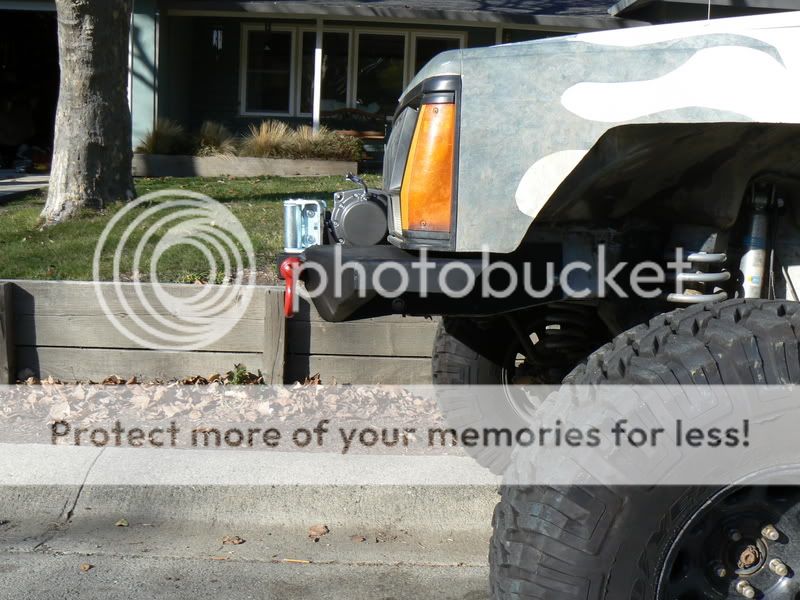
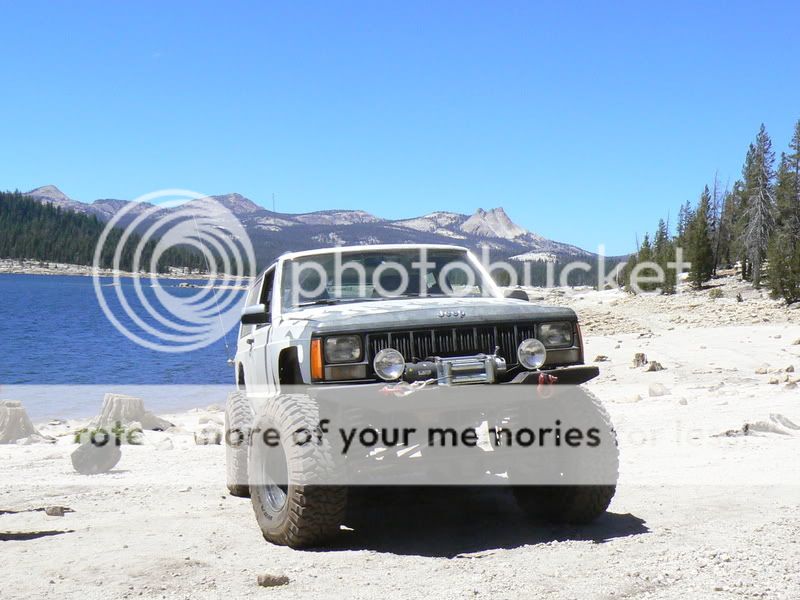
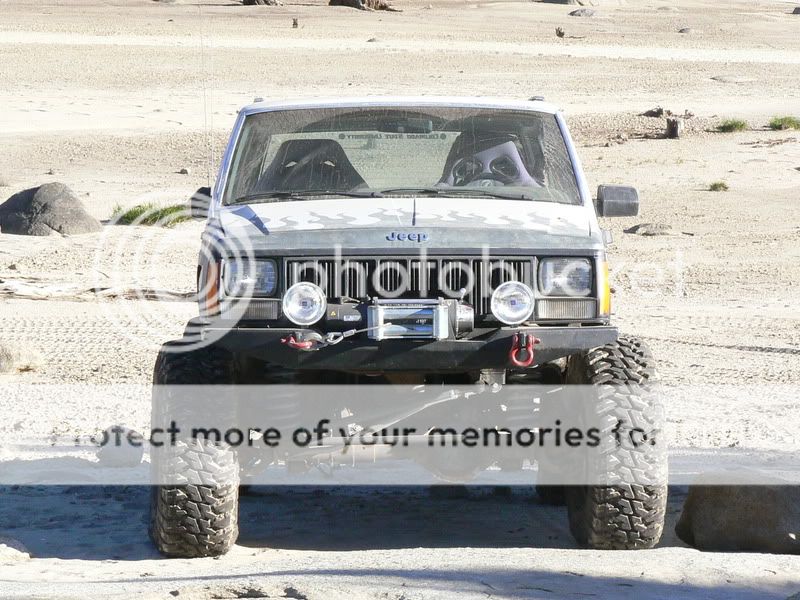
Mostly finished with the winch all bolted up. Winch is the XD 9000.
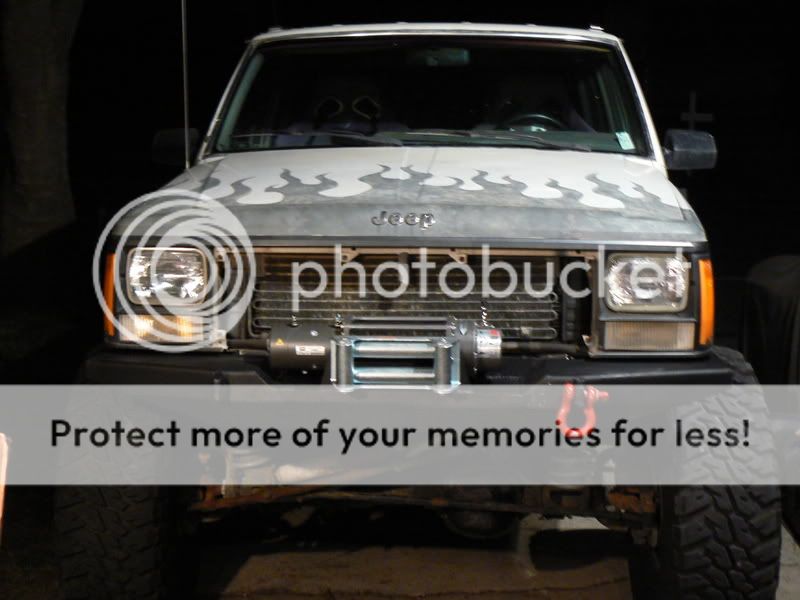

Ending up, it weighs a lot. End weight was 102 lbs without the winch. Winch weighs 78 lbs. The weight wasn’t that big of a concern. I could have saved weight by using 1/8'' for a lot of it, but Id rather have it heavy then have it break. The main part of the bumper sticks out 6'' ahead of the headlights, with another 2'' for the roller fairlead and shackle mounts. Its held on with 17 bolts, so I don’t think it is going anywhere.
I started this project after I decided that I finally needed a winch. Originally I was going to buy a bumper, and bolt it all on. But most of the bumpers that I saw didn’t have what I really wanted: They stuck out really far, cutting down on approach angle, and didn’t seem to have enough mounting holes. So, I embarked on my fun project of making a bumper.
Winch bumpers range from $300-$600. I went down to my local steel store and bought $115 of steel: 6 feet of 2x6x.25 and 3 feet of 2x2. I already had ¼’’ and 1/8’’
I searched around online, and found several bumpers that I decided to model mine after. I combined Hanson’s and JCR’s front bumpers, and came away with what I have now.
So all this sounds good? Want to make your own? Well here’s how I did it.
First take off the front grill and other stuff in the way of the winch being tucked up into the grill. This includes the plastic/fiberglass grill surrounding. The grill I will cut to fit around the winch.
I started with making the frame brackets. They are made out of ¼’’. Make sure to incorporate the steering box bolts for extra strength and as a outside framerail brace. Notice how the D ring tabs are extra long. This allows them to stick through the 2x6 making them stronger and more welding surface.
Unfortunately I don’t have any pictures of what I did to the 2x6, but you can kind of see in the pictures that I do have. First the 2x6 had a bottom cut out of it making it a U. Then the face was cut intermittently allowing it to fold down. Outside of where the frame brackets are, the 2x6 was bent back towards the Jeep.
I cut holes into the 2x6 and slid it onto the frame brackets to tack weld them together. The winch mount was then cut and welded in. It was made out of six pieces of ¼’’.
It looked something like: ----\______/----
An additional piece was welded on the back to bolt to the crossmember.
Again, I didn’t take enough pictures to really show how it all went together, but with the couple that I do have, you should be able to see how it went together.
A piece was added from the bumper extending back protecting the corner marker lights. Notice it in the pictures bellow.
From the frame mounts out to the outside of the bumper I skinned it with 1/8'' and added a brace with the 2x2'' to the additions mentioned above so I can use it as a high lift jack point.
The rest was just finish up work. The shackle mounts are 3 pieces of ¼’’ for a total of ¾’’. The entire bumper is made out of ¼’’ minus the two skinned portions from the frame mounts out.
All finished waiting for paint:
Mostly finished with the winch all bolted up. Winch is the XD 9000.
Ending up, it weighs a lot. End weight was 102 lbs without the winch. Winch weighs 78 lbs. The weight wasn’t that big of a concern. I could have saved weight by using 1/8'' for a lot of it, but Id rather have it heavy then have it break. The main part of the bumper sticks out 6'' ahead of the headlights, with another 2'' for the roller fairlead and shackle mounts. Its held on with 17 bolts, so I don’t think it is going anywhere.